Table of Contents

Subscribe to Our Youtube Channel
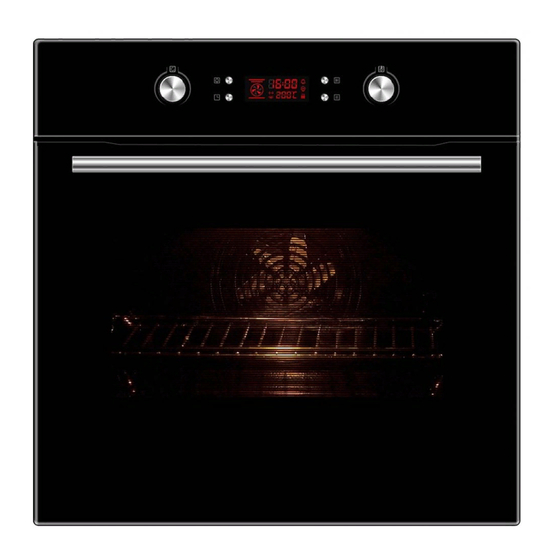
Related Manuals for Vogue 310602


Summary of Contents for Vogue 310602
- Page 1 INSTALLATION INSTRUCTIONS USER GUIDE VOGUE 9 Function Pyrolytic Wall Oven 600mm BLACK 310602 To prevent the risk of accidents or damage to the appliance, it is essential to read these instructions before it is installed and used for the first time...
-
Page 2: Table Of Contents
Contents 1…………………………………..…………………Important safety information 5…………………………………..…………………Installation 7…………………………………..……………..….Prior to start up of the appliance 7..…………………………………..……………….Your new oven 10………………………………..………………….Program and function instruction 18…………………………………..……………….Settings & functions of the oven 19…………………………………..……………….Before using the oven for the first time 20…………………………………..……………….How to operate the oven 20…………………………………..……………….Troubleshooting 21…………………………………..……………….Baking and grilling tips 23…………………………………..……………….Maintenance and cleaning 27…………………………………..……………….Environmental note 28…………………………………..……………….Test dishes... -
Page 3: Important Safety Information
Important safety information This User Instruction Manual contains important information, including safety & installation points, which will enable you to get the most out of your appliance. Please keep it in a safe place so that it is easily available for future reference; for you or any person not familiar with the operation of the appliance. - Page 4 ● Only use utensils that are suitable for ● The appliance surfaces will become hot use with ovens. during use and retain heat after operation. ●Any damage caused by the non- compliance of temperature tolerance of oven during installation or by the too close distance between the furniture arning! and the oven will be borne by the...
- Page 5 when it is open, as it may cause ●Lay out the cord in such a way that no damages to the oven door hinges. unintentional pulling or tripping over it is ●Do not place those baked hot oil or fat possible.
- Page 6 ●Avoid installing this type of product in ●The spur outlet must still be accessible areas where it would be highly exposed even when your oven is located in its to shocks. housing to enable the appliance to be disconnected from the mains supply. ●Do not let children play with the product.
- Page 7 Installation Before installation The appliance should be installed built in the cabinet . It should be keep safety distance with appliance and the kitchen walls. Detail please check below picture . (values in mm). Surfaces, synthetic laminates and adhesives used must be heat resistant(100℃ •...
- Page 8 Installation method Installation and connection Material damage! ▲ The door and/or handle must not be used for lifting or moving the appliance. For installation the appliance must be connected in accordance with all local gas and/or • electrical regulations. Carry the appliance with at least two persons. •...
-
Page 9: Prior To Start Up Of The Appliance
1. Slide the oven through the cabinet aperture, align and secure. 2. Fix your oven with the 2 screws and washers as indicated in the figure. Final check 1. Connect the appliance to the mains supply and switch on the mains supply. 2. - Page 10 1. Control panel 4. Wire Rack 2. Fan motor (behind steel plate) 5. Door 3. Tray 6. Handle B. Technical specifications Voltage/frequency 220-240V~50Hz Total power consumption 3150KW Cable type/section H05VV-F 3*1.5mm Cable length 1.2m External dimensions(height/width/depth) 595/595/593(mm) Installation dimensions(height/width/depth) 600/600/ min 595(mm) Main oven Multifunction oven Energy efficiency class...
- Page 11 Inserting accessories You can insert the accessories into the cooking compartment at 5 different levels. Always insert them as far as they will go so that the accessories do not touch the door panel. The accessories can be pulled out approximately halfway until they lock in place. This allows dishes to be removed easily.
- Page 12 D. Control panel Here, you will see an overview of the control panel. Depending on the appliance model, individual details may differ. 1.3.1 Button icon instruction Pic 1: Buttons diagram Reminder/parameter Plus/minus Clock/ Start Pause/ Plus/minus switch (cooking reservation cancel (temperature/time) (temperature/time) function)
-
Page 13: Program And Function Instruction
Display the time value Reservation function Reminder time setting icon Oven working icon Reminder time icon Display the temperature value System time icon Unit of degree Celsius ℃ System time setting icon Lock function Work parameter setting icon (time and temperature) 1.3.3 Function icon instruction Icon Function... - Page 14 during the self-inspection, please refer to protection function for problem analysis, you can touch “ ” to cancel the fault code and return to standby mode. 2. Time setting In the standby mode, touching the “ ” button once to enter the system clock setting state. At this time, the hour value of the clock and the setting icon “...
- Page 15 You can rotate the programming switch KB2 to set the cooking temperature. If temperature is not adjustable for that function level, the default clock value and the working parameter setting icon “ ” flash as well as the oven working icon “ ”...
- Page 16 4. Reservation function After setting cooking time and temperature and before touching “ ” to start-up, touch • “ ” to enter to cooking end time(reservation function) setting (default end time=system time +set cooking time), cooking end time icon “ ” will flash(1s/ time) , the reservation function icon “...
- Page 17 After start self-cleaning, door lock function will be activated automatically, the oven door • will be locked and self-cleaning process starts. After self-cleaning process starts, if the display screen shows fault code “E-3”, please refer to protection function for problem analysis.
- Page 18 6.4 Forced unlocking: In the case of oven lock, you can press and hold the “K2+K4” button to unlock in the oven standby state. When you hear the sound “Di” the door lock is forced unlock, the door lock icon will be extinguished. The door can be opened and door lock function is disabled.
- Page 19 7.4 In any state, when the power board cannot receive valid communication data from the display board for 20 seconds, the power board automatically turns off all loads, and the display board displays "E-5". When the display board cannot receive valid communication data from the power board for 20 seconds, the display board sends data to close all loads, and the display board displays "E-6".
-
Page 20: Settings & Functions Of The Oven
(2) Touch “ ” button again, minute value flashes, and hour value keeps bright; (3) Rotate programming switch KB2 to set the minute, at this time the value of the minute is always bright, the setting range is 0-59; (4) When the alarm time is set, you can touch “ ”... - Page 21 Defrost mode: The fan runs without heat to reduce the defrosting time of frozen foods. The time required to defrost the food will depend on the room temperature, the quantity and type Function 1 of food. Always check food packaging for the defrosting instructions.
-
Page 22: Before Using The Oven For The First Time
Note: A. The exhaust motor works at low speed under the Function1 - Function 7 state and ECO function, and the exhaust motor stops working when the cavity temperature is lower than 100℃ in the standby state. B. Under any function, if the cavity temperature is higher than 300℃, the exhaust motor will work at high speed. -
Page 23: Troubleshooting
Tips for roasting 1. Seasoning with lemon juice and black pepper will improve the cooking performance when cooking a whole chicken, turkey or a large piece of meat. 2. 2.Meat with bones takes about 15 to 30 minutes longer before it is cooked than a roast of the same size without bones. -
Page 24: Baking And Grilling Tips
No electrical current Check if the oven have electrical Lamp isn’t coming current Power interrupt Check your kitchen light or other appliance whether still working on Oven stop working in a sudden during Normal close thermostat Check if the cool fan are working, if working protective yes, need change for a new normal... - Page 25 8. The bottom of a fruit cake is too light. Place the cake one level lower the next time. 9. The fruit juice overflows. Next time, use the deeper universal pan, if you have one. 10. Small baked items made out of yeast dough stick to one another when baking. There should be a gap of approx.
-
Page 26: Maintenance And Cleaning
temperature. • The roast looks good but the juices are burnt. Next time, use a smaller roasting dish or add more liquid. The roast looks good but the juices are too clear and watery. Next time, use a larger • roasting dish and use less liquid. - Page 27 For cleaning purposes and to remove the door panels, you can detach the oven door. Every door hinge has a locking rod, when it is close, door was fixed in place, then the door was not disassembly. If in order to remove down door to open the locking rod, hinge will be locked and would not bite.
- Page 28 Lift up the enamel door and then push forward. • Flip the enamel door, remove the four screws using a cross screwdriver. • Notice! Dangerous! If the glass has some scratches, it may lead to cracking. Don’t use the glass spatula, acute and corrosive cleaning product or detergent to clean the glass.
-
Page 29: Environmental Note
If the bulb in the oven Light fails, it must be replaced. Risk of electric shock! • Switch off the circuit breaker in the fuse box. • Place a tea towel in the oven when it is cold to prevent damage. Unscrew the glass cover by turning it anti-clockwise. -
Page 30: Test Dishes
human health, which could otherwise be caused by inappropriate waste handling of this product. The symbol on the product or on the documents accompanying the product indicates that this appliance may not be treated as household waste. Instead it shall be handed over to the applicable collection point for the recycling of electrical and electronic equipment. - Page 31 B. The baking parameters given in Tables are approximate and can be corrected based on your own experience and cooking preferences. C. Please use the accessories provided. Before cooking, check that any accessories that are not required are removed from the oven. D.
Need help?
Do you have a question about the 310602 and is the answer not in the manual?
Questions and answers
Easy instructions to operate a Vogue 9 310602
To operate the Vogue 9 310602 oven easily:
1. Power On: Make sure the oven is connected and power is on.
2. Use Control Panel:
- Use the Plus/Minus buttons (K3, K4) to set temperature and time.
- Use the Clock/Start button (KB1) to start cooking.
- Use the Pause/Cancel button (KB2) to pause or stop.
3. Select Function: Use the control panel to choose the desired cooking function.
4. Use Wire Rack or Tray: Place food on the wire rack or oven tray as needed.
5. Monitor Display: The screen shows temperature, time, and function icons.
6. End of Cooking: The oven will show the end time icon; turn off if needed.
Always follow safety instructions and refer to the display icons for guidance.
This answer is automatically generated
Easy way to operate Vogue Oven 310602
To operate the Vogue Oven 310602:
1. Remove all accessories before first use if using the self-cleaning function.
2. Set the desired function by selecting from the available options (e.g., fan-assisted, energy-saving grill, ECO self-cleaning).
3. Adjust the temperature controller to the required setting.
4. Set the timer if the model includes one.
5. Ensure the oven door is properly sealed; replace the seal if damaged.
6. Check power supply if the oven does not heat or stops suddenly.
7. Use proper baking/grilling tips, such as checking sponge cake readiness with a cocktail stick before the end of baking time.
Always follow safety instructions and maintenance guidelines.
This answer is automatically generated