
Related Manuals for Roborock E5


Summary of Contents for Roborock E5
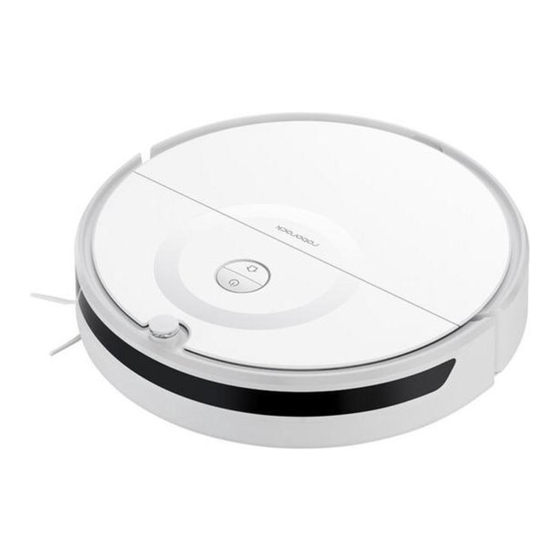
- Page 1 Roborock E5 Robotic Vacuum Cleaner User Manual Read this user manual carefully before using this product and store it properly for future reference.
-
Page 2: Table Of Contents
Contents Safety Information FCC IC Statement MPE Requirements Battery and Charging Holiday Energy Saving Function Product Overview Installation Instructions for Use Routine Maintenance Basic Parameters Troubleshooting FAQs... -
Page 3: Safety Information
Safety Information IMPORTANT SAFETY INSTRUCTIONS When using an electrical appliance, basic precautions should always be followed, including the following: READ ALL INSTRUCTIONS BEFORE USING (THIS APPLIANCE). Failure to follow the warnings and instructions may result in WARNING Do not use outdoors or on wet surfaces. Do not allow to be used as a toy. - Page 4 Safety Information measures reduce the risk of starting the appliance accidentally. Follow all charging instructions and do not charge the battery pack or appliance outside of the temperature range safety of the product is maintained. Place the cords from other appliances out of the area to be cleaned. Do not operate the vacuum in a room where an infant or child is sleeping.
- Page 5 Safety Information SAVE THESE INSTRUCTIONS Household use only. IMPORTANTES MESURES DE S CURIT AVERTISSEMENT Ne pas tirer soulever ni trainer l’appareil par le cordon. Ne pas utiliser le cordon comme une poignée, le coincer dans l’ e mbrasure d’une porte ou l’appuyer contre des arêtes vives ou des coins. Ne pas faire rouler l’appareil sur le cordon. manipuler le chargeur, y compris la prise du chargeur, et les bornes du chargeur avec les mains mouillées.
- Page 6 Safety Information cendres chaudes. batterie, de lever ou de déplacer l’appareil. Transporter l’appareil en gardant un doigt sur l’interrupteur, ou mettre sous une autre batterie. de sécurité ont pour but d’ é viter une mise en marche accidentelle de l’appareil. courtcircuit des bornes des batteries peut causer des brûlures ou un incendie.
- Page 7 Safety Information façon de faire garantira la sécurité du produit. d’ e ntretien. se cogner accidentellement. Ne pas laisser les enfants s’assoir sur l’aspirateur. Déconnecter la brosse principale avant le nettoyage ou le service. CONSERVER CES INSTRUCTIONS Laser Safety...
-
Page 8: Fcc Ic Statement
Compliance Statement (1) This device may not cause harmful interference, and (2) this device must accept any interference received, including interference that may cause undesired operation. Correspondence of the responsible party in USA Company Roborock Technology Co. Address Email support@roborock.com Warning... - Page 9 FCC IC Statement (1) l'appareil ne doit pas produire de brouillage, et compromettre le fonctionnement. the FCC Rules. These limits are designed to provide reasonable protection against harmful interference in a residential installation. the instructions, may cause harmful interference to radio communications. However, there is no guarantee that interference one or more of the following measures: —Reorient or relocate the receiving antenna.
-
Page 10: Mpe Requirements
MPE Requirements antenna of this device and persons during device operation. To ensure compliance, operations at closer than this distance is not recommended. pendant son functionnement. -
Page 11: Battery And Charging
Battery and Charging Keep the dock charger away from heat (such as heating plates). Do not wipe or clean the charging contacts with a piece of wet cloth or wet hands. If left unused for a long period, please store the cleaner in a cool and dry place after having it fully charged and switched Battery pack charging temperature Battery pack using temperature Storage (1 month) -
Page 12: Holiday Energy Saving Function
Holiday Energy Saving Function... -
Page 13: Product Overview
Product Overview Robot Clean/Power Power Indicator Press to start White: Battery level cleaning Press and hold to Breathing: Charging or starting up Flashing red: Error Dock/Spot Cleaning Press to return to the dock Press and hold to spot clean Note: Press any button to pause cleaning, returning to dock,or spot cleaning. - Page 14 Product Overview Parts List SPOT CLEAN DOCK POWER LEVEL Charging Dock Moisture-Proof Mat(Optional) Remote Controller Power Cable Adjustable Water Tank(Optional) Mop Cloth(Optional)...
- Page 15 Product Overview Robot Dustbin Latch WiFi Indicator Light connection Steady: WiFi connected Filter Air Vent Speaker...
- Page 16 Product Overview Robot and Sensors Obstacle Sensor Dock Locator Omni-Directional Wheel Charging Contacts Motion Tracking Bumper Sensor Side Brush Main Wheel Main Brush Main Brush Cover Latch...
- Page 17 Product Overview Charging Dock Power Indicator Dock Location Beacon Power Cable Connection Charging Contacts...
- Page 18 Product Overview Overview of Remote Controller The remote controller allows you to remotely control the robot vacuum to move around in the room or change the cleaning mode within 4 meters. Arrow Buttons for Remote Control Battery Compartment Start/Pause SPOT CLEAN DOCK POWER...
-
Page 19: Installation
Installation Important Tidy cables and loose items from the ground and move any If using this robot in a raised area, always use a secure physical barrier to prevent accidental falls that may result in personal tangled in, struck by, or knocked over by the robot. Note:... - Page 20 Installation Using the Robot Note: retained around the Charging Dock. Position the charging dock Charging Dock. when the robot is charging. plug it into mains power. signal. To avoid problems returning to the dock, do not place the Charging Dock in direct sunlight or block the Dock Location Beacon.
- Page 21 Installation Secure the moisture-proof mat Power on and charge After securing the charging dock, wipe the area where the Press and hold the button to power on. When the Power Indicator is on, place the robot on the Charging Dock to charge.
- Page 22 Installation Connect to the mobile app (recommended) 1. Download app scan the QR code below, then download and install the app. WiFi indicator light connection Steady: WiFi connected Note: If you cannot connect your phone to the robot, reset the WiFi, and add your robot as a new device.
- Page 23 Installation Mopping 3. Install the mop cloth Note: Insert it into the mounting slot in the water tank. Use barrier tape to prevent mopping carpeted areas, or remove carpets prior to mopping. tank. needs. 4. Install the module Slide the mop module in line with the alignment marks on the rear of the machine until you hear a "click".
-
Page 24: Instructions For Use
Installation Instructions for Use Start cleaning When the battery is fully charged, the Power Indicator will Press and hold the button to power on the robot. The Power remain lit. Press the button or use the app to start a Indicator will turn on, and the robot will enter standby mode. - Page 25 Instructions for Use Charging mop cloth Auto mode: After cleaning, the robot will automatically return to the Charging Dock. To add water or clean the mop cloth, press any button to stop the button to send the robot back to robot and remove the mopping module.
- Page 26 Instructions for Use Spot Cleaning Reset WiFi In Standby or Pause mode, press and hold the button to start If a mobile phone cannot connect to the robot due to router spiraling out from its starting point. After cleaning, the robot will reset the WiFi.
- Page 27 Instructions for Use System Reset If the robot does not respond when you press a button or the robot cannot be shut down, reset the system by pressing and holding the button. The robot will restart automatically after resetting. Firmware Update Charging Dock and ensure that the battery level is higher than Restore Factory Settings If the robot is not functioning after a system reset, press and hold...
-
Page 28: Routine Maintenance
Routine Maintenance Dustbin and Filter Main Brush * Clean weekly * Clean weekly 1. Open the top cover of the robot, press the Dustbin Latch, then lift and remove the Dustbin. Main Brush Cover Main Brush Cover Latch Main Brush Main Brush Bearing 2. - Page 29 Routine Maintenance Clean the Washable Filter * Clean every two weeks to remove as much dirt as possible. 1. Fill the Dustbin with clean water. Gently shake it, then pour out the dirty water. 4. Leave the Filter to dry before reinstalling it. Note: Dry the Filter thoroughly before use.
- Page 30 Routine Maintenance Main Wheels Mop Cloth * Clean after use Use a soft dry cloth to wipe and clean the main wheels. 1. Remove the mop cloth from the mopping module. Side Brush * Clean monthly 2. Clean and dry the mop cloth. 1.
- Page 31 Routine Maintenance Omni-Directional Wheel Robot Sensors * Clean as required * Clean as required 1. Turn the robot over. Use a soft dry cloth to wipe and clean all sensors, including: wheel. 2. Obstacle Sensor at the front of the robot. 4.
- Page 32 Routine Maintenance Charging Contact Areas Use a soft dry cloth to wipe the charging contacts on the charging dock and the robot.
-
Page 33: Basic Parameters
Basic Parameters Robot Charging Dock Name Parameters Name Parameters roborock E5 CDZ14RR or CDZ15RR Dimensions Dimensions Battery Rated Power Weight Rated Input Wireless Connection WiFi Smart Connect Rated Output Rated Input Charging Time < 6h Charging Battery... -
Page 34: Troubleshooting
Troubleshooting resolution options. Error Solution Error 2: Clean and lightly tap the The Bumper is stuck. Lightly and repeatedly tap the Bumper to remove any foreign Bumper. matter. If no foreign matter is found, move the machine to a new location and restart. starting location and restart. - Page 35 Troubleshooting Error Solution The Filter is not completely dry. Dry the Filter for at least 24 hours. The Filter may also dry or clean the Filter. Error 12: The battery is too low. Low battery. Recharge before use. Recharge before use. Use a dry cloth to clean the Charging Contacts on the robot and on the Charging Dock.
- Page 36 Troubleshooting Note: A system reset may resolve some problems.
-
Page 37: Faqs
FAQs Problem Solution The battery level is low. Put the robot on the Charging Dock to charge it before use. Unable to power on The battery temperature is too low or too high. Only use the robot within the range of If the Charging Dock is not receiving power, check that both ends of the Power Cable are properly connected. - Page 38 Abnormal WiFi connection. Reset the WiFi then download the latest mobile app and retry. Unable to connect to WiFi. There may be an error with your router settings. Contact Roborock customer service for troubleshooting. The battery level is too low. Scheduled cleaning can only begin when the battery level is...
- Page 39 FAQs Problem Solution The robot has started missing certain spots The Obstacle Sensor may be dirty. Clean it with a soft dry cloth. Please check whether there is water in the water tank, rinse the mopping cloth, replace the No or little water during mopping Too much water during mopping...
- Page 40 Robotic Vacuum Cleaner For more product information, visit our website: www.roborock.com...
Need help?
Do you have a question about the E5 and is the answer not in the manual?
Questions and answers