Advertisement
Available languages
Available languages
Quick Links
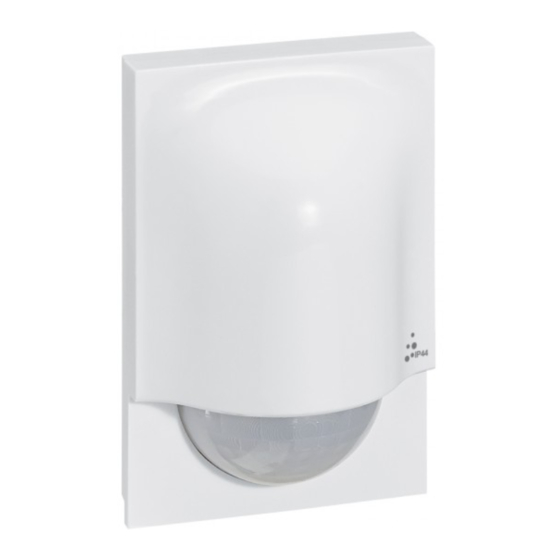
Wireless motion sensor
5 742 52
This product is a connected accessory which requires you to buy and install the «... with
Netatmo» connected starter pack and "... with Netatmo" connected power outlets, switches
(with dimmer option) and/or connected lighting micromodules first.
Pack contents:
x1 Wireless
motion sensor
Specifications
This product can control up to 20
connected switches (with dimmer
option), micromodules, cable outlets
and power outlets "... with Netatmo".
Frequency bands: 2.4 to 2.4835 GHz
Power level: < 10 mW
x2 AA batteries
2 x AA - 1.5 V
+ 5°C /+ 45°C
2 - 8 m
5 to 1000 LUX
from 15 s to 15 min
IP
44
PIR
Advertisement

Related Manuals for LEGRAND 5 742 52


Summary of Contents for LEGRAND 5 742 52
- Page 1 Wireless motion sensor 5 742 52 This product is a connected accessory which requires you to buy and install the «... with Netatmo» connected starter pack and "... with Netatmo" connected power outlets, switches (with dimmer option) and/or connected lighting micromodules first.
- Page 2 Open the front cover Do not insert the batteries now Do not fix the motion sensor to the wall now. The installation will be finalized on step 6. Start the wireless motion sensor configuration Press the middle of the wireless master switch until its light briefly turns green, and then stop pressing.
- Page 3 Insert the batteries in the wireless motion sensor The motion sensor light will flash green and then switch off. Nota: If the motion sensor flashes green green red, then remove the batteries and restart on step .
- Page 4 Pair the wireless motion sensor to a wired connected product Make sure that the indicator lights on the wired products are green and not flashing. If not, go back to step 2 and then come back to step 4. To pair a wireless motion sensor with a connected light switch, go to step 4.1.1. To pair a wireless motion sensor with a connected micromodule, go to step 4.2.1.
- Page 5 4.1.2 Check the correct pairing Press the ON and OFF buttons of the wireless motion sensor to check if the light turns on and off correctly. If it doesn’t, come back to step 4.1.1. 4.2.1 Pair a wireless motion sensor with a connected micromodule Phase A : Press the ON button on the wireless switch you wish to pair, while tapping it three times onto the light switch you wish to control.
- Page 6 4.2.2 Check the correct pairing Press the ON and OFF buttons of the wireless motion sensor to check if the light turns on and off correctly. If it doesn’t, come back to step 4.1.1. 4.3.1 Pair a wireless motion sensor with a connected power outlet Phase A : Press the ON button on the wireless switch you wish to pair, while tapping it three times onto the power outlet you wish to control.
-
Page 7: Multiple Pairing
4.3.1 Pair a wireless motion sensor with a connected power outlet Phase C : The indicator lights on the two products will briefly turn blue and stop flashing. Phase D : The light on the wired product will turn green again and the light on the wireless motion sensor will switch off. - Page 8 Recommended places Fix the motion sensor For optimal use, the motion detector should be placed at a height of approximately 2.50 m from the ground. Ø 3.5 mm max. 60 mm Ø 6.5 mm...
- Page 9 Set up the motion sensor By default, the motion detector is set to a minimum delay (15 seconds), a maximum light sensitivity (1000 lux) and a maximum sensor sensitivity (8 meters). If you want to change these settings, follow the steps below. Time delay Ambient light sensitivity Movement sensitivity...
- Page 10 8.2 Adjust the ambient light sensitivity In order for the sensor to detect only when it is dark, turn the screw (potentiometer) counterclockwise. 8.3 Adjust the motion sensor sensitivity To reduce the sensitivity of the motion sensor, turn the screw (potentiometer) counterclockwise.
- Page 11 To add a connected product to your connected installation, you should follow the instructions: - in the Legrand Home + Control application (Settings/Add a new product section) - or consult the user manual on legrand.fr www.legrand.fr/reference/574252 LEGRAND - Pro and Consumer Service - BP 30076 87002 LIMOGES CEDEX FRANCE •...
-
Page 12: Batteries Replacement
SIMPLIFIED EU DECLARATION OF CONFORMITY The undersigned, Legrand declares that the radio-electric equipment refered to in these instructions complies with directive 2014/53/EU. The full text of the EU declaration of conformity is available on the following website: www.legrandoc.com... - Page 13 جهاز استشعار الحركة الالسليك 5 742 52 …with Netatmo هذا املنتج هو ملحق متصل يتطلب رش اء وتثبيت حزمة التشغيل املتصلة …with Netatmo واملقابس, ومفاتيح (مع خيار تخفيت الضوء) و/أو وحدات االضاءة الدقيقة :محتويات الحزمة جهاز استشعار الحركة بال سلك...
- Page 14 فتح الغطاء الرئيسي للمنتج عدم ادخال البطاريات ال تقم بتثبيت الكاشف عىل الحائط ، سيتم االنتهاء من التثبيت يف الخطوة Wireless Motion Detector تشغيل إعداد إىل اللون حتى يتحول ضوء التحكم يف اضغط عىل مفتاح التحكم العام يف Start / End Start / End .األخرض...
- Page 15 أدخل البطاريات في استشعار الحركة الالسلكي .سوف يومض كاشف الحركة باللون األخرض ثم ينطفئ .املنتج جاهز لالعداد . مالحظة: إذا كان المنتج يومض باللون األخضر واألحمر ، قم بإ ز الة البطاريات واستئناف الخطوة من جديد...
- Page 16 إقران جهاز استشعار الحركة الالسلكي بمنتج سلكي متصل تأكدوا من أن املؤ رش ات الضوئية التي عىل املنتجات السلكية تنري باللون االخرض الثابت. إذا مل يكن األمر والعودة إىل الخطوة .كذلك ، كرر الخطوة . 4.1.1 لربط جهاز استشعار الحركة الالسلكي بمفتاح لإلضاءة متصل ، انتقل إلى الخطوة 4.2.1 لربط...
- Page 17 التحقق من أن املنتج مرتبط بشكل جيد 4.1.2 " يف جهاز استشعار الحركةOFF" " أوON" الضغط عىل زر ، للتحقق من أن االنارة تشتعل أو تنطفىء. إذا مل تتغري حالة الضوء .4.1.1 فارجع إىل الخطوة ربط جهاز استشعار الحركة الالسليك بوحدة دقيقة متصلة 4.1.2 املوجود...
- Page 18 التحقق من أن املنتج مرتبط بشكل جيد 4.2.2 " يف جهاز استشعار الحركة للتحقق من أن االنارةOFF" " أوON" الضغط عىل زر 4.1.1 تشتعل أو تنطفىء. إذا مل تتغري حالة الضوء ، فارجع إىل الخطوة لربط جهاز استشعار الحركة الالسليك مبقبس متصل 4.3.1 املوجود...
- Page 19 لربط جهاز استشعار الحركة الالسليك مبقبس متصل 4.3.1 سيتحول ضوء جهاز استشعار الحركة إىل اللون األزرق الصلب لفرتة قصرية ثم ينطفئ .سييضء املصباح املوجود عىل املقبس املتصل باللون األزرق الثابت لفرتة قصرية ثم يتحول اىل أخرض لربط عدة وحدات .لكل منتج ترغبون التحكم به .يمكنكم...
- Page 20 .نصائح في التركيب تركيب جهاز استشعار الحركة في المكان المطلوب .لالستخدام األمثل ، يجب وضع جهاز استشعار الحركة على ارتفاع حوالي 05.2 متر من األرض Ø 3.5 mm max. 60 mm Ø 6.5 mm...
- Page 21 ضبط جهاز استشعار الحركة الالسلكي )بشكل افرتايض ، يتم ضبط جهاز استشعار الحركة عىل فرتة تأخري بحد أدىن (51 ثانية) ، وحساسية للضوء األقىص (0001 لوكس والحد األقىص لستشعار الحركة (8 أمتار). إذا كنت تريد تغيري هذه اإلعدادات ، فاتبع الخطوات التالية املوقت...
- Page 22 ضبط حساسية الضوء ليك يشتغل الجهاز فقط عند حلول الظالم ، أدر املسامر (مقياس الجهد) عكس اتجاه عقارب الساعة ضبط حساسية جهاز استشعار الحركة لتقليل حساسية مستشعر الحركة ، أدر املسامر (مقياس الجهد) بعكس اتجاه عقارب الساعة. سيكون الكشف بعد ذلك عىل مسافة أقرص...
- Page 23 إلضافة جهاز استشعار الحركة الالسليك إىل التثبيت املتصل ، يوىص باتباع التعليامت قسم اإلعدادات / إضافة منتج جديد - من تطبيق Legrand Home + Control - أو الرجوع إىل اإلرشادات والتعليامت لالستخدام عىل Legrand.fr www.legrand.fr/reference/574252 LEGRAND - Pro and Consumer Service - BP 30076 87002 LIMOGES CEDEX FRANCE • www.legrand.com...
-
Page 24: Déclaration Ue De Conformité Simplifiée
احمر الشارة بطارية ضعيفةLED DÉCLARATION UE DE CONFORMITÉ SIMPLIFIÉE Le soussigné, Legrand déclare que les équipements radioélectriques cités sur cette notice sont conformes à la directive 2014/53/UE. Le texte complet de la déclaration UE de conformité est disponible à l’adresse internet suivante :...
Need help?
Do you have a question about the 5 742 52 and is the answer not in the manual?
Questions and answers