Table of Contents
Advertisement
Quick Links
Advertisement
Table of Contents

Related Manuals for BenQ W5700S


Summary of Contents for BenQ W5700S
- Page 1 Digital Projector User Manual CinePrime Series I W5700 / W5700S / HT5550 V 1.03...
-
Page 2: Warranty And Copyright Information
Warranty and Copyright information Limited warranty BenQ warrants this product against any defects in material and workmanship, under normal usage and storage. Proof of purchase date will be required with any warranty claim. In the event this product is found to be defective within the warranty period, BenQ's only obligation and your exclusive remedy shall be replacement of any defective parts (labor included). -
Page 3: Table Of Contents
Table of Contents Warranty and Copyright information ................2 Important safety instructions ....................4 Introduction .......................... 7 Shipping contents ............................7 Projector exterior view ..........................8 Terminals..............................9 Controls and functions..........................10 Positioning your projector ....................12 Choosing a location ..........................12 Obtaining a preferred projected image size.................. -
Page 4: Important Safety Instructions
Important safety instructions Your projector is designed and tested to meet the latest standards for safety of information technology equipment. However, to ensure safe use of this product, it is important that you follow the instructions mentioned in this manual and marked on the product. 1. - Page 5 9. Never replace the lamp assembly or any 12. Do not block the ventilation holes. electronic components unless the - Do not place this projector on a blanket, bedding projector is unplugged. or any other soft surface. - Do not cover this projector with a cloth or any other item.
- Page 6 - Locations where the altitudes are higher than 3000 may cause it to fail. If the projector does m (10000 feet). become wet, disconnect it from the power supply's power outlet and call BenQ to have the projector serviced. 3000 m (10000 feet)
-
Page 7: Introduction
Optional accessories 1. Spare lamp kit 3. BenQ WDP02 2. Ceiling mount kit 4. BenQ 3D glasses Replacing the remote control batteries 1. Press and slide off the battery cover, as illustrated. 2. Remove the old batteries (if applicable) and install two AAA batteries. -
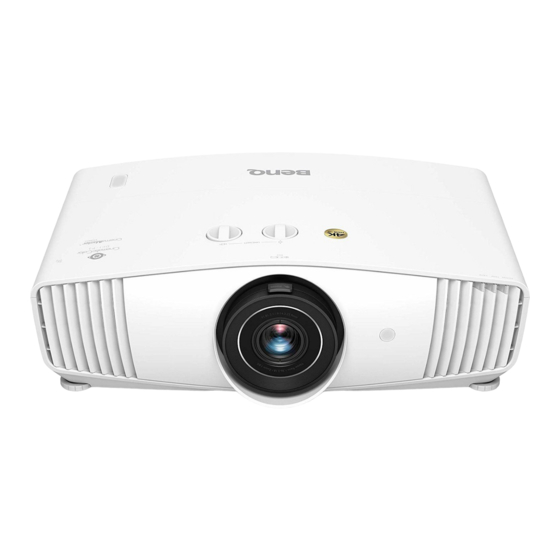
Page 8: Projector Exterior View
Projector exterior view 1. IR remote sensor 8. Adjuster feet 2. Lens shift adjustment knobs 9. Ceiling mount holes 10. Vent (air inlet) Left/Right, Up/Down) 11. Connector panel 3. Lamp cover Terminals on page 4. Zoom ring 12. AC power jack 5. -
Page 9: Terminals
Terminals 1. RJ-45 LAN input jack (10/100M) 6. HDMI input port (Version 2.0b) 2. SPDIF audio output port 7. HDMI input port (Version 2.0b) 3. IR-IN jack 8. USB Mini-B port (for firmware upgrades) For use with an IR extender cable to ensure 9. -
Page 10: Controls And Functions
Controls and functions Projector & Remote control 1. SOURCE All the key presses described in this document Displays the source selection bar. are available on the remote control or projector. POWER Toggles the projector between standby mode and on. Toggles the projector between standby mode and on. - Page 11 11. LIGHT 16. 3D Turns on the remote control backlight for a Displays the 3D menu. few seconds. To keep the backlight on, press 17. INVERT any other key while the backlight is on. Press When your 3D image is distorted, enable the key again to turn the backlight off.
-
Page 12: Positioning Your Projector
Note that a special rear projection setup and portability. screen and the BenQ Projector Ceiling Mount Kit are required for this installation location. 3. Front Ceiling 4. Rear... -
Page 13: Obtaining A Preferred Projected Image Size
All measurements are approximate and may vary from the actual sizes. BenQ recommends that if you intend to permanently install the projector, you should physically test the projection size and distance using the actual projector in situ before you permanently install it, so as to make allowance for this projector's optical characteristics. -
Page 14: Mounting The Projector
If you use a non-BenQ brand projector mounting kit, there is a safety risk that the projector may fall down due to an improper attachment through the use of the wrong gauge or length screws. -
Page 15: Adjusting The Projector Position
Adjusting the projector position Shifting the projection lens The lens shift control provides flexibility for installing your projector. It allows the projector to be positioned off the center of the screen. The lens shift is expressed as a percentage of the projected image height or width. You can turn the knobs on the projector to shift the projection lens in any direction within the allowable range depending on your desired image position. -
Page 16: Adjusting The Projected Image
Adjusting the projected image Adjusting the projection angle If the projector is not placed on a flat surface or the screen and the projector are not perpendicular to each other, the projected image becomes trapezoidal. You can screw the adjuster feet to fine-tune the horizontal angle. -
Page 17: Connection
Connection When connecting a signal source to the projector, be sure to: 1. Turn all equipment off before making any connections. 2. Use the correct signal cables for each source. 3. Ensure the cables are firmly inserted. A/V device Notebook or desktop computer HDMI USB Type-A Speakers... -
Page 18: Operation
Operation Starting up the projector 1. Plug the power cord. Turn on the power outlet switch (where fitted). The power indicator on the projector lights orange after power has been applied. 2. Press on the projector or on the remote control to start the projector. - Page 19 Step 4: Specify Auto Source. Select On if you want the projector to always search for available signals automatically when the projector is turned on. Now you’ve completed the initial setup. 4. If you are prompted for a password, press the arrow keys to enter a 6-digit password. See Utilizing the password function on page 5.
-
Page 20: Using The Menus
Using the menus The projector is equipped with On-Screen Display (OSD) menus for making various adjustments and settings. The OSD screenshots below are for reference only, and may differ from the actual design. Below is the overview of the OSD menu. Main menu icon Main menu PICTURE... -
Page 21: Securing The Projector
BenQ 2. Write down the number and turn off your projector. Customer Center. 3. Seek help from the local BenQ service center to decode Recall Code: the number. You may be required to provide proof of purchase documentation to verify that you are an authorized user of the projector. -
Page 22: Switching Input Signal
Changing the password 1. Go to SYSTEM SETUP: ADVANCED > Password > Change Password. 2. Press OK. The INPUT CURRENT PASSWORD message appears. 3. Enter the old password. • If the password is correct, another message INPUT NEW PASSWORD appears. •... -
Page 23: Presenting From A Media Reader
Presenting from a Media Reader The MEDIA READER (USB) ports on the projector allow you to browse the image and document files stored on a USB flash drive connected to the projector. It can eliminate the need for a computer source. - Page 24 • Button functions for viewing video clips Button Description Plays/Pauses the video. Cycles through the video clips. Rewinds/Fast-forwards the video. BACK Goes back to the thumbnail page. • Button functions for viewing pictures Button Description 1. Calls out the function menu. 2.
-
Page 25: Upgrading Firmware
Upgrading firmware 1. Go to BenQ website and enter Product page > Support > Software to download the latest firmware file. 2. Unzip the downloaded file, find and save the file named "update_signed.zip" to a USB flash drive. 3. Plug the USB flash drive into the USB 3.0 port on the back of the projector. -
Page 26: Shutting Down The Projector
Shutting down the projector 1. Press and a confirmation message will appear prompting you. If you don't respond in a few seconds, the message will disappear. 2. Press a second time. The power indicator flashes orange, the projection lamp shuts down, and the fans will continue to run for approximately 90 seconds to cool down the projector. -
Page 27: Menu Operation
Management Rename User Mode Brightness 0–100 Contrast 0–100 Color 0–100 Tint 0–100 Sharpness 0–15 Gamma Selection 1.8/2.0/2.1/2.2/2.3/2.4/2.5/2.6/BenQ HDR Brightness -2 – +2 Preset/Red Gain/Green Gain/Blue PICTURE Color Temperature Gain/Red Offset/Green Offset/Blue Offset Primary Color Management Color/Hue/Saturation/Gain Advanced Color Enhancer/Flesh Tone/Pixel... - Page 28 Network Settings LAN Settings On/Off Discovery Enable Network Standby Mode/ Network Standby Auto Disable Network Standby Mode Language Splash Screen BenQ/Black/Blue Disable/5 min/10 min/15 min/20 Auto Off min/25 min/30 min SYSTEM SETUP: Direct Power On On/Off BASIC Center/Top-Left/Top-Right/Botto Menu Position...
-
Page 29: Picture Menu
Source Picture Mode Resolution Color System INFORMATION Color Gamut Light Usage Time 3D Format Firmware Version Service Code PICTURE menu The projector is preset with several predefined picture modes so that you can choose one to suit your operating environment and input signal picture type. •... - Page 30 There is one user-definable mode if the current available picture modes are not suitable for your need. You can use one of the picture modes (except the User) as a starting point and customize the settings. • Load Settings From 1.
- Page 31 • Gamma Selection Gamma refers to the relationship between input source and picture brightness. • 1.8/2.0/2.1/BenQ: Select these values according to your preference. • 2.2/2.3: Increases the average brightness of the picture. Best for a lit environment, meeting room or family room.
- Page 32 • Color Management The Color Management provides six sets (RGBCMY) of colors to be adjusted. When you select each color, you can independently adjust its range and saturation according to your preference. • Primary Color: Selects a color from among Red, Yellow, Green, Cyan, Blue, or Magenta.
- Page 33 • Dynamic Iris: Automatically changes the black level of the projected pictures to enhance the effect of contrast ratio. When the projector is starting up, the Dynamic Iris will be calibrated for 3-15 seconds. You will hear the sound of the motor operation during this period of time.
-
Page 34: Display Menu
(with 3D game discs), 3D Blu-ray players (with 3D Blu-ray discs), and so on. After you have connected the 3D video devices to the projector, wear the BenQ 3D glasses and make sure the power is on to view 3D contents. When watching 3D contents: •... -
Page 35: Installation Menu
INSTALLATION menu Projector The projector can be installed on a ceiling or behind a screen, or with one or more mirrors. See Choosing a location on page Position Adjusts the image size and focus and check that the projected image is free from distortion. Test Pattern There are several options to set the image's aspect ratio depending on your input signal source. -
Page 36: Network Settings Menu
Network Settings menu • Wired LAN: See BenQ Network Projector Operation Guide. • AMX Device Discovery: When this function is On, the projector can be detected by AMX controller. • Network Standby: This menu provides basic and advanced settings for network control when the projector is in standby mode. -
Page 37: System Setup: Advanced Menu
BenQ video display devices. Accordingly, we recommend that setup and calibration be performed by an ISF certified installation technician. -
Page 38: Information Menu
INFORMATION menu • Source: Shows the current signal source. • Picture Mode: Shows the selected mode in the PICTURE menu. • Resolution: Shows the native resolution of the input signal. • Color System: Shows the input system format. • Color Gamut: Shows the color gamut status. Current •... -
Page 39: Maintenance
Maintenance Care of the projector Cleaning the lens Clean the lens whenever you notice dirt or dust on the surface. Please be sure to turn off the projector and let it cool down completely before cleaning the lens. • Use a canister of compressed air to remove dust. •... -
Page 40: Lamp Information
Lamp information Getting to know the lamp hour When the projector is in operation, the duration (in hours) of lamp usage is automatically calculated by the built-in timer. The method of calculating the equivalent lamp hour is as follows: 1. Lamp Usage Time = (x+y+z) hours, if Time used in Normal mode = x hours Time used in Economic mode = y hours Time used in SmartEco mode = z hours... - Page 41 Order Replacement Lamp Lamp hour >XXXX Hours the lamp hour on page 40), you may continue to operate the Order a new lamp at www.BenQ.com projector until the next hour lamp warning appears. Press OK to dismiss the message. Notice It is strongly recommended that you replace the lamp at this age.
- Page 42 Replacing the lamp (FOR SERVICE PERSONNEL ONLY) • To reduce the risk of electrical shock, always turn the projector off and disconnect the power cord before changing the lamp. • To reduce the risk of severe burns, allow the projector to cool for at least 45 minutes before replacing the lamp. •...
- Page 43 8. Use the handle to slowly pull the lamp out of the projector. • Pulling it too quickly may cause the lamp to break and scatter broken glass in the projector. • Do not place the lamp in locations where water might splash on it, children can reach it, or near flammable materials.
- Page 44 Resetting the lamp timer 17. After the startup logo, open the On-Screen Display (OSD) menu. 18. Go to SYSTEM SETUP: ADVANCED > Lamp Settings and press OK. The LAMP SETTINGS page appears. 19. Highlight Reset Lamp Timer and press OK. A warning message is displayed asking if you want to reset the lamp timer.
- Page 45 Indicators Light Status & Description Power events Stand-by mode Powering up Normal operation Normal power-down cooling Download Color wheel start failed Scaler reset fail (video projector only) Lamp/light source life exhausted Lamp door is not closed Burn-in ON Burn-in OFF Lamp events Lamp/light source error in normal operation Lamp/light source is not lit up...
-
Page 46: Troubleshooting
Troubleshooting The projector does not turn on. Cause Remedy Plug the power cord into the AC power jack on the projector, and plug the power cord into the power outlet. If There is no power from the power cord. the power outlet has a switch, make sure that it is switched Attempting to turn the projector on again during Wait until the cooling down process has completed. -
Page 47: Specifications
Output terminals Please visit below website and choose your country to Audio signal output find your service contact window. PC audio jack x 1 http://www.benq.com/welcome SPDIF x 1 Transporting Control Original packing or equivalent is recommended. 12V DC x 1 (0.5 A power supply) -
Page 48: Dimensions
Dimensions 492 mm (W) x 168.5 mm (H) x 349 mm (D) 349 168.5 Unit: mm Specifications... -
Page 49: Timing Chart
84.997 68.667 94.500 XGA_120 119.989 97.551 115.500 (Reduce Blanking) 1152 x 864 1152 x 864_75 75.00 67.500 108.000 BenQ Notebook 1024 x 576 60.00 35.820 46.996 Timing BenQ Notebook 1024 x 600 64.995 41.467 51.419 Timing 1280 x 720 1280 x 720_60 45.000... - Page 50 3840 x 2160_30 3840 x 2160 67.5 For 4K2K model 3840 x 2160_60 For 4K2K model 3840 x 2160 (Only HDMI 2.0 support) The timings showing above may not be supported due to EDID file and VGA graphics card limitations. It is possible that some timings cannot be chosen.
Need help?
Do you have a question about the W5700S and is the answer not in the manual?
Questions and answers