BenQ Home Entertainment Series User Manual
Hide thumbs
Also See for Home Entertainment Series:
- User manual (58 pages) ,
- Quick start manual (41 pages) ,
- User manual (47 pages)

Related Manuals for BenQ Home Entertainment Series


Summary of Contents for BenQ Home Entertainment Series
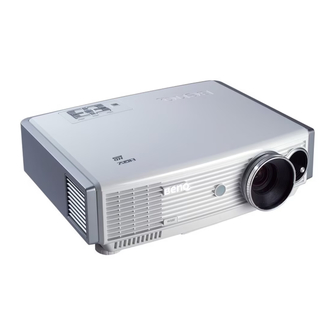
- Page 1 All manuals and user guides at all-guides.com W500 LCD Projector Home Entertainment Series User Manual Welcome...
-
Page 2: Table Of Contents
All manuals and user guides at all-guides.com Table of contents Important safety instructions ................5 Introduction ......................8 Projector features ..................8 Shipping contents ..................9 Standard accessories ....................9 Optional accessories ....................9 Projector exterior view ................10 Front and upper side ....................10 Rear side ........................ - Page 3 All manuals and user guides at all-guides.com Speeding up the process of source search ..............26 Adjusting the projected image ..............26 Adjusting the projection angle ..................26 Fine-tuning the image size and clarity ...............26 Correcting two-dimensional keystone ...............26 Correcting pincushion and barrel distortion .............27 Optimizing the image ................
- Page 4 All manuals and user guides at all-guides.com Indicators ........................47 Troubleshooting ....................49 Specifications ....................... 50 Projector specifications ................50 Optical ......................... 50 Electrical ........................50 Terminals ........................50 General characteristics ....................50 Dimensions ....................50 Timing chart ....................51 Warranty and Copyright information ............... 53 Copyright ....................53 Disclaimer ....................53 Warranty .....................53...
-
Page 5: Important Safety Instructions
All manuals and user guides at all-guides.com Important safety instructions Your BenQ projector is designed and tested to meet the latest standards for safety of information technology equipment. However, to ensure safe use of this product, it is important that you follow the instructions mentioned in this manual and marked on the product. - Page 6 Do not place liquids near or on the projector. Liquids spilled into the projector will void your warranty. If the projector does become wet, disconnect it from the power point and call BenQ to have the projector repaired. Important safety instructions...
- Page 7 We want you to have a pleasant experience using with live parts. The only user serviceable parts are your BenQ projector, so we need to bring this the lamp and air filters which have their own safety matter to your attention to prevent possible removable covers or access panels.
-
Page 8: Introduction
All manuals and user guides at all-guides.com Introduction Projector features The projector integrates high-performance optical engine projection and a user-friendly design to deliver high reliability and ease of use. The projector offers the following features. • Three-panel LCD system to deliver superior brightness, color saturation and color depth •... -
Page 9: Shipping Contents
All manuals and user guides at all-guides.com Shipping contents The projector is shipped with the cables required for connection to a video and PC equipment. Some of the items may not be available depending on your region of purchase. Please check with your place of purchase. Standard accessories Some of the accessories may vary from region to region, and may differ from those illustrated. -
Page 10: Projector Exterior View
All manuals and user guides at all-guides.com Projector exterior view Front and upper side 1. External control panel (See page 11 for details) 2. Vent (heated air exhaust) 3. Focus and Zoom adjustment 4. Front IR sensor 5. Projection lens 6. -
Page 11: Controls And Functions
All manuals and user guides at all-guides.com Controls and functions Projector 1. Focus ring 7. MODE Adjusts the focus of the projected image. See "Fine- Sequentially selects a predefined picture setting tuning the image size and clarity" on page 26 available for each input. -
Page 12: Remote Control
All manuals and user guides at all-guides.com Remote control POWER Turns the projector on or off. See pages 23, 34 and 47 for details. 2. Source buttons (COMP1, COMP2, VIDEO, HDMI, D-SUB, S-VIDEO) Selects an input source for display. See "Switching input signal"... -
Page 13: Replacing The Remote Control Batteries
All manuals and user guides at all-guides.com Replacing the remote control batteries 1. To open the battery cover, turn the remote control over to view its back, push on the finger grip on the cover and slide it down in the direction of the arrow as illustrated. -
Page 14: Positioning Your Projector
Note that a special rear projection screen is required. Note that a special rear projection screen and the BenQ Projector Ceiling Mounting Kit are required for this Set Floor Rear in the System Setup > Projector Position installation location. -
Page 15: Obtaining A Preferred Projected Picture Size
The distance from the projector lens to the screen, the zoom setting, and the video format each factors in the projected image size. BenQ has provided separate tables of dimensions for both 16:9 and 4:3 screen ratios to assist you in determining the ideal location for your projector. -
Page 16: Installation For A 16:9 Ratio Screen
All manuals and user guides at all-guides.com column is 4356 mm. Looking across this row shows that a 3048 mm (30.48 m) screen is required. If you can only obtain imperial sized screens, the screen size is 10' (120") diagonally. Installation for a 16:9 ratio screen Floor Installation Ceiling Installation... -
Page 17: Installation For A 4:3 Ratio Screen
There is 3% tolerance among these numbers in the above two tables due to optical component variations. BenQ recommends that if you intend to permanently install the projector, you should physically test the projection size and distance using the actual projector in situ before you permanently install it, so as to make allowance for this projector's optical characteristics. -
Page 18: Shifting The Projection Lens
All manuals and user guides at all-guides.com Shifting the projection lens The lens shift lever at the front side of the projector provides flexibility for installing your projector. It allows the projector to be positioned off axis from screen center. The lens shift (offset) is expressed as a percentage of the projected image height or width. -
Page 19: Connection
All manuals and user guides at all-guides.com Connection You can connect the projector to any type of video equipment, such as a VCR, DVD player, digital tuner, cable or satellite decoder, video game console or digital camera. You can also connect it to a desktop or laptop PC or Apple Macintosh system. -
Page 20: Connecting Video Source Devices
All manuals and user guides at all-guides.com Connecting Video source devices You can connect your projector to various Video source devices that provide any one of the following output sockets: • HDMI • Component Video • S-Video • Video (composite) You need only connect the projector to a Video source device using just one of the above connecting methods, however each provides a different level of video quality. -
Page 21: Connecting A Component-Video Source Device
All manuals and user guides at all-guides.com The final connection path should be like that shown in the following diagram: HDMI device: DVD player, digital tuner, etc. From audio output To audio input terminals terminals HDMI cable • It is not recommended to establish the connection via a DVI to HDMI cable. The weight of the DVI to HDMI adapter may be pulling down on the HDMI port, causing it to become loose over time. -
Page 22: Connecting An S-Video Or A Composite Video Source Device
All manuals and user guides at all-guides.com Connecting an S-video or a composite Video source device Examine your Video source device to determine if it has an unused S-Video or composite Video output socket available: • If so, you can continue with this procedure. •... -
Page 23: Using The Projector
All manuals and user guides at all-guides.com Using the projector Start up 1. Plug the power cord into the projector and into a wall socket. Turn on the wall socket switch (where fitted). Check that the Power indicator on the projector lights orange after power has been applied. The power cable used in the illustration may look different to the power cable type used in your region. -
Page 24: Utilizing The Password Function
Press MODE on the projector or remote control. The projector will RECALL PASSWORD display a coded number on the screen. Write down the number and turn off your projector. Seek help from the local BenQ service center to Please write down the recall code, and contact with the BenQ decode the number. -
Page 25: Changing The Password
All manuals and user guides at all-guides.com Changing the password 1. Open the OSD menu and go to the Advanced Setup > Password menu. Press ENTER. 2. Highlight Change Password. Press ENTER. 3. The message 'INPUT CURRENT PASSWORD' displays. Enter the old password. i. -
Page 26: Speeding Up The Process Of Source Search
All manuals and user guides at all-guides.com Speeding up the process of source search You can speed up the process of source search by blocking source(s) not in use. 1. Go to the Advanced Setup > Source Block menu and press ENTER. 2. -
Page 27: Correcting Pincushion And Barrel Distortion
All manuals and user guides at all-guides.com • Press one of the Keystone/Arrow buttons ( ) on 2D Keystone the projector or remote control to display the 2D Keystone correction page. Press the button whose keystone icon is similar to the adjustment you are about to make. -
Page 28: Optimizing The Image
All manuals and user guides at all-guides.com To correct the image's shape, you can perform the following steps. 1. Press MENU on the projector or remote control. Go to the Display > Keystone menu and highlight Pincushion Correction. 2. Press Left or Right repeatedly to adjust the image until you are satisfied with the shape. -
Page 29: Adjusting Picture Quality
All manuals and user guides at all-guides.com Setting the User 1/User 2/User 3 modes There are three user-definable modes if the current available picture modes are not suitable for your need. You can use one of the picture modes (except the User 1/2/3) as a starting point and customize the settings. 1. -
Page 30: Advanced Picture Quality Controls
All manuals and user guides at all-guides.com In the pictures below, the black portions are inactive areas and the white portions are active areas. 1. Anamorphic: (displayed as 4. Wide: A 4:3 aspect ratio image is enlarged "ANA" on the remote NON-linearly in horizontal direction to control) Scales an image so accommodate 16:9 full-screen display. -
Page 31: Adjusting Picture Clarity
All manuals and user guides at all-guides.com Adjusting picture clarity 1. Go to the Picture--Advanced menu and highlight Clarity Control. 2. Press ENTER. 3. Press Up or Down to highlight one of the following functions and press Left or Right to adjust the setting. -
Page 32: Color Management
All manuals and user guides at all-guides.com Color management In most installation situations, color management will not be necessary, such as in classroom, meeting room, or lounge room situations where lights remain on, or where building external windows allow daylight into the room. -
Page 33: Operating In A High Altitude Environment
Creating your own startup screen In addition to selecting the projector preset startup screen from between BenQ logo and Blue screen, you can make your own startup screen that is an image projected from your computer or video source. -
Page 34: Personalizing The Projector Menu Display
All manuals and user guides at all-guides.com Personalizing the projector menu display The On Screen Display (OSD) menus can be set according to your preferences. These settings do not affect the projection settings, operation, or performance. • Language in the System Setup menu sets your familiar language for the on-screen menus. •... -
Page 35: Menus
Digital Zoom Letter Box H.Size Wide PC & Component YPbPr Tuning Phase Real Auto 17 languages System Setup Language BenQ Splash Screen Blue My Screen My Screen Floor Front Projector Position Ceiling Front Auto Off Black Floor Rear Sleep Timer... -
Page 36: Using The Menus
All manuals and user guides at all-guides.com Information Source Picture Mode Resolution Lamp Hours Nor. Lamp Hours Eco. Lamp Rest Rate Dust Filter Hour If there is no equipment connected or no signal detected, limited menu items are accessible. Using the menus The projector is equipped with on-screen display (OSD) menus for making various adjustments and settings. -
Page 37: Picture--Basic Menu
All manuals and user guides at all-guides.com Picture--Basic menu The Picture--Basic menu allows you to adjust the finer details of the projected image quality. Before making adjustments, you are suggested to choose a desired picture mode in this menu which has set some certain values in order to meet different lighting environment and presentation purposes. -
Page 38: Picture--Advanced Menu
All manuals and user guides at all-guides.com Picture--Advanced menu The Picture--Advanced menu allows you to adjust the finer details of the projected image quality. FUNCTION (default DESCRIPTION setting / value) "Setting black level" on page 30 for details. Black Level (0 IRE) "Adjusting picture clarity"... -
Page 39: System Setup Menu
Thai, and Polish. Allows you to select which logo screen will display during projector startup. Three Splash Screen options are available: BenQ logo, Blue screen or My Screen. (BenQ) Captures and stores the projected image as My Screen. See "Creating your own My Screen startup screen"... -
Page 40: Advanced Setup Menu
All manuals and user guides at all-guides.com Advanced Setup menu FUNCTION (default DESCRIPTION setting / value) amp Power (Normal): Pre ss Left or Right on the projector or remote • control to set Normal or Economic as the power type of your projection. Using Eco mode reduces system noise and reduces power consumption by 20%. -
Page 41: Information Menu
All manuals and user guides at all-guides.com Returns all settings to the factory preset values. Reset All Settings The following settings will still remain: Phase, Projector Position, Language, Password and High Altitude Mode. Information menu FUNCTION (default DESCRIPTION setting / value) Shows the current signal source. -
Page 42: Maintenance
Never remove any parts of the projector except the lamp or the air filter. Contact your dealer or local BenQ Customer Service Centre if the projector fails to operate as expected. Cleaning the lens Clean the lens whenever you notice dirt or dust on the surface. - Page 43 All manuals and user guides at all-guides.com To clean the filter: Shut down the projector if turned on and wait until the fans stop running. Disconnect the projector from any cables. Turn the projector over. Draw the dust filter grill from the bottom side of the projector.
-
Page 44: Lamp Information
All manuals and user guides at all-guides.com Lamp Information Calculation of lamp hour When the projector is in operation, the duration (in hours) of lamp usage is automatically calculated by the built-in timer. The method of calculating the equivalent lamp hour is as follows: Total (equivalent) lamp hour = 1 (hours used in Economic mode) +3/2 (hours used in normal mode) "Lamp Settings"... -
Page 45: Replacing The Lamp
All manuals and user guides at all-guides.com If this warning message displays, the projector will shut down in 40 WARNING seconds. The lamp MUST be replaced before the projector will operate normally. NOTICE: Lamp-usage time exceeded Replace lamp (refer to User's Manual) then reset lamp timer Replacing the lamp •... - Page 46 All manuals and user guides at all-guides.com Lift the handle so that it stands up. Use the handle to slowly pull the lamp out of the projector. • Pulling it too quickly may cause the lamp to break and scatter broken glass in the projector. To reduce the risk of injuries to fingers and damage to internal components, use caution when removing lamp glass that has shattered.
-
Page 47: Temperature Information
All manuals and user guides at all-guides.com Temperature information When the Temperature warning light is on, it is warning you of the following possible problems: 1. The internal temperature is too high. 2. The fans are not working. Turn the projector off and contact qualified service personnel for further help. For more detailed information, please refer to "Indicators"... - Page 48 All manuals and user guides at all-guides.com Light Status & Description Power Temp Lamp Thermal events The projector has shutdown automatically. If you try to re- start the projector, it will shutdown again. Please contact your dealer for assistance. Maintenance...
-
Page 49: Troubleshooting
All manuals and user guides at all-guides.com Troubleshooting THE PROJECTOR DOES NOT TURN ON. Cause Remedy Plug the power cord into the AC inlet on the projector, and plug the power cord into the power outlet. If the There is no power from the power cable. power outlet has a switch, make sure that it is switched Attempting to turn the projector on again during Wait until the cooling down process has completed. -
Page 50: Specifications
All manuals and user guides at all-guides.com Specifications Projector specifications All specifications are subject to change without notice. Optical Projection system Three-panels LCD system. DMD chip 0.55" LCD (1280 x 720) Lens 1.2x zoom Projection screen size 23.5" ~ 300" Lamp 140W Electrical... -
Page 51: Timing Chart
All manuals and user guides at all-guides.com Timing chart 'V' denotes the type of input that this timing can support. Refresh H. Freq. Pixel Freq. Comp. S-Video/ Format Resolution D-Sub HDMI rate(Hz) (KHz) (MHz) Video 720 x 400 720 x 400 31.469 28.322 31.5... - Page 52 All manuals and user guides at all-guides.com Refresh H. Freq. Pixel Freq. Comp. S-Video/ Format Resolution D-Sub HDMI rate(Hz) (KHz) (MHz) Video 59.94 / 15.734/ NTSC 3.58 3.58 15.75 59.94 / 15.734/ NTSC 4.43 4.43 15.75 PAL-B/G 15.625 4.43 59.94 / 15.734/ PAL M 3.58...
-
Page 53: Warranty And Copyright Information
Further, BenQ Corporation reserves the right to revise this publication and to make changes from time to time in the contents hereof without obligation of BenQ Corporation to notify any person of such revision or changes. -
Page 54: Regulation Statements
All manuals and user guides at all-guides.com Regulation statements FCC statement CLASS B: This equipment generates, uses and can radiate radio frequency energy and, if not installed and used in accordance with the instructions, may cause harmful interference to radio communications. However, there is no guarantee that interference will not occur in a particular installation.
Need help?
Do you have a question about the Home Entertainment Series and is the answer not in the manual?
Questions and answers