Table of Contents
Advertisement
Quick Links
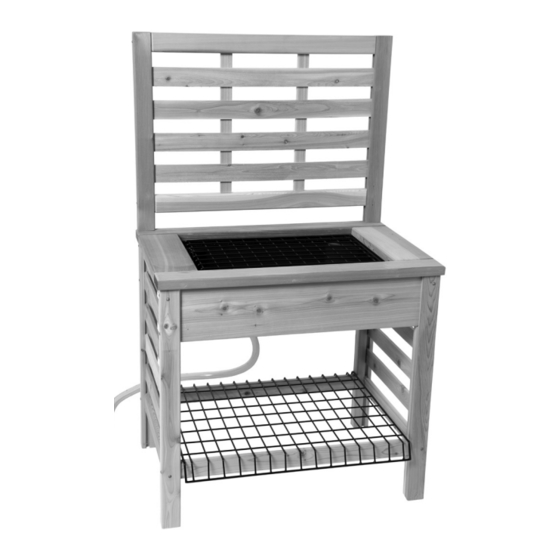
The CedarLast Potting Bench is the optimum gardening work station, providing a versatile dry sink for planting and cleaning pots.
It combines classic styling with solid cedar construction that will last for years. Its simple design complements any setting, from rustic
to modern.
Parts List
(1) Potting Bench Top
(2) Side Panels
(2) Front/Back Panels
(2) Shelf Supports
(1) Sink
(1) Trellis
(2) Trellis Supports
(1) Shelf
(1) Sink Grate
NOTE: Assembly is easiest with two people.
Step 1. Place the Side Panels upside down on a flat, protected surface. Slide the Front and
Back Panels into the slots on both Side Panels, as shown in Figure 1. NOTE: The platforms
on the Front and Back Panels should be closer to the top of the Potting Bench.
Step 2. Place the ends of the Shelf Supports into the openings on the Side Panels (Figure
1). Make sure all pieces are fully in place and use the larger Star Bit to attach them together
by inserting Long Screws into the 3 predrilled holes in each Corner (Figure 2).
Step 3. Remove the nut and washer from the bolt attached to the Drain Plug (Figure 3).
Place the Bolt through the small hole in the corner of the Sink and reattach the
washer and nut (Figure 4).
Step 4. Use your flat head screwdriver to remove the bolt and the strainer from
the Sink Drain. Line up the Drain with the bottom of the larger hole in the Sink
(Figure 4). Place the strainer on top of the hole, lining it up with the rest of the
Drain and reattach the Bolt through the center. NOTE: Before tightening the bolt,
make sure the Drain's overflow is pointed in the direction you want water to
drain.
Step 5. Sit the Potting Bench upright. Place the Sink into the top of it, making
sure it is centered (Figure 5).
Figure 2
Side Panel
Long
Screws
#8596680
CedarLast Potting Bench
(1) Sink Drain
(1) Drain Plug
(1) Drainage Hose
(12) 3" Long Screws
(12) 2.5" Short Screws
(2) Star Bits for your power drill
Assembly
Figure 3
attached bolt with
strainer
bolt
washer & nut
Sink
Drain
overflow
Tools Required
Power drill
Flat head screwdriver
Rubber mallet (optional)
over please
Figure 4
attach Drain Plug here
Sink
Drain
Plug
Figure 1
Side Panels
Shelf Supports
Front/Back
slot
Panels
platform
Figure 5
back of the Potting Bench
attach Sink
Drain here
sink
1105V Rev 01/18
Advertisement
Table of Contents

Summary of Contents for Gardener's CedarLast 8596680
- Page 1 CedarLast Potting Bench The CedarLast Potting Bench is the optimum gardening work station, providing a versatile dry sink for planting and cleaning pots. It combines classic styling with solid cedar construction that will last for years. Its simple design complements any setting, from rustic to modern.
- Page 2 Step 6. Place the rectangular Potting Bench Top on a flat protected surface. Flip the Potting Bench with the Sink upside down and place it on the Top. Important: The Top is slightly larger than the Frame. Center the Bench so the Top extends evenly along each side. Use the other Star Bit to place Short Screws into the 4 holes in the bottom of the Potting Bench, attaching it to the Top (Figure 6).


Need help?
Do you have a question about the CedarLast 8596680 and is the answer not in the manual?
Questions and answers