
Subscribe to Our Youtube Channel
Related Manuals for Zanussi ZDLN6531


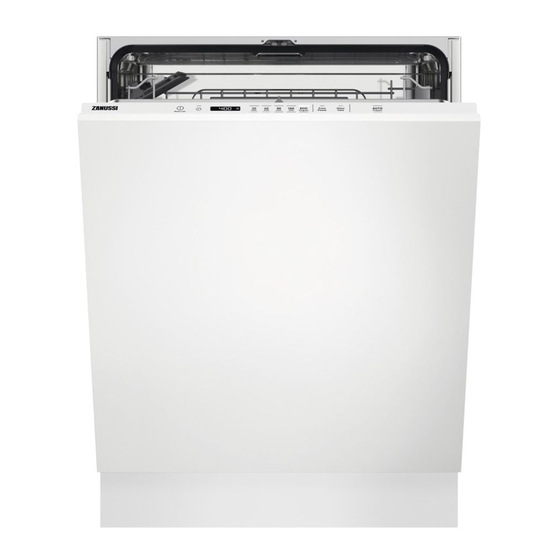
Summary of Contents for Zanussi ZDLN6531
- Page 1 User Manual GETTING STARTED? EASY. ZDLN6531 EN User Manual Dishwasher ES Manual de instrucciones Lavavajillas...
-
Page 2: Safety Information
VISIT OUR WEBSITE TO: Get usage advice, brochures, trouble shooter, service and repair information: www.zanussi.com/support SAFETY INFORMATION Before the installation and use of the appliance, carefully read the supplied instructions. The manufacturer is not responsible for any injuries or damage that are the result of incorrect installation or usage. -
Page 3: Safety Instructions
Do not change the specification of this appliance. • The operating water pressure (minimum and maximum) must be • between 0.5 (0.05) / 8 (0.8) bar (MPa) Follow the maximum number of 13 place settings. • If the supply cord is damaged, it must be replaced by the •... -
Page 4: Water Connection
cable need to be replaced, this must be carried • Dishwasher detergents are dangerous. Follow out by our Authorised Service Centre. the safety instructions on the detergent • Connect the mains plug to the mains socket packaging. only at the end of the installation. Make sure that •... -
Page 5: Product Description
PRODUCT DESCRIPTION The graphics below is just a general product overview. For more detailed information, refer to other chapters and/or documents provided with the appliance. Upper spray arm Rinse aid dispenser Lower spray arm Detergent dispenser Filters Cutlery basket Rating plate Lower basket Salt container Upper basket... -
Page 6: Control Panel
CONTROL PANEL On/Off button/Reset button Option buttons Delay start button AUTO programme button Display Programme buttons DISPLAY A. Indicators B. Time indicator INDICATORS Indicator Description Rinse aid indicator. It is on when the rinse aid dispenser needs refilling. Refer to "Before first use". -
Page 7: Programme Selection
PROGRAMME SELECTION PROGRAMMES OPTIONS You can adjust the programme selection to your needs by activating options. Extra Power This option improves the washing results of the selected programme. It increases the wash temperature and duration. Glass Care This option provides special care for a delicate A. - Page 8 Programme Type of load Degree of soil Programme phases Options 90 min • Crockery • Normal • Wash 60 °C • Extra Power • Cutlery • Lightly • Intermediate rinse • Glass Care • Pots dried-on • Final rinse 55 °C •...
-
Page 9: Basic Settings
Water (l) Energy (kWh) Duration (min) Programme Machine Care 8.4 - 10.2 0.60 - 0.71 1) The pressure and the temperature of the water, the variations of the mains supply, the options and the quantity of dishes can change the values. 2) In accordance with the 1016/2010 regulation 3) In accordance with the 2019/2022 regulation Information for test institutes... -
Page 10: The Water Softener
The order of the basic settings presented in the The water softener should be adjusted according to table is also the order of the settings in setting the hardness of the water in your area. Your local mode. water authority can advise you on the hardness of the water in your area. - Page 11 END SOUND You can activate an acoustic signal that sounds Water softener level Amount of water (l) when the programme is completed. Acoustic signals sound also when a malfunction of the appliance occurs. It is not possible to deactivate these signals.
-
Page 12: Setting Mode
A. Previous button selected automatically after you activate the B. OK button appliance. C. Next button When the latest programme selection is disabled, Use Previous and Next to switch between the the default programme is ECO. basic settings and to change their value. SETTING MODE Use OK to enter the selected setting and to confirm changing its value. -
Page 13: How To Fill The Rinse Aid Dispenser
HOW TO FILL THE RINSE AID DISPENSER 4. Carefully shake the funnel by its handle to get the last granules inside. 5. Remove the salt around the opening of the salt container. CAUTION! Only use rinse aid designed specifically for dishwashers. 1. - Page 14 3. If the programme has a prewash phase, put a HOW TO SELECT AND START THE small quantity of detergent on the inner part of PROGRAMME AUTO the appliance door. 1. Press AUTO. 4. Close the lid. Make sure that the release button •...
-
Page 15: End Of The Programme
• When the programme is completed. If the door is opened for more than 30 • After 5 minutes if a programme was not started. seconds during the drying phase, the running programme ends. It does not END OF THE PROGRAMME happen if the door is opened by AirDry When the programme is complete, the display function. -
Page 16: Care And Cleaning
4. When the programme is completed, adjust the they could crack, warp, get discoloured or water softener according to the water hardness pitted. in your area. • Do not wash in the appliance items that can 5. Adjust the released quantity of rinse aid. absorb water (sponges, household cloths). -
Page 17: External Cleaning
REMOVAL OF FOREIGN OBJECTS Check the filters and the sump after each use of the dishwasher. Foreign objects (e.g. pieces of glass, plastic, bones or toothpicks, etc) decrease the cleaning performance and can cause damage to the drain pump. 1. Disassemble the filters system as instructed in this chapter. -
Page 18: Cleaning The Lower Spray Arm
8. Put back the filter (B) in the flat filter (A). Turn it 2. Wash the spray arm under running water. Use clockwise until it locks. a thin pointed tool, e.g. a toothpick, to remove particles of soil from the holes. CAUTION! An incorrect position of the filters can cause bad washing 3. - Page 19 Problem and alarm code Possible cause and solution You cannot activate the appli- • Make sure that the mains plug is connected to the mains sock- ance. • Make sure that there is no damaged fuse in the fuse box. The programme does not start.
- Page 20 Problem and alarm code Possible cause and solution The remaining time in the dis- • This is not a defect. The appliance is working correctly. play increases and skips nearly to the end of the programme duration. Small leak from the appliance •...
-
Page 21: The Washing And Drying Results Are Not Satisfactory
THE WASHING AND DRYING RESULTS ARE NOT SATISFACTORY Problem Possible cause and solution Poor washing results. • Refer to "Daily use", "Hints and tips" and the basket load- ing leaflet. • Use more intensive washing programme. • Activate the Extra Power option to improve the washing re- sults of a selected programme. -
Page 22: Technical Information
Problem Possible cause and solution Limescale deposits on the table- • The level of salt is low, check the refill indicator. ware, on the tub and on the in- • The cap of the salt container is loose. side of the door. •... -
Page 23: Environmental Concerns
and the model name and product number that you For more detailed information about the energy can find on the rating plate of the appliance. Refer label, visit www.theenergylabel.eu. to the chapter "Product description". ENVIRONMENTAL CONCERNS with the symbol with the household waste. Recycle materials with the symbol . -
Page 24: Información Sobre Seguridad
VISITE NUESTRO SITIO WEB PARA: Obtener consejos, folletos, soluciones a problemas e información de servicio y reparación: www.zanussi.com/support INFORMACIÓN SOBRE SEGURIDAD Antes de instalar y utilizar el aparato, lea atentamente las instrucciones facilitadas. El fabricante no se hace responsable de lesiones o daños producidos como resultado de una instalación o... -
Page 25: Instrucciones De Seguridad
por clientes en hoteles, moteles, pensiones y otros entornos – de tipo residencial. No cambie las especificaciones de este aparato. • La presión de agua de funcionamiento (mínima y máxima) debe • estar entre 0.5 (0.05) / 8 (0.8) bares (MPa) Siga el máximo número de ajustes de 13 cubiertos. -
Page 26: Conexión De Agua
• Asegúrese de que los parámetros de la placa USO DEL APARATO de características son compatibles con los • No coloque productos inflamables ni objetos valores eléctricos del suministro eléctrico. mojados con productos inflamables dentro, • Utilice siempre una toma con aislamiento de cerca o encima del aparato. -
Page 27: Descripción Del Producto
• Retire el pestillo de la puerta para evitar que los niños y las mascotas queden encerrados en el aparato. DESCRIPCIÓN DEL PRODUCTO Los siguientes gráficos son sólo una descripción general del producto. Para obtener información más detallada, consulte otros capítulos y/o documentos suministrados con el aparato. -
Page 28: Panel De Control
Cuando AirDry está activado durante la fase de secado, es posible que la proyección en el suelo no esté visible completamente. Para ver si el ciclo ha terminado, consulte el panel de control. PANEL DE CONTROL Botón de encendido/apagado / Botón de Botones de programa reinicio Teclas de opciones... -
Page 29: Selección De Programas
Indicador Descripción Indicador de la fase de secado. Se activa cuando se selecciona un programa con la fase de secado. Parpadea durante la fase de secado. Consulte "Selección de programas". SELECCIÓN DE PROGRAMAS PROGRAMAS Este es el programa estándar para institutos de pruebas. - Page 30 Grado de sucie- Programa Tipo de carga Fases del programa Opciones Preaclara- • Todo tipo • Todos los • Prelavado Las opciones no se de cargas grados de aplican a este pro- suciedad grama. 60 min • Vajilla • Fresco •...
-
Page 31: Ajustes Básicos
Valores de consumo Agua (l) Energía (kWh) Duración (min) Programa 30 min 9.4 -11.4 0.57 - 0.69 Preaclarado 3.7 - 4.5 0.02 - 0.05 60 min 9.3 - 11.4 0.82 - 0.94 90 min 9.1 - 11.1 1.01 - 1.13 160 min 9.2 - 11.2 0.96 - 1.08... -
Page 32: Descalcificador De Agua
Número Ajustes Valores Descripción Apertura auto- 1o (activar) Activar o desactivar AirDry. mática de la 0o (desactivar) Ajuste de fábrica: 1o. puerta Tonos de boto- 1F (activar) Activar o desactivar el sonido de los botones 0F (desactivar) cuando se pulsan. Ajuste de fábrica: 1F. - Page 33 Grados alemanes Grados franceses Nivel del descalcifica- mmol/l Grados Clarke (°dH) (°fH) dor del agua <4 <7 <0.7 < 5 1) Ajuste de fábrica. 2) No utilice sal en este nivel. Independientemente del tipo de detergente que ocurra a mitad de un programa o al final de un que utilice, ajuste el nivel de dureza de agua programa con una breve fase de secado.
- Page 34 SONIDO DE FIN El último programa que se completó antes de la desactivación del aparato se guarda. A Puede activar una señal acústica que suena al continuación, se selecciona automáticamente finalizar el programa. después de activar el aparato. Las señales acústicas suenan también Cuando la última selección de programa está...
-
Page 35: Antes Del Primer Uso
• El aparato vuelve a la lista de ajustes El aparato vuelve a la selección de programa. básica. Los ajustes guardados son válidos hasta que los 5. Mantenga pulsados simultáneamente 30 min y vuelva a cambiar. ECO durante al menos 3 segundos para salir del modo. -
Page 36: Uso Diario
4. Cierre la tapa. Asegúrese de que la tecla de Puede girar el selector de la cantidad apertura se encaja en su sitio. (B) entre la posición 1 (menor cantidad) y la posición 4 o 6 (mayor cantidad). USO DIARIO 1. - Page 37 • La luz correspondiente al botón está El aparato vuelve a la selección de programa. encendida. Compruebe que hay detergente en el • En la pantalla se muestra la duración del dosificador antes de iniciar un nuevo programa. programa. Las opciones no se aplican a este programa.
- Page 38 • Remoje o frote ligeramente los utensilios de secado. Usar demasiado abrillantador produce cocina con restos de comida cocinada u capas azuladas. horneada pegada antes de lavarlos en el • Asegúrese de que el nivel del descalcificador aparato. de agua es correcto. Si el nivel es demasiado •...
-
Page 39: Mantenimiento Y Limpieza
DESCARGA DE LOS CESTOS Después de terminar el programa, 1. Deje enfriar la vajilla y cristalería antes de todavía puede quedar agua en las retirarla del aparato Los artículos calientes son superficies interiores del aparato. sensibles a los golpes. 2. Vacíe primero el cesto inferior y a continuación el superior. - Page 40 5. Asegúrese de que no haya restos de comida ni 1. Gire el filtro (B) hacia la izquierda y extráigalo. suciedad alrededor del borde del sumidero. 6. Vuelva a colocar el filtro plano (A). Asegúrese de que esté bien colocado bajo las 2 guías. 7.
-
Page 41: Solución De Problemas
LIMPIEZA DEL BRAZO ASPERSOR 3. Para instalar el brazo aspersor inferior, INFERIOR presiónelo hacia abajo. Recomendamos limpiar periódicamente el brazo aspersor inferior para que la suciedad no obstruya los orificios. Si los orificios están taponados, la calidad del lavado puede deteriorarse. 1. - Page 42 Problema y código de alarma Causa y soluciones posibles No se puede encender el apa- • Asegúrese de que el enchufe esté conectado a la toma de co- rato. rriente. • Asegúrese de que no hay ningún fusible dañado en la caja de fusibles.
- Page 43 Problema y código de alarma Causa y soluciones posibles El nivel de agua dentro del • Apague y encienda el aparato. aparato es demasiado alto. • Asegúrese de que los filtros están limpios. La pantalla muestra iF1. • Asegúrese de que la manguera de salida esté instalada a la al- tura correcta sobre el suelo.
- Page 44 2. Para salir de la presentación del PNC, El aparato vuelve a la selección de programa. mantenga pulsados simultáneamente Glass Care y AUTO unos 3 segundos. LOS RESULTADOS DEL LAVADO Y EL SECADO NO SON SATISFACTORIOS Problema Causa y soluciones posibles Mal resultado de lavado.
-
Page 45: Información Técnica
Problema Causa y soluciones posibles Olores en el interior del aparato. • Consulte "Limpieza interna". • Inicie el programa Machine Care con un descalcificador o producto de limpieza diseñado para lavavajillas. Depósitos calcáreos en la vajilla, • El nivel de sal es bajo, consulte el indicador de rellenado. la cuba y el interior de la puerta. -
Page 46: Aspectos Medioambientales
ENLACE A LA BASE DE DATOS EPREL DE LA EPREL de la UE utilizando el enlace https:// eprel.ec.europa.eu y el nombre del modelo y el número de producto que se encuentra en la placa El código QR de la etiqueta energética de características del aparato. - Page 48 WWW.ZANUSSI.COM/SHOP...
Need help?
Do you have a question about the ZDLN6531 and is the answer not in the manual?
Questions and answers