
Related Manuals for Zanussi ZDLN1510


Summary of Contents for Zanussi ZDLN1510
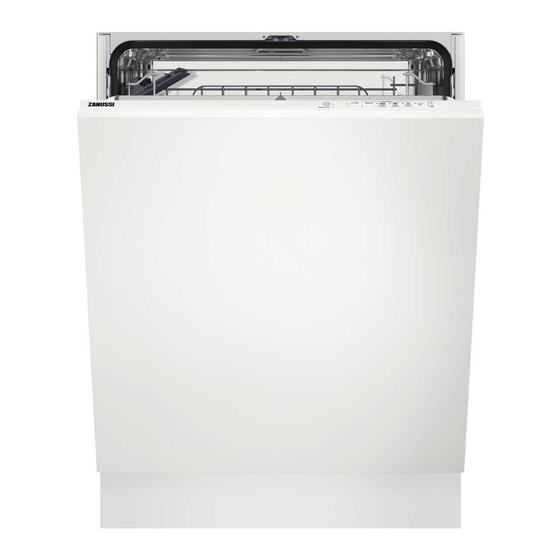
- Page 1 User Manual GETTING STARTED? EASY. ZDLN1510 NL Gebruiksaanwijzing Afwasautomaat EN User Manual Dishwasher...
-
Page 2: Veiligheid Van Kinderen En Kwetsbare Mensen
GA NAAR ONZE WEBSITE VOOR: Advies over gebruik, brochures, het oplossen van problemen, service- en reparatie-informa- tie: www.zanussi.com/support VEILIGHEIDSINFORMATIE Lees zorgvuldig de meegeleverde instructies voor installatie en gebruik van het apparaat. De fabrikant is niet verantwoordelijk voor verwondingen of schade die voortvloeit uit de onjuiste installatie of het onjuiste gebruik. - Page 3 boerderijen; personeelskeukens in winkels, kantoren of – andere werkomgevingen; door gasten in hotels, motels, bed&breakfasts- en andere – woonomgevingen. De specificatie van dit apparaat niet wijzigen. • De waterdruk (minimaal en maximaal) moet liggen tussen 0.5 • (0.05) / 8 (0.8) bar (MPa) Volg het maximale aantal 13 plaatsen.
-
Page 4: Elektrische Aansluiting
ELEKTRISCHE AANSLUITING • Als de watertoevoerslang beschadigd is, sluit dan onmiddellijk de waterkraan en haal de WAARSCHUWING! Gevaar voor stekker uit het stopcontact. Neem contact op brand en elektrische schokken. met de service-afdeling om de watertoevoerslang te vervangen. • Dit apparaat moet worden aangesloten op een geaard stopcontact. - Page 5 VERWIJDERING • Snij het netsnoer van het apparaat af en gooi dit weg. WAARSCHUWING! Gevaar voor • Verwijder de deurgreep om te voorkomen dat letsel of verstikking. kinderen en huisdieren opgesloten raken in het apparaat. • Haal de stekker uit het stopcontact. PRODUCTBESCHRIJVING De afbeeldingen hieronder geven alleen een algemeen productoverzicht.
- Page 6 BEDIENINGSPANEEL Aan-/uittoets/Resetknop Programmakeuzetoets Programma-indicatielampjes Delay Start -toets Indicatielampjes INDICATIELAMPJES Indicatielampje Beschrijving Indicatielampje droogfase. Het is ingeschakeld wanneer u een programma selec- teert met de droogfase. Het gaat knipperen wanneer de droogfase loopt. Zoutindicatielampje. Dit is aan als het zoutreservoir bijgevuld dient te worden. Dit in- dicatielampje is altijd uit als het programma in werking is.
- Page 7 Programma Type lading Mate van vervuiling Programmafasen • Vaatwerk • Normaal tot • Voorspoelen • Bestek zwaar • Wassen 60 °C • Potten • aangekoekt • Tussentijdse spoeling • Pannen • Laatste spoeling 60 °C • Drogen • AirDry • Vaatwerk •...
- Page 8 Raadpleeg voor andere vragen betreffende uw vaatwasmachine het serviceboekje dat met uw apparaat is meegeleverd. INSTELLINGEN PROGRAMMAKEUZEMODUS EN Houd de aan/uit-knop ingedrukt totdat het apparaat GEBRUIKERSMODUS in de programmakeuzemodus staat. Als het apparaat in de programmakeuzemodus Gebruikersmodus ingaan staat, kan een programma worden ingesteld en de Zorg dat het apparaat in de gebruikersmodus worden ingevoerd.
- Page 9 Duitse hardheid Franse hardheid Clarke-hard- Wateronthardingsni- mmol/l (°dH) (°fH) heid veau <4 <7 <0,7 < 5 1) Fabrieksinstelling. 2) Gebruik geen zout op dit niveau. Stel ongeacht het gebruikte soort wasmiddel plaatsvindt in het midden van een programma of het juiste waterhardheidniveau in om de aan het einde van een programma met een korte bijvulindicator voor zout geactiveerd te droogfase.
- Page 10 3. Druk op de aan/uitknop om de instelling te 1. Druk tweemaal op de programmatoets. bevestigen. Het indicatielampje begint te knipperen. DE AANDUIDING VAN LEEG 2. Wacht tot het indicatielampje blijft GLANSMIDDELRESERVOIR knipperen en de overige programma- indicatielampjes uit zijn. Met glansmiddel wordt het serviesgoed zonder vlekken of strepen gedroogd.
-
Page 11: Voor Het Eerste Gebruik
2. Wacht tot het indicatielampje blijft • is aan = AirDry is aan. knipperen en de overige programma- 3. Druk op programmatoets om de instelling te indicatielampjes uit zijn. wijzigen. 4. Druk op de aan/uitknop om de instelling te Het indicatielampje geeft de huidige instelling bevestigen. -
Page 12: Het Vullen Van Het Glansmiddeldoseerbakje
HET VULLEN VAN HET 1. Druk op de ontgrendelknop (D) om het deksel GLANSMIDDELDOSEERBAKJE te openen (C). 2. Vul het doseerbakje (A) met glansmiddel niet verder dan de aanduiding ''MAX''. 3. Verwijder gemorst glansmiddel met een absorberend doekje om te voorkomen dat er te veel schuim ontstaat. -
Page 13: Aanwijzingen En Tips
Het programma annuleren Tijdens het aftellen is het niet mogelijk het programma te wijzigen. Druk gedurende 3 seconden op de aan/uit-knop totdat het apparaat in de programmakeuzemodus Nadat het aftelproces voltooid is, wordt het staat. programma gestart. Controleer of er vaatwasmiddel in het De deur openen als het apparaat in werking afwasmiddeldoseerbakje aanwezig is voordat je een nieuw programma start. - Page 14 • Om kalkaanslag in het apparaat te voorkomen: 3. Start het kortste programma met een – Vul de zoutcontainer indien nodig bij. spoelfase. Voeg geen afwasmiddel toe en – Gebruik de aanbevolen dosering van het plaats vaat in de korven. wasmiddel en spoelglansmiddel.
-
Page 15: Onderhoud En Reiniging
Na voltooiing van het programma kan er zich aan de binnenkant van het apparaat nog water bevinden. ONDERHOUD EN REINIGING 2. Verwijder de filter (C) uit de filter (B). WAARSCHUWING! Schakel het 3. Verwijder de platte filter (A). apparaat uit en trek de stekker uit het stopcontact voordat u onderhoudshandelingen verricht. -
Page 16: Buitenkant Reinigen
LET OP! Een onjuiste plaatsing van de 3. Duw de sproeiarm naar beneden om deze weer filters kan leiden tot slechte terug te plaatsen. wasresultaten en het apparaat beschadigen. DE ONDERSTE SPROEIARM SCHOONMAKEN We raden u aan om de onderste sproeiarm regelmatig schoon te maken om te voorkomen dat vuil de gaten verstopt. - Page 17 VERWIJDEREN VAN VREEMDE LET OP! Als u de voorwerpen niet VOORWERPEN kunt verwijderen, neem dan contact op met een erkend Controleer de filters en de opvangbak na elk servicecentrum. gebruik van de vaatwasser. Vreemde voorwerpen (bijv. stukken glas, plastic, botten of tandenstokers, 3.
- Page 18 Probleem en alarmcode Mogelijke oorzaak en oplossing Het beschermingssysteem tegen water- • Draai de waterkraan dicht. lekkage is in werking getreden. • Zorg ervoor dat het apparaat correct geïnstalleerd • Het indicatielampje knippert 3 • Zorg ervoor dat de korven zijn geladen volgens de keer onderbroken.
-
Page 19: De Was- En Droogresultaten Zijn Niet Naar Tevredenheid
Probleem en alarmcode Mogelijke oorzaak en oplossing Ratelende / kloppende geluiden vanuit het • Het serviesgoed is niet juist in de korven gerang- apparaat. schikt. Raadpleeg de folder voor het laden van de korven. • Zorg ervoor dat de sproeiarmen vrij kunnen rond- draaien. - Page 20 Probleem Mogelijke oorzaak en oplossing Vlekken en opgedroogde water- • De vrijgegeven hoeveelheid glansmiddel is te laag. Zet de vlekken op glazen en servies. dosering van het glansmiddel op een hogere stand. • De kwaliteit van het glansmiddel kan de oorzaak zijn. Het serviesgoed is nat.
-
Page 21: Technische Informatie
Raadpleeg "Voor het eerste gebruik", "Dagelijks gebruik" of "Aanwijzingen en tips" voor mogelijke andere oorzaken. TECHNISCHE INFORMATIE Afmetingen Breedte / hoogte / diepte 596 / 818 - 898 / 550 (mm) Voltage (V) 220 - 240 Elektrische aansluiting Frequentie (Hz) Watertoevoerdruk Min. -
Page 22: Safety Information
VISIT OUR WEBSITE TO: Get usage advice, brochures, trouble shooter, service and repair information: www.zanussi.com/support SAFETY INFORMATION Before the installation and use of the appliance, carefully read the supplied instructions. The manufacturer is not responsible for any injuries or damage that are the result of incorrect installation or usage. -
Page 23: Safety Instructions
Do not change the specification of this appliance. • The operating water pressure (minimum and maximum) must be • between 0.5 (0.05) / 8 (0.8) bar (MPa) Follow the maximum number of 13 place settings. • If the supply cord is damaged, it must be replaced by the •... -
Page 24: Water Connection
cable need to be replaced, this must be carried • Dishwasher detergents are dangerous. Follow out by our Authorised Service Centre. the safety instructions on the detergent • Connect the mains plug to the mains socket packaging. only at the end of the installation. Make sure that •... -
Page 25: Product Description
PRODUCT DESCRIPTION The graphics below is just a general product overview. For more detailed information, refer to other chapters and/or documents provided with the appliance. Upper spray arm Rinse aid dispenser Lower spray arm Detergent dispenser Filters Cutlery basket Rating plate Lower basket Salt container Upper basket... -
Page 26: Control Panel
CONTROL PANEL On/Off button/Reset button Programme button Programme indicators Delay Start button Indicators INDICATORS Indicator Description Drying phase indicator. It is on when you select a programme with the drying phase. It flashes when the drying phase operates. Salt indicator. It is on when the salt container needs refilling. It is always off while the programme operates. -
Page 27: Consumption Values
Programme Type of load Degree of soil Programme phases • Crockery • Normal to heavy • Prewash • Cutlery • Dried-on • Wash 60 °C • Pots • Intermediate rinse • Pans • Final rinse 60 °C • Drying • AirDry •... -
Page 28: Programme Selection Mode And User Mode
SETTINGS PROGRAMME SELECTION MODE AND How to enter user mode USER MODE Make sure the appliance is in programme selection mode. When the appliance is in programme selection mode it is possible to set a programme and to enter To enter the user mode, press and hold the user mode. - Page 29 Regardless of the type of detergent used, set duration by another 5 minutes when it occurs at any the proper water hardness level to keep the point at the beginning or in the middle of a salt refill indicator active. programme.
-
Page 30: Acoustic Signals
The indicator shows the current setting: During the drying phase, the door opens automatically and remains ajar. • is on = Rinse aid empty notification is CAUTION! Do not try to close the • is off = Rinse aid empty notification is appliance door within 2 minutes after off. -
Page 31: Before First Use
BEFORE FIRST USE 1. Make sure that the current level of the water softener agrees with the hardness of the water supply. If not, adjust the level of the water softener. 2. Fill the salt container. 3. Fill the rinse aid dispenser. 4. -
Page 32: Using The Detergent
2. Press the on/off button to activate the The indicator is on. appliance. 3. Close the appliance door to start the Make sure that the appliance is in programme countdown. selection mode. During the countdown, it is not possible to change •... -
Page 33: Hints And Tips
automatically. If you close or open the door If the acoustic signal for the end of a programme is before automatic deactivation, the appliance is activated and the programme is complete, the deactivated. appliance is automatically switched off after the 2. -
Page 34: Care And Cleaning
LOADING THE BASKETS • The filters are clean and correctly installed. • The cap of the salt container is tight. • Always use the whole space of the baskets. • The spray arms are not clogged. • Use the appliance to wash dishwasher-safe •... -
Page 35: Cleaning The Lower Spray Arm
4. Wash the filters. CLEANING THE LOWER SPRAY ARM We recommend to clean the lower spray arm regularly to prevent soil from clogging the holes. Clogged holes can cause unsatisfactory washing results. 1. To remove the lower spray arm, pull it upwards. 5. -
Page 36: Internal Cleaning
• Do not use abrasive products, abrasive cleaning REMOVAL OF FOREIGN OBJECTS pads or solvents. Check the filters and the sump after each use of the dishwasher. Foreign objects (e.g. pieces of glass, INTERNAL CLEANING plastic, bones or toothpicks, etc) decrease the •... - Page 37 Problem and alarm code Possible cause and solution The appliance does not drain the water. • Make sure that the sink spigot is not clogged. • Make sure that the interior filter system is not clog- • The indicator flashes 2 times in- ged.
-
Page 38: The Washing And Drying Results Are Not Satisfactory
Problem and alarm code Possible cause and solution Small leak from the appliance door. • The appliance is not levelled. Loosen or tighten the adjustable feet (if applicable). • The appliance door is not centred on the tub. Adjust the rear foot (if applicable). The appliance door is difficult to close. - Page 39 Problem Possible cause and solution There are whitish streaks or blu- • The release quantity of rinse aid is too much. Adjust the rinse ish layers on glasses and dishes. aid level to a lower level. • The quantity of detergent is too much. There are stains and dry water •...
-
Page 40: Technical Information
Refer to "Before first use", "Daily use" or "Hints and tips" for other possible causes. TECHNICAL INFORMATION Dimensions Width / height / depth (mm) 596 / 818 - 898 / 550 Voltage (V) 220 - 240 Electrical connection Frequency (Hz) Water supply pressure Min. - Page 44 WWW.ZANUSSI.COM/SHOP...
Need help?
Do you have a question about the ZDLN1510 and is the answer not in the manual?
Questions and answers