Advertisement
Quick Links
English
English
English
English
GB
Operating Instructions
COOKER AND OVEN
Contents
Operating Instructions,1
Description of the appliance-Overall view,2
Description of the appliance-Control Panel,3
RS
-
-
,14
B
,22
KZ
24
28
32
,1
,2
,3
,19
,23
,23
1
2
3
31
32
K3G21/R
K3G21S/R
K3G21S/UA
KN3G27/RU
KN3G217S/RU
KN3G217/RU
KN3G2107/RU
Advertisement

Related Manuals for Indesit KN3G217S/RU


Summary of Contents for Indesit KN3G217S/RU
-
Page 1: Table Of Contents
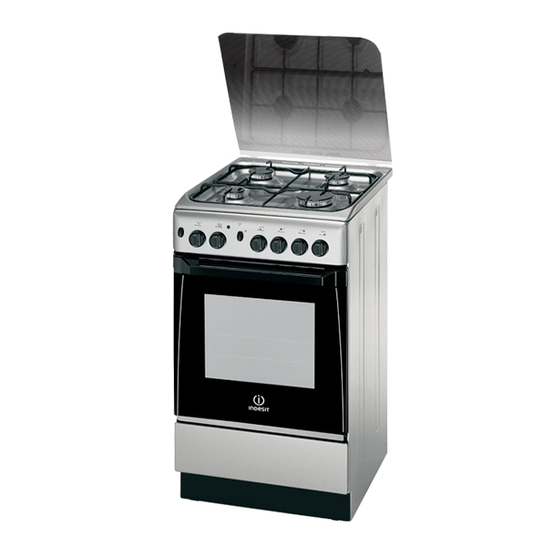
K3G21/R K3G21S/R K3G21S/UA KN3G27/RU KN3G217S/RU English English English English KN3G217/RU Operating Instructions KN3G2107/RU COOKER AND OVEN Contents Operating Instructions,1 Description of the appliance-Overall view,2 Description of the appliance-Control Panel,3 Installation,4 Start-up and use,8 Using the hob,9 Precautions and tips,11 Care and maintenance,12... - Page 2 Description of the appliance Overall view 1. Hob burner 2. Hob Grid 3.Containment surface for spills 4.Control panel 5..Sliding grill rack 6.DRIPPING pan 7.Adjustable foot 8.GUIDE RAILS for the sliding racks 9.position 5 10.position 4 11.position 3 12.position 2 13.position 1 14.Glass Cover (Only on certain models) 8.HA PAB 14.C...
- Page 3 Description of the appliance Control panel 1.GAS BURNER IGNITION button (Only on certain models) 2.TIMER knob (Only on certain models) 3.OVEN AND GRILL CONTROL knob 4.OVEN LIGHT / ROTISSERIE button (Only on certain models) 5.Hob BURNER control knob 4. 4. 5.
-
Page 4: Installation,4
Installation ! Before operating your new appliance please read Disposing of combustion fumes this instruction booklet carefully. It contains important information concerning the safe installation The disposal of combustion fumes should be and operation of the appliance. guaranteed using a hood connected to a safe and ! Please keep these operating instructions for future efficient natural suction chimney, or using an electric reference. - Page 5 ! Once the appliance has been installed, the power • Do not position supply cable and the electrical socket must be blinds behind the HOOD easily accessible. cooker or less than 200 mm away from its Min. ! The cable must not be bent or compressed. sides.
- Page 6 ! If one or more of these conditions is not fulfilled or 3. While the burner is alight, quickly change the position if the cooker must be installed according to the of the knob from minimum to maximum and vice versa conditions listed for class 2 - subclass 1 appliances several times, checking that the flame is not (installed between two cupboards), the flexible steel...
- Page 7 1/100 1/100 1/100 1/100 Nominal Reduced (mm) (mm) (mm) (mm) Fast 3.00 (Large)(R) Semi Fast 1.90 (Medium)(S) Auxiliary 1.00 K3G21/R (Small)(A) K3G21S/R Oven 2.80 K3G21S/UA KN3G27/RU Grill 2.30 KN3G217S/RU Nominal (mbar) 28-30 KN3G217/RU Supply Minimum (mbar) Pressures KN3G2107/RU Maximum (mbar)
-
Page 8: Start-Up And Use,8
Start-up and use Using the hob Practical advice on using the burners Lighting the burners For the burners to work in the most efficient way possible and to save on the amount of gas For each BURNER knob there is a complete ring consumed, it is recommended that only pans that showing the strength of the flame for the relevant have a lid and a flat base are used. - Page 9 ! If the flame is accidentally extinguished, switch off 3. Acitvate the function by pressing the TURNSPIT the burner and wait for at least 1 minute before button. attempting to relight the oven. Oven light Adjusting the temperature The light may be switched on at any moment by To set the desired cooking temperature, turn the pressing the OVEN LIGHT button.
- Page 10 Oven cooking advice table Cooking position of Temperature Cooking time Food to be cooked Pre-heating time (min) (Kg) shelves from bottom (°C) (min.) Pasta Lasagne 200-210 75-85 Cannelloni 50-60 Pasta bakes au gratin 50-60 Meat Veal 200-210 95-100 Chicken 210-220 90-100 Duck 100-110...
-
Page 11: Precautions And Tips,11
Precautions and tips ! This appliance has been designed and manufactured in • If the appliance breaks down, under no circumstances should you attempt to repair the appliance yourself. compliance with international safety standards. Repairs carried out by inexperienced persons may cause The following warnings are provided for safety reasons and injury or further malfunctioning of the appliance. -
Page 12: Care And Maintenance,12
Care and maintenance Switching the appliance off The cover If the cooker is fitted with a Disconnect your appliance from the electricity supply glass cover, this cover before carrying out any work on it. should be cleaned using lukewarm water. Do not use Cleaning the appliance abrasive products. - Page 13 K3G21/R, K3G21S/R, KN3G27/RU, KN3G217S/RU, KN3G217/RU, KN3G2107/RU Indesit Company 220–240 50/60 3100 cert.rus@indesit.com. - 1- - 2- S/N — (S/N XXXXXXXXX * XXXXXXXXXXX), - 4- S/N — Indesit Company S.p.A. 47, 60044, « » , 127018,...
- Page 14 (c . . A). 100% ( . .), 50° . . B). 90 °C).
- Page 15 § « ». « ». — 50 ° ; 13 — 50 ° ; 1500 —...
- Page 16 « » ( «V» .) — (MAX), — (MIN) . « »); «MAX» «MIN»...
- Page 17 «V» 2006/95/ 12.12.06 (« ») 2004/108/EC 15.12.04 (« » 2009/142/EC 30.11.09 (« ») — 93/68/EEC 22.07.93 – 2002/96/EC; 1275/2008 ( Stand-by / — . « ».
- Page 18 1/100 1/100 1/100 1/100 (p.c.s.*) ) (R) 3,00 ) (S) 1,90 1,00 ) (A) 2,80 2,30 28-30 15 ° 1013 P.C.S. = 50,37 M P.C.S. = 49,47 M P.C.S. = 37,78 M...
- Page 19 24–26 16–20 10–14 « ». — — *( ), — , — «F» Max. ( )*, 2–3 — « » —...
- Page 20 140 ° (MIN) 250 ° (MAX). —...
- Page 21 °C 200-210 75-85 50-60 50-60 200-210 95-100 210-220 90-100 100-110 70-80 70-80 100-105 180-200 45-50 180-200 45-55 180-200 45-50 210-220 20-25 25-35 40-45 50-55 40-45 15-20 20-30 15-20 70-80 70-80 40-45 25-30 1- (...
- Page 22 2002/96/EC (WEEE) . .) « »,...
- Page 23 — – 25 – . .); (S/N),...
- Page 24 . .) 100%- 50°C- (T 90°C) • • •...
- Page 25 • • 15-100 50°C- • 50°C- • • • • • • • • 1500 •...
- Page 26 , 1- 2. « » 3. «V» (« »...
- Page 27 « » « » 34x39x44 « » K3G21/R K3G21S/R K3G21S/UA KN3G27/RU KN3G217S/RU KN3G217/RU KN3G2107/RU : 12.12.2006 2006/95/EC ( – 15.12.04 2004/108/EC – 30.11.2009 2009/142/EC – 22.07.1993 93/68/ – 2002/96/EC. 1275/2008 ( (p.c.s.*) 1/100 1/100 1/100 1/100 3.00 )(R) 1.90 )(S) 1.00...
- Page 28 ø 24 - 26 16 - 20 10 - 14 « » * (C) (X)* «F» • « » , 15...
- Page 29 « » (140°C) « » (250°C) Гриль a) 1- b) 4- «D» « » Айналмалы істік* «S» «S» 3. « »...
- Page 30 (°C) 200-210 75-85 50-60 50-60 200-210 95-100 210-220 90-100 100-110 70-80 70-80 100-105 180-200 45-50 180-200 45-55 180-200 45-50 210-220 20-25 25-35 40-45 50-55 40-45 15-20 20-30 15-20 ° 4 70-80 70-80 40-45 25-30...
- Page 31 • • • • • • • • • • • (WEEE) 2002/96/EC • - 1- • • • • • • . .) • • • • • • •...
- Page 32 02/2013 - 195086306.08 XEROX FABRIANO • • • • • • 230 , E 14. • • • • ( / ).
Need help?
Do you have a question about the KN3G217S/RU and is the answer not in the manual?
Questions and answers