Table of Contents
Advertisement
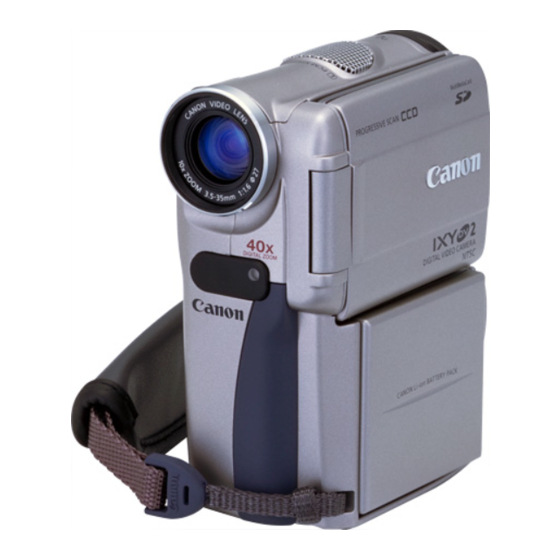
DIGITAL VIDEO CAMCORDER
Instruction Manual
This instruction book explains the use of the MV4, MV4i and MV4i MC
camcorders. There are two main differences between them. The MV4i MC
includes a Memory Card function. The models with an 'i' include a DV
Recording and Analog Line-in function. Please note that most illustrations
and explanations in this instruction book refer to the MV4 model.
PAL
PUB.DIE-165
Digital
Mini
Video
Cassette
E
Advertisement
Chapters
Table of Contents

Related Manuals for Canon MV MV4


Summary of Contents for Canon MV MV4
-
Page 1: Instruction Manual
DIGITAL VIDEO CAMCORDER Instruction Manual This instruction book explains the use of the MV4, MV4i and MV4i MC camcorders. There are two main differences between them. The MV4i MC includes a Memory Card function. The models with an 'i' include a DV Recording and Analog Line-in function. -
Page 2: Important Usage Instructions
• Use of CV-150F DV cable is necessary to comply with the technical requirement of EMC Directive. • The cable STV-250N with the ferrite core provided with the digital video camcorder must be used with this equipment in order to comply with the technical requirement of EMC Directive. -
Page 3: Table Of Contents
Contents Introduction Important Usage Instructions ...2 Thank you for Choosing a Canon ...4 Introducing the MV4/MV4i/MV4i MC ...5 Mastering the Basics Finding Your Way Around the Camera ...6 ~ Preparations ~ Powering Your Camcorder ...9 Loading a Cassette ...12 ~ Basic Recording ~ Basic Recording ...14... -
Page 4: Thank You For Choosing A Canon
Thank you for Choosing a Canon First, we’d like to thank you for purchasing this Canon camcorder. Its advanced technology makes it very easy to use — you will soon be making high-quality videos which will give you pleasure for years to come. -
Page 5: Introducing The Mv4/Mv4I/Mv4I Mc
Analog Line-in Recording and A/V Insert Editing (MV4i/MV4i MC only) Connect to a VCR or analog camcorder and record to a DV tape in the MV4i/MV4i MC. Also, replace original images on a pre-recorded tape. PCM Digital Sound... -
Page 6: Finding Your Way Around The Camera
Finding Your Way Around the Camera (stop) button (p. 23)/ INDEX SCREEN button (MV4i MC only) (p. 108) Self-timer button (p. 67)/ REC PAUSE (LINE-IN) button (MV4i and MV4i MC only) (p. 81, 84) Record review button (p. 52)/ REC (record) SEARCH – button (p. 52)/ (rewind) button (p. - Page 7 MV4i MV4i MC POWER dial (p. 14, 35) Viewfinder (p. 126, 131) Program selector (p. 53) Program AE (p. 53) Easy Recording (p. 53) SELECT dial (p. 26, 36) POWER indicator (p. 14) Cassette compartment cover (p. 12) Cassette compartment (p.
- Page 8 Memory card compartment cover (MV4i MC only) (p. 99) PHOTO button (p. 50, 103) START/STOP button (p. 15) MENU button (p. 36) SELF TIMER button (p. 67) TV SCREEN button (p. 142) DATA CODE button (p. 75) AUDIO MONITOR button (p. 95) REC PAUSE button (p.
-
Page 9: Powering Your Camcorder
Powering Your Camcorder Before operating your camera, you will need to use the power adapter to: Provide power from a mains outlet Charge a battery pack • The power adapter converts current from a household power socket (100–240 V AC, 50/60 Hz) to the DC current used by your camera. - Page 10 Charging and attaching the battery packs Charge indicator Your battery pack was partially charged before it left the factory. It should have enough power for you to check that your camera is working properly. However, you must charge the battery pack fully if you want it to power the camera for more than a few minutes.
- Page 11 • When powering your camcorder from a mains outlet, you do not need to remove battery packs attached to the adapter, but charging will not take place until you remove the DC coupler from the adapter. • Do not connect the power adapter to an unspecified product.
-
Page 12: Loading A Cassette
Loading a Cassette OPEN / EJECT OPEN / EJECT Only use videocassettes marked with the D logo.* Loading and unloading 1. Make sure that you have attached a power source. 2. Slide the OPEN / EJECT 5 switch upwards to release the cassette compartment cover. -
Page 13: Cassette Memory
• To protect the tape heads, transfer cassettes directly from the tape case to the camcorder — do not open the tape protect cover or touch the tape itself. • Do not use cassettes where the tape has been damaged or spliced — they may damage the camcorder. -
Page 14: Basic Recording
Basic Recording Before you start recording Have you completed the following steps? • Attached a power source ( • Removed the lens cap ( • Chosen the display: viewfinder ( • Extended the viewfinder ( • When you’re using the viewfinder, fully close the LCD or rotate the LCD so that it faces the same direction as the lens ( You may also want to install the backup battery ( and time display (... - Page 15 • Disconnect the power source. • To check that the camera is recording correctly, make a test recording first. • Before making important recordings, clean the video heads using a Canon DVM-CL Digital Video Head Cleaning Cassette or a commercially available digital video head cleaning cassette.
-
Page 16: Changing The Recording Mode
Changing the recording mode Choose from 4 recording modes: SP (standard play), 1.5× SP, 2× SP or 3× SP. • Only SP and LP modes are available when the camcorder is set to CARD PLAY mode. Recording times (this example uses an 80-minute tape) Standard recording 80 min. - Page 17 • The recording mode might not appear in the display correctly if you switch to LP while the camcorder is connected to another digital video device. • When the recording mode is changed to the image for appropriate recording in that mode.
- Page 18 Confirmation/Warning beeps The camera’s short operation confirmation beeps are indicated by ` in the illustrations. Beeps sound upon certain camera operations such as when you turn the camera on, during the self-timer countdown, right before the camera’s automatic shut-off, and also upon any unusual condition of the camera. Beeps are not recorded on the tape.
-
Page 19: Zooming
Zooming 10× optical zoom The camera’s 10× zoom lens allows you to choose the best picture angle for each scene: • Move the zoom control towards W to zoom out to wide-angle. • Move it towards T to zoom in to telephoto. You can also control the speed of zooming: •... -
Page 20: Using The Lcd Screen
Using the LCD Screen Open the LCD screen Push the LCD panel OPEN button and open the panel by pulling it away from the camera. This automatically switches the LCD screen on and the viewfinder off. When you close the LCD panel, the LCD screen automatically switches off and the viewfinder switches back on. -
Page 21: Adjusting The Lcd Screen
About the LCD Screen The LCD screen built into this camcorder is a high precision product. However, small black dots or bright points of light (red, blue or green) may appear constantly on the LCD screen. This is not a malfunction of the LCD screen and they are not recorded on the tape. -
Page 22: Allowing The Subject To Monitor Recording
Allowing the subject to monitor recording When you turn the LCD panel so that it faces the same direction as the lens, you can watch yourself during recording or let your subject monitor recording. The viewfinder is also activated when the panel is in this position. -
Page 23: Playing Back A Cassette
• To wind the tape backwards, stop playback and press the button. • If the playback picture is rough (mosaic-like noise), clean the video heads using a Canon DVM-CL Digital Video Head Cleaning Cassette or a commercially available digital video head cleaning cassette. 26). - Page 24 Other playback modes Playback pause Press the (pause) button. To resume normal playback, press it again, or press (play) button. The camera automatically goes into stop mode after about 5 minutes’ playback pause. Fast forward playback To play back the recording at about 11.5 times normal speed, press and hold the (fast forward) button during normal playback or press and hold the forward) button during normal fast forward.
- Page 25 To play back at about 1/5 normal speed, press the SLOW M button during normal playback. Press the PLAY e button to return to normal playback. • The camcorder automatically returns to playback after about 30 seconds of slow playback in SP or LP recording mode.
-
Page 26: Built-In Speaker
Built-in speaker The camcorder has a built-in speaker so you can review the sound track alongside the picture when you’re using the LCD screen to play back a tape. The built-in speaker is monaural. Adjust the speaker volume by turning the SELECT dial. -
Page 27: Connections For Playback On A Tv Screen
Cable to the camera. Attach the ferrite core to the cable about 5 cm from the plug end (the plug to be connected to the camcorder) of the STV-250N Stereo Video Cable. • Pass the cable through the centre of the core and wrap it around the core once, then close the unit until it clicks shut. - Page 28 DU-300 Docking Unit Specifications S-video terminal output (MV4i/MV4i MC: input/output) Microphone terminal Headphone terminal LANC u u terminal Dimensions Weight Weight and dimensions are approximate. Erorrs and omissions excepted. Subject to change without notice. If your TV (or VCR) has a SCART terminal (without S (S1)-video) STV-250N Stereo Video Cable •...
- Page 29 If your TV (or VCR) has an S (S1) -video input terminal For higher picture quality, we recommend playing back recordings on a TV with an S (S1) terminal. STV-250N Stereo Video Cable • Attach the DU-300 Docking Unit in order to use the S-video terminal ( •...
- Page 30 If your TV (or VCR) has audio/video input terminals • Connect the camera using the STV-250N Stereo Video Cable. Connect the white plug to the white audio terminal L (left). Connect the red plug to the red audio terminal R (right). Connect the yellow plug to the yellow video terminal VIDEO.
-
Page 31: Tips For Making Better Videos
Tips for Making Better Videos Holding the camera For maximum stability, grip the camera in your right hand and keep your right elbow pressed against your body. If necessary support the camera with your left hand. With practice, you will be able to operate the controls by touch, without taking your eye off the action. -
Page 32: Picture Angle
Picture angle Instead of zooming while recording, try to choose your picture angle before you begin. A good way to tell a story with video is to begin with a long shot that establishes the situation, and then move in with medium shots and close-ups to show the details. -
Page 33: Turning The Image Stabilizer Off
Turning the Image Stabilizer Off With most camcorders, even the slightest hand movements will be noticeable during telephoto recording. However, the MV4/MV4i/MV4i MC’s image stabilizer allows you to obtain steady recordings even at high magnification. CARD MOVIE P.SCAN R E C CAM.SET UP To turn the image stabilizer off, open the menu and select CAM.SET UP. -
Page 34: Using The Menus
Using the Menus Many of the camera’s advanced functions are selected from menus which appear in the display. There are 2 main menus: CAM. MENU PLAY (MV4i and MV4i MC: VCR) MENU( The MV4i MC has 2 additional main menus: C. - Page 35 Selecting from the Menus The following icons are used throughout this manual to show the setting for the POWER dial. MV4i MC CARD R E C MV4i PLAY MOVIE P.SCAN CARD PLAY MOVIE P.SCAN MOVIE P.SCAN...
- Page 36 MENU 1. Turn the POWER dial to the appropriate setting. 2. Press the MENU button to open the menu. • One of the main menus appears, according to the POWER dial setting. 3. Turn the SELECT dial and move the arrow to the desired submenu.
-
Page 37: List Of Menus
List of Menus Turn to appropriate page for a detailed explanation of each function. 2 CAM. MENU Appears when the POWER dial is set to There are 5(+1) submenus within the CAM. MENU. q To digital effects submenu w To card mix submenu (MV4i MC only) e To camera set up submenu r To VCR set up submenu... - Page 38 r VCR set up submenu !5 Record mode... !6 Wind screen ... !7 Audio mode ... !8 Return t Display set up submenu !9 Brightness ... @0 Mirror mode... @1 TV screen... @2 Date/time display... @3 Return y System submenu @4 Wireless controller...
- Page 39 q Digital effects submenu q Digital effects select ... w Fader ... e Effect... r Multi-image screen speed... t Multi-image screen split ... y Return w VCR set up submenu u Output channel... i Wind screen ... o Return e Card set up submenu (MV4i MC only) !0 Image quality ...
- Page 40 y System submenu @1 Wireless controller... @2 Tally lamp ... (MV4i and MV4i MC only) @3 Beep ... @4 Return 2 C. REC MENU (MV4i MC only) Appears when the POWER dial is set to C. REC MENU. q To digital effects submenu w To camera set up submenu e To card set up submenu r To display set up menu...
-
Page 41: Wireless Controller
r Display set up submenu !5 Brightness ... !6 Mirror mode... !7 TV screen... !8 Date/time display... !9 Return t System submenu @0 Wireless controller... @1 Beep ... @2 Time zone/ Daylight saving time... @3 Date/time set ... @4 Return 2 C. -
Page 42: Tally Lamp
q-2 Card operations submenu (when displaying an index screen) y To image protect ... u To print mark ... i Return w VCR set up submenu o Record mode... !0 Return e Display set up submenu !1 Brightness ... !2 Displays ... !3 Date/time select ... -
Page 43: Using The Wireless Controller/Tally Lamp
Using the Wireless Controller/Tally Lamp The supplied wireless controller can operate the camera from a distance of up to 5 m (16 feet). Point it at the camera’s remote sensor while you press the buttons. There are some functions that cannot be operated without the wireless controller: •... -
Page 44: Cardr E C
When Operating 2 Canon DV Camcorders (Remote Sensor Mode) To prevent interference from other Canon wireless controllers being used nearby, there are 2 remote sensor modes and an off setting. The wireless controller and the camera have to be set to the same mode in order to be compatible. - Page 45 If your wireless controller isn’t working: Make sure the camera and the wireless controller are both set to the same mode. Check the mode the camera is set to by pushing any button other than the REMOTE SET button on the wireless controller. The camera’s mode appears in purple for about 4 seconds.
-
Page 46: Setting The Date And Time
2. Select T.ZONE/DST. • The time zone display appears on the screen. • Your camcorder’s time zone is factory-preset to Paris. If you are at another time zone, select your time zone first and daylight saving time (DST) setting if necessary. - Page 47 14 15 16 17 18 19 20 21 22 23 Time zone LONDON PARIS CAIRO MOSCOW DUBAI KARACHI DACCA BANGKOK H. KONG (Hong Kong) TOKYO SYDNEY SOLOMON • After you have selected your time zone and set the date and time, when you travel to another time zone, there is no need to reset the date and time.
-
Page 48: Setting The Clock
Setting the clock After you set the date and time, the date/time and home time zone will be displayed for about 4 seconds each time you turn the power on. CARD MOVIE P.SCAN R E C SYSTEM 1. Open the menu and select SYSTEM. 2. -
Page 49: Recording In Progressive Scan Mode
Recording in Progressive Scan Mode In Progressive Scan Mode, the MV4/MV4i/MV4i MC records 25 full frame images per second, continuously, for superior quality frames. Use Progressive Scan Mode for fast moving scenes and moments that are hard to capture just taking a still photo. -
Page 50: Taking Still Pictures To A Cassette
Press the PHOTO button fully down and the still picture will be taken immediately. • The camcorder takes the image immediately, and then records the “photo” to the tape for approximately 6 seconds (8 seconds in During this time the camcorder also records the sound, and the display shows the still picture. - Page 51 • “PHOTO” flashes at the bottom right of display. • Exposure is locked. • During autofocus F flashes white in the display as the camcorder adjusts the focus and it is displayed continuously as a green mark when the camera is ready to take the still picture.
-
Page 52: Searching And Reviewing While Recording
Searching and Reviewing While Recording Record search When the camera is in record pause mode, you can use record search to play the tape forwards or backwards to find the point where you want to start or resume recording. This is useful when you want to add a new scene to a previously used cassette. -
Page 53: Using The Various Recording Programs
Using the Various Recording Programs The camera provides you with a choice of 7 recording programs. They use different combinations of camera settings in order to adjust the exposure and other functions to match the recording situation. • For simple point-and-shoot operation, select the Easy Recording program. Slide the program selector to the [ position. - Page 54 Setting the program AE mode CARD MOVIE P.SCAN R E C 1. Slide the program selector to Q (program AE) mode. 2. Press the SELECT dial in to display the program menu. 3. Turn the SELECT dial to move the arrow up or down the display. 4.
- Page 55 Easy Recording The simplest way to use the camera is with the program selector set to the [ position. The camera will take care of focus, exposure and other adjustments, leaving you free to point and shoot. Auto This is the same as the Easy Recording program, except that you now have the option of using any of the camera’s manual functions.
-
Page 56: Sand & Snow
Spotlight This program is designed for recording spotlit scenes, such as on a stage. The exposure is automatically adjusted for glare-free recordings of subjects lit by a concentrated light source. Sand & Snow Use this program in places where the background is so bright that the subject appears underexposed in the display —... -
Page 57: Using Digital Effects
Using Digital Effects Use the camera’s digital effects for more interesting productions. • Faders: Start or end scenes on a tape with a fade to or from black • Effects: Add flavor to your recordings ( Art, Black and White, Sepia, Mosaic •... - Page 58 • When you do not want to use digital effects, set D.E.SELECT to OFF through the menu. • The camera remembers your chosen digital effect setting until you change it. • Digital effects can be selected but not operated on a blank blue screen (appears in PLAY mode (MV4i and MV4i MC: in VCR mode)).
- Page 59 G Faders Fade Trigger (FADE-T) When you start recording, the scene gradually fades in from a black screen. When you stop recording, it gradually fades out. Wipe (WIPE) When you start recording, the picture begins as a thin vertical line in the centre of the screen which gradually expands sideways until it fills the whole of the screen.
- Page 60 G Effects Art (ART) Adds a paint-like effect, called solarization, to the image. Black and White (BLK & WHT) Makes the image black and white. Sepia (SEPIA) Makes a monochrome image with a brownish tint. Mosaic (MOSAIC) Blurs the image by enlarging the size of some pixels.
-
Page 61: Operating Faders
Digital effects can be set with the controls on the body of the camera or the wireless controller. Pressing the L/M buttons on the wireless controller correspond to turning the SELECT dial up and down, and pressing the SET button corresponds to pressing the SELECT dial in. -
Page 62: Effect
8. If you’re in MOVIE or P.SCAN mode: If you’re in PLAY (MV4i or MV4i MC:VCR) mode: Fade in- Press the Operating effects Sound records/plays back normally. When operating effects in MOVIE, P.SCAN or CARD REC mode, make sure the program selector is set to Q. -
Page 63: Using The Multi-Image Screen
Using the Multi-Image Screen Divides your display image into 4, 9 or 16 smaller images with the Image Capture feature. With this feature, the camera captures the current scene being shot or replayed. Choose the transition speed — manual, fast (every 4 frames), moderate (every 6 frames) or slow (every 8 frames) —... - Page 64 7. Select the desired setting. 8. Close the menu. • The digital effects menu disappears. • MULTI-S flashes in the display. Multi-image screen on/off 9. Push the D.EFFECTS ON/OFF button. • Manual: As you press the ON/OFF button, scenes will be captured one after another the indicated number of times.
-
Page 65: Audio Recording
12 bit (1 channel only). MV4i/MV4i MC only • When you record to the MV4i/MV4i MC from a camcorder with DV terminal outputs, the audio mode becomes automatically set to 12 bit. External microphone and headphones For greater creative control over audio recording, you can connect an external microphone to the camera via the DU-300 Docking Unit’s MIC terminal. -
Page 66: Wind Screen
1. Attach the microphone to the adapter bracket. • Extend the adapter bracket open until it locks. 2. Attach the adapter bracket to the docking unit. 3. Connect the microphone. You can monitor the sound while recording and playing back by attaching stereo headphones to the H terminal on the docking unit. -
Page 67: Setting The Self-Timer
Setting the Self-Timer This is useful when you want to include yourself in the picture when recording movies or still photographs. CARD MOVIE P.SCAN R E C 1. Press the self-timer button on the body of the camera the SELF TIMER button on the wireless controller. •... - Page 68 If you are using the wireless controller, the PHOTO button. • The camcorder takes the picture for approximately 6 seconds (8 seconds in SP or LP recording mode). • If you’re in MOVIE or P.SCAN mode, the camcorder returns to record pause mode after recording to a tape.
-
Page 69: Adjusting Exposure Manually
Adjusting Exposure Manually Exposure lock CARD MOVIE P.SCAN R E C When you are recording in situations where the lighting may change suddenly, you can lock the exposure at the current level in order to control the brightness of the image. To lock the exposure, press the EXP button. -
Page 70: Shutter
• You cannot adjust the exposure without the e mark before E.LOCK in the display. Push the EXP button so that e appears before E.LOCK. Then you can adjust the exposure manually. • The standard exposure level depends on which recording program you have selected. - Page 71 Guidelines for shooting using high shutter speeds • When shooting with a shutter speed of 1/1000 or higher, do not shoot the sun directly. Recommended shutter speeds when shooting: • People doing outdoor sports such as golf or tennis • Moving cars or trains or other rapidly moving vehicles such as roller coasters •...
-
Page 72: Adjusting Focus Manually
Adjusting Focus Manually The camera can focus automatically. All you have to do is point it, and whatever is in the centre of the display will usually be in sharp focus. If it does not seem to be focusing well, it may be because the subject is not suitable for autofocus. You can use the manual focusing function for more control over focusing. -
Page 73: Setting The White Balance
Setting the White Balance The camera’s auto white balance system compensates for a wide range of lighting conditions. Although slight variations are unavoidable, colours will appear natural in virtually every situation. In some cases, you will get better results by setting the white balance yourself, or using one of the two preset modes: T Indoor Mode... - Page 74 Setting the white balance manually will probably work better than auto white balance when shooting: Subjects with one dominant colour, such as sky, sea or forest Close-ups In rapidly changing lighting conditions In places lit by certain types of fluorescent or mercury vapour lights •...
-
Page 75: Displaying Date, Time And Camera Data (Data Code)
×2 playback. Press the DATA CODE button. When using a cassette, press it while the camcorder is in play, slow or still mode. • Press it once to display, once more to hide it. Selecting date/time... -
Page 76: Setting The Data Code
– If noise or tape damage prevents the data code from being read. • If a recording made on MV4/MV4i/MV4i MC is played back on a different DV camcorder, the data code may not be displayed correctly. • The data code will appear in the display even if DISPLAYS ( set to OFF through the menu. - Page 77 Six-second auto date The 6-second auto date appears for 6 seconds to mark the changeover of a day if the tape was being recorded at 12:00 midnight. It also appears for 6 seconds when you start playback and have the data code turned off. The 6-second auto date will adjust for any time zone changes you have indicated.
-
Page 78: Searching The Tape (Photo Search/Date Search)
Searching the Tape (Photo Search/Date Search) This allows you to move quickly through still pictures recorded anywhere on a tape (photo search) or between different days or areas of recording (date search) on a tape. PLAY 1. Press the SEARCH SELECT button to choose between photo/date search. -
Page 79: Returning To A Pre-Marked Position
Returning to a Pre-Marked Position Use the wireless controller to mark a point on a tape that you want to return to following playback. PLAY MOVIE P.SCAN 1. Press the ZERO SET MEMORY button on the wireless controller during playback at a point you want to return to later. •... -
Page 80: Editing
Editing to a VCR By connecting the camera to a VCR, you can edit your recordings in order to remove unwanted scenes — or combine different shots to create your own video productions. Preparations 1. Connect the camera to the VCR. •... -
Page 81: Dubbing With Digital Video Equipment
Side with arrow Preparations 1. Connect the camera and the other digital device. • Connect the Canon CV-150F DV cable (optional) with the side of the plug marked with the arrow facing as shown above. 2. Prepare the other device. - Page 82 Example dubbing to the camera 1. Connect the camera and the other digital device. • Connect the Canon CV-150F DV cable (optional) with the sides of the plugs marked with the arrows facing as shown above. 2. Prepare the other device.
- Page 83 • During DV dubbing, you cannot add digital effects. • When playing back a tape recorded in camcorder, you cannot record correctly with other digital devices not equipped with that mode. Copyright signal Certain pre-recorded software tapes are copyright protected.
-
Page 84: Recording From A Vcr, Tv Or Analog Camcorder-Analog Line-In (Mv4I And Mv4I Mc Only)
Recording from a VCR, TV or Analog Camcorder- Analog Line-in (MV4i and MV4i MC only) You can record a video played on your VCR or analog camcorder (for digital camcorders, see p. 82) or a TV program onto a tape in the MV4i/MV4i MC, if the TV or other device has audio/video outputs. - Page 85 2. Press the REC PAUSE button. • S-video and A/V IN/OUT terminals automatically work as input terminals. • The camcorder enters record pause mode. 3. Start playback on the other device or turn on the TV to see the desired program while you monitor the picture.
-
Page 86: Recording Over Existing Scenes-A/V Insert Editing (Mv4I And Mv4I Mc Only)
Recording Over Existing Scenes — A/V Insert Editing (MV4i and MV4i MC only) You can insert new scenes from your VCR or other camcorder onto your pre- recorded tape using the MV4i/MV4i MC’s analog line-in or DV in terminals. Original video and audio will be replaced with the new video and audio. - Page 87 Example recording from a VCR 1. Connect the camcorder to the VCR. 2. Prepare the VCR and TV. • Set the TV/Video selector on the televison to Video. For further details, see “Connections for Playback on a TV Screen”...
- Page 88 3. Press the A/V INSERT button. • A/V INSERT and 2a appear in the display. 4. Play back the cassette in the VCR. 5. To start inserting, press the PAUSE button of the MV4i/MV4i MC. • 2a changes to 2. 6.
-
Page 89: Audio Dubbing
SP mode with 12-bit sound. Use the internal or an external microphone. The original sound will not be erased. For best results, add sound to tapes that have been recorded with this camcorder in SP mode with 12-bit sound. If there are non-recorded portions on the tape, or portions recorded in a mode other than SP mode, or with 16-bit or 12-bit, 4- channel sound, dubbing will stop. - Page 90 Dubbing Do not connect/disconnect any cables to/from the camera when dubbing audio or preparing to dub audio. PLAY 1. Locate the point where you want to start audio dubbing, then press the PAUSE button. • You can use the playback buttons on the body of the camera or the special playback functions on the wireless controller in the same way as in playback mode.
- Page 91 • There may be a loss of sound quality if you add sound to a tape recorded on a camcorder other than the MV4. • After adding sound 3 or more times to the same place on a tape, there may be some loss in sound quality.
- Page 92 For best results, add sound to tapes that have been recorded with this camcorder in SP mode with 12-bit sound. If there are non-recorded portions on the tape, or portions recorded in a mode other than SP mode, or with 16-bit or 12-bit, 4-channel sound, dubbing will stop.
- Page 93 • When you add sound using the built-in microphone make sure not to connect any cables to the MIC terminal (on the DU-300). • To use your TV to monitor video, connect the S-video terminal ( A/V terminal (use only the video plug) to your TV. You can monitor the sound with headphones ( 65).
- Page 94 • There may be a loss of sound quality if you add sound to a tape recorded on a camcorder other than the MV4i/MV4i MC. • After adding sound 3 or more times to the same place on a tape, there may be some loss in sound quality.
-
Page 95: Setting The Audio Mix
Setting the Audio Mix When you play back a tape that was recorded in 12 bit mode, you can set the audio output to play: stereo 1 (the original sound), stereo 2 (any new sound, dubbed to the tape after recording), or mix the balance between the two. •... -
Page 96: Selecting Audio Output Channels
Selecting audio output channels When you play back a tape whose audio has been recorded on multiple channels, you can change the output channels of that sound. PLAY VCR SET UP 1. Load a tape recorded with multiple-channel audio. 2. Open the menu and select VCR SET UP. Then select OUTPUT CH, set it to the desired setting and close the menu. -
Page 97: Connecting To A Pc
Connecting to a PC By using a DV cable and connecting the camcorder to a PC equipped with a DV terminal conforming to IEEE 1394/DV compatible capture board, you can transfer images taken with the camcorder to your PC. • While connected, it is recommended that you power your camcorder from a household power socket using the power adapter. -
Page 98: -Mv4I Mc Only
Memory Card Introduction The camcorder can take, store and manage still images on 2 types of memory cards: the SD (Secure Digital) Memory Card (supplied with the camcorder) or a MultiMediaCard (commercially available). The SD Memory Card has the protect switch to protect your recording from accidental erasure. - Page 99 Inserting and removing the memory card 1. Turn the POWER dial to OFF. 2. Slide the memory card compartment cover in the direction of the arrow and open. 3. Insert straight or remove the memory card. • Push the memory card all the way in. •...
- Page 100 • Depending on the image you are recording, sometimes there will be no difference in image quality between settings. • Images are compressed and recorded in the JPEG (Joint Photographic Experts Group) format. • The number of pixels is 640 × 480 (VGA) in both FINE and STANDARD modes.
-
Page 101: File Nos
File numbers The images you take are automatically assigned file numbers from 0101-9900 and stored in folders of 100 images each. Each folder is numbered from 101 to 998 and recorded on the memory card. Sample images have been pre-recorded on the supplied SD Memory Card, entering folder number 100 (the folder name is “100canon”). -
Page 102: Shtr Sound
Turning the shutter sound off Makes the sound of a shutter being released when a still image is recorded to a memory card. CARD R E C CARD SET UP To turn the shutter sound off, open the menu and select CARD SET UP. -
Page 103: Recording Still Images To A Memory Card
Take still images to a memory card. You can also record onto a memory card images from a tape in the camcorder, or images input through the DV in terminal. • Moving pictures cannot be recorded onto a memory card. - Page 104 The indicators that appear in the display when recording to a memory card: Backup battery 129) 2 While the camcorder is recording the still image, display. >>>> • While appears red in the display, do not remove the memory card or disconnect the power source.
-
Page 105: Recording An Image From A Cassette As A Still Image
Recording an Image from a Cassette as a Still Image -MV4i MC only- INEX SCREEN MIX/SLIDE SHOW CARD D.EFFECTS REC SEARCH Record an image from a cassette onto a memory card. To automatically record multiple still images from a cassette to a memory card, refer to “Copying Still Images from a Cassette”... -
Page 106: Recording From Another Dv Device As A Still Image
Side with arrow Preparations 1. Connect the camera to the other digital device. • Connect the Canon CV-150F DV cable (optional) with the sides of the plugs marked with the arrows facing as shown above. 2. Prepare the other device. -
Page 107: Viewing Still Images
Play back and view still images recorded on a memory card. (For details on connecting to a TV, see “Connections for Playback on a TV Screen” on p. 27) • The camcorder may not be able to copy or play, etc., images recorded on a non- Canon camera. -
Page 108: Slide Show
Card Jump Function You can jump from the current image to the desired image of unadjacent image number without displaying the images one by one. The numbers shown in the upper right in CARD PLAY mode indicate the image number of the current still image / total number of still images on the memory card. CARD PLAY With an image in the display, press and hold the CARD +/–... -
Page 109: Settings Of The Still Image Recorded To Memory Card
An image on a memory card must be marked before it can be printed. The camcorder supports the Images can be automatically printed on a DPOF-supporting Canon Printer. Up to 50 images per memory card can be print marked. There are 3 ways to mark a still image for printing (including the ways to cancel the setting). - Page 110 Erasing still images Erase images singly or all at once. • You cannot erase protected images. Cancel image protection first in order to erase an image. • Erase images with caution. Once an image has been erased, it cannot be restored. There are 3 ways to erase a single image.
- Page 111 File Operation (FILE OPER.) CARD R E C 1. With an image in the display, press the SELECT dial in to open the FILE OPER. menu. • PROTECT , PRINT MARK • If you select |RETURN, the menu disappears from the display. To protect an image 2.
-
Page 112: Preventing Accidental Erasure (Protect)
PLAY CARD OPER. Make sure a memory card that has images recorded on it is inserted into the camcorder. 1. With an image in the display, press the INDEX SCREEN button. • Up to 6 images appear in the display. -
Page 113: Marking A Still Image For Printing (Print Mark)
CARD OPER. Make sure a memory card that has images recorded on it has been inserted into the camcorder. 1. With an image in the display, press the INDEX SCREEN button. • Up to 6 images appear in the display. - Page 114 CARD PLAY CARD OPER. Make sure a memory card that has images recorded on it has been inserted into the camcorder. 1. With an image in the display, open the menu and select CARD OPER. 2. Select PRINT MARKS • ERASE ALL PRINT MARKS 3.
-
Page 115: Erasing Still Images
PLAY CARD OPER. Make sure a memory card that has images recorded on it is inserted into the camcorder. To erase images one at a time 1. Select the image you want to erase. • Use the index screen ( and make sure the image you want to erase fills the display. - Page 116 5. Select YES and press the SELECT dial in. • The image is erased and the previous image appears. • To erase another single image, move to that image with the CARD +/– buttons, and select YES. • If the image you are trying to erase is a protected image, YES appears in purple and is unselectable.
-
Page 117: Combining Images And Recording Them To A Cassette (Card Mix)
Combining Images and Recording Them to a Cassette (Card Mix) -MV4i MC only- Liven up your productions by superimposing one image on top of the other. Combine 2 still images or a still image and a moving image. Choose a still image from the memory card, either one of the pre-recorded sample images ( one you have recorded yourself, then combine it with the currently recording image, moving or still. - Page 118 P.SCAN CARD MIX Make sure a memory card that has images recorded on it and a cassette have been inserted into the camcorder. Make sure the program selector is set to Select 1. Open the menu and select \ \ CARD MIX.
- Page 119 For a still image 1. Press the PHOTO button halfway down and hold it. • F flashes white in the display as the camcorder adjusts the focus and it is displayed continuously as a green mark when the camcorder is ready to take the image.
-
Page 120: Copying Still Images From A Cassette
CARD OPER. Make sure a memory card that has enough memory available and a recorded cassette have been inserted into the camcorder. 1. Locate the first still image on the cassette that you want to copy and stop the cassette at a point before that image. -
Page 121: Copying Memory Card Still Images To A Cassette
CARD OPER. Make sure a memory card that has images recorded on it and a cassette that has enough recordable space have been inserted into the camcorder. 1. Locate the point on the cassette where you want to start copying and set it to stop. -
Page 122: Formatting A Memory Card
• Be cautious when formatting recorded memory cards. All images will be permanently erased. • If you use memory cards other than the supplied one, make sure to format them with the camcorder, not a PC or other device. CARD PLAY CARD OPER. -
Page 123: Other Information And Precautions
Contents of a memory card cannot be compensated for should data become damaged or lost. • Do not remove the power source or the memory card while the camcorder is accessing (recording to, reading, erasing files from or formatting) the memory... -
Page 124: Sample Images
Store and carry memory cards in their case to protect the terminal area. • There is only one correct way to insert memory cards into the camcorder. Do not forcefully insert the memory cards backwards or upside down. This could damage the memory card or the camcorder. - Page 125 Card luminance key Camera chroma key SD Memory Card Specifications Capacity Interface Operating temperature range Dimensions Weight Weight and dimensions are approximate. Errors and omissions excepted. Subject to change without notice. PhotoEssentials - Royalty Free Stock Photography The PhotoEssentials suite of royalty-free images on CD-ROM features premium quality assignment photography and is ideally suited for use in advertising, brochures, reports, multimedia, websites, books, packaging and more.
-
Page 126: Preparing The Camera
Preparing the Camera Adjust the viewfinder • Turn the POWER dial to MOVIE mode. Extend the viewfinder straight out, then adjust the viewfinder focusing lever to suit your eyesight. • The viewfinder extends straight out for comfortable viewing. Store the camera with the viewfinder flush with the body of the camera. -
Page 127: Notes On Using The Batteries
The power indicator light also flashes. • The indicator is not constant — different levels will be shown when you subject the battery pack and camcorder to different conditions. BP-406 BP-412 (optional) 45 min. - Page 128 When to recharge You can recharge a lithium ion battery pack whenever it is convenient. Unlike a conventional battery pack, it does not have to be fully discharged first. However, as the battery pack will naturally discharge itself over time, it is best to charge it the same day you plan to use it, or the day before.
- Page 129 Installing the backup battery Open the cassette compartment cover. The cassette compartment will open automatically. If necessary, close it to give yourself more room to install the backup battery. Insert the CR1616 lithium battery as far as it will go with the + side facing outwards.
-
Page 130: Maintenance
Maintenance Cautions Avoid high temperatures and high humidity. • Do not leave the camera inside a car in hot weather, for example. • Be careful of heat radiating from video lighting equipment. • Do not take the camera into a humid room. Avoid sudden changes in temperature. - Page 131 Storage If you do not intend to use the camera for some time, store it in an area which is free of dust and moisture, and where the temperature is no higher than 30°C (86°F). After storage, check each part and function of your camera to make sure everything is still working properly.
-
Page 132: Using The Camera Abroad
• You can use the compact power adapter to operate your camera and charge battery packs in any country where the electricity supply is between 100 and 240 V AC, 50/60 Hz. Contact your Canon dealer for information about plug adapters for overseas use. - Page 133 Condensation Condensation may form on the camera when it is moved from a cold place to a warm place. Using the camera while condensation is present can damage both the tape and the camera. Condensation may become a problem: When you take the camera from a cold place to a warm room When the camera is left in a humid room Protecting the camera from condensation...
-
Page 134: Troubleshooting
Troubleshooting Refer to this checklist first if you have any problems with your camcorder. Possible explanations are given for each problem on the list — turn to the page numbers in parentheses for more information. Make sure that the camera is properly connected if you are using it with a TV or VCR. - Page 135 • Some subjects are not suitable for autofocus. In these situations, you will often get better results using manual focus ( about the same distance away, lock the focus, and then point the camera at your original, hard-to-focus subject. Horizontal stripes Many subjects at different distances Reflective surfaces...
- Page 136 • It is not turned the right way ( Turn it the right way and try inserting again. • Turn the camcorder's power off and back on again and remove and reinsert the card. If the mark continues to flash, format the memory card.
- Page 137 ? The PHOTO button doesn’t work. ? The image cannot be erased. Miscellaneous Problem ? The wireless controller doesn’t work. ? The power indicator is flashing. ? The camera malfunctions. ? The DV cable is connected correctly, but there’s nothing in the display.
-
Page 138: The Mv4/Mv4I/Mv4I Mc System Diagram
The MV4/MV4i/MV4i MC System Diagram WL-D75/WL-D76 Wireless Controller ZR-1000 Zoom Remote Controller VL-10Li Battery Video Light BP-900 Series Lithium-ion Battery Pack CA-910 Compact Power Adapter SC-1000 Soft Carrying Case * MV4i MC only MiniDV Video Cassette DU-300 Docking Unit SA-1 Adapter Bracket DU-300 Docking Unit S-150... -
Page 139: Optional Accessories
Optional Accessories BP-400 Series Battery Packs Extra batteries for use with the MV4/ MV4i/MV4i MC. CH-910 Dual Battery Charger/Holder This holds two battery packs and can charge them both consectively. It can then be connected directly to the MV4/MV4i/MV4i MC to give twice the playback time. - Page 140 (optional). Zoom Remote Controller ZR-1000 When this product is plugged into the LANC m terminal of a Canon camcorder, it is possible to control functions such as the start and stop of recording and the zoom and focusing functions while the camcorder is mounted on a tripod, without touching the camcorder body itself.
- Page 141 A clear overcoat adds luster to your prints and reduces colour fading. This mark identifies genuine Canon video accessories. When you use Canon video equipment, we recommend Canon-brand accessories or products bearing the same mark.
-
Page 142: Screen Displays
ON. • When operating the camcorder, the displays appear for 2 seconds. However, the displays do not disappear when displaying an index screen. - Page 143 Shows how much battery power remains 127). The battery pack is exhausted ( 127). No cassette is loaded, or it is set for erasure prevention 12, 13). Remaining tape (Green: more than five minutes. Yellow: less than five minutes. Red: final few seconds.) ...finally, it tells you when you have...
- Page 144 Zoom display ( 19): Optical zoom Optical plus 40× digital zoom Zoom in Zoom out The image stabilizer is turned on ( 33). CAM. MENU PLAY (MV4i and MV4i MC: VCR) menu ( C.REC MENU (MV4i MC only) C.PLAY MENU (MV4i MC only) CARD PHOTO REVIEW MENU...
- Page 145 Manual focus is selected ( 72). Shutter speed ( White balance is Indoor Outdoor U The 16:9 mode: the display flashes when the effect is being selected, and appears steadily when it is activated ( 17). Digital effects. The display flashes when the function is being selected and appears steadily when it is...
- Page 146 The number of still images that can still be recorded on the memory card 101) (Green: 6 or more images. Yellow: Between 1 and 5 images Red: No more images) Accessing a memory card ( Current still image/Total number of still images on the memory card 104) Protect mark...
-
Page 147: Caution Phrases
Appears when, during DV dubbing, CHECK THE DV INPUT the DV cable is disconnected or the power of the digital equipment connected to the camcorder is turned off. (MV4i and MV4i MC only). Refer to p.133 CONDENSATION HAS BEEN DETECTED... - Page 148 A temporary card error is also possible. If CARD ERROR disappears after 4 seconds and red, turn the camcorder’s power off and back on again, and remove and reinsert the card. If flashes green, recording or playing back is possible.
-
Page 149: Specifications
Specifications MV4/MV4i/MV4i MC Power Supply (rated): 7.4 V DC Power Consumption (while recording with the AF turned on): 4.4 W (Using viewfinder), 5.4 W (Using LCD screen) Television system: CCIR standard (625 lines, 50 fields) PAL colour signal Video recording system: 3 rotary heads, helical scanning DV system (Consumer digital VCR SD/SDL system) Digital component recording... - Page 150 Operating temperature range: 0°–40°C (32°–104°F) Dimensions: 48 × 106 × 86 mm × 4 × 3 Weight: 390 g (13 BP-406 Battery Pack Battery type: Rechargeable lithium ion battery Rated voltage: 7.4 V DC Operating temperature: 0°–40°C (32°–104°F) Battery capacity: 680 mAh Dimensions: 49 ×...
-
Page 151: Index
Index 16:9, 17 Å Abroad, Using the Camera, 132 Accessories, 4, 139 Adapter, AC, 9, 11 AE Programs, 53 Analog line-in, 84 Art, 60 Audio Dubbing, 89 Audio Mix, 95 Audio Mode, 65 Audio Output, 96 Audio Recording and Playback, 26, 65 Audio/Video Terminal, 30 Auto, 55... - Page 152 Photo Search, 78 Playback, 23 Playback Connection, 27 Playback Pause, 25 Portrait, 55 Power Adapter, 9, 11 Powering Your Camcorder, 9 Pre-Marked Position, 79 Preparing the Camera, 126 Preventing Accidental Erasure*, Print Mark*, 113 Problems, 134 Progressive Scan Mode, 49 Protect*, 112 Â...
- Page 153 Ê Tally Lamp, 45 Tape Protection, 13 Telephoto, 19 Temperature, 129, 131 Time Code, 146 Time Zone, 46 Tips for Making Better Videos, 31 Tripod, 31 Troubleshooting, 134 TV, 27, 142 Ë Using the Camera Abroad, 132 Using the Menus, 34 ◊...
-
Page 154: Menu At A Glance
Menu at a Glance Use the list below to quickly navigate the camera’s menu. Functions are listed alphabetically. Function 16:9 effect 6-sec. Date Audio Mode Beep Brightness Card mix* Copy- card to cassette* Copy- cassette to card* Data code Date/time display Date/time select Date/time set Digital effect select... -
Page 155: Print Mark
Function POWER dial is set to... Image stabilizer MOVIE P.SCAN Multi-image screen MOVIE P.SCAN speed Multi-image screen MOVIE P.SCAN split Mirror mode MOVIE P.SCAN Mix level* MOVIE P.SCAN Mix type* MOVIE P.SCAN Output channel Print mark* Protect* Quality* Record mode MOVIE P.SCAN Remote sensor code... - Page 156 Canon UK Ltd. Ribcon Way Luton Bedfordshire LU4 9UR Telephone 0870-241-2161 Canon Australia Pty. Ltd 1 Thomas Holt Drive, North Ryde, N.S.W. 2113, Australia Telephone 805-2000, Fax 887-4484 Canon New Zealand Ltd Fred Thomas Drive, Takapuna, P.O. Box 33-336, Auckland, New Zealand Telephone 486-1570, Fax 486-6420 Canon Singapore Pte.