Advertisement
Quick Links
CaflOll
CANONINC.
Canon Europa N.V.
P.O. Box 2262, 1180 EG Amstelveen,
the Netherlands
Canon UK Ltd.
Ribcon Way
Luton Bedfordshire
LU4 9UR
Telephone 0870-241-2161
Canon Australia Pry. Ltd
1 Thomas Hott Drive, North Ryde, N.S.W. 2113, Australia
Telephone 805-2000, Fax 887-4484
Canon New Zealand
Ltd
Fred Thomas Drive, Takapuna, P.O. Box 33-336, Auckland, New Zealand
Telephone 486-1570, Fax 486-6420
Canon Singapore Pte. Ltd
79 Anson Road #09-01/06,
Singapore 079906
Telephone (65)-532-4400,
Fax (65)-221-2939
Canon Hongkong
Company
Ltd
9/F, The Hong Kong Club Building, 3A Chater Road, Centrat, Hong Kong
Canon Latin America, Inc.
Sates & Enquiries: 6505 Blue Lagoon Drive Suite 325 Miami PL 33126 USA
DIGITAL VIDEO CAMCORDER
Instruction Manual
m=
0=
C
g.
O
PUB.DIE-158
0201A/Ni9.5
Printed
on 70% reused
paper.
© CANON iNC. 2001
DY8-9020-094-000
PRINTED iN JAPAN
IMPRIME AU JAPON
B
|
CallOll
Minil'li,3!"
Digita=
--Video
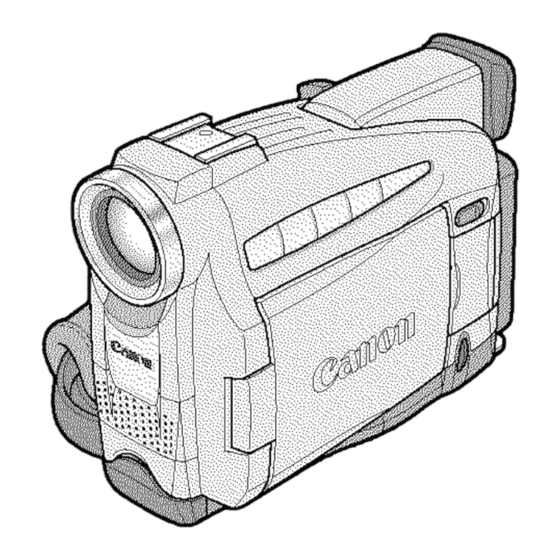
MV450/MV450i
This instruction book explains the use of the MV450 and MV450i
camcorders. The main difference between these models is that the MV450i
includes a DV Recording and Analog Line-in Recording function. Please
note that illustrations and explanations in this instruction book refer mainly to
the MV450 model.
PAL
€
3
o
o.
Advertisement

Related Manuals for Canon MV450i


Summary of Contents for Canon MV450i
- Page 1 Canon UK Ltd. Ribcon Way Luton Bedfordshire LU4 9UR Telephone 0870-241-2161 Canon Australia Pry. Ltd 1 Thomas Hott Drive, North Ryde, N.S.W. 2113, Australia Telephone 805-2000, Fax 887-4484 Canon New Zealand Fred Thomas Drive, Takapuna, P.O. Box 33-336, Auckland, New Zealand Telephone 486-1570, Fax 486-6420 Canon Singapore Pte.
- Page 2 WARNING: TO REDUCE THE RISK OF ELECTRIC SHOCK, DO NOT REMOVE COVER (OR BACK). NO USER SERVICEABLE PARTS INSIDE. REFER SERVICING TO QUALIFIED SERVICE PERSONNEL. WARNING: TO REDUCE THE RISK OF FIRE OR ELECTRIC SHOCK, DO NOT EXPOSE THIS PRODUCT TO RAIN OR MOISTURE. "6 CAUTION: TO REDUCE THE RISK OF ELECTRIC SHOCK AND TO REDUCE ANNOYING...
- Page 3 Using the Vafiuus Recordthg Prugrams .,55 Using Digital Effcg,ts ........ 59 Important Usage Insh-uctthns ....2 Using the Multi-Linage Screen ....@I Thank you for Choosing a Car_on ....5 Authu Rcg_dthg ........Introducing the MV450/MV,150i ....6 Setting the SoU-Timer ......68 Using the VL-3 Vidc_oLight £: (optional) ..........
- Page 4 Marking a SOil [rrtage ftxr Pfintiag (_int Mark) ........Memory Card Introduction ....101 FtXnrLatfinga Memtxry Card ....120 Othar ]nf_xnrtation and Proeattfiuns ..121 Reeordiag Still Images tu a MenlO_ Card ........Recordiag an Image ffum a Cassette Preparing the Cam¢,t_dex ......124 as a Still Image ........
- Page 5 First, we'd like _ thank yeu for Your camcurder is supplied with rite purchasing this Canon camcorder. fellowing accessories: advanced technology rlt_es it very easy _) use -- you will soon be rlt_ing high-quality videos which will give you pleasure fur years to come.
- Page 6 D¥ "_ _" terminal and transfer your • originM itrmges to your Allows the Canon Vider_ Light VL-3 Record fbr 1.5× 2:< or 3x longer than or the DirectionM Stereo Microphone when irt SP mode-- up to 4 hours on...
- Page 10 Bef'ure operating your ea_ncorder, you will need to use the power adapter Provide power from a rnaiim outlet Charge a battery pack [] Noles: • The power adapter converts c_r_nt from a household power socket (100-240 V AC, 50/60 Hz) to the DC current used by your carn_rder, •...
- Page 11 Your battery pack was pardally chin,god before it left the factory, It should have enough power for you to check that your camcorder is working properly, However, you must charge the battery pack fully if you want it to power rite carncorder for more than a few minutes.
- Page 12 5. When charging is complete, disconnect the power adapter from the camcorder. Unplug the power cable from the mains outlet, then disconnet_t it from the adapter. 6. Remove the battery pack after use. • Rotate the viewfinder upwards. • Press attdhold rile BATT. RELEASE button while you slide the battery up, Notes: pr_xtuct * Never...
- Page 13 The Compact Power Adapter CA-560 included with the carncorder cart be used _ong with the CR-560 Kit for 3 different ways to power the camcorder or charge battery packs: 1. Charge rite BP-5C/0 Series battery packs with power frem your car battery. 2.
- Page 14 2, Operate the camcorder with power from your car battery. Carncorder + DC Cable + Charge Adapter + Car Battery Cable > ear's cigarette lighter • m 3, Charge the BP_500 Series battery packs from a household mains outlet. 1 or 2 battery pack(s) + Ch_uge Adapter + Compact Po er Adapter...
-
Page 15: Loading A Cassette
O_fly u_ vider_casrettes markeA widt die_r"rl_ l ogo,* • 1. Make sure that you have attached a power source. 2. Slide the OPEN [ EJECT -- switch (on the bottom of the eame_rder) compartment to release the cassette cover. • Pull the cover fully open (while holding rite button) and wait a couple of reconds... - Page 16 • _ '- 27o protect your recording from accidental erasure, slide the tab on the cassette m_ that it exposes the hole, (This switch position is usually labelled SAVE or ERASE OFF.) you load this cassette and put the camcorder in record pause mode ( _ 17), 'q'HE TAPE IS SET FOR ERASURE...
- Page 17 Have you completed rite following steps? • Attached a power source ( _ ]0). • Removed rite lens cap ( [._ ] 24) and fastened the shoulder strap ( _ ] 25). • Choren the display: viewfieder ( _21] 24) or LCD screen (_123). [] Notes: •...
- Page 18 [] Notes: • To check that the carncerder is recording correctly_ make a test recording first. • Before _rmking important recordings, clean rite video heads using a Canon DVrvI-CL Digital Video Head Cleaning Cassette or a eommerc'ially available digital video heed cleaning cassette.
- Page 19 Choose from 4 recording medes: SP (standard play), ] .5x SP, 2x SP or 3x SP, ', Only SP attd LP medes are available whun the camcorder is ret to CARD PLAY (M_¢450i: PLAY(VCR)) mode, Recording times (this example uses an 80-minute tape) Standard te_rding Extended recording...
- Page 20 • You might not be able to do DV dubbing een'eefly with the camcorder set to I---ISPor I---ILPmode. • The _eoc_rding [r_v, t e might not appear in the display €_onec_y if you switch between I---ISPand I---ILP while the carneorder is eonneeteO to another digital video de_ce, •...
- Page 21 The camcorder's ] Ox zoom lens allows you to choose rite best picture angle for so_ne: each • Move rite zoom conO'o] towards W to zoom out to wide-angle. • Move it towards T to zcx_m in to telephoto. You can also control the speed of zootrfing: •...
-
Page 22: Zooming
[] Notes: • When zooming as a rule, keep at least : m (3 ft 33/8 in) between you and your subject, However when the zoom is at rite wide-angle position, you can focus on a subject as close as 1 cm (_/*in). •... - Page 23 Slide the LCD panel OPEN button and open the panel by pulling it away from rite camcorder. This automatically switches rite LCD screan on and the view:tqnder off, When you clore rite LCD panel, press the upper cortter until it clicks closed. The LCD screan automatic'ally switches...
- Page 24 • Always rotate rite LCD panel vertically into place, before closing it or pushktg it flat against the side of the camcorder, • Always fully close rite LCD panel until it clicks securely, • Be careful not rx_leave the LCD, viewfinder or lens exposed rx_diseet sunlight...
- Page 25 When you rum rite LCD panel so that it iiiiiiiiiiiiiiiiiiiiiiiiiiiiiiiiiiiiiiiii_" "'"_iiiiiiiiiiiiiiiiiiiiiiiiiiiiiiiiiiiiiiiiiiiiiiiiiiiii faces rite same disection as the lens, you can watch yeurself during iiiii iiiiiiiiiiiiiiii recording or let your subject menitor iiiiiiiiiiiii iiiiiiiiiiii recording, The viewfinder is 'also ac_vated when the panel is in this positien, (Adjust fire view:fieder,...
- Page 26 • 27ow_ed the tape backwards, stop playback and press the _ (rewind) buttom • N the playback picture is rough (mosaic-l_ke noise), clean the v_dee heads using a Canon DVM-CL Dig_tui Video Head Cleaning Cassette or a eernmercially available dig_tui v_deo head cleaning cassette,...
- Page 27 Playback pause Press the II (pause) button, To resume noruml playback, press ]t again, mr press the _" (play) button, The camcorder automaticaily goes into stop mode after about 5 minutes' playback pause, Fast forward playback To play back the recording at about 11,5 times normal speed, press and hold the (Nst forward) button during...
- Page 28 Reverse Playback To play back in reverse at normal speed, press rite -/4111 button during norrmd forward playback. Press the PLAY I1_button to return to nomml for_'ard playback. • The camcorder automatically goes into stop mode after about 2 minutes of pau_d reverse playback, Forward :<2 Playback...
- Page 29 The eamcorder has a built-in speaker so you can review the sound track alongside fire picture during tape playback, The built-in speaker is monaural. Adjust the speaker wflume by turning the selector dial. • Tllrn the selector dial up to increase the volume, and down to lower the volume, •...
- Page 30 You can connect the carncorder to a TV or VCR in order _ play back your recordings, You will need to attach a [x_wer source m the carncorder ( [22]10). Power oil" 'all devices befbre starting the connections, See your TV or VCR instruction m_nual fbr _rther details, 17 II...
- Page 32 Fer higher picazve quality, we rexx_mmendplaying back _onlings ort a TV with art S (S_)tenrfimfl. When connecti.ng for playback on a 'IW scxeen, make sure the AV/he',gtphene terminal is switched _ AX_ lI PHONES appears in rite d_splay, sw_tch the terra, Hal, •...
- Page 33 NNNNNNNNNNNNNNNNNNNNNNNNNNNNN When connecting for playback on a TV screen, make sure the AV/beadphone _m_' • terminal is switched to AV, If"PHONES appears in the display_ switch tbe ter_rfimfl. • Connect the camcorder using the ST_250N Stereo Video Cable. Connect _ to white plug to the white audio terminel L (left').
- Page 34 For ma×imum stabil_ty_ grip the camcorder _n your right necessary support rite camcorder with your left hand, _,¥1th practice, fll be able to operate the controls touch, without taking your eye off the action. hand and keep your right elbow pressed against your body, __ii_ii "...
- Page 35 Instead of zooming while _rding Long shot to choose your picture attgle before you begin, A good way to tell a story with video is to begin w]rit a long shot that establishes rite situation and then move Medium shot ]n with medium shots and close-ups show the details, Remember...
- Page 36 With most carn,x_rders even rite slightest hand movements will be noticeable during telephoto recording. However, rite MV450/MV45tJi's image stabilizer 'allows you to obtain steady recordings even at h_glt magnification, MENU /*e_M,S_TU_ _)_,MAG__.o_,o_ 're turn the image stabilizer off, open the menu and select CAM.SET UP.
- Page 37 Many of rite camcorder's advgnced fu_ctions am _legte_ from metros w_ficlt appem" in fire d_splay, "l_tere gre 4 fr/_i_l rll_ttllS: CAM. MENU Camera menu ( [._ 39) PLAY MF2qU (M450i :VCR MENU) ( _ 412) C, C&M. MENU Card camera menu ( _ 42) C,PLAY MENU Card play menu...
- Page 38 1. q[llrn the POWER switch and the TAPE/CARD switch to the desired settings. 2. Press the MENU button to open the menu. • One of'_te main menus appears, according to tile settings of fire TAPE/CARD switch and rite POWER switch, ::13.
- Page 39 , Pmssktg tlte starffsmp burton or the PHOTO button will close tlte menu and start recording. • You can display rite menus on a connected TV screen by 0.ruling "IN" SCREEN ( [2121 14] ) on through the menu or usktg rite wireless controller's TV SCREEN button.
- Page 40 CAM. MENU, cont. VCR set up submenu @ Rexx._rd mode ......_SEL ET" VCR SET UP .._SE_Lu Wind so'inert ......®--_ii_£i£i£i£_iiiiiiiiiiiiiiiiiiiiiiiii -® WIND SCREER.OFF-- _)) Audio mode ......_166 _0---AUDIO MODE..1261t AVCPHONES...AV-- _:.2,AV or headphones ...._---÷RETURN Retum Display set up submenu Brightness ......
- Page 41 VCR set up submemt (._ Record mode * ...... _._ ] 9 _SEL,_ET @ Output channel ...... [2_ 99 OUTPUT CR,,.L/R (_ Audio dubbing* ...._ 96 _---AUDIO DUB,,.AUDIO WIHD SCREEN, @ Wind screen ......_ 67 ®---AUDIO MODE,.12bit AV/PHONES,,.AV @ Audio m_xte* ......
- Page 42 PLAY MENU (MV4.50i: VCR MENU), cont. s_bmen_ System _} Wis'eless e_ntroller ....[.1_46 SYSTEM _SEL._ET _CLOSE OI_HiH_N_NNNNN @ Light-up buttons ...._ 48 BUTTORLIGHT,ON I @ Button light eolour ...._ 48 _I-LIGHT _OLOR,BLUE BEEP..ON I @ Beep ........_I-*RETURN @ Return •...
- Page 43 I_ VCR set up submemt @ AV or headphones ...._ 30 SET UP rVOR _RETURN Display set up submenu Brightness ......[2121 24 DISP,SET UP _PL._SET i_LOSE @ Mirror mode ......E212] 25 NIRROR ..ON-- @ TV screen ......F.L]14-1 _---TV 8GtEEH,,,OH...
- Page 44 C. PLAY MENU, cont. Card operations sttbrnemt @ To linage protect ....[_ 111 CARD GPER. _SEL._SET" @ To pdm mark ...... LL] 119 _PHINT MARK_ @ Copy from card to cassette ,,, _ @---eOPY[D*t_I -_-_ IMAGE ERASE @ Image erase ......@---FORaAT <"RETURN @ Format .........
- Page 45 The supplied wireless controller can operate the camcorder from a distance of up m 5 m (16 feet'), Point it at the camcorder's remote sensor while you press the buttons. There are some functions that cannot be operated without the wireless controller: Special playback (_2127) Photo/date s_h...
- Page 46 27oprevent interference from other Canon wireless controllers being used nearby, there are 2 remote sensor modes and an off setting, The wireless ernttmller and the cameorder have m be set rx_ rite same mode in order to be er_mpatible, pre_t The wireless controller and rite eameorder have been to mode ].
- Page 47 working: If yotw wireless c_ntroller isn't Make sure the carn_rder and rite wireless con0"oller are both set to rite same mode, Check rite m_vde rite cam_rder is set to by pushing any button other than rite REMOTE SET button on rite wireless con0"oller, The cameorder's mode appears...
- Page 48 The clear but0tms above ritz LCD panel light up when the eamcorder's power is on, or only when one of the buttons is presred, m_ng it possible to play back cassettes when in dark surroundings. You can 'also change ritz eoleur in which they light up to blue, _rquoise (greenish...
- Page 49 The date and/or time display fbsns pan of the data code. You can choose display or hide it during playback (_78), Set the date and time display when you first sPart using your camcorder. Install the backup battery before you begin ( _ ] 28).
- Page 50 No "T'ime z one No Tim8ZOEG LONDON WELLGTN(We[]ington} PAF_IS SAMOA CAlnO HONOLU(Honolulu) MOSCOW ANCHOI3(Anohomge_ DUBAI L.A. _LosAr',_eles} KAp_,CHI DENVErl DACCA CHICAGO BANGKOK N.Y. (New York_ H. KONG (Ho_g Kong) CARACAS TOKYO RIO _Riode J_neiro) SYDNEY FE]3NAN.(FernandodeNoronha} SOLOMON AZORES [] Notes: •...
- Page 51 After you set the date and time, the date/time and home time zone will be displayed fbr about 4 seconds each time you turn the power on. MENU( [_ 37) _'_Y_T_a _'D;TlaE SET., 12:_1 .JAH._01 1. Open the menu and select SYSTEM. 2.
- Page 52 To take still images on a memory card, see p. 105, You can record still pictures like a photograph, The camcorder records the picture and sound m tape fur several seconds, The exposure is autotrmticaily adjusted, Copy still photos automatically m a memory card ( _21] ] 7) fur transfer m a PC for ffrmge enhancement and printout, .-Mso,s_tarfingyour shooting with a still photo makes it easy m find the begimling again later with the Photo Search _nction (_[2181),...
- Page 53 [During record pause mode l 1. Press the PHOTO button halfway down and hold it: • "PHOTO" flashes at rite bottom right of display, • Exposure is locked, • During autofbcus 0 flashes whke in rite display as rite eamcorder 'adjusts the focus and it is displayed continuously as a green mark when the camcorder is ready to take the still picture, •...
- Page 54 When the camcorder is in record pause mode, you can ure rexx_rd search m play the tape fbrwards or backwards find the point where you want to start or resume recording, This is use_ whert you wartt _ add a new reene to a previously used cassette.
- Page 55 The camcorder provides you with a choice of 7 recording programs, They use different combinations of earocorder settings in order to adjust rite exposure and other functions to march the recording situation, * For sirople point-and-shoot operation, select the Easy Reer_rding program. Slide rite program _lector m the Z position, .
- Page 56 1. Slide the program selector to [] (program AE) mode. 2. Press the selector dial in to display the program menu. 3. _[llrn the selector dial to move the arrow up or down the display. 4. Press the selector dial in to selet_t the desired program. •...
- Page 57 The simplest way _) use rite camcorder is with rite program selector set to rite _ position, The carncorder will take care of fbcus, exposure other adjustments, leaving you free to point and shoot. This is the same as the Easy Recording program, except that you now have the option of using arty of the carn_rder's...
- Page 58 This progrmn is designed for recording spotlit scenes, such as on a stage. The exposure is automatically adjusted for glare-free rex_rdktgs of subjects lit by a er_ncantzated light source. Use this program in places where the background is so bright that rite subject appears underexposed in the display I a sunny beach or...
- Page 59 Use rite camcorder's digital effects for more interesting productions. • Faders: Start or end scenes on a tape with a fade to or from black ( [._ 60). Fade Trigger, Vertical Wipe, Horizontal Wipe, Mosaic Fade* • Effects: Add flawmr m your recordings ( _2] 61).
- Page 61 Effects Sepia (SEPIA) Mosaic (MOSAIC) Makes monochrome Blurs tlte image image w_tlt a by enlarging rite brownish tint, s_ze of some Art (ART) Black and White p_xels, (BLK & WHT) Adds a paint- like effect, Makes called image black and solarizatiott, white, the image.
- Page 62 Digital effects can be set with rite _mtrols on tim body of the camcorder or the wireless controller, Pressing rite _ buttons on tim wireless controller _rrespond to turning the selector dim up and down, and pressing rite SET button _rresponds to pressing the selector dial in.
- Page 63 6. If yoN're [n TAPE CAMERA mode: Fade in- Press the start/stop button, Fade out- Press the start/stop button, If yoN're in TAPE PLAY (MV450i:PLAY (VCR)) mode: Fade in- Press the I_ (play) button, Fade out- Press the II (pause) button. Sound records/plays back normally, When operating...
- Page 64 Divides your display image into 4, 9 or 16 smaller images with rite Image Capture feature. With this feature, rite camcorder captures the c_rrent scene being shot or replayed, Choose the tyansition speed -- marmal, fast (every 4 frames), mederate (every 6 frames) or slow (every 8 frames)
- Page 65 8. Press the DIGITAL EFFECTS button to close the menu, • The digital effects menu disappears • MULTI-S flashes in the display, [MultMtrmge semen on/eft ] 9. Push the ON]OFF button. • MULTI-S stops flashing, • Manual: As you press rite ON/OFF button, scenes will be captured one Mter another rite indicated number of times.
- Page 66 MVgS0/MV450i can record sound in twe audio modes -- _6-bit and _ 2-bit. The 6-bit mede produces the higher sound quality (slightly superier to CD) while the 2-bit mede recerds on 2 channels (stereo 1), leaving 2 channels free (steree fer you to add new sound at a later date.
- Page 67 [] Notes: * When using an external microphone, use a microphone cable not longer titan 3 meters to avoid eleem_magnedc inerference. * For de'tails on using the opdonal DM-50 trfica'ophone,see p, 71, * Be careful when using long micrephones as titey may extend inrx_the frame, * You can monitor the sound while recording by setting the AV/lteedphone terminal m headphones (_2130) aed attachhlg stereo headphones m the (3 terminal,...
- Page 68 This is useful when you want to include yourse]f in the picture when recording movies or still photographs, 1. Press the © se[f-tlmer button on the body of the ¢_mcorder the SELF TIMER button on the wireless controller. • SELF-T appears in rite display.
- Page 69 I R_r stills ] 2. Press a PHO_[_) button on the camc_rder body or the wireless controller. * The camcorder automatically adjusts rite focus 2 seconds before rite countdown is complete, The O mark flashes white then turns gj'een _,ffterrite focus and exposure are set, If"...
- Page 70 When recording in dark rooms attach the Video Light to the carncerder's advanced accessory shoe. The ¥1deo Light is powered • by the same power source as rite camcorder. Also refer to rite VL-3 Video Light instructions. Turn rite camcorder's power off before attaching/removing the Video Light,...
- Page 71 The highly sensitive Directional Stereo Mica'ophone DM-50 has been designed exclusively fbr carncorders equipped with an advanced accessory shoe ,J'_', It is powered by the carncorder s power supply, Use during cassette recording or audio dubbing ( _ 93), Refer m the DM-50's instructions fbr further dePails, T'um the camcorder's power off befbre attaetfing/removing the microphone,...
- Page 72 By ermtrolling rite level of rite automatic exposure (AE) _nction you can lighten or darken the image slightly. This _lows you to compensate for backlit, overexposed scenes, Make sure the pregr_n selector is set to IPI 1. Press the selector dial in and select any recording program other...
- Page 73 Set the Shutter speed manually to take stable shots of quickly moving subjects, MENU *e_,SET uP p),,.s,u''_R ..AUTO ( _ 37) 1. Make sure the eameorder is set to the [] (program AE) mode. 2. Press the selector dial in and choose AUTO from the program menu.
- Page 74 Guidelines for shooting using high shutter speeds • When shooting with a shutter speed of ]/1000 or higher, do not Shoot the sun directly, Recommended shutter speeds when shooting: _I_000 or 114000 • People doing outdoor spoyts such as (or _18000 to_meze golf or tennis evermmore _hG _[orm...
- Page 75 The cmxIcorder can fbcus aur_maticNly. All you have to do is point it, and whatever is in the centre of rite display will usually be in sharp focus. It" it does not seem to be fbcusing well, it may be because the subject is not suitable autofbcas.
- Page 76 The carner_rder's auto white b_ance system compensates for a wide range of lighting _mditions. Although slight variations are unavoidable, erfiours will appear natural in virtually every situation. In some cases, you will get better results by _tting the white balance yourselL or using one of the two preset modes: :.5: Indoor Mode...
- Page 77 Setting the white balance martually will probably work better than auto white balance when shooting: Subjects with one dominant colour, such as sky+ sea or fbrest Close-ups In rapidly changing lighting conditions In places lit by certain types of fluorescent or mercm"y vapour lights [] Notes: ,, Turn the digital 7_om oil"...
- Page 78 A data eerie, eentaining the date and time the recording was made and other eameorder data (shutter speed and exposure settings) is automatically meerded on a special data _ction of the tape. • Only the date and time appear in the data code when using a memory card, Bring TAPE PLAY (MV450i: PLAY (VCR))
- Page 79 You can also choose to display cameerder data (shutter speed and exposure settings) in cassette data codes. [ I',iI:Vl To change, open the menu sdect DISP.SET UP. Then selet_t DATA CODE, set it to DATEfrlME, CAMERA DATA or CAM. & D/T and close the menu.
- Page 80 The 6-second aura date appears for 6 seconds to mark rite changeover of a day if the tape was being lem._rded m ] 2:(Y0rrfidnJghL It also appears for 6 _conds when you start playback and have the data code turned off, The f-second auto date will adjust for any time zone changes you have indicated.
- Page 81 This Nlows you to move quickly ritrough still pictures recorded anywhere on a tape (photo search) or between different days or areas of recording (date search) on a tape, 1. Press the SEARCH SELECT button to choose between photo/date search. •...
- Page 82 Use tlte wireless controller to mark a point on a tape fltat you want m return m fk_llowing playback. re÷m, I I',iI_,Y4 1. Press the ZERO SET MLEMORY button on the wireless controller during playback at a point you want to return to later.
- Page 83 By connecting the carn_rder m a VCR, you carl edit your recordings in order m remove unwarged scenes -- or combine different shots to create your own videx_ productions. 1. Connet_t the c_Lmcorder to the VCR, , See "Connections for Playback on a TV Scxeen"...
- Page 84 • Connect the Canon CV-_ 50F DV cable (optional) with the side of the plug marked with the arrow facing as shown above. 2. Prepare the other device. . Load a blank cassette, and put the other device in record pause mode, •...
- Page 85 1. Connet_t the eame_rder and the other digital device. • Connect rite Canon C_]50F DV cable (optiotafl) with the sides of rite plugs marked with the am_ws facing as shown above, 2. Prepare the other devle_.
- Page 86 1. Find a point on your recorded cassette slightly before the section you want to copy and set it to playback pause mode. 2. Press the eameorder's REC PAUSE button. • The camcorder enters record pause mode 3. Start playback on the other digital device while you monitor...
- Page 87 Copyright precaution Ce_.airt pre-texx_rdeO videx_rapes, :lJhlts and other materials, as well as some television pmgrammes are ot_pyrighteO. Unauthorize_t recording of these materials may violate copyright protect.on laws. Copyright signals When playing back: If you try t_._ p lay back a tape that contains copyright con0"ol s_gnMs for the pmtectkm of s_.fftware,"COPYRIGHT PROTECTF£) PLAYBACK IS RESTRICTED"...
- Page 88 You can record a video played on your VCR or attalog carn_rder (for digital carn_rders see p, 84) or a TV program onto a tape in the MV450i, if" rite TV or other device has audiolvideo outputs. • If" an anomalous signal is sent f_rn rite TV or VCR, rite images re_rded on rite...
- Page 89 1. Find a point on your recorded cassette slightly before the section you want to copy and set it to playback pause mode. 2. Press the REC PAUSE button. • S-vide_ _nd AV ]N/OUT t_TnJnals work as input tgrmJnals, • The camcorder enters record pause mode, 3.
- Page 90 You cg.n insert new scenes f_m your VCR or other carner_rder ont,_ your pre- recorded tape using the l'vW450i's attal,_g line-kt or DV Jn terminals, Original vJder_ g.nd audio will be replaced with rite new video and audio. Scene 7) be i_sertee The piayL, aek tape Inser: _r:.
- Page 91 The tape in the MV450i: When using the MV450i's AV insert _nction, otfly record to tapes recorded in SP mode with continuously recorded time codes. If"there are non-recorded portions or portions recorded in a mode other than SP mode on the tape, recording will stop.
- Page 92 1. On the VCR, locate a point 3 seconds before the scene to be inserted. Set the VCR to playback pause mode. 2. On the e_Lmeorder, press PLAY and locate the recording start point. Set the came.order to playback pause mode. •...
- Page 93 - For MV450 (For MV4S0i, _195). You earl add sound to rite original sound on a pre-recorded tape recorded irt the SP m_xie with 12-bit sound. Use the internal or an external trfic_'ophone, The original soued will not be erased, Fur best results, 'add sound to tapes that have been recorded with this carneerder...
-
Page 94: Audio Dubbing
Do not eonnectldiscenneet any cables m/from the etuncorder when dubbing audio or preparing _ dub audio. Locate the point where you want to start audio dubbing, then press the PAUSE button. • You can u_ rite playback burns on the body of the camcorder or rite special playback functions on the wireless ot_ntroller in the same way as in playback mode, •... - Page 95 - For MV450i (For MV450, _93), You earl add sound to rite original sound on a pre-recorded tape from audio products (AUDIO IN') or with the internal or external mica'ophone (MIC. IN), The originN seund will not be erased, For best results, add sound to tapes that have been terx_rded with tiffs eameorder _n SP merle with 12-Nt sound, If there are non-recorded portions on the tape, or portions recorded ]n a mode other than SP mode, or w_tlt 16-bit or 12-bit, 4-eharmel sound, dubNng w_ll stop, If your tape...
- Page 96 [] Notes: • When osing an e_eFm_l microphone ,-F Connect it to the _rficrophone rennin'd, When osing the DM-50 _" Make sure nothing is eonnecred to mkropllone rite microphone termimfl, Whmz oslng the blfilt-ln microphone _1, Make sure nothing is eonnecred to either rite microphone terminM or rite accessory shoe.
- Page 97 4. Locatethe pointwhereyouwant to start audio dubbing, then press the PAUSE button. • You cart use the playback buttons on the body of the ¢am,x_rder or the special playback functions on the wireless _ntroller in the same way as ht playback mode.
- Page 98 Wlten you play back a tape that was rexx_rded in ]2-bit mode, you can set the audio output m play: stereo 1 (the originM sound), sterex._ 2 (any new sound, dubbed to the tape after recording), or mix the bMance between the two. •...
- Page 99 When you play back a tape whose audio has been recorded on multiple channels you carl change rite output chgnnels of that sound. I ",,1 IF_,Yd MENU(_3?) I *VcR+ETuP 1_*_uTpuTcH+++L_ 1. Load a tape recorded with multiple-channel audio. 2. Open the menu and select VCR SET UP. Then select OUTPUT set it to the desired setting and close the menu.
- Page 100 By using a DV cable attd connecting rite camcorder to a PC exluipped with a DV terminal conforming to IEEE 1394/DV compatible capture board, you can transfer images taken wJtb the camcorder to your PC, • While connected, it is recommended that you power your eamcorder from a household...
- Page 101 The camcorder can take, store and trmnage still images on 2 types of memory cards: rite MultiMediaCard (supplied with rite camcorder) or an SD IVIemory Card (commerci_ly available). The MultiMediaCard is an ultra-small, ultra-light media that can record still images. About rite same size as a MultiMediaCard, rite SD (Secure Digital)
- Page 102 1. _[1lrn the POWER switch to OFF. 2. Open the memory card compartment cover in the direction of the arrow. 3. Insert or remove the memory card. • Push rite memory card all the way kt • Remeve the memery card by pushing the card in and letting it spring out attempt memory pushing...
- Page 103 [] Notes: • Depending on the image you are recording, sometimes there will be ne difference in image quality between settings, • Images are compres_d and recorded in the JPEG Photographic Experts (Joirtt Group) retreat. • The number of pixels is 640 x 480 (VGA) in beth FINE and STANDARD modes.
- Page 104 The images you take are automatically assigned file numbers from (.EIO:-9900 and stored in fblders of 100 images each. Each folder is nuntbered from : tYOto 998 atul re_rded on the memory card, Sample images have been ple-iecorded on the supplied MultiMediaCard, entering folder nuntber...
- Page 105 _HHHHHHHHHHHHHHHHHHHHHHHHHHHHHHHHHHHHHHHHHHHHHHHHHHHHHHHHHHHHHHHHHHHHHHHHHHHHHHHHHHHHHHHHHHHHHHHHHHHHHHHHHHHHHHHHHHHHHHHHHHHH___ The camcorder's Pregressive Photo _nc_ion lets you take vivid, virtually blur- free still images of moving subjects onto a memory card. You can also record onto a memory card images from a tape in the carncorder, or images input fltmugh the DV in termiwal (MV45tJi only).
- Page 106 [] Notes: • Te use the self-timer ( [2_368),press rite © button before step 3, and then press rite PHOTO button t_lly down, • The wireless controller's PHOTO button has no half-way setting. Press the button fully and the eamcorder iTrmaediately takes rite image. •...
- Page 107 Record an image from a cassette onto a memory c_,ml,To automatically record multiple still images from a cassette m a memory card, refer m "Copying Still Images from a Casrette" on p. 117. * The still image's data erode will reflect tlte date and time ]t]s recorded to the memory card, I '1t"_+d 1.
- Page 108 -MV450i only- Record images input ritmugh rite DV Jn terminal onto the memory card as still images, • "Citestill image's data code will reflect the date and time it is recorded to the memory card, 1. Connect the eamcorder to the other digital device.. "...
- Page 109 Play back and view still images recorded on a memery card. (For details on connecting m a TV, see "Connectiens for Playback on a TV ScTeen" on p. 30) • The cameorder may net be able to copy or play, etc., images re_rded on a non- C_lon camcor_Jer.
-
Page 110: Index Screen
• Slide Show With an image in the display, press the SLIDE SHOW button. • The images play back one ',ffter rite other for 5 seconds each. To stop the slide show, press the SLIDE SHOW button. • The slide show starts or stops each time you press the SLIDE SHOW button. - Page 111 Select important images and protect them from accidental erasure, ff a memory card is formatted, however, 'all images, includhlg protected images, will be pe_ently erased ( _ 120). • The pre-recorded sample images provided on the supplied MultiIvIediaCard 'already pyotected. [ ",1 t 'Yd MENU( ]_ "*_OT_T_...
- Page 112 Erase images singly or ell at once, • You cannot erare protected images, Cancel image protection ( _ 111) first in order m erase an image, • Erase images with caution. Once an image has been erared it cannot be restored.
- Page 113 'all Car_ To erase images memory once 4. Select ALL. ,, ERASE ALL. IMAGES? [EXCEPT o-_ IMAGES] NO YES appeA.trs in rite display, 5. Select YES. * All ]ntages except the pyotected ones are era_d. . If" you sele/,,"tNO, you return to step 4, 6.
- Page 114 Liven up your productions by superimposing one image on top of the otlter, Combitte 2 still images or a still image and a moving image, Choose a still image from rite memory card, either one of the pro-recorded sample images ( _ 122) or one you have recorded your_,...
- Page 115 CAM. CHROMA (Camera clu'oma key) Superimpose the cuo'endy recording image on t_p of a still image, which becomes its backgyound, Shoot rite subject (ff the c_rrenfly recording image against a blue background, such as a bNe c_rtain. The origimfl still image will appear in place of the blue area.
- Page 116 Select the desired setting. • Yeur currently recording image is combined with the pre-recorded still image. Selet_t MIX LEVEL. Adjust the mix level. • Turning tile relector dial upwards adjusts to rite fight and turning downwards adjusts to rite left, Close the menu.
- Page 117 Copies multiple still images from a tape _) _he memory card using _he Pho_) Search functiott , The still images data codes will reflect _he date and time the copies are _rmde "JNL,'Vd MENU ( [22137) Make sure a memory card _hat has enough memory available and a recorded cassette have been inserted into fue carncorder 1.
- Page 118 Copies multiple still images from the memory card to a cassette. • The still images' data codes will reflect the date aed time the eepies are made, • The [] SP and []LP recording modes are not available when copying memory card images to a cassette.
- Page 119 The camcorder supports the _ DPOF (Digital Print Order Format) print ?brmat. Images can be aurx_matically printed on a DPOF-supporting Canon printer, Up to 50 images per memory card can be print marked, (_ 37) Make sure a memory card [hat has images recorded on it has been inserted into rite camcorder.
- Page 120 Format new memery cards, if you get rite message CARD ERROR, or to perrmtttettfly and quickly erase all the images on a memory c+trd, including protected images (tiffs includes the pre-reot_rded card mix sample images) The MultiMediaC+trd supplied with this camcorder lms already been forlrmrted fk_r...
- Page 121 MultiMediaCard, ritey can be downloaded from the following home pages:* htth:]]www,cmlon-europa,com/hroduct,'_pmducts.htlnl htth://www,canon-asia.com/ htth://www,canon,com, au *You will need a PC Card Adapter or PC Card Reader to be able to do nload to a memory card * It"you purchase eddifiotafl memory cards, format ritem wirit tbe carncorder, not a PC or other device.
- Page 122 + Do not leave memory cards in places subject to high temperature or high harnJdity. ° Moving a memory card rapidly between hot and cold temperaao'es may cause condensation m form on it, leading to malfunctions. Avoid this problem by placing the memory card in a plastic bag and letting it slowly adjust to temperature changes before removing it from the bag.
- Page 123 Card luminance Camera chroma * The pre-recurded sample images on the MultiMediaCard included with this camcorder are intended sNely fur the personM enjoyment gained from _mtblifittg them w_tlt person_ videx._s taken with this camcorder. Do nut use the pre-recorded sample images fur any uther purpose. PhomEssentiais - Royalty Free Stock Photography...
- Page 124 eamcorder toXAPECAMERA mode, Extend the viewfinder sTaight out, then 'adjust the viewfinder fbcusing Rotate the viewflnder to an angle that allows you to view comfortably. Store the eameorder with the viewfinder flush lever _ suit your eyesight. _iii with the body of the carncorder, To view with the viewfinder, make sure the LCD panel is either aimed so that the...
- Page 125 • For extra mcurity and po_a_bility, attach tile shoulder strap before using the camcorder. • Pass tim ends titmugh tite attacltment bars and adjust the lengtit as sltown+ • Be eare_l not to leave rite view:fieder exposed to bright sunlight, or it will melt, ('rite ligltt is concentrated by tlte view:finder lens.) Adjust the angle of the viewfinder to prevent sunlight from entering.
- Page 126 • These times vary -- the s_est polley is always to have 2 or 3 times as many battery packs as you tlfink you will need. • You will get more ye_rding time _f you turn the camcorder off between shots, ktste'w2 of leaving it in record pause mode.
- Page 127 The indicator in the display shows you 100% approximately how much charge rite battery pack has left: Notes: * "CHANGE THE BATTERY PACK" appears in rim display for 4 seconds when rim power is completely exhausted, 'Cite empty battery mark then appears and starts to flash, The power indicator...
- Page 128 Open the backup battery cover on the battery attachment unit, and insert the CR2025 lithium battery with the + side facing outwards. Click the cover back into place, This backup battery alMws the camcorder to remember the date attd time and other settings when main power source is removed, It has a life span of...
- Page 129 Avuld high temperatur_ and high humidity, • Do not leave the carner_rder inside a car in hot weather, for example. • Be careful of heat radiating from videm lighting eXlu_pm_nt. • Do not take the earncorder into a humid room, Avoid sudden changes in temperature.
- Page 130 It"you do not intend to use the camcorder for some time, store it in an area which is free of dust and moisture, and where rite temperature is no higher tlatn 30°C (86°17). After storage, cheek each part and Nnction of your camer_rder m make sure everything is still worldng properly, [] Note: * These cautions _so apply to accessories such as battery packs and cassettes,...
- Page 131 Video heads • When mosaic-like noise appears on rite playback picture, the video heads may be dirty. When the video heads are badly eonta[rfinated, the eameorder may show a blank blue screen or a warning, • For rite best picture possible, after using the carncerder for appreximately 20 hours, clean the video heads using Canen's DVM-CL Digital Video Head Cleaning Cassette.
- Page 132 Condensation may f'orrn on the carncorder when it is moved from a cold place to a warm place, Using the carncorder while condensation is pre_nt can damage both the tape and the carncx_rder, Condensation may become a problem: When you take the camc_.:xdgrfrom a cold When a cold room is heated rapidly plac_ to a warm room When the camcordgr is left in a humid...
- Page 133 Refer to this checklist first if you have any problems with your cam_rder, Possible explanations are given fbr each problem on rite list -- turn _ the page numbers Jn parenflte_s for more Jnfbrlnation, Make sure that the camcorder Js properly connected if you are using it with a TV or VCR.
- Page 134 [] Note: • Some subjects are not suitable for aumfocus, fit there situations, you will often get better results using rnanuN focus ( [._ 75), Focus on somethktg which is about the same distance away, lock rite focus, and then point the camcorder at your original, hard-m-fbcus subject, Without much...
- Page 135 [] There's no sound coming from the • The speaker has been turned off with speaker during ployboek, rite selector di_ (_129). • Headphones are being used, Cause and/or what to do about it Problem [] The memory, curd will not insert. * k is not turned the right way ( [_ ] 02).
- Page 136 * You are using an u_ortrmtted memory card. Fortrmt the card (_20). ° The image is pretected ( _ liD, [] The image cannot be erased. * You are using art SD Ivlemory Card and it is set for erasure prevention.
- Page 137 iiiiiiiiiiiiiiiiiii_ii_i_iiiiiiiiiiiiiiiiiiiiiiiiiiiiiiiiiiiiiii __=.
- Page 138 BP-500 Seri_s Battery. Packs Extra batteries for use with the M_'450EvIV450i, CR-560 Charge Adapter/Car Battery. Cable Kit Connect the car battery cable to power your camcordar or recharge battery packs on the move, The car battery cable plugs into your car's cigarette lighter socket and runs off a ] 2-24 V DC negative ground battery, Also, when u_d with the CA-560 Compact...
- Page 139 Zoom Remote Controller ZR-1000 LANC t_ terminal of a Canon eameorder, is possible to control functions such as fire p_xtuet When riffs is plugged into the start and s_p of recording and rite zoom a.nd focllsing...
- Page 140 WS-20 Wrist Strap iiiiiiiiiiiiiiiiiiiiiiiiiiiiiiiiiiiiiiiiiiiiiiiiiiiiiiiiiiiiiiiiiiiiiiiiiiiiiiiiiiiiiiiiiiiiii active shooting. iiiiiiiiiiiiiiiiiiiiiiiiiiiiiiiiiiiiiiiiiiiiiiiiiiiiiiiiiiiiiiiiii SC-IO00 Soft Carrying Case A harltiy camcorder bag with padded _mp',trtrnents and plenty of space for _CeSSOtqeS. CD-300 Digital Printer This 300 dpi resolution printer is perfect for printing out the high quality images taken with camcorders.
- Page 141 To display the date and time press the DATA CODE burton. See also p. 78. Press the wireless contreller's SCREEN burton or turn TV SCREEN on through the menu to see rite other displays on the TV screen. (The displays appear wldte on-screem) They will not be added to any _rdiHgs...
- Page 142 Shows how rmtch Rewind ( _ battcay power remains ( _] 127). Fast f_ward playback ( _ 27) The battc_ pack is cxhaustcd ([.,]21127), R_wind ply'back (_'Z7) Framc _Klvmlce No cassc_c is loaded, playback ( [_ 27) Or 1$ is scI for cffasltre Fr_3c 1_,¥e1_C prcvcnfion...
-
Page 143: Optical Zoom
Zt_om d isplay (_ 21): Optical zoom Audio m ode (_ 66) _cal plus 4 0",< digital zoom Data c_ode( _ Op6cal plus 200× digital morn Photo modz ¢_ 52) Zoom iii Zoom ORt • Setting the AF/AE. 0 mark fla_ms whi_ The image stabilL-_r •... - Page 144 Audio inDtt and Microphone input thedisplayThe effect 16:gflashcs mode:is being whan (MV,150i only, _96) soloctcd, and appoars iiiiiiiiiiiiiiiiiiiiiiiiiiiii_Nii_ stoadily when it is Audio inDtt acfivatod ( [.]_20), Microphone input iiiiiiiiiiiiiiiiiiiiiii Niil _i display flashcs w han file fimction i sbcing sclcctod and ,appears DVinput ([,,_85, 108) iiiiiiiiiiiiiiiiiiiiiiiiiiiiiiiiiiiiNii_...
- Page 145 iiiiiiiiiiiiiiiiiiiiiiiii_ _°°_'°° Accessirlg a mem_ card ([2]_1101) _c_o_C_cI'_ s_u i,_m_ o, i iiiiiiiiiiiiiiiiiiiiiiiiiiiiiiiii@iiil still images on the mem_y card ( _ 109) This records counter information, including hour, minute, _cond ttt_ _e_ onnur_ber°naspe .,e _ ape _tse", 'tis r eset_ cede autotrmfically when a new tape is Ca_ mix (_tH)
- Page 146 The camcorder displays various caution phrases -- they appear for 4 seconds before disappearing, Appears each time you turn the power on, until you set the time z,_ne, date and time ( _ 49), possible after the Appears when the camct_der has battezy pack is displayed file caution.
- Page 147 Appears if you have triczl to mark 51 or mc_e images printing, t_ if a mark file cannot be, edited. (L_ 119) video heads when *his caution appears, I Memory card caution phrases There are, i1oilrmges iiiiiiiiiiiiiiiiiiiiiiiiiiiiiiiiiiiiiiiiiiiiiiiiiiiii rex_._ded on tale memory card, ivassible, If CARD ERROR disappears...
- Page 148 Viewfinder: 0.44 in, TFT eolour LCD, Power Supply (rated): 7.4 V 1_2 Power C_usumption (while recording approx. 113,000 pixels LCD screen: 2.5 in measu_d with the AF tttrned on); diagonally, TFT coloox, approx. 3.7 W (U_ing viewfindcx), 112,000 pixels 4.5 W (U_ing LCD scTecn) "Iblevision system: CCIR start 'dard Mica'ophone: Stcxeo elez_2ret condenser (625 lines, 50 field_) PAL colottr signal...
- Page 149 ] 6:9, 20 Data Code, 78 Date and Time, 49 Abroad, Using the Carttcorder, Date Search, 81 Accessories, 5, ] 38 Digital Effects, Adapter, AC, ]0-]2, Digital Zoom, 2] AE Programs, DV Dubbing, AE ShJf't, 72 Amdog line-in, Art, 61 Easy Recording, 57 Audio Dubbing, Fxliting m a VCR, 83...
-
Page 150: Memory Card Introduction
LANC, 83 Recharging tlte Battery Pack, 126 LCD Screen, 23 Recording, 17, 105 Lens Cap, l_A- Recording from Cassette _ Light-up buttons, 48 Memory Card, 107 Imading Cassettes, 15 Recording from DV Device to Imw Light, 58 Memory Card, 108 LP Mode, ] 9 Recording Programs, 55 Record Pause M_xte, 17... -
Page 151: Viewing Still Images
Tape Protection, Telephoto, Temperature, 12, ]26, ]30, 148 Tilne C_xle, 145 Tilne Zone, 49 Tips fer Making Better Vider_s, 34 Trip_xl, 34 Troubleshooting, ] 33 TV, 30, 14] Using rite Carncerder Abroad, ] 31 Using rite Menus VCR, 30 Vertical Wipe, 60 Vider_cassettes, Vider_ Heads, ]31 Vider_ Light, 70... - Page 152 Use the list below _ quickly navigate rite cmneorder's menu, Functions am listed alphabetically. First make sure the Then sele_ it camera is set to,,. Function '_rom this slJbmerm and _1. ] 6:9 effect C_.SV:T UP })_sP.sFr uP f-see, Date Audio dub (MV_-5¢.I'_ otfly) VCRsv:r UP...
-
Page 153: Image Stabilizer
First make sure the camera is set to,,, "lhen _eleet it Fma_llon from Ihls Image stabilizer c_.s_:_u_ Mi_rar m_sde ,_s_.s_:_ c_' Mixlevel ._. CARl) MIX Mixtype i,. CARl) MIX Output ehatmel VCR SET UP Print mark CARl) OPER. Pmt, eet CARl) OPER.
Need help?
Do you have a question about the MV450i and is the answer not in the manual?
Questions and answers