Advertisement
Table of Contents
- 1 Table of Contents
- 2 Safety Instructions
- 3 Technical Specification
- 4 List of Materials
- 5 Technical Drawing
- 6 Parts Identification
- 7 Installation of Ceramic Toilet
- 8 Preparation
- 9 Aintenance
- 10 Main Unit Care and Maintenace
- 11 Spray Nozzle Maintenance
- 12 Replacing the Deodorant Box
- 13 Description of the Knob Function
- 14 Remote Control Illustration
- 15 Troubleshooting Uide
- Download this manual
Ressa
Spa Toilet
US-RS100W
INSTALLATION MANUAL
Thank you for your purchase of the Ressa Spa Toilet. We are committed to providing
exceptional service. Please contact us at any time should you have questions about your
products.
Please read the instructions carefully before installation and keep available for future
maintenance or reference.
Advertisement
Table of Contents

Related Manuals for Crosswater Ressa X1 US-RS100W


Summary of Contents for Crosswater Ressa X1 US-RS100W
- Page 1 Ressa Spa Toilet US-RS100W INSTALLATION MANUAL Thank you for your purchase of the Ressa Spa Toilet. We are committed to providing exceptional service. Please contact us at any time should you have questions about your products. Please read the instructions carefully before installation and keep available for future maintenance or reference.
-
Page 2: Table Of Contents
Content Safety instructions Technical specification List of materials Technical drawing Parts identification Installation of ceramic toilet Preparation aintenance Main unit care and maintena ce Spray nozzle maintenance 5. Replacing the deodorant box Description of the knob function Remote control illustration Troubleshooting uide... - Page 3 IMPORTANT SAFEGUARDS When using electrical products, especially when children are present, basic safety precautions should always be followed, including the following: The appliance is not to be used by persons (including children) with reduced physical, sensory or mental capabilities, or lack of experience and knowledge, unless they have been given supervision or instruction.
-
Page 4: Safety Instructions
IMPORTANT SAFETY INSTRUCTIONS CAUTION – Indicates that failure to follow the instruction may cause bod y injury or property damage. Do not install or use the product in wet places as steam room etc. It is recommended to use a waterproof electrical outlet which should be nstalled in a place where is not wet. -
Page 6: Technical Specification
Technical Specifications Model US-RS100W Rated voltage 110V-120V,50/60Hz Rated power 1200-1400W Main Unit Overall unit Waterproof IPX4 Electrical wire Flush volume 1.28G 4.8L Flushing mode Siphonic jet Toilet Rough-in distance 12" Water pressure range 0.18MPA - 0.8MPA (static pressure) Heating mode Instant Heating power 1400W... -
Page 7: List Of Materials
393 Fortune Blvd, Milford, MA, 01757 USA 1.844.992.8371 Exclusive North American distributor for Crosswater London fortebrands.com Thank you for your purchase of the Ressa Spa Toilet. We are committed to providing exceptional service. Please contact us at any time should you have questions about your products. -
Page 8: Technical Drawing
Technical drawings 1. Recommended power outlet location 12"(305mm) "(425mm) recommended power "(410mm) outlet location 12"(305mm) 2. Recommended water supply location " Water supply "-14 NPT (250±10mm) For water supply from the wall 6-7/8" (175±10mm) 2-3/8" " (250±10mm) (60±10mm) Rough in 12"... -
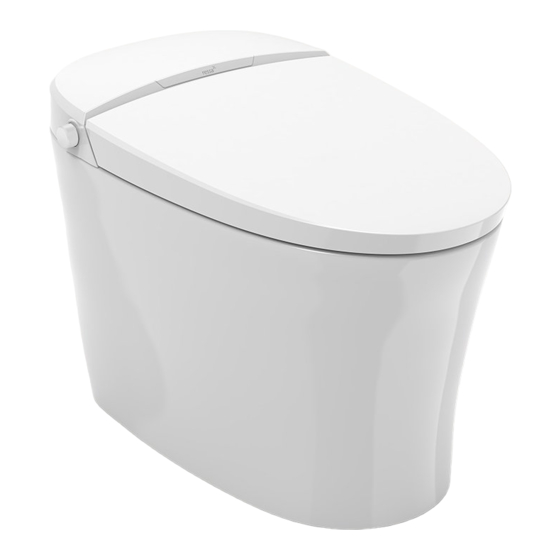
Page 9: Parts Identification
Parts identification Left side Bumper Seat Knob Ceramic toilet Right side Drying shield Rear cleaning Sensor Front cleaning Spray nozzle... -
Page 10: Installation Of Ceramic Toilet
Installation of ceramic toilet Precaution before installing 2. Hose Minimum static working water pressure: Connect the water inlet and angle valve of the 0.18MPa (5.81Gal(22.0L)/min), failure to toilet with the matching hose and tighten it meet this pressure will not achieve the best flushing function. - Page 11 4. Ceramic toilet installtion 5. Screw installation Fixing sleeve Toilet drain outlet Sealing flange Screw Decorative cap Important: Two people are required to carry the toilet.
- Page 12 6. Remote control installation Step 1: Fix the holder onto the wall by using screws or tape as shown in below diagrams. Step 2: Insert 2 x AAA batteries (not Step 3: Put remote control into the holder. supplied) into the remote control. Notice:Do not install and use the product in damp places such as a shower room.
-
Page 13: Preparation
Preparation 1. Turn on the angle valve Angle valve Indicator light Tips: Reset switch Press electric leakage test button prior to usage, the reset switch pops up indicating Electric leakage that the leakage protection function is normal. test button Press the TEST button (then RESET button) every month to assure proper operation 3. -
Page 14: Aintenance
aintenance Spray nozzle Main unit care and maintenace 1. Shut off power supply before 1. Nozzle self-cleaning doing maintenance. To start the manual cleaning function, when not seated, rotate the knob clockwise. The nozzle will automatically extend out. 2. Wipe with a soft damp cloth. Use warm water only. -
Page 15: Replacing The Deodorant Box
Filter Cleaning When the product is left unused for a long time Turn off power and the angle valve 2. Unscrew angle valve nut 3. Disconnect the hose from angle valve, drain the water and reconnect. 4. If needed, seek assistance from a professional plumber for anti-freezing process. -
Page 16: Description Of The Knob Function
Description of the knob function Knob operation instructions When seated, the knob rotates clockwise to start rear cleaning function, and rotates counterclockwise to start front cleaning function ear and front cleaning function will automatically enter into the drying function after completion. ( Note: default water pressure, water temperature, air temperature, seat temperature, rod position are intermediate) After starting the drying function, clockwise rotation increase... -
Page 17: Remote Control Illustration
Remote control illustration Rear cleaning / Oscillating Water increasing Nozzle moving forward Front cleaning / Oscillating Water reducing Nozzle moving backward Drying Auto mode 1 Auto mode 2 Indicator light Stop/Energy saver (only visible when the light is on) Dryer temperature Water temperature Seat temperature Night light... - Page 18 Auto mode The system can store 2 individual settings. Once the desired configuration is set, for instance, water volume and nozzle position, one can press the Auto mode 1 or mode 2 button to store the settings. (Mode 1 is for rear cleaning and Mode 2 is for front cleaning ) When pressing the Auto Mode button, the system will automatically switch to the settings stored previously, and follow the below procedures for a complete cleaning process.
-
Page 19: Troubleshooting Uide
Troubleshooting Guide Problem Cause Solution Straighten the hose to remove Water supply hose is kinked. the kink. Angle valve is not fully turned Poor flushing Turn on the angle valve fully. Filter is dirty. Clean the filter efer to page 13. Angle valve is shut off. - Page 20 Problem Cause Solution Switch to function mode to use No air out In standby mode. dry function. Refer to page 14. Power off. Turn on the power. The seat switch will not turn on unless the user is seated Sit back on the toilet seat. properly.
- Page 21 Problem Cause Solution Night light does not Night light function is "OFF". Set to "ON". work The positive and negative direction of the batteries Re-load batteries. Remote control does is incorrect. not work Batteries have expired. Load new batteries. The drying feature stops automatically after about 5 minutes of continuous use.
- Page 23 Do not use in-tank cleaners as they can seriously damage the fittings in the tank. This damage could cause leakage and result in property damage. Crosswater London shall not be responsible or liable for any damage that occurs as a result of the use of in-tank cleaners.
- Page 24 Picture of product may not be entirely consistent with actual appearance and color. ASVFAF0145000A-1.1 Issued: August 2021...
Need help?
Do you have a question about the Ressa X1 US-RS100W and is the answer not in the manual?
Questions and answers
Where is remote instruction manual? Tessa spa toilet. How do I shut off seat temp?
The remote control instructions for the Crosswater Ressa X1 US-RS100W toilet can be found in the installation manual under the section titled "Remote control illustration." To shut off the seat temperature, set the seat temperature level to zero or the lowest level. Then, press the “STOP” button.
This answer is automatically generated