Parrot ANAFI Ai User Manual
Hide thumbs
Also See for ANAFI Ai:
- Manual (136 pages) ,
- User manual (120 pages) ,
- User manual (117 pages)

Related Manuals for Parrot ANAFI Ai


Summary of Contents for Parrot ANAFI Ai
- Page 1 ANAFI Ai R o b o t i c s f o r y o u r b u s i n e s s U S E R G U I D E v . e a r l y . 1 . 0 1...
- Page 2 <PAGE BLANK ON PURPOSE> P A G E I S B L A N K O N P U R P O S E...
-
Page 3: W E Are Parrot . Welcome To The Team
The indispensable prerequisites, on the next pages, will not occupy more than 5 minutes of your time: ANAFI Ai requires the FreeFlight 7 app to fly, and to make sure your drone and controller are fully up to date with the latest features. -
Page 4: Prerequisites
ANAFI Ai REREQUISITES You want to put ANAFI Ai to work as soon as possible, so do we. Refer to the enclosed Super Quick Start Guide (SQSG) if you need illustrated guidance to get these quick prerequisites out of the way. - Page 5 If the prompt does not appear on your screen when you connect your device to your Parrot Skycontroller 4 FreeFlight 7 , launch manually, as any other app. 3. Follow onscreen instructions to update your ecosystem. v.early.1.01 – published on November 2, 2021...
- Page 6 ANAFI Ai 4. All systems are ready for flight.
-
Page 7: Table Of Contents
Face ..............................17 Top ..............................17 Bottom ............................. 18 Right Side ............................18 LED status indicator color codes ....................18 Pairing ANAFI Ai to a Parrot Skycontroller 4 ................19 HDMI video sharing ........................19 v.early.1.01 – published on November 2, 2021... - Page 8 ANAFI Ai ..........................20 4G C ONNECTIVITY About 4G connectivity ........................20 Inserting the SIM card ........................20 Activating the SIM card ......................... 21 4G flying ............................23 .......................... 24 BSTACLE AVOIDANCE Obstacle avoidance and manual piloting ................... 24 Obstacle avoidance and automated flights ................25 Obstacle avoidance: screenshots ....................
- Page 9 ........................... 41 MART ATTERY Battery removal ..........................41 Battery installation ......................... 41 Battery charging ..........................41 Battery care and safety ......................... 42 ........................... 44 EDIA RETRIEVAL Installing and retrieving the microSD card ................. 44 Retrieving photos and videos ....................... 44 Compatible microSD cards ......................
- Page 10 ANAFI Ai ..........................69 DVANCED IMAGING Exposure value (EV) ........................69 Shutter speed (s) ..........................69 ISO value (ISO) ..........................70 White balance (WB) ........................70 Lock AE ............................72 Lock AE Touch ..........................72 HDR..............................74 P-Log ..............................75 ............................
-
Page 11: Foreword
Wi-Fi network – when you want to fly the drone using your smartphone as its sole controller. About GPS ANAFI Ai does not need a satellite – GPS, Glonass, Galileo – synchronization (or fix) to take off. It can therefore be piloted indoor and through cluttered areas, stabilized by its onboard sensors. -
Page 12: About 4K Video Formats
About the smart batteries As you will find out by reading this guide, the batteries of both ANAFI Ai and the Parrot Skycontroller 4 are smart enough to enter a wintering mode when you are not using them for ten days in a row. -
Page 13: Disclaimer
ISCLAIMER 1. ANAFI Ai IS NOT A TOY and should not be used or handled by a person under the age of 18 years. 2. BEFORE USING ANAFI Ai: (A) CAREFULLY READ the user manual and all information and documentation available on www.parrot.com, which is susceptible to be updated at any time and... -
Page 14: Technical Specifications
ANAFI Ai ECHNICAL SPECIFICATIONS DRONE SKYCONTROLLER 4 - Size folded: 304 x 130 x 118 mm - Size without terminal: 238 x 147 x 55 mm - Size unfolded: 320 x 440 x 118 mm - Maximum size: 315 x 147 x 55 mm - Weight: 898 g / 1.98 lb... -
Page 15: Package Contents
ACKAGE CONTENTS Your ANAFI Ai package contains: an ANAFI Ai drone a smart battery, preinstalled on ANAFI Ai a carrying case a gimbal protection 2 USB-C to USB-C cables (charge and pairing) a USB-C to Lightning cable (connection to iOS devices) -
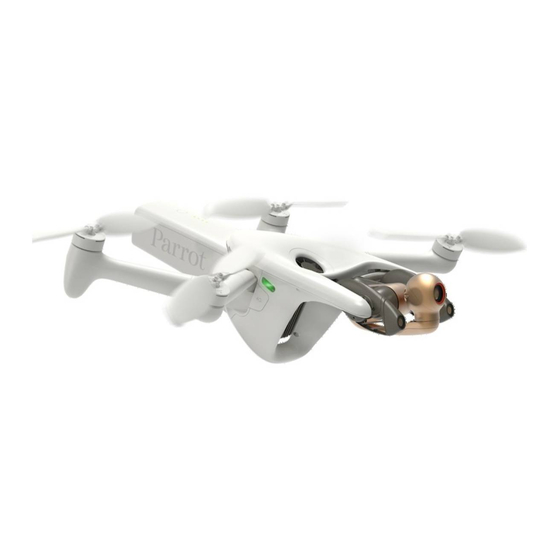
Page 16: Presentation Of Anafi Ai
ANAFI Ai ANAFI Ai RESENTATION OF Ready to store or carry Foldable arms and propellers Ready to fly Stereo obstacle avoidance cameras Charge level LED indicators 180° tilt 4K camera gimbal Smart battery USB-C charging port Power button... -
Page 17: Presentation Of Parrot Skycontroller 4
RESENTATION OF ARROT KYCONTROLLER Face Detachable Control sticks Wi-Fi antenna Take-off/Landing Status indicator LED Power Sliding handles Gimbal tilt trigger Zoom trigger Optics reset Shutter Neck strap loops v.early.1.01 – published on November 2, 2021... -
Page 18: Bottom
USB-C device connection port Spare control stick (second one on the opposite side) LED status indicator color codes When the Parrot Skycontroller 4 is powered on, its LED status indicator gives you an instant visual indication: flashing green: Skycontroller 4 update in progress;... -
Page 19: Pairing Anafi Ai To A Parrot Skycontroller 4
4. Plug the drone to the side USB-C port of the controller with an USB-C to USB-C cable. 5. The LED of the Parrot Skycontroller 4 flashes briefly in green: it is acknowledging ANAFI Ai. 6. Wait for synchronization between Parrot Skycontroller 4 and ANAFI Ai (steady dark blue LED on the controller): check that the left trigger of the Parrot Skycontroller 4 activates the drone’s gimbal to ensure the synch is complete. -
Page 20: Connectivity
Inserting the SIM card The SIM card slot of ANAFI Ai is located on the right side of the drone, under the “4G” cover. To install the SIM card, lift the cover open and insert the SIM card straight into the slot, shortest side first and connectors turned to the back of the drone –... -
Page 21: Activating The Sim Card
Activating the SIM card To activate the SIM card, power the ANAFI Ai ecosystem on as you would for a flight. The following screen pops up. Select “Configure” to activate the SIM card. SIM card popup If you have not created your Parrot.Cloud account yet, you can do it now: tap “Please register”... - Page 22 ANAFI Ai If the popup does not appear, access the “Cellular access” menu from the drone page of the dashboard, as on the following screenshot, displaying “SIM locked”. Tap “Cellular access” to unlock SIM Enter your PIN when prompted. After a few seconds, the 4G protocols are activated.
-
Page 23: 4G Flying
4G flying When the SIM card has been activated, each time the ecosystem is powered on (or each time it connects to a 4G network), FreeFlight 7 confirms the availability of 4G with the popup shown on the following screenshot. 4G connected Wi-Fi is about to break up, due to powerline interferences 4G has automatically taken over... -
Page 24: Obstacle Avoidance
OA activated, degraded operation red: OA activated, but inoperative Parrot strongly recommends deactivating the OA whenever the icon is NOT green – unlike in the following screenshot. OA activated and operating optimally Obstacle avoidance and manual piloting The OA is designed to help the pilot, not to replace his control over the drone. -
Page 25: Obstacle Avoidance And Automated Flights
When you fly the drone in a direction where the OA cannot detect obstacles (directly sideways or sideways and toward the back), a notification appears on your screen as on the screenshot below. “Drone blind” notification Face the drone in the direction of the motion to avoid getting this notification. Obstacle avoidance and automated flights During automated flights, the drone manages its trajectory to keep the OA fully functional. -
Page 26: Obstacle Avoidance: Screenshots
The following screenshots illustrate situations where the OA should be deactivated to avoid piloting errors. Orange shield, GPS downgraded: Parrot recommends deactivating the OA. Red shield: deactivate the OA immediately. If you see the “stereo camera failure” as in the latest screenshot, land your drone as... -
Page 27: Calibrations
CALIBRATIONS This section presents the calibration procedures required by the ecosystem: one procedure for the Skycontroller 4’s magnetometer and four procedures for ANAFI Ai’s systems: Gimbal calibration Horizon correction Magnetometer calibration Stereo camera calibration (Obstacle detection) Skycontroller 4 FreeFlight 7 may require you to calibrate the magnetometer of your Skycontroller 4 if it has been exposed to a strong magnetic field or if your flying conditions change radically –... -
Page 28: Gimbal
Gimbal Access calibration options from the ANAFI Ai page of the dashboard. Before starting this procedure, you need to position ANAFI Ai on a flat and perfectly level surface. A N A F I A i calibration menu Use the first option to perform a gimbal calibration, that is more precise than the quick calibration which occurs when ANAFI Ai is powered on. -
Page 29: Correct Horizon (Exceptional Procedure)
Correct horizon (exceptional procedure) Your ANAFI Ai’s camera has been factory-calibrated with unparalleled precision. Unlike the calibration of ANAFI Ai or that of the Parrot Skycontroller 4, which must be carried out periodically, the camera calibration must not be carried out unless it appears necessary –... -
Page 30: Magnetometer
ANAFI Ai Horizon corrected When you have straightened the tilt of the camera, tap the “<” icon on the top left of the screen to confirm your setting and exit camera calibration. Magnetometer When the calibration of the magnetometer of the drone is required, and notably each time you change your drone’s battery, FreeFlight 7 guides you through the following... - Page 31 Calibrating the Z axis Calibrating the Y axis Calibrating the X axis v.early.1.01 – published on November 2, 2021...
-
Page 32: Obstacle Detection
Optimal calibration (120 meters) option provides the best quality calibration, and must be favored whenever possible. Tap an option to select it: ANAFI Ai takes off, reaches the selected height, performs a 360 and descends. Calibration ongoing... - Page 33 When prompted by FreeFlight 7, land the drone to complete the calibration. Calibration successful confirmation Drone landed, calibration sequence complete v.early.1.01 – published on November 2, 2021...
-
Page 34: Pre - Flight Checklist
• Make sure ANAFI Ai’s battery is securely installed on the drone’s body. • Make sure ANAFI Ai’s lenses are clean – if you need to clean them, do it before you power the drone on: hold the gimbals between two fingers so that you do not pressure their mechanisms when you clean the lens, and gently wipe the lens with a microfiber cloth. -
Page 35: Getting Started
Parrot recommends you always run a full charge of your smart battery before flying ANAFI Ai. 2. If you want to use the controller and enjoy the full ANAFI Ai experience, charge Parrot Skycontroller 4. 3. Check that your flying zone is safe and clear. -
Page 36: Taking Off
Power ANAFI Ai on and position the drone on your flat, open hand. On the left of the screen of your device, a “Handlaunch Available” interface appears. -
Page 37: Flying
Move to the right Turn left Move to the left Note that you can modify ANAFI Ai’s controls through the SETTINGS menu of FreeFlight 7. Refer to the “SETTINGS/ Controls” section of this guide for additional information. v.early.1.01 – published on November 2, 2021... -
Page 38: Returning Home
FreeFlight 7 alerts you that it will enter automatic RTH mode. If you feel confident you can bring ANAFI Ai back to its take-off point or if you wish to land it at a different location, you can cancel the auto-RTH directly from the alert pop-up. -
Page 39: Pilot Rth
(whether linked to a Parrot Skycontroller 4 or not) at the exact moment an RTH button is activated – or to the last known coordinates of the device, in case it has lost GPS synch. -
Page 40: Landing
Fly ANAFI Ai between 60 cm (2 ft) and 120 cm (4 ft) directly over your open hand. Press the button of your Skycontroller 4: ANAFI Ai lands on your hand. -
Page 41: Smart L I P O Battery
ANAFI Ai, or not. Battery removal To remove the smart battery from the drone, unfold the arms of ANAFI Ai and press the push-button located under the battery and disengage it from the drone. Battery installation... -
Page 42: Battery Care And Safety
65%. If you leave your ANAFI Ai battery for 12 days, you will find out its power button does not activate the charge level LED indicators. The battery needs to be charged to exit the wintering mode and start operating as described in the earlier paragraphs: this behavior preserves the battery over time. - Page 43 If the behavior of your battery is not consistent with the elements contained in this section, and if you cannot get it to power your ANAFI Ai, you must hard reset your battery: plug it to a power source with the enclosed cable, then keep the battery’s power button pressed for 15 seconds (regardless of the...
-
Page 44: Media Retrieval
Installing and retrieving the microSD card The micro SD card slot of ANAFI Ai is located on the left side of the drone, under the “SD” cover. To install the micro SD card, lift the cover open and insert the micro SD card straight into the slot, shortest side first and connectors turned to the back of the drone. -
Page 45: Freeflight 7 Gallery
To access the Gallery from the dashboard of FreeFlight 7, tap the “Gallery” box. If ANAFI Ai is powered on and connected to the device (directly or through the Parrot Skycontroller 4), the FreeFlight 7 Gallery displays the microSD card media, by default. - Page 46 ANAFI Ai Confirm your selection from the next screen to launch the formatting. Note that both options delete all microSD card contents.
-
Page 47: Introducing Free Flight
LIGHT The HUD (head-up display) interface of FreeFlight 7 is the companion to ANAFI Ai. It enables you to access all the features of ANAFI Ai, from the screen of your device, at the touch of your thumbs. This section explores FreeFlight 7 functions, starting with a presentation of HUD information. -
Page 48: Hud Slider Management
Parrot therefore recommends you always check both your FreeFlight 7 HUD’s GPS icons are green (and not red), before you make your ANAFI Ai take off. HUD Slider Management The slider which separates the video feed from the map (or 3D view) enables you to configure your screen to your liking or to the specifics of your mission. - Page 49 Slider: more map Keep sliding it toward the left and hold the position for a second to maximize the map (or 3D view) and minimize the video feed into a small rectangular window, top left of the interface. Slider: video feed minimized Tap the video window to revert to default.
- Page 50 ANAFI Ai Slider: minimap mode Tap the minimap (or 3D window) to revert to default view.
-
Page 51: Settings
ETTINGS Access FreeFlight 7 settings through the icon on the extreme right of the top bar of the HUD. This section presents the Quick and Controls settings. Quick For each item, tap to toggle (Map or 3D view) or activate and highlight – as Auto-record on the following screenshot. -
Page 52: Advanced Settings
For each item, the default value (DV) is displayed in bold characters or highlighted on screenshots. Behaviour The Behaviour settings allow you to adapt the flight behavior of ANAFI Ai for each mode (“Film”and “Sport”). Use each slider to fix your values. -
Page 53: Interface
Interface For each item, Map type or Measurement system, tap an option to select it. Interface settings Tap “RESET INTERFACE SETTINGS” on the bottom of the page to reset to default. Geocage The Geocage is activated (“On”) by default, with the following values: Height: 30 m (configurable from 1 m to 150 m) Distance: 100 m (configurable from 10 m to 4 km) Tap “Off”... -
Page 54: Rth
ANAFI Ai Tap “RESET GEOCAGE PREFERENCES” on the bottom of the page to reset to default. When the Geocage is activated, FreeFlight 7 displays an alert when the drone approaches the set limit, and it stops when it reaches them, as in the screenshot below. -
Page 55: Recording
Tap “RESET RTH PREFERENCES” on the bottom of the page to reset to default. Recording Recording settings enable you to select camera options, both in photo and video modes. The default values are displayed in the following screenshot. Recording settings About Overexposure display: when this setting is activated, the HUD of FreeFlight 7 shows all overexposed areas of the screen as hatched, which enables you to fine-tune your framing, your EV settings, or both. -
Page 56: Connection
ANAFI Ai Connection Connection settings let you manage your 4G connection, change your ANAFI Ai’s Wi-Fi network name, password & band, and broadcast your DRI. The following screenshots highlight default values for each item. Connection settings: Cellular data Connection settings: Wi-Fi... - Page 57 (where applicable). Tap “RESET WI-FI PREFERENCES” on the bottom of the page to reset to default. FreeFlight 7 must be connected to ANAFI Ai for this button to appear. v.early.1.01 – published on November 2, 2021...
-
Page 58: Videos , Photos And Panoramas
By default, ANAFI Ai and FreeFlight 7 are set to start recording a video as soon as ANAFI Ai takes off. This literally means all you have to do, to start filming, is to fly ANAFI Ai into the sky! - Page 59 Video fps menu When you are happy with your settings and your framing, press the hard shutter button on the right of Parrot Skycontroller 4 (or tap the soft shutter button of the HUD) to start filming. The round soft shutter button of the HUD turns into a square and displays a double timer: time since the video started (main timer, top) and remaining filming time (small timer, bottom).
-
Page 60: Taking Photos
ANAFI Ai Taking photos To access the photo options of ANAFI Ai tap the “Mode” box in the bottom bar of the HUD. Six photo modes are available on ANAFI Ai: Photo (single shot), Timelapse, GPS Lapse, Panorama (4 formats), Bracketing and Burst. - Page 61 Photo options When you are happy with your settings and your framing, press the hard shutter button on the right of the Parrot Skycontroller 4 (or tap the soft shutter button of the HUD) to take a photo. In “Photo” mode, the screen flashes in black and white to confirm a picture has been taken.
- Page 62 In “GPS Lapse” mode, the screen flashes in black and white to confirm a picture has been taken. Control and move ANAFI Ai: when the drone reaches any point on a 5 to 200- meter bubble around the initial photo, depending on your option choice, the drone takes another photo, and so on until you press the shutter button again to stop the GPS Lapse.
-
Page 63: Creating Panoramas
Make sure no object nor subject are present in a 10 meters (30ft) radius around ANAFI Ai. Bear in mind ANAFI Ai locks the exposure (refer to the “AE Lock ” section of this guide for additional information on exposure locking) of the frame with which you start your panorama. - Page 64 ANAFI Ai takes 42 photos in about 85 seconds Super Wide: ANAFI Ai takes 9 photos in about 18 seconds To download the Panorama pictures to your device, land ANAFI Ai From the homepage of FreeFlight 7, tap the “MEDIAS Tile” to access the Gallery. Like other medias, Panoramas are marked with their distinct icon and a green download box, which shows the size of the corresponding series of pictures.
- Page 65 iOS Phone Gallery with 3 out of 4 icon filters activated Finally, select the panorama you want to generate from your Local gallery: FreeFlight 7 displays the following screen. iOS panorama generation page Tap “Generate” to create the panorama (or browse the individual pictures with the slider on the left).
- Page 66 ANAFI Ai iOS panorama format options When the panorama creation is complete, FreeFlight 7 adds the result at the top of the corresponding photo folder.
-
Page 67: Gimbal Tilt And Zoom Controls
IMBAL TILT AND ZOOM CONTROLS ANAFI Ai features a controllable gimbal (180° tilt range, from nadir to zenith) and a 6x zoom. This section presents these features and the way to activate them. Gimbal tilt control ANAFI Ai’s gimbal tilt control is activated through the left trigger of Parrot Skycontroller 4. - Page 68 ANAFI Ai 1080p 4x (max lossless) zoom As already mentioned, ANAFI Ai presents no lossless zoom capabilities for pictures: the zoom is deactivated by design in WIDE formats (JPEG and DNG+JPEG), and it has an impact on the resolution of the pictures in JPEG RECT format.
-
Page 69: Advanced Imaging
DVANCED IMAGING ANAFI Ai is set to deliver high quality and balanced 4K videos and 48MP photos, out of the box. Some image enthusiasts and all professional directors, videographers and photographers, however, will find their way through pro-imaging settings. This section is designed to help you exploit manual settings and develop your filming and photography styles. -
Page 70: Iso Value (Iso)
It can also be used for slow shots, up to 1/15 second for the photo mode. Note that ANAFI Ai can shoot pictures and videos when it is not flying. You can even hold it in your hand and use it as a premium stabilized 4K video and photo camera. - Page 71 Tap the WB box to open the white balance options. Select the WB option that is best suited for your shooting conditions, your subject, or both. The display of the HUD reflects your settings and helps you make the best choice. Auto WB Incandescent WB Fluo WB...
-
Page 72: Lock Ae
A yellow “Lock AE” box appears under the “Next available action” box, at the center of the top bar of the HUD. Move ANAFI Ai around or tilt its gimbal to change the frame: the exposure settings remain as they were when you activated the function. - Page 73 Exposure is locked on a sunny part of the picture: shutter speed is set at 1/1250 s and the image is correctly exposed Exposure is locked in the shadow: shutter speed is set at 1/200 s and the image is overexposed v.early.1.01 –...
-
Page 74: Hdr
Select “HDR On”: a HDR notice appears in black inside a yellow box, at the center of the top of the HUD. Press the hard shutter button on your Parrot Skycontroller 4 (or the soft shutter button of the HUD) to start filming in HDR or to take an HDR photo. -
Page 75: P-Log
SETTINGS/Recording” section of this guide for additional details on HDR and video encoding options selection. P-Log The P-Log option is also available through the “HDR box”. This alternative imaging style makes images a little less contrasted and saturated: P-Log style is ideal for videos you want to edit and process using professional grading tools and filters. -
Page 76: Piloting Modes
Manual flight The Manual flight mode is ANAFI Ai’s default mode. It enables you to pilot the drone and fully control its camera tilt and zoom. When you release the commands in Manual flight mode, ANAFI Ai stays in position, hovering. - Page 77 Cameraman: target selected Fly ANAFI Ai around your target. The drone keeps your target at the center of the frame. Therefore, if you push the right joystick of the Parrot Skycontroller 4 to the left, ANAFI Ai circles around your target clockwise. If you push the right joystick of the Parrot Skycontroller 4 to the right, ANAFI Ai circles around your target counterclockwise.
-
Page 78: Touch & Fly: Waypoint
Single tap a point on the map to select a destination for ANAFI Ai: this point is marked as a black circle with a green border. Use the sliders on the right of the screen to set the drone’s altitude and speed. -
Page 79: Touch & Fly: Poi
Long press a point on the map to create a POI for ANAFI Ai: this point is marked as a green square with a white border. Use the slider on the right of the screen to set the altitude of the POI. - Page 80 However, you can still control the zoom, with the right trigger. When you release the commands in Touch & Fly POI mode, ANAFI Ai hovers and and keeps the POI at the center of the frame.
-
Page 81: Missions
Tap Flight Plan from the “PILOTING MODE” box menu. The map of your surroundings opens full screen. If you are not connected to ANAFI Ai, the minimized live view is black, as on the screenshots that follow. Find your next dream flying spot on the map. - Page 82 ANAFI Ai’s camera. iOS: initial waypoint Tap the white arrow and hold it to move it around. In this example, we want ANAFI Ai to frame the lighthouse as it starts the flight. iOS: initial waypoint, with the camera framing the lighthouse...
- Page 83 Add waypoints to tour the area and end your Flight Plan where you intend to land. iOS: full Flight Plan The tip of the peninsula is a POI: we want ANAFI Ai to focus on it while it flies around it. Tap it and hold your finger on the screen to call choices (POI/Close).
- Page 84 POI. iOS: open waypoints Tap waypoints to link them to the POI. In this example, we want ANAFI Ai to film the tip of the peninsula as it flies around it: we have selected the three waypoints to the left of the peninsula.
- Page 85 Tap a green waypoint to edit it: use the slider on the right of the screen to modify its height; tap and move its white arrow to set the direction of ANAFI Ai’s camera. For this example, we had the drone point toward the land at most steps of the Flight Plan, and toward the lighthouse at take-off and landing, with a descent from 30 to 3 meters between the last two waypoints.
-
Page 86: Vehicle
FreeFlight 7, ANAFI Ai lands at, or hovers over, the last waypoint you have set. That is why, for this section, we have chosen to consider that ANAFI Ai’s final waypoint is also its landing spot. -
Page 87: Photogrammetry Missions
The ASPRS was created in 1934, but the field of photogrammetry has since greatly benefited of the emergence of flying cameras such as Parrot drones. One of the leaders of the field is Pix4D, which became a Parrot Group company in 2012. -
Page 88: Simple
ANAFI Ai From the following screen, either connect to your Pix4Dcloud account, or start your trial. FreeFlight 7 Pix4D options Finally, select a photogrammetry mission type. FreeFlight 7 photogrammetry type selection Simple Simple grid photogrammetry flights are useful to create 2D maps. Simple grids can be precisely adapted to any shape, to match the borders of a field or a coastline, for example. -
Page 89: Double
Select a side overlap. Select a front overlap. Select a camera angle. Select a drone speed. Select your RTH option (Yes or No) Select your 4G upload option (Yes or No) Tap “Done” when ready. Tap “Play” to launch the flight. FreeFlight 7 Simple photogrammetry Double Double grid photogrammetry flights are useful to create 3D maps or 3D models of square... -
Page 90: Circular
ANAFI Ai FreeFlight 7 Double photogrammetry Circular Circular photogrammetry flights are useful to model an isolated building or structure in 3D. Follow these steps to program and launch a Circular mapping flight. Tap the map to create a square flight area. -
Page 91: Automatic
Tap “Play” to launch the flight. FreeFlight 7 Automatic photogrammetry An example of Pix4Dcloud 3D model If you have feedback or comments about the v.early.1.01 of this guide, please reach out to: technical.writer@parrot.com v.early.1.01 – published on November 2, 2021...
Need help?
Do you have a question about the ANAFI Ai and is the answer not in the manual?
Questions and answers