Advertisement
Available languages
Available languages
Quick Links
Advertisement

Related Manuals for Uberhaus 72255157


Summary of Contents for Uberhaus 72255157
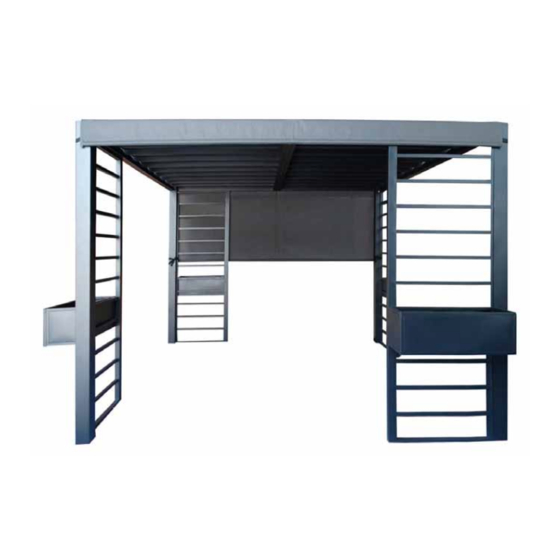
- Page 1 Model / Modèle User Manual...
- Page 2 and for to a days; 4 in. (10 cm). in these conditions (or similar conditions) 1. Visible movement of support members, roofing panels or sagging roofline. 2. Creaks or audible noise from the gazebo. 3. Cracks, fractures or malformation of support member or roof panels.
- Page 3 4. gazebo Damaged or missing fasteners. • DO NOT hang any weights on the roof frame. • DO NOT lean a ladder against the gazebo or climbing onto the roof. • Keep away from heat or flames. • If the gazebo is not be used for a long period of time (e.g. during winter time), disassemble it and store it in a clean, dry environment.
- Page 6 Step 1: 1. Attach the Bracing Bar (I) to the Left Lintel (E) and the Right Lintel (F) with the Bolt (X). (Pay attention to the direction of the Bracing Bar (I) during assembly.) 2. Attach the Bracing Bar (H) to the Middle Lintel (G) with the Bolt (X). (Pay attention to the direction of the Bracing Bar (H) during assembly) Step 2: 3.
- Page 7 5. At the same time, attach the Outer Connector (R) to the Connector (P) with the Bolt (U). Step 3: 6. Attach the Left Lintel (C) and the Right Lintel (D) to the Connector (P) with the Bolt (U). 7. At the same time, attach the Lintel Cover (Q) to the Connector (P) with the Bolt (U). Note: These above two don't need to be temporarily secured with bolts.
- Page 8 Step 4: 8.Insert the Middle Lintel (G) into the Outer Connector (S). 9. Attach the Middle Lintel (G) to the Connector (P) with the Bolt (U). 10. At the same time, attach the Outer Connector (S) to the Connector (P) with the Bolt (U). Page...
- Page 12 Step 10: 16. Attach the Baskets Accessories (M) to the Baskets Accessories (K/L) with the Bolt (W) 17. Hang the whole basket on the Screen (A) and then attach the Baskets Accessories (N) into the bottom side of the Baskets Accessories (K, L, M). Page...
- Page 13 Step 11: O/O1 18. Insert the Rod (O1) into the Rod (O). Insert the rod assembly into the Canopy Fabric (O2). Repeat for the remaining rod assembies. Place the Canopy Fabric (O2) over the gazebo.Tie the corners of the Canopy Fabric (O2) to each post. 19.
- Page 14 lisez et resserrez-les lorsque nécessaire. • N'UTILISEZ PAS l'abri-soleil et N'ENTREZ PAS à l'intérieur de celui-ci lors de conditions extrêmes (par ex., lors des orages, des vents violents, du grésil, de la neige abondante, etc.). Dans ces conditions, il pourrait basculer et causer des blessures graves aux occupants.
- Page 15 1. Un mouvement visible du cadre ou des panneaux du toit, ou un affaissement du toit. • NE PAS poser d’échelle contre l’abri-soleil ou en utiliser pour grimper sur le toit. • Gardez l'abri-soleil loin des sources de chaleur ou des flammes. Requis pour l'assemblage : Avant de commencer l'assemblage du produit, vérifiez si toutes les pièces sont présentes.
- Page 19 5. En même temps, attachez le raccord extérieur (R) au raccord (P) à l'aide d'un boulon (U). Étape 3 : 6. Fixez le linteau gauche (C) et le linteau droit (D) au raccord (P) à l'aide d'un boulon (U). 7. En même temps, attachez le couvercle du linteau (Q) au raccord (P) à l'aide d'un boulon (U).
- Page 20 Étape 4 : 8. Insérez le linteau du milieu (G) dans le raccord extérieur (S). 9. Fixez le linteau du milieu (G) et le raccord (P) à l'aide d'un boulon (U). 10. En même temps, attachez le raccord extérieur (S) au raccord (P) à l'aide d'un boulon (U).
- Page 21 Étape 5 : 11. Fixez le linteau gauche (C) et le linteau droit (D) au poteau (B) à l'aide d'un boulon (U). Étape 6 : 12. Fixez le linteau gauche (E) et le linteau droit (F) au poteau (B) à l'aide d'un boulon (U). Page...
- Page 22 Étape 7 : W W1 13. Attachez le moustiquaire (A) au poteau (B) et le linteau (D/E) à l'aide d'un boulon (W1). Page...
- Page 25 Étape 11 : O/O1 18. Insérez la tige (O1) dans la tige (O). Insérez l'ensemble de la tige dans la toile (O2). Répétez pour l'ensemble des tiges restantes. Placez le tissu de toile (O2) sur l'abri-soleil. Attachez les coins du tissu de toile (O2) à...
-
Page 26: Warranty
GARANTIE Merci d’avoir acheté ce produit UBERHAUS. Ces produits ont été conçus pour répondre à des normes de qualité très strictes et sont garantis pour 1 an contre tout défaut de fabrication. Cette garantie n’a aucune incidence sur vos droits légaux.
Need help?
Do you have a question about the 72255157 and is the answer not in the manual?
Questions and answers