Table of Contents
Advertisement
Quick Links
Advertisement
Table of Contents

Related Manuals for Electrolux EEG67415L


Summary of Contents for Electrolux EEG67415L
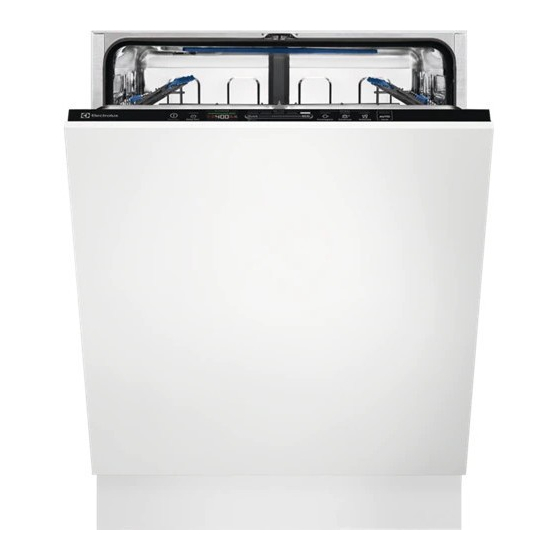
- Page 1 EEG67415L Dishwasher User Manual...
-
Page 2: Table Of Contents
13. ENVIRONMENTAL CONCERNS..............28 WE’RE THINKING OF YOU Thank you for purchasing an Electrolux appliance. You’ve chosen a product that brings with it decades of professional experience and innovation. Ingenious and stylish, it has been designed with you in mind. So whenever you use it, you can be safe in the knowledge that you’ll get great results every time. - Page 3 ENGLISH responsible for any injuries or damage that are the result of incorrect installation or usage. Always keep the instructions in a safe and accessible location for future reference. 1.1 Children and vulnerable people safety This appliance can be used by children aged from 8 •...
-
Page 4: Safety Instructions
Follow the maximum number of 13 place settings. • If the supply cord is damaged, it must be replaced by • the manufacturer, its Authorised Service Centre or similarly qualified persons in order to avoid a hazard. WARNING: Knives and other utensils with sharp •... - Page 5 ENGLISH 2.4 Use • Make sure not to cause damage to the mains plug and to the mains • Do not put flammable products or cable. Should the mains cable need to items that are wet with flammable be replaced, this must be carried out products in, near or on the appliance.
-
Page 6: Product Description
2.6 Disposal separately: These lamps are intended to withstand extreme physical conditions in household appliances, WARNING! such as temperature, vibration, Risk of injury or suffocation. humidity, or are intended to signal • Disconnect the appliance from the information about the operational mains supply. -
Page 7: Control Panel
ENGLISH 4. CONTROL PANEL On/Off button / Reset button EXTRAS buttons Delay Start button AUTO Sense program button Display MY TIME selection bar 4.1 Display 4.2 ECOMETER The ECOMETER indicates how the programme selection impacts energy and water consumption. The more bars are on, the lower the consumption is. -
Page 8: Programme Selection
5. PROGRAMME SELECTION 5.1 MY TIME 5.2 AUTO Sense MY TIME selection bar allows to select a The AUTO Sense programme suitable dishwashing cycle based on automatically adjusts the dishwashing programme duration. cycle to the type of load. The appliance senses the degree of soil and the amount of dishes in the baskets. - Page 9 ENGLISH Programme Dishwasher Degree of Programme phases EXTRAS load soil • Prewash Not applicable Pre-rinse Crockery, Fresh, lightly • Dishwashing 60 °C • ExtraPower cutlery dried-on • Intermediate rinse • GlassCare • Final rinse 50 °C • ExtraHy‐ • AirDry giene 1h 30min Crockery,...
-
Page 10: Basic Settings
Water (l) Energy (kWh) Duration (min) 1) 2) Programme 2h 40min 12.0 1.009 10.5 0.735 AUTO Sense 11.9 0.964 Machine Care 0.636 1) The pressure and the temperature of the water, the variations of the mains supply, the options, the quantity of dishes and the degree of soil can change the values. - Page 11 ENGLISH available settings. For each setting, a The lights related to the Previous, OK dedicated bar of the ECOMETER and Next are on. flashes. How to change a setting The order of the basic settings presented in the table is also the order of the Make sure the appliance is in setting settings on the ECOMETER: mode.
- Page 12 Water hardness German de‐ French de‐ mmol/l Clarke de‐ Water softener grees (°dH) grees (°fH) grees level 47 - 50 84 - 90 8.4 - 9.0 58 - 63 43 - 46 76 - 83 7.6 - 8.3 53 - 57...
- Page 13 ENGLISH the next programme. This activity Acoustic signals sound also increases the total water consumption of when a malfunction of the a programme by additional 4 litres and appliance occurs. It is not the total energy consumption of a possible to deactivate these programme by additional 2 Wh.
-
Page 14: Before First Use
6.6 Key tones The latest programme that was completed before the appliance The buttons on the control panel make a deactivation is saved. It is then selected click sound when you press them. You automatically after you activate the can deactivate this sound. -
Page 15: Daily Use
ENGLISH 7.2 How to fill the rinse aid CAUTION! dispenser Only use rinse aid designed specifically for dishwashers. 1. Open the lid (C). 2. Fill the dispenser (B) until the rinse aid reaches the marking ''MAX''. 3. Remove the spilled rinse aid with an absorbent cloth to prevent excessive foam formation. - Page 16 The upper ends of the two By default, options must be vertical ribs inside the activated every time before compartment (B) indicate you start a programme. the maximum level for filling If the latest programme the dispenser with gel (max.
-
Page 17: Hints And Tips
ENGLISH 8.7 How to cancel the delay paused. The display shows the current countdown status. After closing the door, start while the countdown the countdown resumes. operates Opening the door while the appliance operates may Press and hold for about 3 seconds. affect the energy The appliance returns to the programme consumption and the... - Page 18 • You can use dishwasher detergent, • Make sure that the water softener rinse aid and salt separately or you level is correct. If the level is too high, can use the multi-tablets (e.g. ''All in the increased quantity of salt in the 1'').
-
Page 19: Care And Cleaning
ENGLISH 9.6 Unloading the baskets • Put hollow items (cups, glasses and pans) with the opening facing 1. Let the tableware cool down before downwards. you remove it from the appliance. Hot • Make sure that glass items do not items can be easily damaged. - Page 20 CAUTION! If unable to remove the foreign objects, contact an Authorised Service Centre. 1. Disassemble the filters system as 2. Remove the filter (C) out of filter (B).
- Page 21 ENGLISH 8. Put back the filter (B) in the flat filter (A). Turn it clockwise until it locks. 3. To install the spray arm back, press it downwards. CAUTION! An incorrect position of the filters can cause bad washing results and damage to the appliance.
- Page 22 1. Move the upper basket to the lowest level to reach the spray arm more easily. 2. To detach the spray arm (C) from the 4. To install the spray arm back, press...
-
Page 23: Troubleshooting
ENGLISH 11. TROUBLESHOOTING to contact an Authorised Service WARNING! Centre. Improper repair of the Refer to the below table for information appliance may pose a on possible problems. danger to the safety of the user. Any repairs must be With some problems, the display shows performed by qualified an alarm code. - Page 24 Problem and alarm code Possible cause and solution The temperature of the wa‐ • Make sure that the temperature of the inlet water ter inside the appliance is does not exceed 60°C. too high or malfunction of • Switch the appliance off and on.
- Page 25 ENGLISH Problem and alarm code Possible cause and solution The appliance trips the cir‐ • The amperage is insufficient to supply simultaneous‐ cuit-beaker. ly all the appliances in use. Check the socket amper‐ age and the capacity of the meter or turn off one of the appliances in use.
- Page 26 Problem Possible cause and solution Poor drying results. • Tableware was left for too long inside the closed appliance. Activate the function AirDry to set the automatic opening of the door and to improve the drying performance. • There is no rinse aid or the dosage of rinse aid is not sufficient.
-
Page 27: Technical Information
ENGLISH Problem Possible cause and solution Limescale deposits on the • The level of salt is low, check the refill indicator. tableware, on the tub and on • The cap of the salt container is loose. the inside of the door. •... -
Page 28: Environmental Concerns
It is possible to find information related to For more detailed information about the the performance of the product in the EU energy label, visit EPREL database using the link https:// www.theenergylabel.eu. eprel.ec.europa.eu and the model name and product number that you can find on the rating plate of the appliance. - Page 32 www.electrolux.com/shop...
Need help?
Do you have a question about the EEG67415L and is the answer not in the manual?
Questions and answers