Vimar ELVOX 41018 User Manual
3.5" display
Hide thumbs
Also See for ELVOX 41018:
- Manual (8 pages) ,
- Installation and user manual (45 pages) ,
- Installer's manual (15 pages)
Table of Contents
Advertisement
Quick Links
Advertisement
Table of Contents

Related Manuals for Vimar ELVOX 41018


Summary of Contents for Vimar ELVOX 41018
- Page 1 User Manual 41018 3.5” display...
- Page 2 41018...
-
Page 3: Table Of Contents
41018 Index Informazioni generali ...............................4 Descrizione ................................4 Tasti e connessioni .............................4 Funzionamento .................................5 Utilizzo Filtri Rubrica ............................6 Filtri Iniziali ..............................6 Filtro Edificio .............................6 Filtro Scala ..............................7 Visualizzazione Informazioni aggiuntive ......................8 Informazioni di chiamata ...........................8 Messaggi di notifica ............................9 Funzioni ...................................10 Chiamata da rubrica ad interno ........................10 Ricerca di nome in rubrica tramite tastiera (multitap) ..................10 Chiamata a Centralino .............................11... -
Page 4: Informazioni Generali
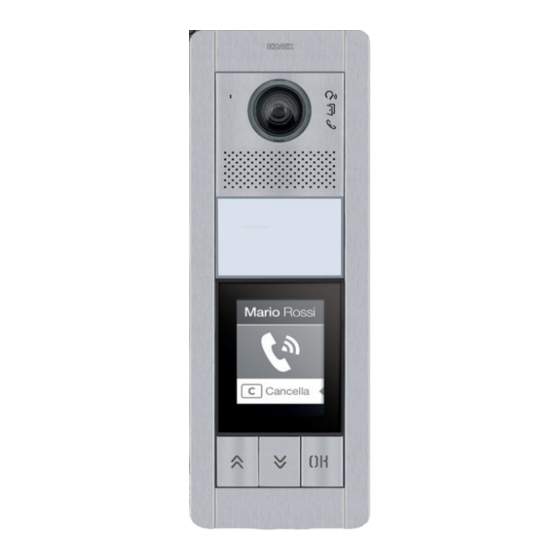
41018 General information Description 3.5” display for audio or audio/video electronic units, equipped with: • 3 buttons to call from contacts list with white LED backlighting • 1 input configurable as external CA lock release push button or PA door open, to be completed with front cover. The display module provides the function of calling via the contacts list of the Outdoor Station on which it is installed. -
Page 5: Funzionamento
41018 Operation In stand by, the Display shows a Home Page, which contains the elements necessary to access the functions available. The functionality and consequently the appearance of the Home Page vary according to the contacts list programming (up to 8192 entries) and the entry control codes (up to 2000 codes for Due Fili Plus installations). Both can be programmed using the configuration software on a PC, or directly using the related... -
Page 6: Utilizzo Filtri Rubrica
41018 Using Contacts List Filters Depending on the programming carried out with SaveProg, a series of filters can be enabled to grant the user access targeted to his or her needs. The filters available are: • Initials filter • Building filter •... -
Page 7: Filtro Scala
41018 Stair Filter The Stair filter lets you access the subset of users associated with a specific stair or all users. It can be combined with the two previous filters. In particular, with the buildings filter you obtain: Stairs Users Switchboard Buildings Lybra... -
Page 8: Visualizzazione Informazioni Aggiuntive
41018 Additional Information display When a user stops on an entry in the contacts list for more than 3 seconds, additional information is displayed. For Due Fili Plus installations, in order of priority: • if present, the string of the User Information field is displayed; •... -
Page 9: Messaggi Di Notifica
Check the module connections and restart the electronic unit For Due Fili Plus installations: upgrade the display module and the audio/video module to the latest FW release, which can be downloaded from the Vimar website, along with SaveProg. UPGRADE THE MODULES For IP installations: Secondary module firmware updating in progress. -
Page 10: Funzioni
41018 Functions The following is possible from the Display: • Calling via the contacts list of the Outdoor Station on which it is installed. • Calling an Indoor Station from the keyboard (only if the Outdoor Station is fitted with a keyboard art. 41019) •... -
Page 11: Chiamata A Centralino
41018 Calling a Switchboard To call a switchboard, if configured in the contacts list, there is a quick item in the main menu. In addition, any other switchboards are accessible as contacts list items. Switchboard Contacts List Select Press to select Switchboard Press to confirm. -
Page 12: Controllo Varchi
41018 Entry control When there is a keyboard on the Outdoor Station, the display shows the feedback of the access control mode operation. This mode is used to activate a previously configured control (e.g. lock, relay, etc.). Code Code Code Confirm Confirm Confirm... -
Page 13: Configurazione Da Dispositivo
41018 Device Configuration The configuration menu allows you to set the parameters of the Display and of the Outdoor Station connected. Two menus are available, one with Administrator functions and the other with Installer functions Contacts Outdoor Accesses Display Info System Change Password List... -
Page 14: Menù Amministratore
41018 Administrator Menu Settings Contacts List Accesses Display Outdoor Station Password Back The display shows the main entries, select the desired entry press to confirm and enter the submenu or “back” to exit the menu (you will need to re-enter the password to re- enter) Contacts List Shows the Contacts List section, where some of the Outdoor Station contacts list parameters... -
Page 15: Rubrica
41018 Contacts List This section is used to manage the user contacts list stored in the Outdoor Station Contacts List Users Bash Malik Edit Boone Maria Back Brooks Rosema Bryan Lopez Boschi Rosanna Callisto Mario Press to confirm selects user to edit For each user, the settable fields are: Name Indoor Station Name... -
Page 16: Accessi
41018 Accesses This section is used to manage the codes access tags. Codes Accesses Edit Access Codes Access Tag Delete Back Del. All Back Press to select one of the entries. Press to confirm. Both for the access codes and tags, you can: –... - Page 17 41018 Delete/Delete all These sections are used to delete one or all the access codes associated with an actuator Actuators Codes F1 ENTRANCE PAN. 45002000 ENTR.PAN.LOCK 31304027 67800034 Press to select the actuator Press to confirm Press to select the code to delete Press to continue Delete Performed...
- Page 18 41018 Access tag This section is used to manage the access tags associated with an actuator Edit/Enter These sections are used to edit an existing tag or enter a new one, associating it with an actuator. The data fields to enter are the same for both the entry and the edit function. Acquisition Both when deleting and when entering a new one, the word “acquisition”...
- Page 19 41018 Name MARIO Name – Type – Confirm Actuator – Confirm Back Back Press to select the function Press to confirm Enter the tag name on the keyboard Press to confirm Type Name Administrator Type – User Actuator – Back Confirm Back Press to select the function...
- Page 20 41018 Delete/Delete all These sections are used to delete one or all the tags stored Access Tag ACQUISITION Acquire the tag or scroll the list of existing tags, in the first case the word “acquisition” appears Acquire tag from module 41017 Delete Performed Confirm...
-
Page 21: Display
41018 Display This section is used to configure various display parameters, such as the interface language, the navigation mode, the display size, and other characteristics such as brightness, colour, etc. and view the logo on the Home Page. Display Language Menu Back Press to select one of the entries... - Page 22 41018 Menu This section is used to select the style of the Home Page. Menu Menu Menu Navigation Direct Direct Font Navigable Navigable Back Expanded Expanded Back Back Press to modify style of the Home Page viewed and related access modes to the available functions. Select the mode from the following: Switchboard Switchboard...
- Page 23 41018 Menu Font Font Navigation Normal Normal Font Large Large Back Back Back Press edit font size to improve readability. Select the mode from the following: RICERCA RICERCA Search by SEARCH BY PER NOME PER NOME name NAME CHIAMATA CHIAMATA Call by no.
- Page 24 41018 This section is used to set varies display parameters. Brightness Brightness Brightness Colours Standby Back Back Back Press to set the brightness level. Select the level (1-5) Press to confirm Press to save the setting and return to the previous menu Colours Colours Brightness...
- Page 25 41018 Standby Standby Brightness Colours Back Standby Back Back Press to activate/deactivate the display standby mode 10. Select OFF deactivated or ON activated 11. Press to confirm 12. Press to save the setting and return to the previous menu Logo This section is used to Enable/Disable the uploaded logo display.
-
Page 26: Posto Esterno
41018 Outdoor Station This section is used to enable/disable voice synthesis on the Outdoor Station Outdoor Station Voice synthesis Back Press to enable/disable the function Voice Synth. Voice Synth. Back Back Select NO disabled or YES enabled Press to save the setting and return to the previous menu Password This section is used to change the passwords associated with the administrator to access the configuration menu. -
Page 27: Menù Installatore
41018 Installer Menu Settings Settings Contacts List Display Accesses Outdoor Station Display Info Outdoor Station System Info Password System Back The display shows the main entries, select the desired entry Press to confirm and enter the submenu At the end of the menu is the “back” item, press to exit the menu (you will need to re-enter the password to re- enter) Shows the Contacts List section, where the Outdoor Station contacts list can be managed, by Contacts List... -
Page 28: Rubrica
41018 Contacts List This section is used to manage the user contacts list stored in the Outdoor Station Contacts List Edit – Name – Delete Information – Del. All Secondary info – Back Visible Main Press to select one of the entries Press to confirm For each user, both for a new entry and when editing an existing user, the settable fields are: Physical address of an Indoor Station or reception switchboard... - Page 29 41018 Edit/Enter These sections are used to edit the data of one or more users stored in the contacts list or enter a new user. The data fields to enter are the same in both cases. Name Visible – Name –...
-
Page 30: Accessi
41018 Accesses This section is used to manage codes, access tags and the associated system actuators. Accesses Codes Access Codes Edit Access Tag Delete Actuators Del. All Back Back Press to select one of the entries. Press to confirm. For both accesses (codes or tags) and actuators, the following is possible: –... - Page 31 41018 Delete/Delete all These sections are used to delete one or all the access codes associated with an actuator Actuators Codes F1 ENTRANCE PAN. 45002000 ENTR.PAN.LOCK 31304027 67800034 Press to select the actuator Press to confirm Press to select the code to delete Press to continue Delete Performed...
- Page 32 41018 Access tag This section is used to manage the access tags associated with an actuator Edit/Enter These sections are used to edit an existing tag or enter a new one, associating it with an actuator. The data fields to enter are the same for both the entry and the edit function. Acquisition Both when deleting and when entering a new one, the word “acquisition”...
- Page 33 41018 Name MARIO Name – Type – Confirm Actuator – Confirm Back Back Press to select the function Press to confirm Enter the tag name on the keyboard Press to confirm Type Name Type – Administrator Actuator – User Confirm Back Back Press to select the function...
- Page 34 41018 Delete/Delete all These sections are used to delete one or all the tags stored Access Tag ACQUISITION Acquire the tag or scroll the list of existing tags, in the first case the word “acquisition” appears Acquire tag from module 41017 Delete Performed Confirm...
- Page 35 41018 Actuators This section is used to manage the system actuators For each actuator, both for a new entry and when editing an existing actuator, the settable fields are: Type Indicates the type of actuator Device Indicates which device the actuator acts on Description Alphanumeric field used to identify the actuator unequivocally Edit/Enter...
- Page 36 41018 Edit Description Edit Type Type ENTRANCE PAN. Outdoor Station Outdoor Station Description Description Confirm Confirm Confirm Back Back Back Press to edit or enter the actuator description Enter the description on the keyboard Press to confirm or “back” to return to the previous menu 10.
-
Page 37: Display
41018 Display This section is used to configure various display parameters, such as the interface language, the navigation mode, the display size other characteristics such as brightness, colour, etc. and view the logo on the Home Page. Display Language Menu Back Press to select one of the entries Press to confirm... - Page 38 41018 Menu This section is used to select the style of the Home Page. Menu Menu Menu Navigation Direct Direct Font Navigable Navigable Back Expanded Expanded Back Back Press to modify style of the Home Page viewed and related access modes to the available functions. Select the mode from the following: RICERCA PER NOME...
- Page 39 41018 Menu Font Font Navigation Normal Normal Font Large Large Back Back Back Press edit font size to improve readability. Select the mode from the following: Ricerca per RICERCA nome PER NOME Chiamata per CHIAMATA N° PER N° Apertura con APERTURA CON CODICE codice...
- Page 40 41018 This section is used to set varies display parameters. Brightness Brightness Brightness Colours Standby Back Back Back Press to set the brightness level. Select the level (1-5) Press to confirm Press to save the setting and return to the previous menu Colours Colours Brightness...
- Page 41 41018 Standby Standby Brightness Colours Back Standby Back Back Press to activate/deactivate the display standby mode 10. Select OFF deactivated or ON activated 11. Press to confirm 12. Press to save the setting and return to the previous menu Logo This section is used to Enable/Disable the uploaded logo display.
-
Page 42: Posto Esterno
41018 Outdoor Station This section is used to configure various Outdoor Station parameters, such as the levels, the Audio push buttons, activating procedures for Stations, setting various types of (lock, routing the Indoor and Outdoor time frames conversation, activating controls and relays, etc.), setting the digits, enabling (only number of call... - Page 43 41018 Audio Microphone Microphone Speaker Microphone Back Back Back Press to define whether the Outdoor Station microphone is activated or deactivated Select 0 deactivated or 1 activated Press to confirm Press to save the setting and return to the previous menu...
- Page 44 41018 Push buttons This section is used to configure the Outdoor Station push buttons, the possible configurations are as follows: – Remapping the call buttons – Assigning the order of push button modules – Grouping type selection Setting ID - Remapping the call buttons By default each push button of the Outdoor Station calls an Indoor Station according to its sequential position.
- Page 45 41018 MODULE 1 MODULE 2 > 30s MODULE 3 MODULE 4 MODULE 5 Only the corresponding LED stays on. Within 30 seconds, press the same push button to set its configuration to default. On the Indoor Station to be associated press either Lock, F1, F2, relay activation or switchboard call Setting ID Start Procedure If the procedure was successful, a sound feedback is produced and a confirmation screen displayed...
- Page 46 41018 Assigning the order of push button modules This procedure allows you to assign the order of the Art. 41010 push button modules connected to the Electronic unit. The order of the modules determines the numbering of the push buttons, the 4 push buttons of the audio/video electronic unit are automatically put in first place.
- Page 47 41018 MODULE 1 MODULE 2 MODULE 1 MODULE 2 MODULE 3 MODULE 4 MODULE 5 MODULE 3 MODULE 4 MODULE 5 When the position of a module has been The push button at the top left of the first defined, a number of LEDs equal to the module will take the number 5, the push button chosen position will light up permanently.
- Page 48 41018 Grouping This section is used to define the behaviour of the Outdoor Station buttons. Push buttons Grouping Setting ID Rocker button Push button order Single Grouping... Double Back Back Press to select the function Select the type between Rocker, Single or Double Press to confirm...
- Page 49 41018 Routing This procedure allows the automatic routing of the Indoor Stations Outdoor Stations Automatic Indoor Station Routing N.B.: the Electronic unit from which this configuration is performed, if vertical, must be Master. Whereas if it is horizontal, it must function as Master via appropriate programming of one or more routers Art. 69RS. Addressing Indoor Station Routing Indoor Stations...
- Page 50 41018 beep Setting ID < 5m End Procedure After each completed assignment, you have a further 5 minutes to do the next one At the end of the procedure, a confirmation screen is displayed...
- Page 51 41018 Automatic Outdoor Station Routing Note: only do this in the Outdoor Station which you wish to assign the Master ID to (ID=1). The procedure works with Outdoor Stations which support the automatic assignment of IDs. Routing Outdoor Station Routing Indoor Stations Outdoor Stations Routing ...
- Page 52 41018 There is also the possibility of setting the ID of the Outdoor Station manually and of modifying its type Routing Gabriele Busellato, Manual Indoor Stations – Outdoor Station ID Outdoor Stations System Routing ... Confirm Confirm Back Back Back Press to set ID manually Press to edit Outdoor Station ID Enter the data on the keyboard...
- Page 53 41018 Time frames This section is used to set the Locks/Talking/Answer, enable and set the time frames for duration of the Outdoor Station Self-start, the destination and F1/F2 controls activation time and the source and activation time of the keyboard Relay Setting the time frames for lock control duration, maximum conversation time and answering a call time Timing Lock...
- Page 54 41018 Enabling cyclic self-start and setting the maximum self-start duration of the Outdoor Station Time frames Self-start Lock Self-start Conversation Disabled Answer Back Self-start Press to select the function Press to set the time Lock Lock Back Select the value Press to confirm Press to save the setting and return to the previous menu Self-start...
- Page 55 41018 Setting the activation time of controls F1/F2 and their destinations choosing between the modules of the local Outdoor Station Time frames Settings Destination Lock Fingerprint Destination Ta.. Conversation RFID Activation time... Answer Keyboard Back Self-start Disabled Back Press to select the function Press to set the destination Select the destination of the control Press to confirm...
- Page 56 41018 Setting the actuator activation time and the related source, i.e. the relay ID Time frames Settings Settings Conversation Source Source Answer Activation time... Activation time... Self-start Back Back Keyboard Relay Press to select the function Press to select the source The source can assume the following values: •...
- Page 57 41018 Number of call digits This section is used to set the mode and if necessary the maximum number of digits used to call an Indoor Station No. of digits Natural Back Select the value between Natural up to 3 digits for vertical system, up to 5 digits for horizontal system, remapping not active up to 4 digits, remapping active up to 8 digits, remapping active Press to confirm.
- Page 58 41018 External Video (only with 41002) This section is used to enable the optional video input for an analogue camera and consequently make audio/video calls External video External video Back Back Select NO disabled or YES enabled Press to save the setting and return to the previous menu Voice Synthesis This section is used to enable/disable voice synthesis on the Outdoor Station Voice Synth.
- Page 59 41018 Common locks On an outdoor station, the parameter allows the configuration of the lock opening in common with one or more outdoor stations. Note: The function is available from firmware version 1.63 (also after update); connected to an electronic unit (41002 - 41005) with firmware version 1.81 or later.
- Page 60 41018 Error Error Disabled Already exists Timeout Any errors in configuration Notes: The procedure for the association of the lock with the outdoor station described above can be repeated for a maximum Back of 8 other outdoor stations. Once this limit has been reached, the attempt at defining another association will fail and the display will exit the configuration procedure.
-
Page 61: Info
41018 Info This section is used to view the firmware versions of the devices installed on the Outdoor Station, the type of installation and the ID of the Outdoor Station.). Av fw ver audio video module version Info Installation lcd fw ver display module version Outdoor Station ID AV FW ver... -
Page 62: Password
41018 Password This section is used to change the passwords associated with the installer and/or administrator to access the configuration menu. Password Repeat Administrator Installer Back Confirm Confirm Cancel Cancel Press to select the type of password to change Press the sequence of keys making up the password, by default: Installer Password: Administrator Password: Press to confirm... -
Page 63: Configurazione Avanzata Da Pc
In the case of installation in systems with IP technology (with audio video module 41006.1), use the PC configuration software "Video-Door IP manager", connecting to the system network. The configuration software is available from the website www.vimar.com. Updating Manual updating... - Page 64 41018...
- Page 65 41018...
- Page 66 Viale Vicenza 14 36063 Marostica VI - Italy www.vimar.com 49400688E0_MU_EN_41018 01 2111...
Need help?
Do you have a question about the ELVOX 41018 and is the answer not in the manual?
Questions and answers