Table of Contents
Advertisement
Quick Links
Advertisement
Table of Contents

Related Manuals for Honeywell NEXH4520HD-NET


Summary of Contents for Honeywell NEXH4520HD-NET
- Page 1 INSTALLATION MANUAL NEXH4520HD-NET Explosion proof Security Camera...
-
Page 2: Table Of Contents
Table of Contents Overview For Your Safety ……..……………………………………………………………………… 3 For Your Installation ..…………………………………………………………………… 4 Product Overview ..……………………………………………………………………….. 8 2 Installation Connecting Network ..………………………………………………………………….. 9 Connecting Cable ………………………………………………………………………… 10 Searching for IP …………….……………………………………………………………… 11 3 Connecting Web Connecting Web .………………………………………………………………………… 12 Configuration mode ….…………………………………………………………………... -
Page 3: Overview
1 Overview 1.1 For Your Safety 1. Be sure to read and use the "Safety Precautions" before using this product. 2. Please keep the instruction manual after reading it. 3. Install in accordance with the manufacturer's instructions. 4. Pay attention to all caution and warning statements. 5. -
Page 4: For Your Installation
1.2 For Your Installation If the product is to be installed in cold places such as in a freezer, the piping pipes must be sealed in silicone to prevent the ingress of fresh air into the housing. Otherwise, moist air from outside may permeate the internal housing, causing moisture or water vapor to condense inside the product due to temperature differences inside and outside the product. - Page 5 1.2 For Your Installation This system can be installed in a standard or inverted position or camera Housing only with optional bracket as below Figure1. And also it can be possible to install method as the optional bracket or adaptors. Figure1.
- Page 6 1.2 For Your Installation Figure2. Install on the surface or on the wall with Mount bracket To install this product, please refer to Figure2 and do the following steps. 1. Make sure the threads of the product and the threads of the supplied stainless steel bolts (Supplied) are free of dirt anddebris.
- Page 7 1.2 For Your Installation PT 3 / 4 ” - 1 4 Nipple PT 3 / 4 ” - 1 4 Thread PT 3 /4 “ - 1 4 Explosion proof Seal Fitting Flexible conduit (Not Supplied) (Not Supplied) Sealing Fibe r compou Cables Fille r...
-
Page 8: Product Overview
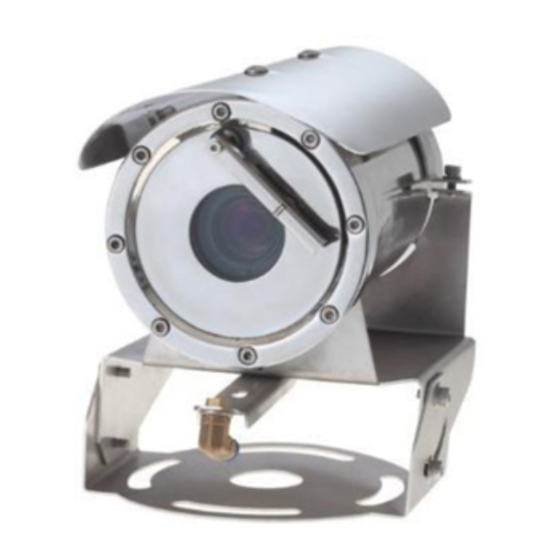
1.3 Product Overview The NEXPTZ is a Zoom all-in-one Explosive proof camera with 2 megapixel Stavis CMOS. To achieve international explosion certification so that it can be used without problems in Zone 1, 2. It's designed and built solid. And anytime, anywhere It is supported by a network that can monitor images in real time. -
Page 9: Installation
2. Installation 2.1 Connecting Netw ork Power Local Network External Network Internet or Intr anet Router Monitoring PC Monitoring PC Figure4. Base Schematic of Installation 1. Figure5 is recommended for the base Schematic of Installation. 2. If you wish to consist of another method or other components, you must proceed to do after conferring with a manufacture. -
Page 10: Connecting Cable
2. Installation 2.2 Connecting Cable Washer Pump Power LAN Cable 2m ± 0.3m Figure5 Cable configuration Configuration of Wire Harness Wire Color Function Description Brown P o wer Input Sky Blue (AC 110V ~ 220V) LAN Cable Video & Network RJ45 Grey * Washer pump... -
Page 11: Searching For Ip
2.3 Searching for IP • Ins tall IP s earc hing tool (Fig.3~ Fig. 6) • Connect IE web browser (Fig.7) • Basic network information - IP address : 192.168.1.108 - Subnet mask : 255.255.255.0 - Gateway : 192.168.1.1 • IPC accessing information - ID : admin, Password : 1234 Figure 6. -
Page 12: Connecting Web
3. Connecting Web 3.1 Connecting Web *** For product security, you must change the initial password to access it. *** Changing Passwords are not recorded internally, it cannot be restored and must be kept. -
Page 13: Configuration Mode
3.2 Configuration Mode 3.2.1 Netw ork Setup / TCP/IP Network/TCP/IP Description ① Enter a host name for the camera up to 15 characters in length. Host Name ② Not configurable. Wire is selected by default. Ethernet Card ③ Select Static or DHCP. If Static is selected, you must manually assign the IP Address (IPv4/IPv6), Mode Subnet Mask (IPv4), and Default Gateway (IPv4/IPv6). - Page 14 3.2.1 Netw ork Setup / Connection Network/Connection/ Description Port ① The maximum number of network connections for the camera. Select a value from 1 to 20. Max. Connections ② The default Transmission Control Protocol (TCP) port setting is 37777. To change the setting, TCP Port select a number in the range 1025–65534.
-
Page 15: Ptz
3.2.2 PTZ / Function *** PTZ/Function/Preset Description ① Set preset No. It becomes valid after you set. /Set preset name. You can input a self-defined Preset No./Name/Delete preset name here. /Delete corresponding preset. ② Save current preset setup./ Click it to add a new preset, use PTZ controls to move to a PTZ Save/Add/Clear position to set as the preset./ Clear all presets setup. - Page 16 3.2.2 PTZ / Function ***PTZ/Function/Pattern Description ① Choose pattern No. from drop down list to set./ Begin the pattern. /Click to display the Pattern No./Start/Set/Start start/stop record buttons./ Click to begin recording the pattern./Click to stop recording the record/Stop record pattern.
- Page 17 3.2.2 PTZ / Function ***PTZ/Function/PTZ Limit Description ① Choose the tilt angle limit from the drop down list. For HDZ302DE, it supports -20° to 10°. For Max Elevation HDZ302D and HDZ302DIN, it supports 0° to 10°. ② Click to enable the PTZ limit function. The Up and Down lines must both be set before enabling Enable PTZ Limit.
-
Page 18: Appendix1. Product Dimension
Appendix1. Product Dimension... -
Page 19: Appendix2. Additional Accessories
Appendix2. Additional Accessories Optional Accessories Note: These MountingAccessories are not supplied with the NEXH Series units. These are purchasing parts. MODEL NAME 1.NEXH-WL: Wall mount bracket designed to mount the NEXH Series Camera directl y to a load-bearing vertical surface. PAN TILT ADJUST Bracket, Pan; 60°x4, Tilt; -55°~+20°... - Page 20 Appendix2. Additional Accessories Unit (mm) NEXH-WL NEXH-CN NEXH-PL...
-
Page 21: Appendix 3. Guarantee
GUARANTEE Honeywell products in Korea are guaranteed as follows in accordance with the consumer damage compensation policy. In case of product failure, please contact the Customer Support Center below. Model Name Manufacturing Number Purchase Date Year Month Purchase Place Name... - Page 22 Honeywell Co., Ltd. Building Technologies Korea Address : 5F, Sangam IT Tower, 434 Worldcup Buk-ro Mapo-gu, Seoul, Republic of Korea TEL : +82 1522-8779 FAX : +82 2 799 6188 E-mail : info.security@honeywell.com Printed inKorea...
Need help?
Do you have a question about the NEXH4520HD-NET and is the answer not in the manual?
Questions and answers