
Related Manuals for Canvas 168-0097-2


Summary of Contents for Canvas 168-0097-2
- Page 1 INVERMERE DESK PRODUCT NO. 168-0097-2 ASSEMBLY INSTRUCTIONS HAVING TROUBLE? TOLL-FREE:...
- Page 2 From on-trend furniture pieces to holiday décor and all your outdoor living essentials, CANVAS makes it easy to refresh your space your unique style and the way you live every day. We would love to hear from you and welcome your thoughtful feedback.
- Page 3 TABLE OF CONTENTS TOOLS REQUIRED NOTE: Cross-head...
-
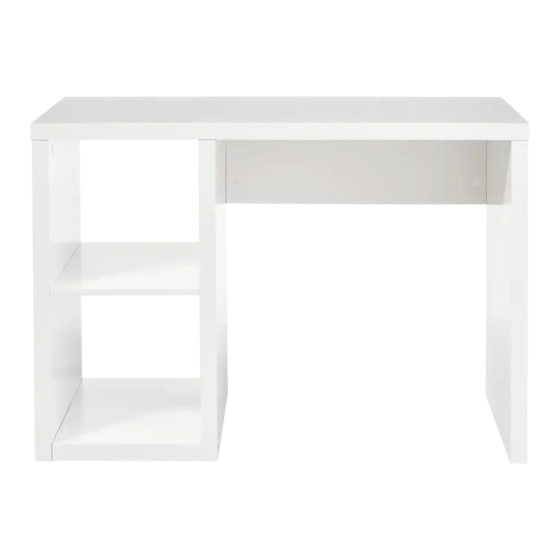
Page 4: Parts List
PARTS LIST ITEM DESCRIPTION THUMBNAIL QUANTITY Top Panel Left Side Panel Middle Panel Right Side Panel Shelf Bottom Panel Back Panel INVERMERE DESK... -
Page 5: Exploded Parts
EXPLODED PARTS INVERMERE DESK... -
Page 6: Hardware List
HARDWARE LIST ITEM DESCRIPTION THUMBNAIL QUANTITY Cam Bolts Hidden Cams Hex Key Wood Dowels Flat Head Hex Screws Anti-tip Restraints Wall Anchors Flat Head Cross-head Screws Washers Short Pan Head Screws EVA Pads Coated Paper Stickers Warning: Before assembly, please check all accessories in the hardware box, and ensure all parts are not missing. -
Page 7: Before You Begin Assembly
BEFORE YOU BEGIN ASSEMBLY MAKE SURE ALL PARTS ARE PRESENT ASSEMBLE IN A CLEARED AREA REMOVE PACKAGING MATERIALS READ EACH STEP CAREFULLY . INVERMERE DESK... - Page 8 STEP-BY-STEP GUIDE STEP 1 Insert ten cam bolts into top panel , left side panel and right side panel as shown. Hand tighten all cam bolts INVERMERE DESK...
- Page 9 STEP-BY-STEP GUIDE STEP 2 Insert four cam bolts into the middle panel Hand tighten all cam bolts 。 Flip over INVERMERE DESK...
- Page 10 STEP-BY-STEP GUIDE STEP 3 Insert eight wood dowels into left side panel and middle panel Insert four hidden cams into shelf . Align shelf and bottom panel between left side panel and middle panel . Tighten the hidden cams on shelf .
- Page 11 STEP-BY-STEP GUIDE STEP 4 Insert two wood dowels into middle panel and right side panel Insert four hidden cams into back panel . Align back panel between middle panel and right side panel . Tighten the hidden cams Tear off the protective paper backing from the EVA pads , and place the adhesive side on the bases of left side panel , middle panel...
- Page 12 STEP-BY-STEP GUIDE STEP 5 Insert eight wood dowels into the tops of the left side panel , middle panel back panel and right side panel as shown. Insert six hidden cams just below the tops of the left side panel , middle panel and right side panel Connect the top panel...
-
Page 13: Tools Required
TIP RESTRAINT STEP 6 WARNING! Fasten the two anti-tip restraints F to the desk using two washers I and two short pan head screws J. Using the anti-tip restraints F as a guide, mark two spots on the wall. Using a 6 mm drill bit, drill a hole at each mark approximately 1 1/2" (4 cm) deep. Hammer two wall anchors G into the wall. -
Page 14: Technical Data
TECHNICAL DATA 110 lb (50 kg) 30 1/2" (77.4 cm) 13 2/5" (34 cm) 22 lb (10 kg) SPECIFICATIONS ASSEMBLED DIMENSIONS (W x D x H) 44 x 21 x 30 1/2" 111.8 x 53.3 x 77.4 cm ASSEMBLED WEIGHT MAXIMUM WEIGHT CAPACITY (Desk Surface) MAXIMUM WEIGHT CAPACITY (Each Shelf) INVERMERE DESK... -
Page 15: Troubleshooting
Do not stand on, sit on or climb this unit. Do not use as a stool. For indoor use only. Always place the unit on a flat, level surface. Wipe clean with a damp cloth. Avoid direct sunlight. WARRANTY INFORMATION PRODUCT NO. 168-0097-2 INVERMERE DESK...
Need help?
Do you have a question about the 168-0097-2 and is the answer not in the manual?
Questions and answers