
Related Manuals for Klarstein ICEMEISTER 2G


Summary of Contents for Klarstein ICEMEISTER 2G
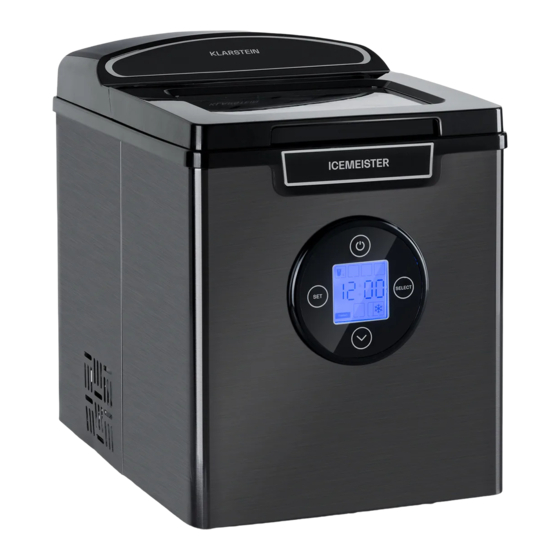
- Page 1 ICEMEISTER 2G Eiswürfelmaschine Ice Cube Maker Machine à glaçons Máquina de hielo Macchina per cubetti di ghiaccio 10035712 10035713 www.klarstein.com...
-
Page 3: Table Of Contents
Sehr geehrter Kunde, wir gratulieren Ihnen zum Erwerb Ihres Gerätes. Lesen Sie die folgenden Hinweise sorgfältig durch und befolgen Sie diese, um möglichen Schäden vorzubeugen. Für Schäden, die durch Missachtung der Hinweise und unsachgemäßen Gebrauch entstehen, übernehmen wir keine Haftung. Scannen Sie den folgenden QR-Code, um Zugriff auf die aktuellste Bedienungsanleitung und weitere Informationen rund um das Produkt zu erhalten. -
Page 4: Sicherheitshinweise
SICHERHEITSHINWEISE • Schließen Sie das Gerät nur an geerdete Steckdosen an, die der Nennspannung des Geräts entsprechen. • Wenn Sie das Gerät bewegen, benutzen Sie die Griffe. • Stellen Sie das Gerät auf einen ebenen Untergrund. • Benutzen Sie das Gerät nur in Innenräumen. •... - Page 5 WARNUNG Gefahr durch Feuer/brennbare Materialien. Bitte beachten Sie die örtlichen Vorschriften zur Entsorgung von Geräten mit brennbaren Kältemitteln und Gasen. • Halten Sie Lüftungsöffnungen im Gerätegehäuse frei von Hindernissen. • Beschädigen Sie nicht den Kältemittelkreislauf. • Verwenden Sie keine mechanischen Vorrichtungen oder anderen Mittel, um den Auftauprozess oder den Eisgewinnungsprozess zu beschleunigen.
-
Page 6: Geräteübersicht
GERÄTEÜBERSICHT Logo Wassertank Logo Filter Luftauslass Ablassstopfen Obere Abdeckung Infrarotlicht-Sender-Diode Sichtfenster Infrarotlicht-Empfänger-Diode Eisfach Eiskorb Eisschaufel Eislöffel Verdampfer Bedienfeld Markierung maximaler Wasserstand... -
Page 7: Bedienfeld, Tasten Und Anzeigen
BEDIENFELD, TASTEN UND ANZEIGEN Anzeigen und Tasten Funktion Eiswürfelherstellung (Anzeige): Während der Eiswürfelherstellung blinkt die Anzeige schwarz auf. Wassertank leer (Anzeige): Wenn der Wassertank leer ist leuchtet die Anzeige schwarz auf. Eiskorb voll (Anzeige): Wenn der Eiskorb voll ist, leuchtet die Anzeige schwarz auf. - Page 8 Anzeigen und Tasten Funktion Timer aus (Anzeige) Timer ein (Anzeige) Timer (Anzeige) Zeitanzeige Kleine Eiswürfel (Anzeige): Wenn kleine Eiswürfel ausgewählt wurden, leuchtet die Anzeige schwarz auf. Mittlere Eiswürfel (Anzeige): Wenn mittlere Eiswürfel ausgewählt wurden, leuchtet die Anzeige schwarz auf. Große Eiswürfel (Anzeige): Wenn große Eiswürfel ausgewählt wurden, leuchtet die Anzeige schwarz auf.
-
Page 9: Installation
INSTALLATION 1. Entnehmen Sie das Gerät aus der Verpackung und stellen Sie sicher, dass das gesamte Zubehör (inkl. Eiskorb und Eislöffel) im Lieferumfang enthalten ist. Wenden Sie sich an den Kundendienst, falls Zubehör fehlen sollte. 2. Stellen Sie sicher, dass das Gerät eben ausgerichtet ist und auf einem stabilen Tisch oder einer stabilen Arbeitsfläche steht, um Fehlfunktionen zu vermeiden. -
Page 10: Reinigung Und Pflege
5. Setzen Sie den Eiskorb wieder ein und schließen Sie die obere Abdeckung. 6. Drücken Sie die EIN/AUS-Taste . Die Anzeige „Eiswürfelherstellung” blinkt auf. Die Eiswürfelherstellung dauert, abhängig von der Raum- und Wassertemperatur, 7-15 Minuten. 8. Die Eiswürfelherstellung beginnt damit, dass Wasser in das Eisfach unterhalb des Verdampfers gepumpt wird. - Page 11 75 mm Arbeitsplatte 4. Halten Sie die Größenauswahl-Taste und die Timereinstelltaste innerhalb von 5 Sekunden nach dem Einschalten 3,5 Sekunden lang gedrückt. Das Gerät piept drei Mal und wird in den Reinigungsmodus versetzt. Die Anzeigen für die Eiswürfelgrößen „Groß“ , „Mittel“ ...
-
Page 12: Fehlersuche Und Fehlerbehebung
Hinweis: Reinigen Sie keinesfalls den Verdampfer. 8. Entleeren Sie den Wassertank und lassen Sie ihn vollständig trocknen, wenn Sie das Gerät über einen längeren Zeitraum nicht verwenden und einlagern wollen. FEHLERSUCHE UND FEHLERBEHEBUNG Problem Mögliche Ursache Lösungsansatz Niedriger Wasserstand oder Unterbrechen Sie die kein Wasser im Wassertank. - Page 13 Problem Mögliche Ursache Lösungsansatz Die Eiswürfel Die Eiswürfelherstellung Stoppen Sie die Eiswürfel- klumpen zusammen dauert zu lange. herstellung. Warten Sie, bis das Eis geschmolzen ist, bevor Sie die Eiswürfel- herstellung fortsetzen. Die Wassertemperatur im Befüllen Sie den Wassertank Wassertank ist zu niedrig. mit Wasser, das eine Temperatur zwischen 8 °C und 25 °C hat.
-
Page 14: Hinweise Zur Entsorgung
HINWEISE ZUR ENTSORGUNG Wenn es in Ihrem Land eine gesetzliche Regelung zur Entsorgung von elektrischen und elektronischen Geräten gibt, weist dieses Symbol auf dem Produkt oder auf der Verpackung darauf hin, dass dieses Produkt nicht im Hausmüll entsorgt werden darf. Stattdessen muss es zu einer Sammelstelle für das Recycling von elektrischen und elektronischen Geräten gebracht werden. - Page 15 Dear Customer, Congratulations on purchasing this device. Please read the following instructions carefully and follow them to prevent possible damages. We assume no liability for damage caused by disregard of the instructions and improper use. Scan the QR code to get access to the latest user manual and more product information.
-
Page 16: Safety Instructions
SAFETY INSTRUCTIONS • Check that the mains voltage corresponds to the rating of the appliance before operating. • Use handles or knobs when moving. Place on a flat stable surface for use. Do not use outdoors. • Do not use near or in the immediate vicinity of a bath or swimming pool or any source of liquid. - Page 17 WARNING Danger from fi re/fl ammable materials. Please observe the local regulations for the disposal of units with fl ammable refrigerants and gases. • Keep ventilation openings in the unit housing free of obstacles. • Do not damage the refrigerant circuit. •...
-
Page 18: Device Overview
DEVICE OVERVIEW Logo Water reservoir Logo Filter Air outlet Drain plug Top lid Infrared light-emitting diode Viewing window Infrared light-receiving diode Ice tray Ice basket Ice shovel Ice scoop Evaporator Control panel MAX water level... -
Page 19: Control Panel, Buttons And Indicators
CONTROL PANEL, BUTTONS AND INDICATORS Indicators and buttons Function Ice making (indicator): The indicator flashes in black when making ice. Water reservoir empty (indicator): The indicator lights in black when there is a lack of water in the water reservoir. Ice basket full (indicator): The indicator lights in black when the ice basket is full. - Page 20 Indicators and buttons Function Timer off (indicator) Timer on (indicator) Timer (indicator) Time display Small ice cubes (indicator): When small ice cubes are selected, the indicator lights up black. Medium ice cubes (indicator): When medium ice cubes are selected, the indicator lights up black.
-
Page 21: Installation
INSTALLATION 1. Remove the appliance from the packaging and make sure that all accessories (incl. ice basket and ice spoon) are included. Contact the costumer service if any accessories are missing. 2. Make sure that the appliance is level and placed on a stable table or work surface to avoid malfunctions. -
Page 22: Cleaning And Maintenance
The ice tray will automatically move back into position under the evaporator and start the next cycle. 9. The ice basket full indicator will light up when the ice basket is full and the ice cube maker will stop the ice-making cycle automatically. Gently remove the ice from the ice basket with the ice scoop. - Page 23 4. Hold and press the ice size selection button and the timer setting button for 3.5 seconds within 5 seconds after plug in. Then three beeps can be heard and the appliance enters into the cleaning mode. At that time, the indicators for the ice cube size large ...
- Page 24 TROUBLESHOOTING Problem Possible cause Suggested solution Low water level or no water Stop making ice, refill water in the water reservoir. and then press the ON/ OFF button to restart the ice- making cycle. The water reservoir The water screen at the Clean the water reservoir.
-
Page 25: Producer
Problem Possible cause Suggested solution The ice-making The ambient temperature or Use the appliance at an cycle seems water temperature is too high. ambient temperature between normal but no ice is 10 °C and 32 °C and fill the produced. water reservoir with some cold water. - Page 26 DISPOSAL CONSIDERATIONS If there is a legal regulation for the disposal of electrical and electronic devices in your country, this symbol on the product or on the packaging indicates that this product must not be disposed of with household waste. Instead, it must be taken to a collection point for the recycling of electrical and electronic equipment.
- Page 27 Chère cliente, cher client, Toutes nos félicitations pour l’acquisition de ce nouvel appareil. Veuillez lire attentivement et respecter les instructions de ce mode d’emploi afin d’éviter d’éventuels dommages. Nous ne saurions être tenus pour responsables des dommages dus au non-respect des consignes et à...
-
Page 28: Consignes De Sécurité
CONSIGNES DE SÉCURITÉ • Ne branchez l‘appareil qu‘à une prise mise à la terre correspondant à sa tension nominale. • Lorsque vous déplacez l‘appareil, utilisez les poignées. • Placez l‘appareil sur une surface plane. • N‘utilisez l‘appareil qu‘à l‘intérieur. • N‘utilisez pas l‘appareil à proximité d‘une baignoire ou d‘une piscine. •... - Page 29 MISE EN GARDE Risque d‘incendie / matières infl ammables. Veuillez respecter les réglementations locales relatives à l‘élimination des appareils contenant des réfrigérants et des gaz infl ammables. • Maintenez les ouvertures de ventilation du boîtier de l‘appareil libres de tout obstacle.
-
Page 30: Aperçu De L'appareil
APERÇU DE L‘APPAREIL Logo Réservoir d'eau Logo Filtre Sortie d'air Bouchon de vidange Diode émettrice de lumière Cache supérieur infrarouge Diode réceptrice de lumière Fenêtre de contrôle infrarouge Compartiment à glace Panier à glace Pelle à glace Cuillère à glace Évaporateur Panneau de commande Marque de niveau d'eau maximum... -
Page 31: Panneau Commande , Touches Et Voyants
PANNEAU COMMANDE , TOUCHES ET VOYANTS Voyants et touches Fonctions Fabrication de glaçons (voyant) : Le voyant s‘allume pendant la fabrication de glaçons Réservoir d‘eau vide (voyant) : Lorsque le réservoir d‘eau est vide, le voyant devient noir. Bac à glaçons plein (voyant) : Lorsque le bac à... - Page 32 Voyants et touches Fonctions Minuterie désactivée (voyant) Minuterie activée (voyant) Minuterie (voyant) Affichage de l'heure Petits glaçons (voyant) : Le voyant s'allume en noir lorsque vous choisissez les glaçons de petite taille. Glaçons moyens (voyant) : Le voyant s'allume en noir lorsque vous choisissez les glaçons de taille moyenne.
-
Page 33: Installation
INSTALLATION 1. Retirez l‘appareil de son emballage et assurez-vous que tous les accessoires (y compris le panier à glaçons et la cuillère à glace) sont inclus dans la livraison. Contactez le service client s‘il manque des accessoires. 2. Assurez-vous que l‘appareil est de niveau et se trouve sur une table ou une surface de travail stable pour éviter les dysfonctionnements. -
Page 34: Nettoyage Et Entretien
5. Replacez le panier à glaçons et fermez le couvercle supérieur. 6. Appuyez sur le bouton ON / OFF [ ]. Le voyant „fabrication de glaçons“ [ ] clignote. Il faut 7 à 15 minutes pour fabriquer des glaçons, selon la température de la pièce et de l‘eau. - Page 35 75 mm Plan de travail 4. Appuyez sur le bouton de sélection de taille [ ] et sur le bouton de réglage de la minuterie [ ] et maintenez-les pendant 3,5 secondes dans les 5 secondes suivant la mise sous tension. L‘appareil émet trois bips et passe en mode nettoyage. Les voyants de tailles de glaçons „Grand“[ ], „Moyen“[ ], „Petit“[...
-
Page 36: Identification Et Résolution Des Problèmes
Remarque : ne nettoyez jamais l‘évaporateur. 8. Videz le réservoir d‘eau et laissez-le sécher complètement si vous ne prévoyez pas d‘utiliser l‘appareil pendant une longue période et avant de le ranger. IDENTIFICATION ET RÉSOLUTION DES PROBLÈMES Problème Cause possible Solution Niveau d'eau bas ou pas Arrêtez de fabriquer des d'eau dans le réservoir. - Page 37 Problème Cause possible Solution Les glaçons La fabrication des glaçons est Arrêtez la fabrication de s'agglutinent trop longue. glaçons. Attendez que la glace fonde avant de reprendre la fabrication de glaçons. La température de 'au du Remplissez le réservoir réservoir est trop basse. d'eau avec de l'eau à...
-
Page 38: Informations Sur Le Recyclage
INFORMATIONS SUR LE RECYCLAGE S‘il existe une réglementation pour l‘élimination ou le recyclage des appareils électriques et électroniques dans votre pays, ce symbole sur le produit ou sur l‘emballage indique que cet appareil ne doit pas être jeté avec les ordures ménagères. - Page 39 Estimado cliente: Le felicitamos por la adquisición de este producto. Lea atentamente el siguiente manual y siga cuidadosamente las instrucciones de uso con el fin de evitar posibles daños. La empresa no se responsabiliza de los daños ocasionados por un uso indebido del producto o por haber desatendido las indicaciones de seguridad.
-
Page 40: Instrucciones De Seguridad
INSTRUCCIONES DE SEGURIDAD • Conecte el dispositivo sólo a enchufes con toma de tierra que correspondan al voltaje nominal del dispositivo. • Cuando mueva la unidad, use las asas. • Coloque la unidad en una superficie plana. • Use la unidad sólo en el interior. •... - Page 41 ADVERTENCIA ¡Peligro de incendio/materiales infl amables! Por favor, observe las regulaciones locales para la eliminación de aparatos que contengan refrigerantes y gases infl amables. • Mantenga las aberturas de ventilación de la carcasa del dispositivo libres de obstáculos. • No dañe el circuito de refrigerante. •...
-
Page 42: Descripción Del Producto
DESCRIPCIÓN DEL PRODUCTO Logotipo Depósito de agua Logotipo Filtro Salida de aire Tapón de drenaje Cubierta superior Diodo emisor de luz infrarroja Diodo receptor de luz Ventana infrarroja Compartimento del hielo Cesta de hielo Pala para hielo Cubo de hielo Evaporador Panel de control Nivel máximo de agua... -
Page 43: Panel De Control, Símbolos Y Teclas
PANEL DE CONTROL, SÍMBOLOS Y TECLAS Símbolos y teclas Funciones Fabricación de cubitos de hielo (símbolo): Durante la fabricación del cubo de hielo, el indicador parpadea en negro. Depósito de agua vacío (pantalla): Cuando el tanque de agua está vacío, el indicador se ilumina en negro. - Page 44 Símbolos y teclas Funciones Temporizador apagado (pantalla) Temporizador encendido (pantalla) Temporizador (pantalla) Reloj Cubitos de hielo pequeños (indicador): Cuando se seleccionan pequeños cubitos de hielo, el indicador se ilumina en negro. Cubitos de hielo medianos (indicador): Cuando se seleccionan cubos de hielo medianos, el indicador se ilumina en negro.
-
Page 45: Instalación
INSTALACIÓN 1. Saque el dispositivo del embalaje y asegúrese de que todos los accesorios (incluyendo la cesta y la pala para el hielo) están incluidos en la entrega. Contacte con el servicio de atención al cliente si falta algún accesorio. 2. -
Page 46: Limpieza Y Mantenimiento
5. Vuelva a colocar la cesta de hielo y cierre la tapa superior. 6. Presione el botón ON/OFF . El indicador de „fabricación de cubitos de hielo” ] parpadea. El proceso de fabricación de los cubitos de hielo toma, dependiendo de la habitación y la temperatura del agua, entre 7 y 15 minutos. - Page 47 Superficie de 75 mm trabajo 4. Mantenga pulsados el botón de selección de tamaño [ ] y el botón de ajuste del temporizador [ ] durante 3,5 segundos dentro de los 5 segundos siguientes al encendido. La unidad emitirá tres pitidos y entrará en el modo de limpieza. Los indicadores del tamaño del cubo de hielo „Grande“...
-
Page 48: Solución De Problemas
Nota: No limpie el vaporizador bajo ninguna circunstancia. 8. Vacíe el depósito de agua y déjelo secar completamente si no tiene intención de utilizar y almacenar el aparato durante un largo período de tiempo. SOLUCIÓN DE PROBLEMAS Problema Posible causa Solución Nivel de agua bajo o tanque Detenga la fabricación del... - Page 49 Problema Posible causa Solución Los cubitos de hielo Lleva demasiado tiempo Detenga la producción de se juntan. hacer cubitos de hielo. cu-bitos de hielo. Espere hasta que el hielo se haya derretido antes de seguir haciendo cubi-tos de hielo. La temperatura del agua Llene el tanque de agua en el depósito de agua es con agua que tenga una...
-
Page 50: Fabricante
INDICACIONES SOBRE LA RETIRADA DEL APARATO Si en su país existe una disposición legal relativa a la eliminación de aparatos eléctricos y electrónicos, este símbolo estampado en el producto o en el embalaje advierte que no debe eliminarse como residuo doméstico. En lugar de ello, debe depositarse en un punto de recogida de reciclaje de aparatos eléctricos y electrónicos. - Page 51 Gentile cliente, La ringraziamo per aver acquistato il dispositivo. La preghiamo di leggere attentamente le seguenti istruzioni per l’uso e di seguirle per evitare possibili danni tecnici. Non ci assumiamo alcuna responsabilità per danni scaturiti da una mancata osservazione delle avvertenze di sicurezza e da un uso improprio del dispositivo.
-
Page 52: Avvertenze Di Sicurezza
AVVERTENZE DI SICUREZZA • Collegare il dispositivo solo a prese con messa a terra corrispondenti alla tensione del dispositivo. • Utilizzare le maniglie per spostare il dispositivo. • Posizionare il dispositivo su una superficie piana. • Non utilizzare il dispositivo all’aperto. •... - Page 53 AVVERTENZA Pericolo dovuto a fuoco/materiali infi ammabili! Osservare le norme locali per lo smaltimento di dispositivi contenenti refrigeranti e gas infi ammabili. • Mantenere le aperture di ventilazione del dispositivo libere da ostacoli. • Non danneggiare il circuito del refrigerante. •...
-
Page 54: Descrizione Del Prodotto
DESCRIZIONE DEL PRODOTTO Logo Serbatoio Logo Filtro Uscita dell’aria Tappo di scarico Diodo di trasmissione a Coperchio superiore infrarossi Finestra di visualizzazione Diodi di ricezione a infrarossi Scomparto del ghiaccio Cestello del ghiaccio Sessola Cucchiaio Evaporatore Pannello di controllo Tacca max. livello acqua... -
Page 55: Pannello Di Controllo, Simboli E Tasti
PANNELLO DI CONTROLLO, SIMBOLI E TASTI Spie e tasti Funzione Produzione di cubetti di ghiaccio (spia): Durante la produzione di cubetti di ghiaccio la spia lampeggia di nero. Serbatoio vuoto (spia): Quando il serbatoio è vuoto la spia lampeggia di nero. - Page 56 Spie e tasti Funzione Timer spento (spia) Timer acceso (spia) Timer (spia) Visualizzazione ora Cubetti di ghiaccio piccoli (spia): Quando si selezionano i cubetti di ghiaccio piccoli, la spia lampeggia di nero. Cubetti di ghiaccio medi (spia): Quando si selezionano i cubetti di ghiaccio medi, la spia lampeggia di nero.
-
Page 57: Installazione
INSTALLAZIONE 1. Togliere il dispositivo dall’imballaggio e assicurarsi che tutti gli accessori (incl. cestello del ghiaccio e cucchiaio) siano presenti. Rivolgersi al servizio d’assistenza clienti in caso contrario. 2. Assicurarsi che il dispositivo sia in piano, su un tavolo o su un piano di lavoro stabile per evitare malfunzionamenti. -
Page 58: Pulizia E Manutenzione
5. Reinserire il cestello del ghiaccio e chiudere il coperchio superiore. 6. Premere il tasto ON/OFF [ ]. La spia “Produzione di cubetti di ghiaccio” [ ] lampeggia. La produzione di cubetti di ghiaccio dura dai 7 ai 15 minuti a seconda della temperatura ambiente e dell’acqua. - Page 59 Superficie di 75 mm lavoro 4. Tenere premuto per 3,5 secondi il tasto di selezione dimensioni [ ] e di impostazione timer [ ] entro 5 secondi dall’accensione. Il dispositivo emette per tre volte un suono ed entra in modalità di pulizia. Le spie delle dimensioni “Grande” ]L, “Media”...
-
Page 60: Ricerca E Correzione Degli Errori
Nota: non pulire mai l’evaporatore. 9. Svuotare il serbatoio e lasciare che si asciughi completamente se non si usa il dispositivo per un periodo di tempo prolungato e lo si vuole riporre. RICERCA E CORREZIONE DEGLI ERRORI Problema Possibile causa Soluzioni Livello dell’acqua troppo Sospendere la produzione di... - Page 61 Problema Possibile causa Soluzioni I cubetti di ghiaccio La produzione di cubetti è Fermare la produzione di si ammassano gli troppo lunga. cubetti. Aspettare che il uni agli altri. ghiaccio si sciolga prima di proseguire la produzione. La temperatura d’acqua nel Riempire il serbatoio con serbatoio è...
-
Page 62: Smaltimento
AVVISO DI SMALTIMENTO Se nel proprio paese si applicano le regolamentazioni inerenti lo smaltimento di dispositivi elettrici ed elettronici, questo simbolo sul prodotto o sulla confezione segnala che questi prodotti non possono essere smaltiti con i rifiuti normali e devono essere portati a un punto di raccolta di dispositivi elettrici ed elettronici.
Need help?
Do you have a question about the ICEMEISTER 2G and is the answer not in the manual?
Questions and answers