
Related Manuals for Zcom ZAC-1023-2-9


Summary of Contents for Zcom ZAC-1023-2-9
- Page 1 IEEE 802.11b/g/n Wireless CPE/ IEEE 802.11a/n Wireless CPE User’s Manual Model name: ZAC-1023-2-9 / ZAC-1023-5-13 ZAC-501 / ZAC-502 ZWA-3070 / ZWA-3080 ZN-7200-2EI / ZN-7200-2AEI-L V1.0 May 2014 P. 1...
- Page 2 Copyright Copyright © 2014 all rights reserved. No part of this publication may be reproduced, adapted, stored in a retrieval system, translated into any language, or transmitted in any form or by any means without the written permission of the supplier. About This Manual This user manual is intended to guide professional installer to install the IEEE 802.11n ZAC Access Point series and how to build the infrastructure centered on it.
- Page 3 Federal Communication Commission Interference Statement This equipment has been tested and found to comply with the limits for a Class B digital device, pursuant to Part 15 of the FCC Rules. These limits are designed to provide reasonable protection against harmful interference in a residential installation. This equipment generates uses and can radiate radio frequency energy and, if not installed and used in accordance with the instructions, may cause harmful interference to radio communications.
- Page 4 FCC Radiation Exposure Statement: This equipment complies with FCC radiation exposure limits set forth for an uncontrolled environment. To avoid the possibility of exceeding radio frequency exposure limits, you shall beep a distance of at least 100cm between you and the antenna of the installed equipment. This transmitter must not be co-located or operating in conjunction with any other antenna or transmitter.
- Page 5 Warranty Hardware warranty is for one (1) year from date of shipment from Distributor warrants that hardware will conform to the current relevant published specifications and will be free from material defects in material and workmanship under normal use and service. IN NO EVENT SHALL DISTRIBUTOR BE LIABLE TO YOU OR ANY OTHER PARTY FOR ANY DIRECT, INDIRECT, GENERAL, SPECIAL, INCIDENTAL, CONSEQUENTIAL, EXEMPLARY OR OTHER DAMAGE RISING OUT OF THE USE OR INABILITY TO USE THE PRODUCT (INCLUDING,...
-
Page 6: Table Of Contents
Content Chapter 1 Introduction ................... 10 Introduction ........................10 Key Features ........................10 Hardware Overview......................11 Front View ..........................11 Back View..........................11 Inside the Bottom Cover......................12 LED Indicators ........................12 Typical Management Scenario ..................13 Hardware Installation ..................... 14 Preparation before Installation .................. - Page 7 Status ............................40 View Basic Information ......................40 View Managed APs ....................... 40 View Wireless Users ......................41 View DHCP Client Table ......................41 Wireless Settings ........................42 Wireless Networks (VAP Profiles Settings) ................42 Wireless Protocols ........................ 46 Access Control ........................48 Traffic Shaping ........................
- Page 8 Thin AP Mode ......................... 68 Information..........................68 Basic Settings ......................... 68 FAT AP Mode ........................70 Status ............................70 View Basic Information ......................70 View Association List ......................70 View Network Flow Statistics ....................71 View ARP Table ........................72 View Bridge Table .........................
- Page 9 Password ..........................97 Upgrade Firmware ........................ 97 Backup/ Retrieve Settings ..................... 98 Restore Factory Default Settings ................... 98 Reboot ..........................99 Remote Management ......................99 SNMP Management ......................100 Certificate Settings ......................102 Tools ............................103 System Log ......................... 103 Ping Watch Dog ........................
-
Page 10: Chapter 1 Introduction
Chapter 1 Introduction Introduction The ZAC Series Access Point is a multi-mode 2x2 Access Point embedded with a software-based virtual access controller (VAC) for centrally managing managed APs that eliminates the need for a separate hardware controller to manage the WLAN. ZN-7200-2EI operates at 2.4GHz band while ZN-7200-2AEI-L operates at 5GHz band. -
Page 11: Hardware Overview
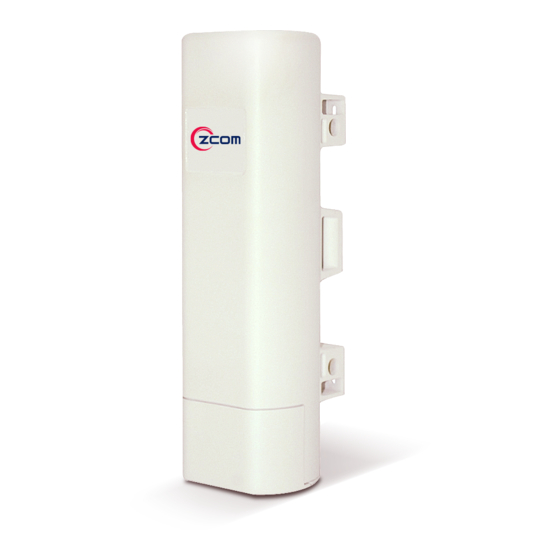
Hardware Overview Front View Back View P. 11... -
Page 12: Inside The Bottom Cover
Inside the Bottom Cover LED Indicators COLOR STATUS DESCRIPTION Green The device is powered on The device is not receiving power Green The device has the Ethernet connection The device has no Ethernet connection Blinking Transmitting/receiving Ethernet packets WLAN Green The WLAN is active The WLAN is inactive Blinking... -
Page 13: Typical Management Scenario
Typical Management Scenario This section describes the typical management of ZAC Access Point. By default, it is set to thin AP mode (managed AP) which allows it to be managed by the ZAC Access Point in AC mode. The following figure illustrates a ZAC wireless network. When a thin AP mode joins a wired network, it will start to look for a ZAC Access Point in AC mode. -
Page 14: Hardware Installation
Hardware Installation This chapter describes safety precautions and product information you have to know and check before installing the ZAC Access Point. Preparation before Installation Professional Installation Required Please seek assistance from a professional installer who is well trained in the RF installation and knowledgeable in the local regulations. -
Page 15: Installation Precautions
Installation Precautions To keep the ZAC Access Point well while you are installing it, please read and follow these installation precautions. Users MUST use a proper and well-installed grounding and surge arrestor with the ZAC Access Point; otherwise, a random lightening could easily cause fatal damage to ZAC Access Point. EMD (Lightning) DAMAGE IS NOT COVERED UNDER WARRNTY. - Page 16 Pole Mounting Ring Ferrite Suppression Core 24VDC Power Cord & PoE Injector Warning: Users MUST use the “Power cord & PoE Injector” shipped in the box with the IEEE 802.11n Wireless Access Point. Use of other options will likely cause damage to the IEEE 802.11n Wireless Access Point..
-
Page 17: Hardware Installation
Hardware Installation Connect up The bottom of the ZAC Access Point is a movable cover. Grab the cover and pull it back harder to take it out as the figure shown below. Plug a standard Ethernet cable into the RJ45 port. Slide the cover back and press down the lock button to seal the bottom of the ZAC Access Point. -
Page 18: Using The Grounding Wire
Using the Grounding Wire The ZAC Access Point is equipped with a grounding wire. It is important that the Access Point, cables, and PoE Injector must be properly connected to earth ground during normal use against surges or ESD. 1. Remove the screw on the grounding point at the bottom of the ZAC Access Point. 2. -
Page 19: Mount The Ap On A Pole
3. Connect the grounding wire to earth ground. Mount the AP on a Pole Turn the ZAC Access Point over. Put the pole mounting ring through the middle hole of it. Note that you should unlock the pole mounting ring with a screw driver before putting it through the device as the following right picture shows. -
Page 20: Power Up
Power Up Connect power cord to the PoE injector as the following right picture shows. Connect the Ethernet cable that connects the Access Point to the “POE” port of the PoE injector as figured below. P. 20... -
Page 21: Connect To The Access Point
Connect the power plug to a power socket. The Access Point will be powered up immediately. Connect to the Access Point To be able to configure and manage the Access Point, please do the followings: Connect to the Access Point To be able to configure and manage the Access Point, please do the followings: Open the ferrite core by unsnapping the connector latches. - Page 22 Loop the cable around and through the core. This helps "lock" the core in place, and may be required in circumstances with severe interference. Close the core and snap the halves back together. Note: The ferrite is professionally installed and a shrink wrap has been put around the ferrite so the users CAN’T take the ferrite off.
- Page 23 Connect the other end of Ethernet cable to a PC or a switch hub. The hardware installation is complete. P. 23...
-
Page 24: Chapter 2 Quick Setup Tutorial
Chapter 2 Quick Setup Tutorial Access the Web Configurator The ZAC Access Point provides you with user-friendly Web-based management interface to easily manage the access point. Configure the computer with a static IP address of 192.168.1.x, as the default IP address of the ZAC Access Point is 192.168.1.1. - Page 25 Enter the username (Default: admin) and password (Default: password) respectively and click “Login” to login the main page of the ZAC Access Point. Note: The username and password are case-sensitive, and the password should be no more than 19 characters! P.
-
Page 26: Configure The Ac+Thin Ap Mode
Configure the AC+Thin AP mode The ZAC Access Point provides 4 operation modes: “Thin AP”, “Virtual AC”, “Virtual AC+Thin AP ”, as well as “FAT AP”. The default mode is “Thin AP”. To allow the ZAC Access Point to manage the thin APs, you need to switch one of the ZAC Access Points to virtual controller mode first. - Page 27 For Virtual Controller + Thin AP mode, if you need to configure the wireless settings for the ZAC Access Point especially SSID and encryption method, go to Wireless Settings > Wireless Networks and click on #1 Wireless SSID for configuration. After the configuration is made, click Save to save the settings. A dialog message will pop up to remind you changes will also apply to other managed Thin APs.
- Page 28 Firmware Upgrade for ZAC AP in AC mode To upgrade the firmware for the ZAC Access Point in controller mode when necessary, go to Management > Firmware Upload and from Upgrade AC Firmware, browse the firmware file where it is placed.
-
Page 29: Information
Moving the mouse over MAC address of each managed AP will also display relevant RF information such as channel mode, current channel, antenna being used together with transmit output power. Chapter 5 Management Page 29... - Page 30 Manage Thin APs To configure and manage the managed APs: 1. Enter the web page of the ZAC Access Point in controller mode and go to Management > AP Management, the following screen shows up. The ZAC Access Point AP in Virtual AC+Thin AP mode on the list is highlighted in bold font. By selecting it and hitting Radio button, you may check radio setting such as channel bandwidth, channel, antenna and output power.
- Page 31 Besides radio setting, you may also reboot the managed AP, change its IP address and perform firmware upgrade for managed AP. Firmware Upgrade for Managed Thin APs For firmware upgrade, you may choose to upgrade the selected managed AP by hitting Upgrade Selected, or do the group upgrade by hitting Upgrade All.
-
Page 32: Fat Ap Mode
Monitor Managed Thin APs To view each managed AP’s status, please go to Status > Managed APs. Besides viewing device information such as device name, MAC address, IP address, and FW version, you may also monitor the wireless clients that are currently associated with the managed APs as well as packets statistics. Configure the Fat AP mode Fat AP mode operates as standalone AP that cannot be managed by the ZAC Access Point. - Page 33 effect. The Fat AP covers “AP mode”, “Wireless Client mode”, “Bridge mode” as well as “AP Repeater mode”. For details please refer to the next Chapter. AP Mode 1. Choose Wireless > Basic Settings. The default is AP mode already. Here, you can change wireless SSID for your public end user.
- Page 34 2. If security is required, open Wireless > Profile Setting and click on “Profile 1 Settings” as below. 3. You may configure the parameters like “Network Authentication” and “Data Encryption” for more secure network communication in your application. After the configuration is made, click Apply to save the parameters.
- Page 35 Wireless Client Mode Go to Wireless > Basic Settings and choose “Wireless Client” from Wireless Mode. Specify the SSID that you would like connect and click Apply to save the configuration. Besides specifying the SSID manually, you may select the preferable Access Point to connect by clicking the “Site Survey”...
- Page 36 3. If the AP you connect to require authentication or encryption keys, click Profile Settings in the left column, select the corresponding authentication and encryption options, and click “ Apply” to save configuration. 4. To check whether the association with the Access Point has been successfully made, go to Status > Connections.
- Page 37 Bridge Mode 1. Go to Wireless > Basic Settings. Choose “Bridge” from Wireless Mode, check a clean channel and click Apply to save configuration. 2. Go to “WDS Settings” in “Wireless”, input the MAC address of the remote bridge to “Remote AP MAC Address 1”...
- Page 38 3. Repeat the above procedures to configure the remote ZAC bridge. 4. Enter the actual distance in Space In Meter. For example, if the distance between the two ZAC bridges is 3 kilometers, enter 3000 in the field. Click Apply to save configuration. 5.
- Page 39 To establish point-to-point bridge connection, please follow the procedures described in Bridge mode. To connect the wireless client to the AP, please follow the procedures described in Wireless Client mode. Chapter 5 Management Page 39...
-
Page 40: Chapter 3 Navigate The Web Configurator
Chapter 3 Navigate the Web Configurator Virtual AC+Thin AP Mode Status View Basic Information Open “Information” in “Status” to check the basic information of the ZAC Access Point, which is read only. Information includes system information, IP settings, and wireless network setting. Click “Refresh”... -
Page 41: View Wireless Users
View Wireless Users Open “Wireless Users” in “Status” to check the information of all the wireless clients such as MAC address, SSID of the managed APs that are associated with, signal strength, connection up time, and uploaded/downloaded packets. All is read only. Click “Refresh” at the bottom to update the list. View DHCP Client Table Open “DHCP Clients”... -
Page 42: Wireless Settings
Wireless Settings Wireless Setting allows you to configure wireless parameters, security method, access control and flow control for your ZAC Access Point. Note that the configuration will also apply on all the other ZAC-managed APs. Wireless Networks (VAP Profiles Settings) The IEEE 802.11n ZAC Access Point allows up to 8 virtual SSIDs on a single BSSID and to configure different profile settings such as security and VLAN ID to each SSID. - Page 43 Basic Setting SSID: This wireless network name is shared among all associated devices in your wireless network. Keep it identical on all those devices. Note that the SSID is case-sensitive and cannot exceed 32 characters. Description: Name of the VAP profile Broadcast SSID: In AP mode, hiding network name is necessary when you are in a wireless environment that may have potential risk.
- Page 44 802.11a/n ZAC Access Point provides you with rock solid security settings. Network Authentication Open System: It allows any device to join the network without performing any security check. Shared Key: Data encryption and key are required for wireless authentication (Not available in Bridge/AP Repeater mode).
- Page 45 If Radius relevant authentication type is selected, please go to Wireless Radius Settings for further radius server configuration. WPA-PSK: It is a simplified WPA mode with no need for specific authentication server. In this so-called WPA Pre-Shared Key, all you have to do is just pre-enter a key in each WLAN node and this is the common way to be adopted in large and middle enterprise as well as residential network.
-
Page 46: Wireless Protocols
Network Basic Setting: Network Mode: Specify the network mode. It includes Bridge and Router. When switch to Router mode, the LAN IP address for web page access will become 192.168.0.99. Wireless Protocols Allow the user to change 802.11 mode and other advanced parameters for the ZAC Access Point. For the country region, FCC domain will support United States only. -
Page 47: Advanced Settings
Basic Settings Country Region: The availability of some specific channels and/or operational frequency bands is country dependent. For FCC domain, the default country is United States only. 802.11 Mode: The IEEE 802.11n ZAC Access Point can communicate with wireless devices of 802.11b/g or 802.11b/g/n. -
Page 48: Access Control
RIFS: RIFS (Reduced Interframe Spacing) is a means of reducing overhead and thereby increasing network efficiency HT Protect: Enable HT (High Throughput) protect to ensure HT transmission with MAC mechanism. Under 802.11n mode, wireless client can be divided into HT STA and Non-HT STA, among which the one with HT protect enabled gets higher throughput. -
Page 49: Traffic Shaping
mode. Open “Access Control” in “Wireless Settings” as below. Wireless Network: Select the VAP network you would like to enable access control. Access Control Mode If you select “Allow Listed”, only those clients whose wireless MAC addresses are in the access control list will be able to connect to your AP. -
Page 50: Radius Settings
Enable Traffic Shaping Check this box to control the overall bandwidth for a specific VAP network. Interface Selection: Select the VAP network you would like to enable traffic shaping. Outgoing Traffic Rate: To specify maximum outgoing bandwidth to a certain rate in kbit/s. Outgoing Traffic Burst: To specify the buffer size for outgoing traffic that can be sent within a given unit of time. -
Page 51: Tcp/Ip Settings
Authentication RADIUS Server This is for RADIUS authentication. It can communicate with RADIUS through IP Address, Port and Shared Secret. IP Address: Enter the IP address of the Radius Server; Port: Enter the port number of the Radius Server; Shared Secret: This secret, which is composed of no more than 31 characters, is shared by the IEEE 802.11n ZAC Access Point and RADIUS during authentication. -
Page 52: Captive Portal
LAN Settings: IP Address: Specify the IP address for the ZAC-managed Access Point. Subnet Mask: Specify the Subnet mask for the ZAC-managed Access Point. DHCP Server: Select to enable or disable DHCP server on the ZAC-managed Access Point. DHCP IP Address Range: When the DHCP Server is enabled, users may specify DHCP IP Address Range for the ZAC-managed Access Point. - Page 53 To enable Captive Portal, check “Captive Portal” and select the VAP network needed for captive portal. Radius Settings Primary Radius Server: Enter the name or IP address of the primary radius server Secondary Radius Server: Enter the name or IP address of the primary radius server if any. Radius Auth Port: Enter the port number for authentication Radius Acct Port: Enter the port number for billing Radius Shared Secret: Enter the secret key of the radius server...
-
Page 54: Firewall Settings
Firewall Settings The firewall is a system or group of systems that enforce an access control policy between two networks. It may also be defined as a mechanism used to protect a trusted network from an un-trusted network. The IEEE 802.11n ZAC Access Point has capabilities of Source IP Filtering, Destination IP Filtering, Source Port Filtering, Destination Port Filtering, Port Forwarding as well as DMZ. - Page 55 Destination IP Filtering: You may create and activate a rule that filters a packet based on the destination IP address to restrict the local computers from accessing certain websites. Check “Enable Destination IP Filtering” to activate rule. Destination IP Address: Enter the IP address to be restricted. Comment: Make comments to record your filtering rule.
- Page 56 Click Apply and the IP address will be added in the list. To delete the restricted source ports, click Select checkbox of the designated ports and click the Delete Selected button. You may delete all the IP addresses in the list by clicking Delete All. Destination Port Filtering: You may create and activate a rule that filters a packet based on the destination port from your local network to Internet.
-
Page 57: Management
Port Forwarding: The port forwarding allows you to automatically redirect common network services to a specific machine behind the NAT firewall. These settings ne are only necessary if you wish to host some sort of server like a web server or mail server on the private local network behind IEEE 802.11n Wireless ZAC Access Point’s NAT firewall. - Page 58 Restart: Restart the selected ZAC-managed AP. Rename: Rename for the selected ZAC-managed AP. Set IP: Assign a static IP address for the selected ZAC-managed AP or obtain the IP address from ZAC Access Point in AC mode. Default is DHCP client. Radio: To display the current radio settings such as channel bandwidth, operating channel, antenna and output power for the selected ZAC-managed Access Point.
-
Page 59: System Settings
Upgrade Selected: Upgrade firmware for the selected ZAC-managed AP. Note that you need to upload the firmware file into the ZAC Access Point in AC mode prior to firmware upgrade, otherwise a window will pop up saying TAP firmware hasn’t been uploaded. Upgrade All: Click to upgrade all the ZAC-managed APs simultaneously. - Page 60 between the access points but establish the redundant link as a backup if the initial link fails. STP Forward Delay: STP Forward Delay is the time spent in detecting and learning network tree topology state before entering the forward state. Default time value is 1 sec. IP Address Assignment: Obtain IP Address Automatically: If a DHCP server exists in your network, you can check this option, thus the IEEE 802.11n ZAC Access Pioint is able to obtain IP settings automatically from the...
Need help?
Do you have a question about the ZAC-1023-2-9 and is the answer not in the manual?
Questions and answers