Advertisement
Quick Links
Advertisement

Related Manuals for Dunelm Fulton Corner TV Unit


Summary of Contents for Dunelm Fulton Corner TV Unit
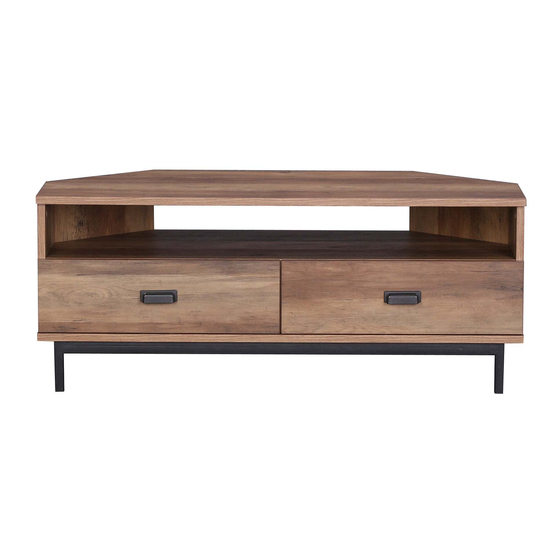
- Page 1 Fulton Corner TV Unit I N S TR UCTI ONS www.dunelm.com...
- Page 2 Thank you Dear Customer Thank you for purchasing your new piece of furniture from Dunelm. We put a lot of effort in the design and construction of our products to ensure they set the standard for quality, durability and ease of assembly.
- Page 3 Component parts supplied Ref Dimensions Visual Ref Dimensions Visual 29.4x23cm 61.5x17.3cm 29.4x23cm 109.9x47.9cm 23x15.5cm 46.7x11cm 105.9x43.9cm 22.5x11cm 64x12cm 22.5x11cm 43x3cm 54.5x16.6cm 102x12cm 54.5x16.6cm 109.9x47.9cm 47.5x21.7cm 31x29.4cm www.dunelm.com...
- Page 4 Parts and fittings Fixtures and fittings supplied(actual size) Dimensions 8X30mm 3.5X14mm 5X50mm 6X10mm 6X40mm 5X40mm 3X16mm Fixtures and fittings supplied(not to scale) Re Dimensions Re Dimensions Visual Visual www.dunelm.com...
-
Page 5: Exploded View
Exploded view www.dunelm.com... - Page 6 Whilst pushing the leaver down, slide the runners in opposite directions to each other to separate. Please do not wipe off the grease as this will help the runners slide back together at the end of assembly. D x 9 E1 x 3 www.dunelm.com...
- Page 7 Step 2: E1 x 1 D x 3 Step 3: CAM-LOCK Tighten until shoulder is flush with panel.Do not overtighten Shoulder or undertighten(see example below) NO GAP Panel Panel A x 6 www.dunelm.com...
- Page 8 TURN CLOCKWISE UNTIL SECURE CORRECT WRONG B x 2 C x 2 Step 5: WHEN FITTING CAMS ENSURE STARTING POSITION IS CORRECT BEFORE YOU INSERT CONNECTING CAM-PILLAR TURN CLOCKWISE UNTIL SECURE CORRECT WRONG C x 4 B x 4 www.dunelm.com...
- Page 9 Step 6: Do not tighten the screw until you attach the metal frame onto the bottom panel. H x 4 I x 2 G x 1 Step 7: I x 8 G x 1 www.dunelm.com...
- Page 10 Step 8: C x 10 F x 10 Step 9: www.dunelm.com...
- Page 11 Step 10: K x 4 Step 11: CAM-LOCK Tighten until shoulder is flush with panel.Do not overtighten Shoulder or undertighten(see example below) NO GAP Panel Panel A x 8 www.dunelm.com...
- Page 12 Step 12: WHEN FITTING CAMS ENSURE STARTING POSITION IS CORRECT BEFORE YOU INSERT CONNECTING CAM-PILLAR TURN CLOCKWISE UNTIL SECURE CORRECT WRONG C x 8 B x 8 Step 13: J x 4 www.dunelm.com...
- Page 13 A x 4 C x 4 J x 4 Step 15: WHEN FITTING CAMS ENSURE STARTING POSITION IS CORRECT BEFORE YOU INSERT CONNECTING CAM-PILLAR TURN CLOCKWISE UNTIL SECURE CORRECT WRONG C x 4 M x 2 B x 4 www.dunelm.com...
- Page 14 Step 16: E2 x 4 D x 12 Step 17: www.dunelm.com...
- Page 15 Step 18: Please slide the drawer backwards and forwards until the drawer runner is sliding smooth. www.dunelm.com...
- Page 16 Step 19: 1.Use stickers((L) on all visible holes. L x 1 www.dunelm.com...
- Page 17 Assembly instructions www.dunelm.com...
- Page 18 Always lift your furniture into place, avoid dragging it across the floor as this can cause damage to joints. When placing furniture on a wooden or laminate floor, please ensure that the plastic or felt protectors are securely fitted and in place. www.dunelm.com...
Need help?
Do you have a question about the Fulton Corner TV Unit and is the answer not in the manual?
Questions and answers