Table of Contents
Advertisement
Quick Links
Advertisement
Table of Contents

Related Manuals for Dunelm Churchgate Top Unit Glass Door


Summary of Contents for Dunelm Churchgate Top Unit Glass Door
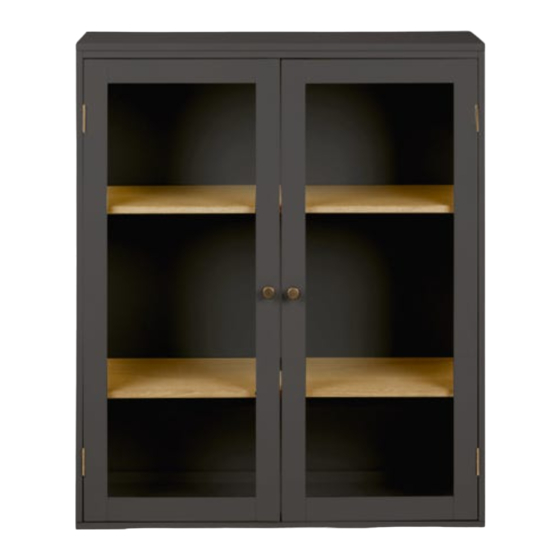
- Page 1 Top Unit Glass Door Assembly Instructions www.dunelm.com...
-
Page 2: Dear Customer
Thank You Dear Customer Thank you for purchasing your new piece of furniture from Dunelm. We put a lot of effort in the design and construction of our products to ensure they set the standard for quality, durability and ease of assembly. - Page 3 Component Parts Supplied Dimensions Visual 28.4 x 86.2cm 2.5 x 23.9cm 90 x 32 x 106.8cm dunelm.com...
- Page 4 See wall fixings guide towards the back of the assembly instructions for further guidance. Fixtures and fittings supplied (not to scale) Item Visual Handle Wall bracket Allen Tools required but not included Item Visual Item Visual Masonry drill L(*) Cordless Drill Wood drill bit (10mm) Cross-head screwdriver dunelm.com...
-
Page 5: Exploded View
Exploded View dunelm.com... - Page 6 This will allow you to check that the items fit in your space and also check for any problematic wall fixing positions, e.g. avoiding wiring and pipes etc. We also recommend you make note or mark which side panels for each base unit will be connecting to a neighbouring base unit. dunelm.com...
-
Page 7: Section 1: Assembling A Single Top Unit
Unscrew the handles (G) and screw (E) from the inside of the doors. Reattach the handles to the outside of the doors using the same screws (E) and the cross head screwdriver (K). E x2 G x2 K x1 dunelm.com... - Page 8 Once drilling completed, insert Wall plugs (F) into wall and take bracket (H) and screw (B) and fix a bracket to the wall. Then repeat this process for both brackets. Side view WALL J x1 B x2 F x2 H x2 K x1 L x1 dunelm.com...
- Page 9 Once in desired position, carefully use Screw (A) and hand screw driver ( K ) to fix top cabinet to wall. Repeat this for both wall mounting brackets. WALL WALL dunelm.com...
- Page 10 Section 1: Assembling a Single Top Unit Step 1.5: WALL dunelm.com...
-
Page 11: Section 2: Connecting Multiple Top Units
Clamp or hold a piece of wood to the outside surface of the cabinet over the drill point. WARNING: ONLY DRILL HOLES IN THE SIDE PANELS THAT WILL BE JOINED TO ANOTHER TOP UNIT. WALL J x1 M x1 dunelm.com... - Page 12 Section 2: Connecting Multiple Top Units Step 2.2: Side view W A L L J x1 K x1 L x1 B x2 per F x2 per H x2 per unit dunelm.com...
- Page 13 Then push the top cabinet against the wall if you wall is smooth a flat. If not, move slightly away from wall and align with back of base unit. Once in desired position, carefully use Screw (A) and hand screw driver (K) to fix top cabinet to wall. WALL WALL dunelm.com...
- Page 14 Wall plugs (F) into wall and take bracket (H) and screw (B) and fix bracket to wall. Side view B x2 per F x2 per H x2 per J x1 K x1 L x1 unit unit unit dunelm.com...
- Page 15 You will need to be careful that the fixing holes on the side of the first and second cabinet are now aligned Once in desired position, carefully use Screw (A) and hand screw driver (K) to fix top cabinet to wall. A x2 K x1 dunelm.com...
- Page 16 Now you are ready to attach the top units together. Insert bolts (C) and (D), and tighten from both sides with Allen keys ( I) p rovided. Please remember to tighten slowly. WALL C x2 D x2 I x2 dunelm.com...
- Page 17 Repeat the above steps unit all top units are fixed into place. In order to completely align top cabinets. You may need to do some final adjustments to top brackets that fix to the wall. Once all aligned you are now ready to insert shelves into your cabinets. WALL dunelm.com...
-
Page 18: Care And Maintenance
Generally aerated blocks should not be used to support heavy with plaster board loads, use a specialist fitting in partitions or hollow wooden this case. For light loads, a doors. General Purpose Plug can be used. dunelm.com... - Page 19 If your furniture becomes stained, scratched, chipped or suffers other damage, we recommend profes- sional help is sought to restore it. Please contact our customer services line for recommended agents. Always follow fitting instructions carefully and retain them for future use. dunelm.com...
- Page 20 Check out Dunelm.com for Wood Furniture Care Kits we have on offer If, in many years to come, you’d like to repaint your furniture, you absolutely can. For best results, we suggest following the steps below put together by our furniture team.
- Page 21 We offer a 5-year guarantee for the hardware on our Churchgate furniture range. What your Guarantee means The product you have purchased from Dunelm is provided with a 5-year hardware guarantee which is valid from the date of delivery. Please keep your proof of purchase as we will need to see this to validate your guarantee.
- Page 22 Dunelm gives no warranty as to how quickly a technician will be able to attend your home or how long any repairs may take. On occasion the repair may not be carried out on the same day as the technician attends to assess your item.
Need help?
Do you have a question about the Churchgate Top Unit Glass Door and is the answer not in the manual?
Questions and answers