
Related Manuals for JVC SP-UXDAB11


Summary of Contents for JVC SP-UXDAB11
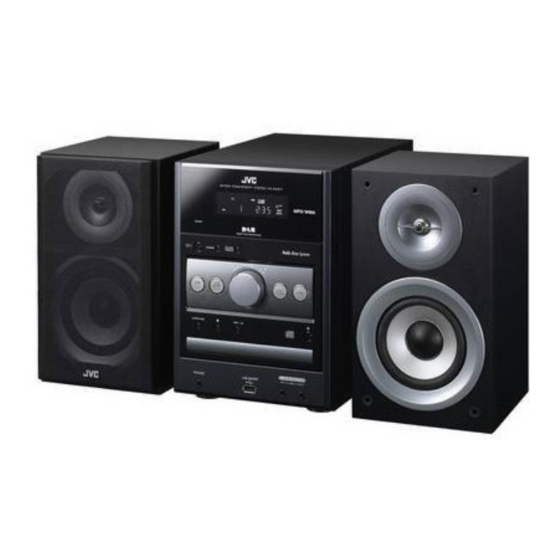
- Page 1 MICRO COMPONENT SYSTEM UX-DAB11 —Consists of CA-UXDAB11 and SP-UXDAB11 INSTRUCTIONS GVT0223-001B...
- Page 2 Warnings, Cautions and Others CAUTION — button! IMPORTANT for the U.K. Disconnect the mains plug to shut the power off DO NOT cut off the mains plug from this equipment. completely (the STANDBY lamp goes off ). When installing If the plug fi tted is not suitable for the power points in the apparatus, ensure that the plug is easily accessible.
- Page 3 Penalties may be applicable for incorrect disposal of this waste, in accordance with national legislation. (Business users) If you wish to dispose of this product, please visit our web page www.jvc-europe.com to obtain information about the take-back of the product. [Other Countries outside the European Union]...
-
Page 4: Table Of Contents
Thank you for purchasing a JVC product. Please read all instructions carefully before operation, to ensure your complete understanding and to obtain the best possible performance from the unit. Contents Precautions ......2 Listening to the Radio . -
Page 5: Precautions
Precautions Avoid moisture, water, dust, and high temperatures Notes on the power cord • Do not place the System in moist or dusty places. • When you are away on travel or otherwise for an • If water gets inside the System, turn off the power and extended period of time, remove the plug from the remove the plug from the wall outlet, then consult your wall outlet. -
Page 6: Connections
Connections Do not connect the power cord until all other connections have been made. NOTES • Make sure the antenna conductors do not touch any other terminals, connecting cords or the power cord. Also, keep the antennas away from metallic parts of the System, connecting cords, and the power cord. This could cause poor reception. - Page 7 For better FM reception FM antenna (supplied) Disconnect the supplied FM antenna, and connect to an Extend it to obtain the best outdoor FM antenna using a 75 Ω wire with a coaxial type reception. connector (IEC or DIN45325). Outdoor FM antenna (not supplied) AM loop antenna (supplied)
-
Page 8: Basic And Common Operations
Basic and Common Operations Operating on the System Press Turn on or off (standby) The STANDBY lamp on the System turns off/on. the power Changing the display Press when the System is turned on. brightness To cancel, press again. Press and hold for more than 2 seconds when the System is on standby. •... -
Page 9: Operating On The Remote Control
Operating on the Remote Control Press Turn on or off (standby) the The STANDBY lamp on the System turns off/on. power See “Playing Back a Disc/USB Mass Storage Class Device” on page 7. Select a source See “Listening to the Radio” on page 10. See “Listening to a Digital Audio Player”... -
Page 10: Playing Back A Disc/Usb Mass Storage Class Device
Playing Back a Disc/USB Mass Storage Class Device This System can play back following discs and files: – CD. – CD-R/CD-RW recorded in audio CD format (CD-DA). – MP3/WMA files on CD-R/CD-RW recorded in ISO 9660 format. – MP3/WMA files on a USB mass storage class device. •... -
Page 11: Operations
Basic Disc/USB Mass Storage Class Device Operations Press On the On the System remote • The current track number and elapsed playing time appear on Play back the disc the main display. For MP3/WMA files: Before the current track number and elapsed playing time appear, the tag information is scrolled if it Play back a USB mass is recorded. -
Page 12: Playing At Random-Random Play
Playing at Random—Random Play Programming the Playing Order —Program Play Press until the RND • This function is not available for MP3/WMA discs. (random) indicator • You can program up to 32 tracks. lights up on the display before playback. Press repeatedly until the PRGM Playback starts in a (program) indicator lights up on the... -
Page 13: Listening To The Radio
Listening to the Radio Basic Tuner Operations Press On the System On the remote The selected band and frequency appear on the main display. • When an FM stereo broadcast or a DAB service with sufficient signal strength is tuned in, the ST (stereo) indicator lights Select a band up on the display. -
Page 14: Presetting Stations And Services
Presetting Stations and Services Receiving FM Stations with Radio Data System You can preset 30 FM stations, 15 AM stations and 30 DAB services manually. Radio Data System allows FM stations to send an additional signal along with their regular program signals. Tune in to the station/service you want to With the System, you can receive the following types of preset. -
Page 15: Switching Temporarily To A Program Of Your Choice Automatically
Searching for Programs Using PTY Switching Temporarily to Codes (PTY Search) a Program of Your Choice Automatically While listening to an FM station: The Enhanced Other Networks function allows the System You can locate a particular kind of program from the 30 to switch temporarily to a station/service broadcasting a preset stations (see page 11) by specifying a PTY code. -
Page 16: What Is The Dab System
What is the DAB System? Scanning for Ensembles DAB (Digital Audio Broadcasting) is one of the digital radio The System scans the DAB bands to pick out available broadcasting systems available today. It can deliver digital ensembles under your receiving conditions. quality sound without any annoying interference or signal •... -
Page 17: Listening To A Digital Audio Player
Listening to a Digital Audio Player To Play Back a Digital Audio Player IMPORTANT: It should be noted that it may be unlawful to Easily re-record pre-recorded tapes, records, or discs Quick Portable Link (QP Link) automatically switches without the consent of the owner of copyright in the source to LINE as the Digital Audio Player the sound or video recording, broadcast or cable connected to the LINE IN jack starts playback. -
Page 18: Setting The Clock And Daily Timer
Setting the Clock and the Daily Timer Setting the Clock Without setting the built-in clock, you cannot use the Daily Timer or the Sleep Timer. Press to activate the clock setting mode. • If you have already adjusted the clock before, press repeatedly until the clock setting mode is selected. -
Page 19: Learning More About This System
– Playable files which do not belong to any groups are If a folder does not include MP3/WMA tracks, they are treated as being part of Group 1. ignored. JVC bears no responsibility for any loss of data in USB mass storage class device while using this System. - Page 20 Listening to the Radio (see pages 10 to 13) Setting the Clock and the Daily Timer (see page 15) • The time shown on the display is based on the built- • “0:00” flashes on the main display until you have set the in clock of the System, not on the information sent clock.
- Page 21 Description of the PTY codes for Radio Data System and DAB NEWS: News. WEATHER: Weather reports and forecasts. AFFAIRS: Topical program expanding or enlarging FINANCE: Stock Market reports, commerce, trading upon the news—debate, or analysis. etc. INFO: Programs the purpose of which is to CHILDREN: Programs targeted at a young audience.
-
Page 22: Troubleshooting
Troubleshooting If you are having a problem with your System, check this list for a possible solution before calling for service. MP3/WMA groups and tracks are not played back as General you expect. \ The playing order was determined when the groups The power does not come on. -
Page 23: Maintenance
Specifications Maintenance To get the best performance out of the System, keep your Amplifier section discs and the mechanism clean. OUTPUT POWER: 40 W (20 W + 20 W) at 6 Ω (10% THD) Handling discs Speakers/Impedance: 6 Ω – 16 Ω •... - Page 24 SAFETY INSTRUCTIONS “SOME DOS AND DON’TS ON THE SAFE USE OF EQUIPMENT” This equipment has been designed and manufactured to meet international safety standards but, like any electrical equipment, care must be taken if you are to obtain the best results and safety is to be assured.
Need help?
Do you have a question about the SP-UXDAB11 and is the answer not in the manual?
Questions and answers