Advertisement
Quick Links
Advertisement

Subscribe to Our Youtube Channel
Summary of Contents for Kogan FORTIS FSEFBTM450A
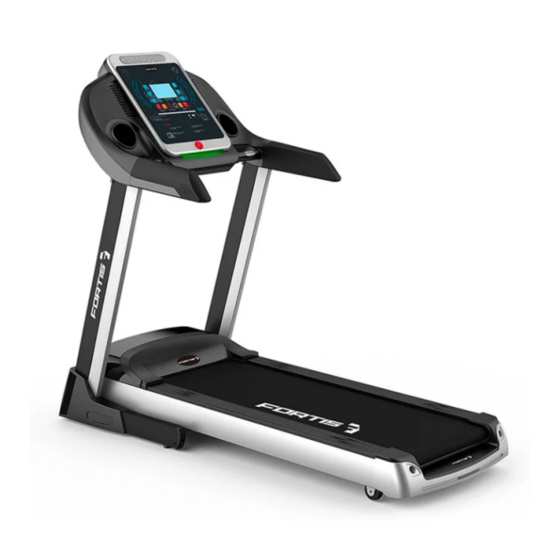
- Page 1 450MM BELT AUTO INCLINE PREMIUM TREADMILL FSEFBTM450A...
-
Page 3: Safety And Warnings
SAFETY & WARNINGS • Install the treadmill in a dry location away from water, dampness and dust. • Do not run on the treadmill with bare feet. Wear appropriate exercise clothing. • Plug the treadmill into a grounded electrical socket. •... - Page 4 ASSEMBLY Step 1: Upright Frame Lift the upright frame, handle and control console, into position and fix in place using x2 M8x45 screws with x2 M8 nuts and x2 M8x20 screws. One of each on each side of the joining section as shown in the image. Step 2: Hand Grips Screw in the hand grips on both sides with M8x20 screw and washer separately by making them pass through handgrip hole and connect with the upright frame.
- Page 5 Step 3: Column Edge Strips Insert the x8 clips into the column edge strips and then attach the edge strip to the frame by pushing it into position. Note: The right column has one hole more than the left column. Step 4: Leg Sheaths Align the two left and right column sheaths with the holes and press them into position firmly.
- Page 6 Step 5: Remove Transport Safety Buckle Remove the safety fixing buckle that holds the legs to the bottom frame using a hex wrench. Note: The treadmill cannot be folded and stored with these buckles still attached. Step 6: Insert Safety Tether Insert the safety tether provided into the yellow mark tether hole on the console below the display.
-
Page 7: Operation
OPERATION Flip the Master Power Switch that is located at the front of the treadmill to the ‘ON’ position. The computer console will beep for 1 second before starting. Before beginning a workout session ensure that the Safety Tether Key is properly placed onto the Computer Console and the Safety Clip is securely attached to an article of your clothing. - Page 8 Console Display Press the START/STOP button to start or stop the START/STOP treadmill. The speed of the treadmill can be adjusted up and SPEED +/SPEED - down between 0.8 and 18 KMPH using the SPEED + and SPEED – keys. Press one of the INSTANT SPEED buttons (6 / 8 / 12) on INSTANT SPEED the computer console and the screen will display the...
- Page 9 Displays the total calories burned during your workout. Calorie starts counting up from 10 to 999 calories. You CALORIES may also pre-set target calories in STOP MODE-H3 before training. Download Bluetooth app HK-Treadmill, from Google Play for Android OS system, from App Store for Apple Bluetooth App IOS system, then customers can control treadmill START, STOP, SPEED or INCLINE by mobile phone.
- Page 10 MODE The split window of TIME begins blinking. The initial pre-set target time is 15:00 minutes. Press the SPEED+/SPEED- button on the computer console to change the setting. The pre-set training program time range is from 5:00 to 99:00 minutes. Once you select H-1 Time mode training time, press the START/STOP button on the console to start exercise, the screen will countdown 3...
- Page 11 Program The computer offers 12 pre-set programs which vary the speed and incline of your workout over a 20-minute time period. The treadmill must not be running to select a program. Press the SELECT button on the computer console to select training program. Refer to the table below for list of programs.
- Page 12 Body Fat Test Program: While the treadmill is not running, press SELECT key and choose body fat test program (FAT). Press the START key for 3 seconds to enter into body fat test. Set the corresponding parameters: Gender 01-Male 02-Female 10-99 Height 100-200...
-
Page 13: Cleaning And Care
CLEANING & CARE Usage and Lubrication • When used in a week for less than 3 hours, it should be lubricated once every 5 months. • Between 4-7 hours, it should be lubricated once every two months. • More than 7 hours, it should be lubricated once a month. Note: The treadmill can’t be over-lubricated. - Page 14 Auto Lubrication In order to ensure adequate lubrication between the treadmill and running belt and to extend the service life of the treadmill, it is equipped with an automatic lubrication system to prevent forgetting to lubricate and possible damage to the treadmill. When setting up the machine, open the hole on the back of motor cover;...
- Page 15 Running Belt Tension Adjustment All treadmills’ belts should be adjusted before leaving the factory and after the installation; however, after it is used for a period, tension may decrease. To tighten the belt, adjust the tighten bolts at the bottom end of the treadmill evenly on both the left and right sides using a 6mm hex key.
-
Page 16: Troubleshooting
TROUBLESHOOTING Fault Code Main Reason Solution Check the connection wire between computer and control board was well The wire from connected. computer to bottom Make sure the IC on the control board was control board isn’t well inserted. If not re-insert. properly connected Abnormal power supply in control board. - Page 17 NOTES...
- Page 20 Need more information? We hope that this user guide has given you the assistance needed for a simple set-up. For the most up-to-date guide for your product, as well as any additional assistance you may require, head online to help.kogan.com.


Need help?
Do you have a question about the FORTIS FSEFBTM450A and is the answer not in the manual?
Questions and answers