Table of Contents
Advertisement
Advertisement
Table of Contents

Related Manuals for Scotchman IRONWORKER 6509-24M


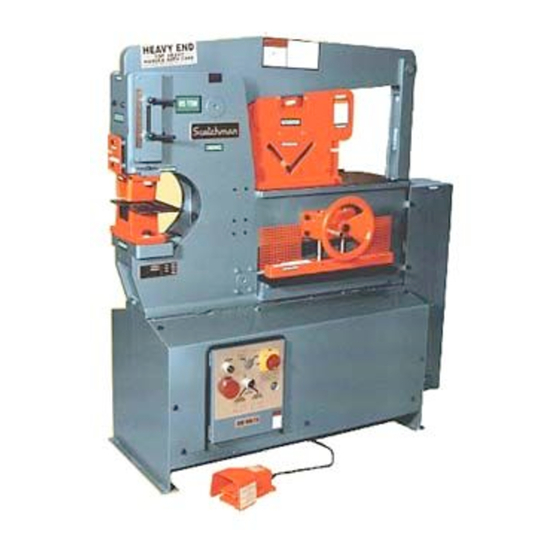
Summary of Contents for Scotchman IRONWORKER 6509-24M
- Page 1 MODEL 6509-24M IRONWORKER PRINTED MARCH 2005 Page 1...
-
Page 2: Table Of Contents
TABLE OF CONTENTS SECTION DESCRIPTION PAGE # INTRODUCTION SAFETY PRECAUTIONS WARRANTY WARNING LABELS INSTALLATION & SET-UP 10-17 Physical Dimensions 10-11 Machine Moving Procedures 12-13 Physical Inspections Electrical Requirements 14-15 Machine Start Up Machine Stroke Inspection & Adjustment 16-17 MAINTENANCE 18-21 Lubrication Routine Lubrication 18-19... - Page 3 TABLE OF CONTENTS SECTION DESCRIPTION PAGE # 7.10 Optional Punch and Die Holders 56-57 7.10A 2-1/2" & 3" Die Inserts 7.10B Offset Die Holder 7.10C 6 x 6 Die Holder 7.10D # 45 Punch Retaining Nut 7.10E Heavy Duty Split Ring Retaining Nut 7.11 Optional Gauging Equipment 58-59...
-
Page 4: Introduction
The hydraulic system operates at a maximum pressure of 2,700 PSI and is protected from overload by a pilot operated relief valve. The Scotchman 6509-24M Ironworker lends itself to a variety of special purpose tools that can be mounted on the tool table where a selection of power and stroke potentials are available. -
Page 5: Safety Precautions
2.0 SAFETY PRECAUTIONS The operators of this machine must be qualified and well trained in the operation of the machine. The operators must be aware of the capacities of the machine and the proper use of the hold down devices, strippers and guards provided with the machine. All of the guards, adjustable restrictors and awareness barriers must be installed on the machine and kept in good working order. - Page 6 Set up a program of routine inspections and maintenance for this machine. Make all repairs and adjustments in accordance with the manufacturer’s instructions. A safety VHS tape was mailed to you or shipped with the machine. If you did not receive it, please contact the factory or your local dealer immediately and one will be sent to you at no charge.
-
Page 7: Warranty
2.1 WARRANTY Scotchman Industries Inc. will, within one year of date of purchase, replace F.O.B. the factory or refund the purchase price for any goods which are defective in materials or workmanship, provided that the buyer returns the warranty registration card within thirty days of the purchase date and, at the seller’s option, returns the defective goods freight and delivery prepaid to the seller, which shall be the buyer’s... -
Page 8: Warning Labels
3.0 WARNING LABELS ITEM PART # DESCRIPTION 003145 REMOVE TOOL 003110 PUNCH & DIE WARNING 003115 DO NOT REMOVE 003125 KEEP HANDS CLEAR 003130 30 TON OFFSET 019101 HEAVY END DECAL 003100 WARNING LABEL 003120 DANGER VOLTAGE LABEL 003105 BAR SHEAR WARNING 003530 COMPLETE DECAL PKG. - Page 9 FIGURE 1 Page 9...
-
Page 10: Installation & Set-Up
4.0 INSTALLATION & SET UP CAUTION: THIS SECTION DISCUSSES INSTALLATION AND SET-UP PROCEDURES. PLEASE READ THOROUGHLY BEFORE OPERATING THIS MACHINE. FIGURE 2 Page 10... -
Page 11: Physical Dimensions
4.1 PHYSICAL DIMENSIONS INCHES A. Floor to punch ram 44-7/8 113.9 B. Floor to top of die holder 40-7/8 103.8 C. Floor to punch bolster 91.4 D. Floor to bottom rail 3-3/4 E. Floor to Bar Shear 28-1/2 72.4 F. Floor to tool table 42-1/2 107.9 G. -
Page 12: Machine Moving Procedures
4.2 MACHINE MOVING PROCEDURES This machine is designed to be moved with a forklift. The weight of this machine is 2,750 pounds (1,250 Kg.). Check the capacity of the lifting equipment before attempting to move the machine. THIS MACHINE IS TOP HEAVY AND SHOULD BE MOVED WITH CARE AND ON FLAT SURFACES ONLY. -
Page 13: Physical Inspections
4.3 PHYSICAL INSPECTIONS After the machine has been located, remove the side shrouds and inspect the interior of the machine for possible shipping damages. CHECK SPECIFICALLY THE FOLLOWING ITEMS: Stroke control handles and limit switches. Pump and motor assembly. Hydraulic hoses and fittings. Starter box and control box. -
Page 14: Electrical Requirements
4.4 ELECTRICAL REQUIREMENTS CAUTION: TO PREVENT DAMAGE TO THE MOTOR AND DANGER TO THE OPERATOR, ALL ELECTRICAL CONNECTIONS SHOULD BE MADE BY A LICENSED ELECTRICIAN. FIGURE 4 All machines are wired for three phase electrical power unless otherwise specified. To insure satisfactory machine performance, the supply voltage should be (+ or -) 10% of the motor voltage rating. -
Page 15: Machine Start Up
POWER REQUIREMENTS: Motor frame 3PH = 182T 1PH = 184T MOTOR VOLTAGE FULL LOAD CURRENT (VAC) (AMPS) 15.5 230 (Single Phase) 23.5 Motor power rating: 5hp Speed 1,725 RPM KVA power rating: 5.6 KVA Frequency 60 HZ Starting Current: 210% Full Load 4.5 MACHINE START-UP Before starting this machine, take time to thoroughly review the VHS safety tape and the operator’s manual. -
Page 16: Machine Stroke Inspection & Adjustment
4.6 MACHINE STROKE INSPECTION & ADJUSTMENT The stroke setting is important for the proper operation of the machine. If this setting has changed, the machine may overtravel and cause the cylinder to "bottom out". This continued condition will eventually cause the starter overload to open. It can also cause the hydraulic oil to overheat and damage hydraulic system components. - Page 17 FIGURE 5 Page 17...
-
Page 18: Maintenance
5.0 MAINTENANCE The Scotchman Ironworker is an exceptionally rugged machine designed for long life with a minimum amount of maintenance. A regular program of servicing will extend the life of the machine and prevent costly down time. 5.1 LUBRICATION ... - Page 19 FIGURE 6 Page 19...
-
Page 20: Scheduled Maintenance
5.3 SCHEDULED MAINTENANCE A program of scheduled maintenance should be set up and documented according to your application and the frequency you use this machine. The following is a list of important items that should be included in a scheduled maintenance program: EVERY 500 HOURS OR 6 MONTHS: Check the tolerance between the punch ram and the punch ram bushing. - Page 21 FIGURE 7 Page 21...
-
Page 22: Machine Operation
6.0 MACHINE OPERATION 6.1 PUNCH OPERATION ALWAYS WEAR SAFETY GLASSES. THE FIRST AND MOST IMPORTANT PROCEDURE IS THE PROPER METHOD OF CHANGING AND ALIGNING PUNCHES AND DIES. FIGURE 8 Page 22... - Page 23 ALIGNMENT AND REMOVAL OF PUNCHES AND DIES: WARNING: Failure to properly align punches and dies can cause serious bodily injury to personnel and/or damage to equipment. Please read carefully and understand the following method. It will also be helpful to refer to the safety tape provided for a visual reference. If you did not receive a safety tape, please contact your dealer or the factory.
- Page 24 NOTE: Please note that all of our shaped punches, including squares, ovals, hexagons and special order punches, are manufactured with a keyed locking system. The keyed slot mates with slots in the punch ram to allow two positive locked positions for the punch. 15.
- Page 25 DO NOT PUNCH ANYTHING THICKER THAN THE PUNCH DIAMETER. This "rule of thumb" can be extended, but the punch supplier or Scotchman should be consulted first, (i.e. do not punch plate thicker than 1/2 inch with a 1/2 inch diameter punch). This rule of thumb applies to mild steel and must be reduced when punching alloy steels.
- Page 26 In mild steels, material thicknesses of 1/4 inch through 5/8 inch should have a total punch to die clearance of 1/32 inch. (Punch diameter + 1/32" = Die diameter.) 3/4 inch thick mild steel should have a minimum of 1/16 inch clearance. (Punch diameter + 1/16" = Die diameter.) In thin materials, the recommended punch to die clearance is 1/10 of the material thickness.
-
Page 27: B Stripper Adjustment
6.1B STRIPPER ADJUSTMENT CAUTION: TO PREVENT PUNCH BREAKAGE ON THE RETURN STROKE, THE STRIPPER MUST BE ADJUSTED SO THAT THE BOTTOM OF THE STRIPPER IS PARALLEL WITH THE MATERIAL BEING PUNCHED. REFER TO FIGURE 10 BELOW. TO ADJUST THE STRIPPER: The height of the stripper is adjusted using the adjustment bolts (A &... -
Page 28: Bar Shear Operation
Before using the bar shear, make sure that all tooling has been moved out from under the upper arm and that the punch and die have been removed from the punch station. When using the Bar Shear on your Scotchman Ironworker, ALWAYS use the hold-down device. ... - Page 29 IN ADDITION TO THE SIX BASIC STEPS OF OPERATION, THE OPERATOR SHOULD ALSO BE FAMILIAR WITH THE FOLLOWING: MAINTAIN PROPER BLADE CLEARANCE. The quality of the cut is an immediate indication of the condition of the Shear Blades, the amount of clearance between the blades or the amount of "spring-back"...
-
Page 30: A Shear Arm Adjustment
6.2A SHEAR ARM ADJUSTMENT REFER TO FIGURE 11 ON THE FOLLOWING PAGE. Adjustment on the shear arm is maintained on the front (operator’s) side by the pressure plate (A) and on the rear by the rub blocks (I & J). The cylinder cover shroud must be removed to gain visual access. USE THE FOLLOWING STEPS TO ADJUST THE SHEAR ARM. - Page 31 FIGURE 11 Page 31...
-
Page 32: B Shear Blade Adjustment
6.2B SHEAR BLADE ADJUSTMENT SEE FIGURE 11 ON THE PRECEDING PAGE. Remove the Shear Table (K) and unlock the lock nuts on the back-up screws (E). Loosen the four (4) socket head retaining screws (D) that hold the lower blade support (C) to the top of the Shear Bed and remove the blade and the lower blade holder. - Page 33 FIGURE 12 Page 33...
-
Page 34: Optional Tool Operation
At the beginning of the section, there is a graphical illustration of the available tonnage at locations along the Upper Arm. SEE FIGURE 13 ON THE FOLLOWING PAGE. This graph will be helpful in setting up various Scotchman or custom tooling. Page 34... - Page 35 FIGURE 13 Page 35...
-
Page 36: X 6 Angle Shear
7.1 6 X 6 ANGLE SHEAR The 6 x 6 angle shear is a component tool designed to shear angle iron. It installs in the tool station on this machine and has a maximum capacity of 6 x 6 x 3/8 or 5 x 5 x 1/2 inch (150 x 150 x 9.5 or 125 x 125 x 12mm) mild steel angle iron. - Page 37 CAUTION: IF THE ANGLE SHEAR SHOULD JAM FOR ANY REASON, DO NOT ATTEMPT TO FREE IT BY HAND!!! USE A PRY BAR OR SIMILAR DEVICE. REPLACE THE BLADES OR INSTALL SHIMS, DEPENDING ON WHAT CAUSED THE JAM. REMOVE THE TOOL WHEN IT IS NOT IN USE.
-
Page 38: Rod Shear
7.2 ROD SHEAR The rod shear is a component tool designed to shear sections of solid round and square stock. It has 9 round cavities that range from 1/4 to 1-1/4 inches (6 to 30mm) and one square cavity that has the capacity 1/4 to 1 inch (6 to 25mm). - Page 39 FIGURE 15 Page 39...
-
Page 40: X 6 90 Degree Notcher
7.3 6 X 6 NINETY DEGREE NOTCHER The 6 x 6 ninety degree notcher is a component tool designed to cut 90 degree Vee notches in angle and flat stock. It has a maximum capacity of 5/16 of an inch (8mm) thickness mild steel. 7.3A 6 X 6 NINETY DEGREE NOTCHER INSTALLATION SEE FIGURE 16 ON THE FOLLOWING PAGE. - Page 41 FIGURE 16 Page 41...
-
Page 42: Rectangle Notcher
7.3C BLADE REPLACEMENT The lower blades are symmetrical and can be rotated to expose four cutting edges. The upper blades have two cutting edges. TO ROTATE OR REPLACE THE BLADES, USE THE FOLLOWING STEPS: CAUTION: THE UPPER CASTING OF THE NOTCHER IS HEAVY ENOUGH TO CAUSE INJURY IF DROPPED. - Page 43 7.4B RECTANGLE NOTCHER OPERATION CAUTION: BEFORE OPERATING THIS TOOL, THE DOWNSTROKE OF THE MACHINE MUST BE SET SO THAT THE FRONT OF THE TOP BLADE JUST PASSES THE LOWER BLADES, APPROXIMATELY 1/8 OF AN INCH (1.5MM). FAILURE TO SET THE STROKE WILL RESULT IN DAMAGE TO THE TOOL AND POSSIBLE INJURY TO THE OPERATOR.
-
Page 44: 24 Inch Brakes
7.5 12, 18 AND 24 INCH BRAKES Brakes are component tools designed to bend and form mild steel. They are shipped standard with dies to accommodate material up to 1/4 of an inch (6mm) thickness. The selector switch must be in the SHEAR position to operate these tools. - Page 45 90 degrees, adjust the down-stroke of the machine until the desired bend is obtained. A great variety of standard brake dies can be used with this unit. These are available from Scotchman Industries or Brake Die suppliers. ...
-
Page 46: Angle Iron Brake
7.6 ANGLE IRON BRAKE This brake is designed to form box frames out of angle iron. It has a maximum capacity of 1/4" (6mm). 7.6A ANGLE IRON BRAKE INSTALLATION SEE FIGURE 20 ON THE FOLLOWING PAGE. This brake mounts in the punch station and the selector switch must be in the PUNCH position to operate this tool. - Page 47 FIGURE 20 Page 47...
-
Page 48: Channel Shear
7.7 CHANNEL SHEAR The Channel Shear is a component tool designed to shear 2 to 5 inch (50 to 125mm) standard channel on this model. 7.7A CHANNEL SHEAR INSTALLATION SEE FIGURE 21 BELOW. The Channel Shear installs under the upper arm in the tool station. The selector switch must be in the SHEAR position to operate this tool. - Page 49 7.7B CHANNEL SHEAR OPERATION The Channel Shear will shear from 2 to 5 inch (50 to 150mm) lightweight (5.4 lb/ft) channel with minimum distortion. Lubricate the blades before the first cut and every 10 to 15 cuts, thereafter. Grease the slider block between the upper arm and the tool every two hours of operation. THE FOLLOWING ARE BASIC STEPS IN SHEARING WITH THE CHANNEL SHEAR.
-
Page 50: Pipe Notcher
7.8 PIPE NOTCHER The Pipe Notcher is a component tool designed to saddle cut pipe or tubing for applications such as railings. There are notchers available to notch angles in pipe and tubing, also. For prices and availability, contact your local dealer or the factory. 7.8A PIPE NOTCHER INSTALLATION SEE FIGURE 22 ON THE FOLLOWING PAGE. - Page 51 FIGURE 22 Page 51...
- Page 52 7.8B PIPE NOTCHER OPERATION The Pipe Notcher is a vendored item for Scotchman Industries. The following is the manufacturer’s recommendation for maintenance and alignment of this tool. PLEASE READ CAREFULLY BEFORE USE OF TOOLING. TO ACHIEVE THE BEST RESULTS FROM YOUR UNIT, PLEASE OBSERVE THESE SIMPLE RULES: Keep the unit clean.
-
Page 53: Picket Tool
7.9 PICKET TOOL INSTALLATION & OPERATION This tool mounts in the punch station only. REFER TO THE DRAWING BELOW. The machine must be in the PUNCH position to operate this tool. Remove the die holder, stripper and the punch retaining nut. Install the tool so that the punch ram aligns with the ram on the picket tool and, with the finger clamps (C) provided, anchor it to the punch bolster. -
Page 54: Square Tube Shear
7.10 SQUARE TUBE SHEAR SEE FIGURE 25 ON THE FOLLOWING PAGE. The square tube shear is designed to shear square tubing from 1/4" to 2". 16 gauge is the maximum material thickness. 7.10A SQUARE TUBE SHEAR INSTALLATION SEE FIGURE 25 ON THE FOLLOWING PAGE. This tool mounts on the tool table. - Page 55 FIGURE 25 Page 55...
-
Page 56: Optional Punch And Die Holders
7.11 OPTIONAL PUNCH AND DIE HOLDERS 7.11A 2-1/2" AND 3" DIE INSERTS The 2-1/2 and 3 inch (63 and 76mm) die inserts are designed to fit in the standard die holder in place of the 2 inch (50mm) insert. They are used in oversize punching applications. For applications, refer to the punch and die section of the Tooling Parts Manual. -
Page 57: E Heavy Duty Split Ring Retaining Nut
7.11E HEAVY DUTY SPLIT RING RETAINING NUT SEE FIGURE 26 BELOW. The heavy duty split-ring retaining nut is used in oversize punching applications that require a punch with a 2 inch (50mm) shank diameter. This retaining nut is provided with a brass billet screw in the threaded section. -
Page 58: Optional Gauging Equipment
7.12 OPTIONAL GAUGING EQUIPMENT 7.12A 54 INCH (137 CM) DELUXE BACK GAUGE The 54 inch (138cm) back gauge mounts on the drop-off side of the machine and will reach all three stations from one point. It is designed to be used as a length stop in the shear, punch and tooling stations. For the proper configuration for each station, SEE FIGURE 27 ON THE FOLLOWING PAGE. - Page 59 FIGURE 27 Page 59...
-
Page 60: Trouble Shooting Guide
8.0 TROUBLE SHOOTING GUIDE 8.1 ELECTRICAL TROUBLE SHOOTING - MOTOR CAUTION: ALL ELECTRICAL WORK PERFORMED ON THE 6509 IRONWORKER SHALL BE DONE BY A QUALIFIED ELECTRICIAN. MOTOR WILL NOT RUN: Check to be sure that the disconnect switch is in the ON position and that the selector switch is in the START position. -
Page 61: Limit Switch Inspection
The solenoid on the control valve is not functioning: REFER TO SECTION 8.3. The foot pedal switch is not functioning properly: A voltage test may be run on the terminal strip in the control box to determine if the foot-switch is working properly. WARNING: THERE IS LINE VOLTAGE PRESENT IN THE CONTROL BOX WHEN THE MACHINE IS POWERED. -
Page 62: Control Valve Inspection
8.3 CONTROL VALVE INSPECTION THE MACHINE WILL ONLY TRAVEL IN ONE DIRECTION. THIS COULD BE CAUSED BY: Contamination in the hydraulic oil which causes the spool to stick in one position. With the machine’s power off, the spool of the valve can be manually shifted. On each end of the control valve, there is a pin in the center of the knurled nut that holds the coil on. -
Page 63: Hydraulics
8.4 HYDRAULICS THE MOST COMMON HYDRAULIC PROBLEMS ARE: Low level of hydraulic oil in the reservoir: The reservoir holds 12 U.S. gallons (45 Liters). The level should be 1" below the top of the reservoir. Contamination in the hydraulic oil: The oil and the filter should be changed at least once a year and any time there is a possibility that contamination has gained access into the system. -
Page 64: Cylinder Seal Replacement
8.5 CYLINDER SEAL REPLACEMENT Use the following steps to replace the seals in the hydraulic cylinder: SEE FIGURE 28 ON THE FOLLOWING PAGE. IF YOUR MACHINE HAS A DIFFERENT STYLE OF CYLINDER, REFER TO SECTION 10.0. With the selector switch in the SHEAR position and the arms up, turn the machine’s power off at the disconnect switch and lock it. - Page 65 16. Cycle the machine several times to purge the air out of the hydraulic system. FIGURE 28 Page 65...
-
Page 66: Ironworker Parts Lists
9.0 6509 IRONWORKER PARTS LISTS THE FOLLOWING SECTION CONTAINS THE IRONWORKER PARTS LISTS AND DRAWINGS. FOR YOUR CONVENIENCE, ALWAYS GIVE YOUR COMPLETE SERIAL NUMBER WHEN ORDERING PARTS. 9.1 SHEAR ARM ASSEMBLY ITEM PART # DESCRIPTION 030650 Rub Block 006240 Shear Arm 010176 Brass Bushings 080031... - Page 67 214012 M-10 Washer 212014 M-12 Lock Washer 214014 M-12 Washer 214017 M-16 Washer 212012 M-10 Lock Washer FIGURE 29 Page 67...
-
Page 68: Punch Assembly
9.2 PUNCH ASSEMBLY ITEM PART # DESCRIPTION 006260 Punch Bolster 221420 M-16 SHCS 113017 Reid Washer 201640 M-16 HHCS 534001 Die Holder (Includes F, I & J) 218058 M-10 Set Screw 006202 #82 Die Insert 218050 M-10 Set Screw 534402 Punch Plate 230107 M-8 FSHCS... - Page 69 FIGURE 30 Page 69...
-
Page 70: Stripper Assembly
9.3 STRIPPER ASSEMBLY ITEM PART # DESCRIPTION 007228 Stripper 007229 Adjustment Screw (Left) 007237 Stripper Stud (Left) 007240 Spring Retainer 007241 Spring 007236 Adjustment Screw (Right) 007239 Spring Rod 220014 M-6 x 10 BHCS 007242 Sight Glass (3-1/4 x 1-7/8) 007248 Sight Glass (4 x 2-5/15) 007253... - Page 71 FIGURE 31 Page 71...
-
Page 72: Upper Arm Assembly
9.4 UPPER ARM ASSEMBLY ITEM PART # DESCRIPTION 007220 Upper Arm (Includes A, B, D & F) 010176 Bushing 080174 Grease Bolt 007226 Upper Arm Bushing 006130 Upper Arm Pin 006174 Punch Pin & Bushing FIGURE 32 Page 72... -
Page 73: Stroke Control Assembly
9.5 STROKE CONTROL ASSEMBLY ITEM PART # DESCRIPTION 007104 Cover (S/N#5035FF To 5279FF) 007105 Cover (S/N#5280FF & Up) 212012 M-10 Lock Washer 201220 M-10 HHCS 004087 Pointer 207012 M-10 Star Washer 080061 Handles 073450 Machine Screw 213005 M-5 Washer 004085 Scale 004086 Limit Switch Mount... -
Page 74: Hold Down Assembly
9.6 HOLD DOWN ASSEMBLY ITEM PART # DESCRIPTION 013185 Guard 080342 Housing 080337 Post-Left 080336 Post-Right 017340 Key 7 x 7 x 24 080347 Gear-Left 003125 Label (Hands Clear) 080348 Gear-Center 080349 Gear-Right 080338 Wheel Shaft 080344 Base 220026 M-6 BHCS 141415 1/4 x 1-3/4 Roll Pin 017346... - Page 75 FIGURE 34 Page 75...
-
Page 76: Cylinder Assembly
9.7 CYLINDER ASSEMBLY ITEM PART # DESCRIPTION 006230 Clevis Pin 007403 Cylinder Clevis 007404 Cylinder 007426 Cylinder Anchor Pin 016063 1-1/2" Snap Ring 006235 Cylinder Shroud 224205 M-10 WLCS 007162 Rear Shroud 007152 Front Shroud 007401 Cylinder Seal Kit (Not Pictured) FIGURE 35 Page 76... -
Page 77: Connecting Link Assembly
9.8 CONNECTING LINK ASSEMBLY ITEM PART# DESCRIPTION 007263 Connecting Link 006160 Connecting Link Pins 016063 1-1/2" Snap Ring 243101 M-6 Grease Zerk FIGURE 36 Page 77... -
Page 78: Power Unit
9.9 POWER UNIT ITEM PART# DESCRIPTION 006050 Valve Assembly (Inc. Manifold & Filter) 552135 Valve (Ser.#5575FF996 & Prior) 552169 Valve (Ser.# 5576FF996 & Up) 006051 Coil For A2 Valve 006057 Coil For 5575FF & Prior 011410 Filter Element 003740 Hose 003750 Hose 203210... - Page 79 FIGURE 37 Page 79...
-
Page 80: Electrical Unit
9.10 ELECTRICAL UNIT ITEM PART # DESCRIPTION K & M 011930 Transformer 011933 Primary Fuse 011835 Secondary Fuse 011837 Stop Switch Assembly 048125 Stop Switch Actuator 011840 Start Switch Actuator 011841 Start Switch Assembly 011843 Selector Switch (Punch/Shear) 011844 Selector Switch Knob 011846 Coil 011948... - Page 81 FIGURE 38 Page 81...
-
Page 82: Supplement For Older Models
10.0 SUPPLEMENT FOR OLDER MODELS 10.1 CYLINDER SEAL REPLACEMENT Use the following steps to replace the seals in the hydraulic cylinder: SEE FIGURE 39 ON THE FOLLOWING PAGE. With the selector switch in the SHEAR position and the arms up, turn the machine’s power off at the disconnect switch and lock it. - Page 83 15. Use care removing the blocking device (A) from under the arms. Since the cylinder does not contain oil, it may drop some when the blocks are removed. 16. Cycle the machine several times to purge the air out of the hydraulic system. FIGURE 39 Page 83...
-
Page 84: Six Foot Back Gauge
10.2 STRIPPER ASSEMBLY ITEM PART # DESCRIPTION 007228 Stripper 007229 Adjustment Screw (Left) 007237 Stripper Stud (Left) 007240 Spring Retainer 007241 Spring 007236 Adjustment Screw (Right) 007239 Spring Rod 220014 M-6 x 10 BHCS 007242 Sight Glass (3-1/4 x 1-7/8) 007248 Sight Glass (4 x 2-5/15) 007247... - Page 85 FIGURE 40 Serial #’s 5035FF1094 to 7124FF103 Page 85...
Need help?
Do you have a question about the IRONWORKER 6509-24M and is the answer not in the manual?
Questions and answers
What is the number for the big nut that holds the top punch called