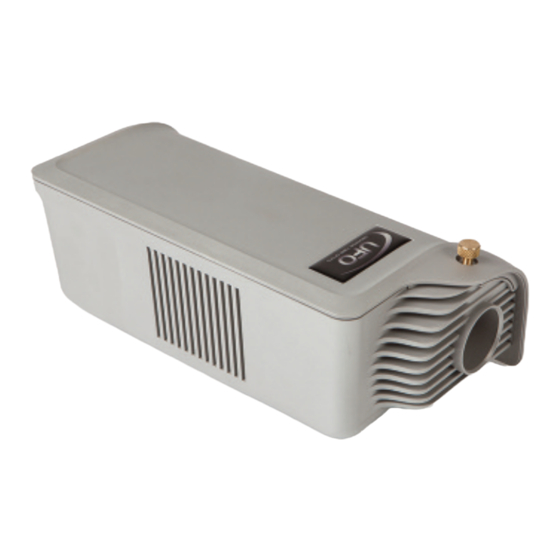
Summary of Contents for UFO Luna SLP-3000M
- Page 1 PRODUCT USER GUIDE Luna SLP Light Source Rev: C2 PLEASE READ THIS USER GUIDE BEFORE INSTALLING OPERATING OR PERFORMING MAINTENANCE ON THE LIGHT SOURCE UNIT E357731...
- Page 2 INTRODUCTION Thank you for purchasing this UFO light source. To ensure that the light source is set up optimally and gives a long service life, please read this user guide before installing, operating or performing any maintenance on the unit.
-
Page 3: Installation
Align the plate against the rivets and secure the plate to the light source with the four plastic screws using an M4 pozi-drive screwdriver. Do not overtighten. The light source can now be fixed securely to the mounting surface. Note: Mounting plate diagram is indicative only. UFO LIGHTING... -
Page 4: Power Supply Requirements
INSTALLATION POWER SUPPLY REQUIREMENTS The light source is powered from a 24V DC PSU/Constant Voltage SELV LED driver. The driver caters for UK/European/other mains supplies using the relevant power cord supplied. XXXXDMX /10 V CONNECTIONS LUNA SLP XXXXM CONNECTIONS LUNA SLP CONNECTION LUNA M MODELS ONLY There are 2 connections required –... - Page 5 TA (male). The pin out details for the plugs are shown below. Either socket may be used as DMX in or DMX out. Note: UFO can supply converters for these light sources to allow them to be interfaced to standard 3 pin XLR connectors or RJ45 connectors.
- Page 6 TA (male). The pin out details for these plugs are shown below. Either socket may be used as 0-10V IN or 0-10V OUT Note: UFO can supply converters for these light sources to allow them to be interfaced to standard 3 pin XLR connectors or RJ45 connectors.
-
Page 7: Operation
2. Tilt the light source on its side and remove the screw from the base as shown below. 3. Slide the access cover down to remove and set the cover and screw aside. 4. Switch DIP switch 10 (top) to ON as shown below. 5. Replace access cover and securing screw. UFO LIGHTING... - Page 8 OPERATION SETTING THE DMX ADDRESS 1. Disconnect the light source from the mains supply. 2. Tilt the light source on its side and remove the screw from the base as shown below. 3. Slide the access cover down to remove and set the cover and screw aside. 4.
- Page 9 DMX B Start DMX B Start Dip Switches On Dip Switches On Channel # Channel # 1,2,4 1,3,4 2,3,4 1,2,3,4 1,2,3 1,2,3,4,5,6,7,8,9 Note: with dip switch 10 OFF, the light source will not illuminate unless a DMX signal is present. UFO LIGHTING...
- Page 10 OPERATION LUNA 0-10 V MODELS ONLY USING THE LIGHT SOURCE Luna 0-10V models allow the light output to be varied by applying a different voltage through the rear connectors. The following table represents light output percentage against approximate control value input. Note: the light source will not illuminate Light Output Voltage...
-
Page 11: Maintenance Log
MAINTENANCE MAINTENANCE LOG Date Maintenance Undertaken Note: a record of all maintenance MUST be kept in the table above, indicating what maintenance was undertaken and when. This MUST be dated for warranty purposes. UFO LIGHTING... -
Page 12: Troubleshooting
TROUBLESHOOTING PROCEDURES FOR ALL MODEL TYPES Problem Possible Cause(s) Remedy Unit is dead – Mains supply off Check supply & reinstate no light output Loose mains plugs Check plugs and LED power indicator on Plug fuse blown (UK) Check fuse. If blown, replace PSU is not PSU failed Replace PSU... - Page 13 10V signal present No 010V signal Carry out voltage and present 010V cable faulty polarity check on mini XLR plug. Repair as necessary Note: please complete relevant troubleshooting procedures before returning the unit to us for further investigation. UFO LIGHTING...
-
Page 14: Technical Specifications
TECHNICAL SPECIFICATIONS Description Details Port connector size 30mm diameter Fibre type Glass / PMMA Mains Supply Voltage 100240V AC, 4763Hz PSU Output 24V DC, 0.75A, 18W max. LED Power 11.5W Min Ambient Temperature 10°C Max Ambient Temperature +45°C 60mm crossflow, 12V Led Type White light User addressable 1 channel dimming... - Page 15 NOTES UFO LIGHTING...
- Page 16 United Kingdom • United States • Germany • Europe • Universal Fibre Optics Ltd Universal Fiber Optics USA LLC UFO Licht GmbH Home Place Coldstream 1749 Northgate Blvd Andreasstraße 20 TD12 4DT Sarasota FL34234 93059 Regensburg Deutschland +44 (0)1890 883416...


Need help?
Do you have a question about the Luna SLP-3000M and is the answer not in the manual?
Questions and answers