Advertisement
Table of Contents
- 1 Led Fibreglass Pool/Spa Light Introduction
- 2 Led Fibreglass Pool/Spa Light Specifications
- 3 Installation
- 4 Led Fibreglass Pool/Spa Light Component Identification
- 5 Led Replacement Light Installation
- 6 Disconnecting the Led Light
- 7 Connecting Replacement Led Light
- 8 Troubleshooting
- Download this manual
BRITESTREAM SLIM90
FIBREGLASS POOL LIGHT
Rainbow Pool Products
PO Box 2388, Mansfield Qld 4122
Telephone STD 61-7-3849 5385
Facsimile STD 61-7-3849 5384
Email: info@rainbowpoolproducts.com.au
Web: www.rainbowpoolproducts.com.au
!
WARNING
This equipment must be installed and serviced by a qualified technician. Improper
Installation can create electrical hazards which could result in property damage, serious
injury or death. Improper installation will void the warranty.
Notice to Installer
This manual contains important information about the installation, operation and safe use
of this product. Once the product has been installed this manual must be given to the
owner/operator of this equipment.
Advertisement
Table of Contents

Related Manuals for Waterco Rainbow BRITESTREAM SLI90

Summary of Contents for Waterco Rainbow BRITESTREAM SLI90
- Page 1 BRITESTREAM SLIM90 FIBREGLASS POOL LIGHT Rainbow Pool Products PO Box 2388, Mansfield Qld 4122 Telephone STD 61-7-3849 5385 Facsimile STD 61-7-3849 5384 Email: info@rainbowpoolproducts.com.au Web: www.rainbowpoolproducts.com.au WARNING This equipment must be installed and serviced by a qualified technician. Improper installation can create electrical hazards which could result in property damage, serious injury or death.
- Page 2 Table of LED FIBREGLASS POOL/SPA LIGHT INTRODUCTION ----------- 01 LED FIBREGLASS POOL/SPA LIGHT SPECIFICATIONS ---------- 01 LED FIBREGLASS POOL/SPA LIGHT ------------------------------- 02 COMPONENT IDENTIFICATION INSTALLATION -------------------------------------------------------- 02 LED REPLACEMENT LIGHT INSTALLATION ----------------------- 03 DISCONNECTING THE LED LIGHT --------------------------------- 03 CONNECTING REPLACEMENT LED LIGHT ------------------------ 04 TROUBLE SHOOTING ------------------------------------------------ 05...
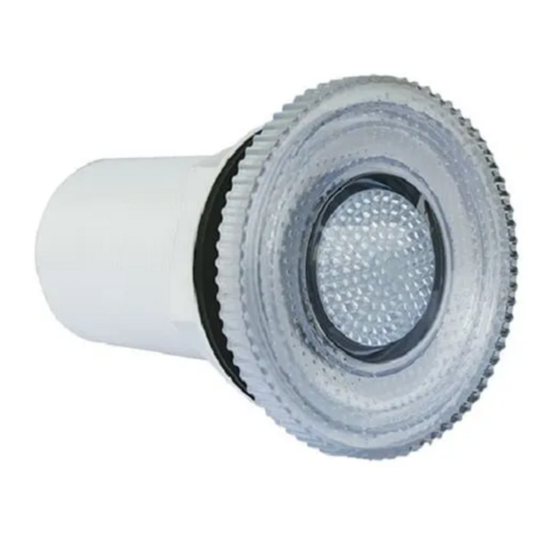
- Page 3 Waterco Britestream LED Fibreglass Niche Pool Lights LED FIBREGLASS POOL/SPA LIGHT INTRODUCTION Britestream Slim90 has been speci cally designed for easy installation into breglass pools/ spas. Features include the following: • Flush mounted with a minimal 14mm projection into pool.
- Page 4 Note: It is recommended that the pool/spa light be fully immersed in water & the installation is inspected for leaks prior to back lling the pool/spa light/s installation area. • The 20m power cable is now ready for connection to a Waterco single or multi connect pool light transformer.
- Page 5 Waterco Britestream LED Fibreglass Niche Pool Lights LED REPLACEMENT LIGHT INSTALLATION Disconnecting the LED light • Disconnect power to light at the circuit breaker. • Remove the light lens (1) by turning turning the light lens to the left unscrewing from the outer ange body (7).
- Page 6 Connecting replacement LED light The replacement LED lights are available as white, blue or multicolour RGB models and are supplied as a complete light assembly with the additional components as follows: 2 x Quick connect spade electrical connectors (4). 1 x gland mount cap (5) with black power cable gland nut and black gland (6). 2 x “o”...
- Page 7 (7) and re t the new replacement LED light & lens assembly (1) and secure to the light Niche housing (7) by turn till tight to the right. Congratulations, reconnect power to your light at the circuit breaker and your new Waterco replacement LED light is ready for use.
Need help?
Do you have a question about the Rainbow BRITESTREAM SLI90 and is the answer not in the manual?
Questions and answers