
Related Manuals for ISCO Orbit OCM 223


Summary of Contents for ISCO Orbit OCM 223
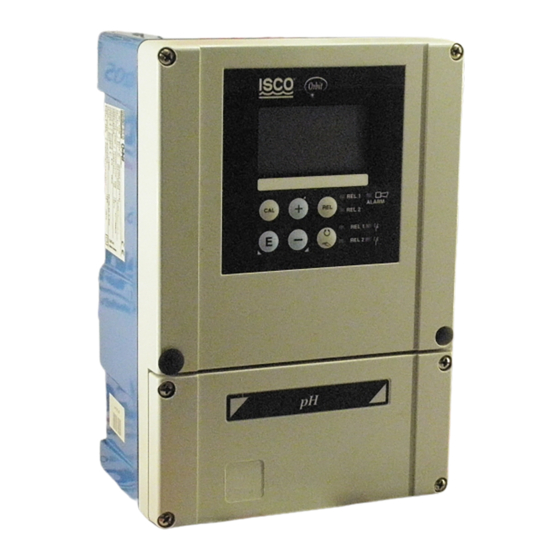
- Page 1 Orbit OCM 223 / 253 Transmitter for Free Chlorine/Chlorine Dioxide Installation and Operation Guide Isco Part # 69-0043-002 51513336...
- Page 2 Isco recommends that you read this manual completely before placing the equipment in service. Although Isco designs reliability into all equipment, there is always the possibility of a malfunction. This manual may help in diagnosing and repairing the malfunction.
-
Page 3: Table Of Contents
OCM 223 / 253 Table of Contents Table of Contents Table of Contents Relay contact configuration ....45 ..... . . Service 1 . -
Page 4: Safety
1 Safety OCM 223 / 253 Safety Safety symbols Warning! This symbol alerts you to hazards which could cause serious injuries as well as damage to the instrument if ignored. " Caution! This symbol alerts you to possible faults which could arise from incorrect operation. They could cause damage to the instrument if ignored. -
Page 5: Operational Safety
OCM 223 / 253 1 Safety Operational safety The instrument has been designed according to the state of the art and complies with the applicable regulations and EN standards (see “Technical Data”). It is built in accordance with EN 61010-1 and left our factory in perfect condition with regard to safety aspects. -
Page 6: Identification
2 Identification OCM 223 / 253 Identification Equipment name 2.1.1 Nameplate OCM 223 chlorine / chlorine dioxide OCM 253 chlorine / chlorine dioxide order code OCM 223-EK0110 order code OCM 253-EK0110 codes serial no. 276945 3472 8732 serial no. 276944 codes 3472 8732... -
Page 7: Additional Functions Of Es And Ep Versions
OCM 223 / 253 2 Identification Additional functions of ES and EP versions ES version Compared to the basic EK version, this version is extended by the Plus package: Manual pH compensation for free chlorine, fields B2 and B3 Current output table, fields O33x Sensor and process monitoring, function group P Automatic start of cleaning function, field F8. -
Page 8: Installation
3 Installation OCM 223 / 253 Installation The following procedure should be followed for a complete measuring system installation: 1. Installation or attachment of transmitter (see chapter 3.3) 2. Selection and connection of cables and sensor (see chapter 4.2) 3. Start-up (see chapter 6.1). Measuring system A complete measuring system comprises: the OCM 223 or OCM 253 chlorine / chlorine dioxide transmitter... -
Page 9: Dimensions
OCM 223 / 253 3 Installation Dimensions Pg13,5 Pg 7 Pg 16 B214C04Y.eps REL 1 ALARM REL 2 REL 1 REL 2 B214C05E.eps Fig. 3.2: Dimensions of OCM 253 Note! There is a hole in the punching for Pg 16 cable entry. Itr serves as a pressure balance during air freight dispatching. -
Page 10: Mounting
3 Installation OCM 223 / 253 B214C07Y.eps B214C08Y.eps Fig. 3.4: Dimensions of OCM 223 Mounting 3.3.1 Field instrument There are several mounting options for the field instrument version of the transmitter: Mounting on round posts Mounting on square posts Wall mounting. When installing the instrument outdoors, you require weather protection cover OYY 101 for all mounting options. - Page 11 OCM 223 / 253 3 Installation Fig. 3.5: Weather protection cover for field instruments Post mounting kit Mounting kit for mounting the field housing on horizontal and vertical pipes (max. 60 mm); is also used for attachment of the weather protection cover. Material: stainless steel 1.4301 (AISI 304) Universal mounting post OYY 102 Square pipe for mounting transmitters;...
- Page 12 3 Installation OCM 223 / 253 3.3.2 Mounting examples B214C12Y.eps Fig. 3.7: Field instrument: pipe mounting Fig. 3.8: Field instrument: Wall mounting (left), mounting with universal mounting post and weather protection cover (right)
- Page 13 OCM 223 / 253 3 Installation 3.3.3 Panel-mounted instrument The instrument is attached using the supplied clamping screws (see Fig. 3.9). The total installation depth required is approx. 165 mm. Fig. 3.9: Attachment of panel-mounted instrument 1 Wall of control cabinet 2 Seal 3 Clamping screws...
-
Page 14: Wiring
4 Wiring OCM 223 / 253 Wiring Electrical connection 4.1.1 Terminal diagram The terminal diagram depicted in Fig. 4.1 shows the connections for the membrane-covered OCS 140 / 141 / 240 / 241 sensor or the open 963 sensor. Redox Ref. - Page 15 OCM 223 / 253 4 Wiring Note! The instrument has protection class II and is usually operated without protective earth connection. Connecting the chlorine sensor 963 The chlorine sensor 963 is delivered from the factory without an integrated temperature sensor for measuring the temperature. Therefore connect the temperature input (terminals 11/12) as follows: No temperature measurement required: Connect supplied equivalent resistor 10 k (Part No.
- Page 16 4 Wiring OCM 223 / 253 4.1.2 Terminals on field instrument Insert the measuring cable through the cable glands of the field instrument and connect the wires as shows in the terminal diagram in Fig. 4.1 and 4.2. SENSOR REL 4 REL 3 REL 2 REL 1...
-
Page 17: Installing The Sensor And Connecting The Measuring Cable
OCM 223 / 253 4 Wiring Installing the sensor and connecting the measuring cable 4.2.1 Connecting the measuring cable The OCS 140 / 141 / 240 / 241 chlorine / chlorine dioxide sensors are equipped with 3 m fixed cable and can be connected to the transmitter. Connecting cables are required for the open chlorine sensor 963 and for the pH or redox electrode in the case of the EP instrument version. - Page 18 4 Wiring OCM 223 / 253 Fig. 4.6: Make-up of special measuring cable OPK 1 (above) and OPK 9 (below) Cable termination for panel-mounted OCM 223 with solder-free BNC connector Fig. 4.7: Cutting off the cable end (left) and make-up of inner coaxial cable (right) Fig.
- Page 19 OCM 223 / 253 4 Wiring 1. Cut off terminated end of the inner coaxial cable (see Fig. 4.7). 2. Push cable gland (➀) and disc (➁) onto coaxial cable, strip outer insulation (13 mm), then screw clamping ring (➂) onto insulation. Note: Parts ➀...
-
Page 20: Operation
5 Operation OCM 223 / 253 Operation User interface Indicates active Liquid crystal display contact and key for for measured and toggling relay configuration data to Manual mode mg/l 0.42 R242 Indicator LED for Setpoint alarm function Field for user labelling Indicator LEDs for limit contactor relay... -
Page 21: Key Functions
OCM 223 / 253 5 Operation 5.2.2 Liquid crystal display Fig. 5.2: Liquid crystal display Key functions CAL key After you press CAL the instrument prompts for the calibration access code: Code 22 for calibration Code 0 or any code for calibration data checking. Press the CAL key to acknowlegde the calibration data or to proceed within the calibration menu. - Page 22 5 Operation OCM 223 / 253 PLUS key and MINUS key The PLUS and MINUS keys have the following functions: Select function groups Set parameters and numerical values (when held down, increases setting speed). Operate relays in manual mode (see chapter 5.2) Pressing the PLUS key allows you to switch between the current input in mA and %.
-
Page 23: Auto / Manual Operating Modes
OCM 223 / 253 5 Operation Auto / Manual operating modes Auto mode In this mode the relays are controlled by the transmitter. Manual mode In this mode all relays can be controlled manually. REL key In manual mode, the REL key is used to select one of the relays or the cleaning function present in the instrument. -
Page 24: Operating Concept
5 Operation OCM 223 / 253 Operating concept 5.5.1 Operating modes Fig. 5.3: Description of possible operating modes Note! When you perform calibration and parameterisation, you can select the hold state for functions and contacts (see chapter 6.7, field S2) and you can change the hold period. - Page 25 OCM 223 / 253 5 Operation 5.5.2 Menu structure The configuration and calibration functions are arranged in a menu structure by function groups. Select a function group in Setup mode by pressing the PLUS and MINUS keys. Within a function group, you can switch from function to function by pressing the ENTER key. Select the option you want or edit by pressing the PLUS and MINUS keys.
-
Page 26: Access Codes
5 Operation OCM 223 / 253 Access codes All instrument access codes are fixed and cannot be changed. The access codes can be requested as follows (cf. Fig. 5.3): CAL + ENTER keys + any Code: Access to Read mode, i.e. all settings can be read but not changed. -
Page 27: Instrument Configuration
OCM 223 / 253 6 Instrument configuration Instrument configuration After switching the instrument on, the instrument performs a self-test and then starts up in measuring mode. Now the instrument can be configured and calibrated. The following function groups are available in the transmitter (the groups only available in the ES and EP versions are marked accordingly in the functional descriptions). - Page 28 6 Instrument configuration OCM 223 / 253 Factory settings All the factory settings are active when the instrument is switched on for the first time. The table below lists all the main settings. For all further factory settings, refer to the description of the function groups in chapter 6 (there the factory setting is printed in bold).
-
Page 29: Start-Up
OCM 223 / 253 6 Instrument configuration Alarm contact Fig. 6.3: Recommended fail-safe circuit for the alarm contact Normal operating state Alarm state • Instrument in operation • Error message present (alarm LED red) or • No error message present (alarm LED green) •... - Page 30 6 Instrument configuration OCM 223 / 253 6.2.1 Setup 1 (Chlorine / Chlorine dioxide) For access to the SETUP menu, please enter Code 22. Selection or range Coding Field Display Remarks Factory setting (bold) Function Group Initial display in function group SETUP 1. SETUP 1 140 = OCS 140 141 = OCS 141...
- Page 31 OCM 223 / 253 6 Instrument configuration Flow monitoring in sample stream (see Fig. 3.1) If a flow rate drops below 30 l/h or there is a total flow failure in the sample stream through the OCA 250 assembly, an alarm is triggered if the INS proximity switch is installed.
- Page 32 6 Instrument configuration OCM 223 / 253 6.2.2 Setup 2 (Temperature or pH / Redox) Selection or range Coding Field Display Remarks Factory setting (bold) Function Group Initial display in function group SETUP 2. SETUP 2 Field only exists on EP version. ORPmV = redox potential in mV (Oxidation-Reduction Potential).
- Page 33 OCM 223 / 253 6 Instrument configuration Forms of chlorine A distinction is made between free chlorine and bonded chlorine. Free chlorine Free chlorine refers to the sum of elementary chlorine (Cl ), hypochlorous acid (HOCl) – and hypochlorite ions (OCl These forms of chlorine are capable of killing bacteria, deactivating viruses and oxidising organic substances within a short period of time.
- Page 34 6 Instrument configuration OCM 223 / 253 pH compensation of chlorine sensor signal (only on ES and EP versions, for OCS 140 / 141 sensors) To calibrate and inspect the chlorine measuring system, a colorimetric reference measurement must be carried out using the DPD method. Free chlorine reacts with diethyl-p-phenylenediamine and forms a red dye.
-
Page 35: Current Input
OCM 223 / 253 6 Instrument configuration Current input This function group offers two independent application solutions, provided that the current output of an external measured quantity, e.g. flow meter, is connected to the 4 … 20 mA input of OCM 223 / 253. The following assignments then apply: Flow in main Current signal Current input... - Page 36 6 Instrument configuration OCM 223 / 253 6.3.2 Feedforward control to PID controller In processes with very short response times it may be practical to apply the flow rate to the controller, if the flow rate fluctuates, in order to optimise the control process (see Fig.
- Page 37 OCM 223 / 253 6 Instrument configuration Selection or range Coding Field Display Remarks Factory setting (bold) Function Group This function group only exists if a relay CURRENT INPUT card with current input is installed. Select flow rate Only switch on when flow meter is monitoring of main connected in main stream.
-
Page 38: Current Outputs
6 Instrument configuration OCM 223 / 253 Current outputs The CURRENT OUTPUT function group is used to configure the individual outputs. You can either select a linear (O3(1)) or, on the ES and EP versions, you can define a current output characteristic yourself (O3(3). - Page 39 OCM 223 / 253 6 Instrument configuration Selection or range Coding Field Display Remarks Factory setting (bold) Function Group Initial display in function group CURRENT CURRENT OUTPUT OUTPUT Out2 only with appropriate equipment Select current Out1 output Out2 You can select a separate characteristic for each output.
- Page 40 6 Instrument configuration OCM 223 / 253 Selection or range Coding Field Display Remarks Factory setting (bold) Simulate current Simulation only ends when you select O3(2) sim = simulation output O3(1) or O3(3). Enter simulation current value When you enter a current value, it is output O321 value 0.00 …...
-
Page 41: Monitoring Functions
OCM 223 / 253 6 Instrument configuration Monitoring functions Use the monitoring functions to define various alarms and set output contacts. You can set each error separately as active or inactive (at the contact or as an error current). When there is an alarm, you can also activate a cleaning function (F8). 6.5.1 Alarm Selection or range Coding... - Page 42 6 Instrument configuration OCM 223 / 253 Selection or range Coding Field Display Remarks Factory setting (bold) Automatic start of This field does not exist for some errors, cleaning function? see chapter 7.2. Select next error or next = next error If you select next you return to F5, return to menu <---R...
- Page 43 OCM 223 / 253 6 Instrument configuration Overview of monitoring functions Function Possible setting Alarm event Application — User-definable lower Applications Only lower AT Lower AT reached or exceeded alarm threshold (AT) Alarm threshold with or without Only upper AT Upper AT reached or exceeded monitoring chemical...
- Page 44 6 Instrument configuration OCM 223 / 253 Selection or range Coding Field Display Remarks Factory setting (bold) 20000 ppb 0 ... 20000 ppb Enter upper alarm 20.00 ppm P114 Omitted when P111 = Off. threshold 0 ... 20 ppm 20.00 (5.00) mg/l 0 …...
-
Page 45: Relay Contact Configuration
OCM 223 / 253 6 Instrument configuration Selection or range Coding Field Display Remarks Factory setting (bold) pH 9.00 Enter upper alarm pH 4.1 … 9 P124 Omitted when P121 = Off. threshold 1500 mV 10 … 1500 mV AC = Sensor alternation check, CC = Controller check. - Page 46 6 Instrument configuration OCM 223 / 253 6.6.1 Limit contact for chlorine / chlorine dioxide measured value and temperature or pH or redox measured value The transmitter has a number of options to assign a contact. The limit contact can be assigned to a switch-on and switch-off point, as well as a pickup and dropout delay.
- Page 47 OCM 223 / 253 6 Instrument configuration 6.6.2 P(ID) controller You can define various controller functions on the transmitter. Starting with the PID controller, you can implement P, PI, PD and PID controllers. To obtain the best possible control, you must select the right controller to match the application.
- Page 48 6 Instrument configuration OCM 223 / 253 Control and fine-optimisation of set parameters using a recorder Fig. 6.11: Setting optimisation T and K Actuating signal outputs (R247 to R2410 and R257 to R2510) Each control contact outputs a clocked signal whose intensity corresponds to the controller's manipulated variable.
- Page 49 OCM 223 / 253 6 Instrument configuration Control characteristic for direct and inverse control action In fields R246 and R256 you can select between two control characteristics whose actions are depicted below. Fig. 6.13: Control characteristic of a proportional-action controller with direct and inverse control action X = setpoint, X = control deviation, y = set value 6.6.3 Timer for cleaning function...
- Page 50 6 Instrument configuration OCM 223 / 253 6.6.4 ChemoClean function As for the time function, ChemoClean can also start a cleaning action. By comparison, the function scope is extended by an option for defining cleaning and rinsing intervals. You can therefore clean at irregular intervals at various repetition cycles and set separate cleaning times and rinsing times.
- Page 51 OCM 223 / 253 6 Instrument configuration Selection or range Coding Field Display Remarks Factory setting (bold) Function Group Select and set relay contacts. RELAY Rel1 Select contact to be Rel2 configured Rel3 Rel4 PV = process value of main measuring parameter.
- Page 52 6 Instrument configuration OCM 223 / 253 Selection or range Coding Field Display Remarks Factory setting (bold) Display status of R217 limit contact Only on EP version. LC pH = Depending on the operating mode you Configure limit limit contact pH select in field B1, you configure for pH or R2(2) contact for pH or...
- Page 53 OCM 223 / 253 6 Instrument configuration Selection or range Coding Field Display Remarks Factory setting (bold) Configure limit Confirmation with ENTER switches off LC °C = R2(3) contact for another relay function which has already limit contact temperature temperature been switched on.
- Page 54 6 Instrument configuration OCM 223 / 253 Selection or range Coding Field Display Remarks Factory setting (bold) On =PID control Switch function R2(4) Basic = only basic load dosage R241 on or off Basic PID+B = PID control with basic load PID+B dosage 500 ppb...
- Page 55 OCM 223 / 253 6 Instrument configuration Selection or range Coding Field Display Remarks Factory setting (bold) Selecting the basic load, you choose the desired dosage quantity. 100% basic load corresponds to: R2411 Enter basic load 0 … 40% steadily on at R247 = on at R247 = freq 20 mA at R247 = curr Confirmation with ENTER switches off...
- Page 56 6 Instrument configuration OCM 223 / 253 Selection or range Coding Field Display Remarks Factory setting (bold) This field only appears when you select Enter maximum pulse –1 120 min pulse frequency in R257. If you select R259 frequency of the –1 60 …...
- Page 57 OCM 223 / 253 6 Instrument configuration Selection or range Coding Field Display Remarks Factory setting (bold) Switch function R2(7) R271 on or off int = internal (timed) ext = external There is no real-time clock. Select type of start R272 i+ext = internal + external External suppression is required for...
- Page 58 6 Instrument configuration OCM 223 / 253 Selection or range Coding Field Display Remarks Factory setting (bold) Switch function R2(8) R281 on or off 500 ppb 0 ... 20000 ppb The setpoint is the value which the 0.5 ppm controller has to hold. The controller will R282 Enter setpoint 0 ...
-
Page 59: Service 1
OCM 223 / 253 6 Instrument configuration Service 1 Selection or range Coding Field Display Remarks Factory setting (bold) Function Group SERVICE 1 SERVICE 1 ENG = English GER = German This field must be set once during FRA = French Select language instrument configuration. -
Page 60: Service 2
6 Instrument configuration OCM 223 / 253 Selection or range Coding Field Display Remarks Factory setting (bold) " Caution! Facty = All data except for sensor type Reset the instrument (field A1), operating mode (field B1) and Sens = sensor dates (to default values) language (field S1) are deleted and reset Facty = factory settings... -
Page 61: Interfaces
OCM 223 / 253 6 Instrument configuration Interfaces Selection or range Coding Field Display Remarks Factory setting (bold) Function Group Only for instruments equipped with INTERFACE communication interface. HART: 0 … 15 Enter address PROFIBUS: 1 … 126 Display of tag number... -
Page 62: 6.10 Calibration
6 Instrument configuration OCM 223 / 253 6.10 Calibration For access to the CALIBRATION menu, please enter Code 22. Note! Hinweis! For chlorine and chlorine dioxide calbration you need a photometer, e.g. OCM 181 or OCM 182 (see chapter 9, Accessories). To calibrate chlorine and chlorine dioxide for trace detection (<... - Page 63 OCM 223 / 253 6 Instrument configuration Selection or range Coding Field Display Remarks Factory setting (bold) This field is only used for registration of the Enter calibration 25.0 °C calibration temperature. Input not temperature 0 … 50 °C imperative. Press the ENTER key to display the current Buffer value of previous Enter pH value of first...
- Page 64 6 Instrument configuration OCM 223 / 253 Selection or range Coding Field Display Remarks Factory setting (bold) Press the ENTER key to display the current Buffer value of previous Enter value of redox measuring value. Press the ENTER key calibration buffer again as soon as the measuring value has 0 …...
-
Page 65: Diagnosis And Corrective Maintenance
OCM 223 / 253 7 Diagnosis and corrective maintenance Diagnosis and corrective maintenance Maintenance Maintenance means that all measures which will guarantee the safety of operation and reliability of the entire measuring system are taken in due time. Maintenance of OCM 223 / 253 includes: Calibration (see chapter 6.10) Cleaning of assembly and sensor Checking of cables and connections... - Page 66 7 Diagnosis and corrective maintenance OCM 223 / 253 Error Possible cause Remedial action Equipment needed, spare parts Chlorine value too low • Measuring chamber not closed • Refill and carefully screw tight • Electrolyte OCY 14-F or OCY 24-F •...
- Page 67 OCM 223 / 253 7 Diagnosis and corrective maintenance Error Possible cause Remedial action Equipment needed, spare parts Controller / limit contact • Controller switched off • Activate controller • see chapter 6.6 or fields R2xx do not work • Controller in •...
-
Page 68: Troubleshooting Based On Error Messages
7 Diagnosis and corrective maintenance OCM 223 / 253 Troubleshooting based on error messages Automatic Contact Error current Error cleaning start Cause Action Fact. User Fact. User Fact. User E001 EEPROM memory error • Switch instrument off and back on again, —... - Page 69 OCM 223 / 253 7 Diagnosis and corrective maintenance Automatic Contact Error current Error cleaning start Cause Action Fact. User Fact. User Fact. User E055 Lower Cl/ClO measuring Check measurement and connections; range exceeded if necessary, check instrument and measuring cable using simulator (see E056 Lower pH/mV measuring chapter 8.7).
- Page 70 7 Diagnosis and corrective maintenance OCM 223 / 253 Automatic Contact Error current Error cleaning start Cause Action Fact. User Fact. User Fact. User E154 Cl/ClO below lower alarm • If necessary, perform manual reference threshold for longer than measurement. maximum period set •...
-
Page 71: Diagnosis And Corrective Maintenance
OCM 223 / 253 8 Diagnosis and corrective maintenance Diagnosis and corrective maintenance Diagnosis Diagnosis refers to the identification of instrument malfunctions and defects. Corrective maintenance replacing a part diagnosed to be defective testing instrument and measuring point for proper functioning and thus restoring full functionality. -
Page 72: Diagnosis
8 Diagnosis and corrective maintenance OCM 223 / 253 Diagnosis The table below will help you diagnose problems and specifies the spare parts required. Refer to chapter 8.2.4 and 8.3.4 for information on the exact spare part names and how to install them. - Page 73 OCM 223 / 253 8 Diagnosis and corrective maintenance Error Possible cause Tests and/or remedial action Equipment, spare parts, personnel Additional functions are • No or incorrect release code used • On retrofit: • Contact your supplier. Order missing (“Plus package” check whether the correct serial codes see chapter 9.5.
-
Page 74: Corrective Maintenance Of Ocm 223
8 Diagnosis and corrective maintenance OCM 223 / 253 Corrective maintenance of OCM 223 8.2.1 Exploded view End frame Items 150 ... 170 (for Item 140), Terminal block set for PROFIBUS-DP: Terminal for outputs/digital inputs/communication (outer) Item 190 Terminal for power supply/alarm relay/sensor conn. (inner) End frame Special with D-Sub socket... - Page 75 OCM 223 / 253 8 Diagnosis and corrective maintenance 8.2.2 Disassembly of OCM 223 " Caution! Remember the impacts on the process when you switch the instrument off. 1. First pull off the terminal blocks (items 150 … 180) from the instrument rear to de-energise the instrument.
-
Page 76: Corrective Maintenance Of Ocm 253
8 Diagnosis and corrective maintenance OCM 223 / 253 Corrective maintenance of OCM 253 8.3.1 Exploded view Fuse, also accessible with Electronics box with electronics box relay module LSR1-X (top) installed Item 10 and LSGx mainboard Power supply 100 – 230 VAC (bottom) Voltage selection strap Fuse... - Page 77 OCM 223 / 253 8 Diagnosis and corrective maintenance 8.3.2 Disassembly of OCM 253 1. Open and remover the connection compartment cover. 2. Pull out the mains terminal (item 270) to de-energise the instrument. 3. Open the housing cover and remove the ribbon cable (item 250) on the electronics box.
- Page 78 8 Diagnosis and corrective maintenance OCM 223 / 253 Item Kit name Name Function Order code Ribbon cables 1 set of ribbon cables 51501074 Hinges 2 pair of hinges 51501069 Terminal strip Terminal strip for mains connection 51501079 pH terminal pH terminal with screen plate 51501071 8.3.5 Special case: Replacing the controller...
-
Page 79: Ordering Spare Parts
OCM 223 / 253 8 Diagnosis and corrective maintenance Ordering spare parts Order spare parts from your nearest sales centre. The address is on the rear of these operating instructions. Use the Order Number listed in chapter 8.2.4 or 8.3.4. To be on the safe side, always quote the following information on the spare parts order: Instrument order code Serial number (ser-no.) - Page 80 8 Diagnosis and corrective maintenance OCM 223 / 253 8.6.2 pH/mV sensors (EP instrument option) Visible contamination on the glass electrodes can be cleaned as follows: Oily and fatty deposits clean with detergent (grease solvent, alcohol, or washing detergent). Warning! Protect your hands, eyes and clothing when you use the following detergent.
-
Page 81: Test And Simulation
OCM 223 / 253 8 Diagnosis and corrective maintenance Test and simulation 8.7.1 Chlorine sensors Chlorine sensors work according to the amperometric principle and supply very small direct current as measuring signals. A chlorine sensor can be simulated by a DC source. Due to the small currents, however, the simulation is highly sensitive. - Page 82 8 Diagnosis and corrective maintenance OCM 223 / 253 Zero point rapid test On the OCM 223 connect the BNC inner conductor to the BNC receptacle and the PM terminal. On the OCM 253 connect the pH terminal, the Ref terminal and the PM terminal. For pH, the reading must be about 7, for redox about 0 mV.
-
Page 83: Accessories
OCM 223 / 253 9 Accessories Accessories Connection accessories VBC junction box (see chapter 4.2.2) Junction box for lengthening measuring cable connection between sensor cable and transmitter. Ingress Protection IP 65. Order No. 50005181 CMK extension cable Special measuring cable for OCS 140 / 141 and OCS 240 / 241 sensors to extend the line between the transmitter and the VBC junction box. -
Page 84: Sensors
9 Accessories OCM 223 / 253 Sensors OCS 140 Membrane-covered amperometric sensor for free chlorine in measuring range 0.05 … 20 mg/l Technical Information TI 058e00 OCS 141 Membrane-covered amperometric trace sensor for free chlorine in measuring range 0.01 … 5 mg/l Technical Information TI 058e00 OCS 240 Membrane-covered amperometric sensor for chlorine dioxide in... -
Page 85: Instrument Upgrade
OCM 223 / 253 9 Accessories Instrument upgrade Orders will only be accepted when you quote the serial number of the instrument on your order. Plus package Order No. 51502242 ChemoClean Order No. 51502871 Two-relay card (standard version) Order No. 51500320 Two-relay card (CSA version) Order No. -
Page 86: Technical Data
10 Technical data OCM 223 / 253 Technical data General specifications Product designation OCM 223 OCM 253 Input Measured values Free chlorine or chlorine dioxide, temperature, pH or redox (optional) /ClO measurement Display and measuring range 0 … 5 mg/l or 20 … mg/l Application measuring range 0.05 …... - Page 87 OCM 223 / 253 10 Technical data Output Signal outputs Cl /ClO or temperature/pH/redox (optional) Current range 0 / 4 … 20 mA, galvanically isolated, active; error current 2.4 / 22 mA Min. distance 0 / 4 … 20 mA signal min.
- Page 88 10 Technical data OCM 223 / 253 Output (continued) Alarm Function (selectable) Steady contact / fleeting contact Alarm threshold adjustment range /ClO / pH / redox / temperature: full measuring range Error delay 0 … 2000 min (s) Monitoring time for lower limit violation 0 …...
- Page 89 OCM 223 / 253 10 Technical data Physical data Dimensions of panel-mounted unit (h × w × d) 96 × 96 × 145 mm Installation depth approx. 165 mm Dimensions of field housing (h × w × d) 247 × 170 × 115 mm Weight of panel-mounted unit max.
-
Page 90: Annex
11 Annex OCM 223 / 253 Annex 11.1 Operating matrix of EK and ES versions p. 62 p. 30 p. 32 p. 37 p. 39 p. 41... - Page 91 OCM 223 / 253 11 Annex...
- Page 92 11 Annex OCM 223 / 253 Select alarm threshold Alarm delay Set lower Set upper Select process monitoring 0 min (s) alarm threshold alarm threshold monitoring Off; Low; High 0 ... 2000 min (s) 0.00 mg/l 20.00 (5.00) mg/l Off; AC;...
- Page 93 OCM 223 / 253 11 Annex...
-
Page 94: 11.2 Operating Matrix Of Ep Version
11 Annex OCM 223 / 253 11.2 Operating matrix of EP version p. 62 p. 30 p. 32 p. 37 p. 39... - Page 95 OCM 223 / 253 11 Annex...
- Page 96 11 Annex OCM 223 / 253 p. 41 p. 43 p. 51...
- Page 97 OCM 223 / 253 11 Annex...
- Page 98 11 Annex OCM 223 / 253 Select language Configure Hold Manual Hold Enter Hold Enter SW upgrade dwell time release code (Plus pack.) S+C = for param. + cal. CAL = for Cal. ENG; GER; FRA; SERVICE 1 ITA; NEL; ESP Setup = for param.
- Page 99 OCM 223 / 253 11 Annex...
- Page 100 Index OCM 223 / 253 Index Numerics Connecting the pH or redox electrode... 15 Connection accessories..... . 83 0 .
- Page 101 OCM 223 / 253 Index Flow monitoring......82 Measuring mode ..... . 21, 24, 27 Flow monitoring in sample stream .
- Page 102 Index OCM 223 / 253 pH compensation ......32–34 Sensor type ......30, 60 pH electrode .
- Page 103 Isco assumes no liability for any consequential damages. * This warranty applies to USA customers. Customers in other countries should contact their Isco dealer for warranty service. In the event of instrument problems, always contact the Isco Service Department, as problems can often be diagnosed and corrected without requiring an on-site visit.
- Page 104 Isco, Inc. ® 4700 Superior Street Lincoln NE 68504 USA Phone: (402) 464-0231 USA and Canada: (800) 228-4373 Fax: (402) 465-3022 E-Mail: info@isco.com 51513336 Internet: www.isco.com...
Need help?
Do you have a question about the Orbit OCM 223 and is the answer not in the manual?
Questions and answers