
Related Manuals for Shure KCX


Summary of Contents for Shure KCX
- Page 1 Wireless System Online user guide for KCX wireless system. Version: 3.1 (2020-H)
-
Page 2: Table Of Contents
Shure Incorporated Table of Contents RF Level KCX Wireless System Squelch SAFETY PRECAUTIONS Color ID Rings Quick Setup Getting Good Sound Shure KCX Wireless Correct Microphone Placement Wearing the Headworn Microphone Receiver Wearing the Bodypack Transmitter Transmitter Wireless Tips to Improve System Performance... -
Page 3: Kcx Wireless System
Shure Incorporated KCX Wireless System SAFETY PRECAUTIONS The possible results of incorrect use are marked by one of the two symbols—"WARNING" and "CAUTION"—depending on the imminence of the danger and the severity of the damage. WARNING: Ignoring these warnings may cause severe injury or death as a result of incorrect operation. CAUTION: Ignoring these cautions may cause moderate injury or property damage as a result of incor rect operation. WARNING If water or other foreign objects enter the inside of the device, fire or electric shock may result. -
Page 4: Quick Setup
Congratulations on purchasing your KCX Wireless system from Shure. Shure professional audio products deliver legendary sound quality, stage-proven durability and hassle-free setup. The KCX Wireless System comes with your choice of microphone complete with all the accessories you need. For performers that manage their own sound and desire the freedom of wireless, nothing could be more versatile or easy to operate. Affordable replacement parts and a rugged housing make this an ideal in... -
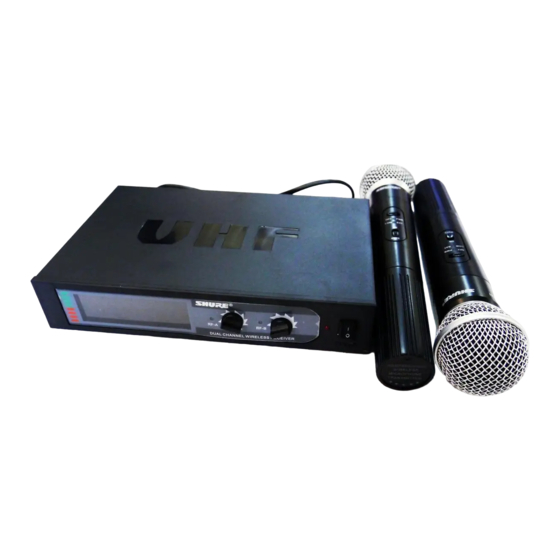
Page 5: Receiver
Shure Incorporated Receiver KCX4 5/16... - Page 6 Shure Incorporated KCX88 ① Power LED light ② Audio Frequency LED light ③ Radio Frequency Diversity lights ④ Balanced output (XLR connector) ⑤ Unbalanced output (6.35mm connector) ⑥ Audio output level (line/mic) switch ⑦ Channel selection dial 6/16...
-
Page 7: Transmitter
Shure Incorporated ⑧ Squelch dial ⑨ Power adapter input ⑩ Antennas Transmitter ① Power button ② Channel selection dial ③ Audio input level (line/mic) switch ④ Battery compartment ⑤ Transmitter gain dial ⑥ Belt clip ⑦ Mic input (CVL lavalier or PGA31 Headworn) ⑧... -
Page 8: Power
Shure Incorporated • Microphone • PG185 Lavalier microphone OR • PG30 Headworn microphone Power Plug in the power adapter to turn on the receiver. There is no power switch. Insert 2 AA batteries into the transmitter. Hold the power button for two seconds to turn on. -
Page 9: Squelch
Shure Incorporated Squelch Squelch controls the amount of RF signal that the receiver picks up. • Turn up the squelch dial (clockwise) to remove ambient noise from unwanted RF sources. • Turn down the squelch dial (counterclockwise) if the microphone is not transmitting clearly to the receiver. -
Page 10: Getting Good Sound
Shure Incorporated Getting Good Sound Correct Microphone Placement • Hold the microphone within 12 inches from the sound source. For a warmer sound with increased bass presence, move the microphone closer. • Do not cover grille with hand. Wearing the Headworn Microphone • Position the headworn microphone 13 mm (1/2 in.) from the corner of your mouth. • Position lavalier and headworn microphones so that clothing, jewelry, or other items do not bump or rub against the micro phone. 10/16... -
Page 11: Wearing The Bodypack Transmitter
Shure Incorporated Wearing the Bodypack Transmitter • Clip the transmitter to a belt or pocket. • For best results, the belt should be pressed against the base of the clip. Wireless Tips to Improve System Performance If you encounter wireless interference or dropouts, try the following suggestions: •... -
Page 12: Specifications
Shure Incorporated Check the power supply of the microphone and receiver. Ensure that the batteries are inserted correctly. Set the transmitter and receiver to the same channel. Check that the receiver is connected to the input on the audio mixer or amplifier. - Page 13 Shure Incorporated Transmitter Audio Polarity Positive pressure on microphone diaphragm produces positive voltage on pin 2 (with respect to pin 3 of XLR output) and the tip of the 6.35 mm (1/4-inch) output. Actual range depends on RF signal absorption, reflection and interference Dependent on microphone type Ref. ±48 kHz...
- Page 14 Shure Incorporated RF Output Power (dependent on applicable country regulations) HI power mode 10 mW maximum LO power mode 1 mW maximum Dimensions 254 mm x 51 mm dia. (10 x 2in.) Weight 270 g (10.2oz.) (without batteries) Housing Molded ABS Power Requirements 2 "AA" size alkaline or rechargeable batteries Battery Life up to 10 hours (alkaline)
-
Page 15: Optional Accessories And Replacement Parts
Dual Channel Rack Mount Kit WADRM Replacement Parts Channel Key 53A14226 Microphone Stand Adapter 95A14227 PS24 Power Supply 95A14220 See your local Shure distributor for assistance Frequency Range and Transmitter Output Level Band Range ( MHz) 698–710 710–726 726–742 742–758 758–774 774–787... - Page 16 Shure Incorporated NOTE: This Radio equipment is intended for use in musical professional entertainment and similar applications. This Radio apparatus may be capable of oper ating on some frequencies not authorized in your region. Please contact your national authority to obtain information on authorized frequencies and RF power levels for wireless microphone products. 16/16...
Need help?
Do you have a question about the KCX and is the answer not in the manual?
Questions and answers