Table of Contents
Advertisement
Quick Links
Advertisement
Table of Contents

Subscribe to Our Youtube Channel
Related Manuals for AccuBANKER SWITCH AB7800


Summary of Contents for AccuBANKER SWITCH AB7800
- Page 1 AB7800 SWITCH Comprehensive Bill Counter USER GUIDE www.AccuBANKER.com...
- Page 2 Thank you for trusting AccuBANKER with your cash handling needs. In order to optimize the performance of your equipment, we encourage you to thoroughly read this user guide prior to use.
-
Page 3: Table Of Contents
Table of Contents Table of Contents......................3 Introduction ........................ 4 Box Contents ......................4 1. Safety Instructions ....................5 2. Getting Started ......................7 2.1 Unpacking the unit .................... 7 2.2 Installation ......................7 2.3 Bill Selection / Placement ................. 8 3. -
Page 4: Introduction
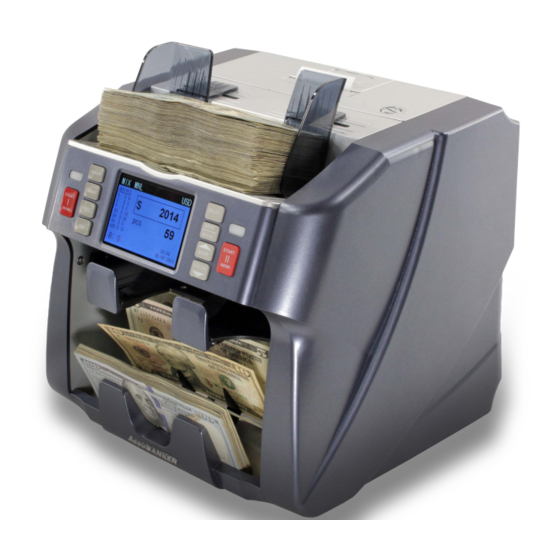
Introduction The AB7800 SWITCH is the perfect solution to your bill counting process. This equipment is not only fast, accurate, and reliable but its mixed bill counting, counterfeit detection, easy-to-use touch screen, and dual user functionality make it suitable for a wide range of cash management tasks. Box Contents 1. -
Page 5: Safety Instructions
1. Safety Instructions Warning Do not use this product in areas where it may be exposed to water or other liquids. Unplug this product from the electric outlet before cleaning. Do not use liquid or aerosol cleaners. To clean, use a damp cloth. To reduce the risk of electric shock, do not disassemble this product. - Page 6 1. Safety Instructions (continued) • Follow all warnings and instructions marked on the unit. • This product is meant to be operated in an indoor environment with proper ventilation. • Do not place near direct sunlight, heat sources, or air conditioners. •...
-
Page 7: Getting Started
2. Getting Started 2.1 Unpacking the unit Carefully unpack all the items found inside the box. Then place contents on a clean, flat, and level work surface. Refer to the “Contents” section of this guide to ensure that all items listed were in the box. After unpacking the unit, store the box and the packing material for any future shipping. -
Page 8: Bill Selection / Placement
2. Getting Started (continued) 2.3 Bill Selection / Placement A. Avoid counting wet, excessively dirty, folded, or damaged bills. B. Check for foreign objects mixed up with the bills such as paper clips, rubber bands, pieces of paper, etc. C. If counting new bills, fan them lightly since they often stick together. D. -
Page 9: Equipment Overview
3. Equipment Overview 3.1 Part Description 1. Printer: Prints Receipt 2. Bill Guiders: Aligns the bills to be counted 3. Hopper: Bills are placed here to be counted 4. Control Panel: Control operations/Shows counting results 5. Rejection Tray: Rejected bills are deposited here 6. -
Page 10: Display Description
3. Equipment Overview (continued) 3.2 Display Description 1880 x 10 x 10 x 10 10 x 10 20 x 10 50 x 10 100 x 10 4:30 12-26-2018 1. Active operating mode 4. Currency 2. Denomination breakdown 5. Total value of counted bills 3. -
Page 11: Control Panel Description
3. Equipment Overview (continued) 3.3 Control Panel Description AB7800 START START ENTER ENTER • START I / START II: Start counting / Switch user / Confirm selection / Reset • BATCH: Batch mode selection Press BATCH continuously to select from the pre-set options. See section 3.4 for more detailed instructions to enter a Batch quantity manually, using the VALUE function. - Page 12 3. Equipment Overview (continued) 3.3 Control Panel Description (continued) • SHOW: Show COUNTING REPORT & SERIAL # REPORT Press SHOW one time to access the “Counting report” then press it again to show the “Serial # report”. Press it again to return to the counting screen.
- Page 13 3. Equipment Overview (continued) 3.3 Control Panel Description (continued) PRINT: Print Reports. Press SHOW to select the desired report, then • press PRINT to print the selected report on the screen. ADD: Press ADD to enable or disable the Addition mode during •...
- Page 14 3. Equipment Overview (continued) 3.3 Control Panel Description (continued) MODE: Press MODE continuously to select which of the six operating • modes is to be used for a count. MIX: Use to count mixed denominations in the same bundle. The screen will show a breakdown of the count by denomination, the total value of the bundle, and how many bills were counted.
-
Page 15: Setting Up Numeric Values
3. Equipment Overview (continued) 3.4 Setting Up Numeric Values Press VALUE to access the Numeric Value screen. This feature is to be used any time a parameter has to be set for a count, settings need to be adjusted on the equipment, a password needs to be set up, etc. -
Page 16: User Menu Overview
4. User Menu Overview User Menu Description This section further describes the functionality of the MENU/BACK button found on the control panel. (Previously referenced in section 3.3) MENU Currency Time Set Settings Update Service User 4.1 Currency Selection Select the specific operator I or II Press MENU on the control panel Press Currency on the touch screen Select the desired currency and press START for the desired operator... -
Page 17: Settings: Allows The User To Configure Several Functions
4. User Menu Overview (continued) 4.2 Settings: Allows the user to configure several functions: a- MG: Magnetic detection adjustment Press VALUE to change the current sensitivity. Press CLR to clear the current setting, enter the new value, and press OK to confirm the new one. - Page 18 4. User Menu Overview (continued) 4.2 Settings (continued) f- SLOPE: Adjust the slope tolerance for the bills Used to adjust the tolerance when any bill is fed aslant. Press VALUE to change the current sensitivity. Press CLR to clear the current setting, enter the new value, and press OK to confirm.
-
Page 19: Time Set: Date And Time Adjustment
4. User Menu Overview (continued) 4.3 TIME SET: Date and Time adjustment a. User the keys select the specific field to adjust. TIME SET b. Press Value key to access the 2018-12-20 03:11:33 numeric screen. ERROR c. Press CLR to clear the current value and enter the new one. -
Page 20: Service
4. User Menu Overview (continued) 4.5 SERVICE a) Collect: (Reserved for Technical Service) Used to scan bills when a new update is required. Contact tech support if the equipment requires an update. b) CIS Calibration: Used to calibrate the CIS (Contact Image Sensor) upon Tech Support’s recommendation. -
Page 21: Users
4. User Menu Overview (continued) 4.5 SERVICE (continued) g) Restore Factory Setting Used to restore the counterfeit detection functions of a unit to factory default settings. It is highly recommended to conduct this procedure when the equipment is repeatedly reporting error messages during its operation. Place the cursor over the YES 7 Restore Factory Set option and press ENTER to begin... -
Page 22: Operation
5. Operation 5.1 Counting Operation Once the unit has been turned on, using the power switch located in the back of the equipment, the unit will proceed with a short self-check test. After this self-check test has been completed, the equipment is ready to begin counting. Select the required Currency as well as the desired operating mode (MIX- SORT- FACE-ORT-DSP-COUNT) Set up any additional options such as ADD, BATCH, etc. -
Page 23: Unit Maintenance
6. Unit Maintenance 6.1 Periodic Cleaning Routines Following these periodic cleaning routines will help keep the unit in the optimum condition for ensuring a trouble-free operation, as well as to extend the unit’s lifespan. Daily routine: Perform the following steps on a daily basis: a. -
Page 24: Troubleshooting
7. Troubleshooting 7.1 Thickness Knob Adjustment (Feeding Gap) Proceed with this calibration when the bills are not fed smoothly through the machine or several error messages are occurring too often like DOUBLE NOTES, CHAIN, or miscounting errors. Other reasons that might require readjusting the feeding gap are: The counting of new or mint condition bills The counting of poor or bad fitness condition bills Polymer bills and Paper-made bills counted together... -
Page 25: Restore Factory Settings
7. Troubleshooting (continued) 7.2 Restore Factory Settings Go to the SERVICE section in the User Menu, then select “RESTORE FACTORY SETTINGS”. This procedure will restore the factory default settings for the Counterfeit detection functions. NOTE: Full procedure description referred to in section g (pg. 21) -
Page 26: Removing Jammed Notes
7. Troubleshooting (continued) 7.3 Removing Jammed Notes If a bill is jammed inside the transporting mechanism, the unit will notify the user, and the message “STUCK NOTES ERR” will appear along with an image of the section where the jammed bill is located. The user must proceed to remove the bills with his/her hands (DO NOT use any sharp objects such as scissors, letter openers, knives, etc.) a) Proceed to open the specified compartment using its handle. -
Page 27: Cis Calibration Procedure
Wait for the message “CIS CHECK OK” on the display. f. Press BACK several times to return to the main counting screen and remove the calibration card from the machine. NOTE: For a video reference of this procedure access our website support page www.accubanker.com/pages/support then select the AB7800 model... -
Page 28: Export Data To The Absuite
8. Export Data to the ABSuite AccuBANKER has developed the ABSuite application that allows the user to connect the AB7800 to the user’s computer to export the counting information and save it. To download the free version of the ABSuite, access the link www.accubanker.com/collections/software then follow the installation... -
Page 29: Warning And Error Messages
9. Warning and Error Messages The unit will notify the user if an error is detected during the booting up procedure or in case any abnormal incident occurs during the operation. Proceed as the table indicates for each error message. If the problem persists, call for technical support. - Page 30 9. Warning and Error Messages (continued) ERROR CAUSE SOLUTION Lower Right Clean the sensor R_D_IR ERR Counting Sensor Contact tech support Clean the sensor Upper Right R_U_IR ERR Counting Sensor Contact tech support Clean the sensor Lower Left L_D_IR ERR Counting Sensor Contact tech support Upper Left Counting...
-
Page 31: Specifications
10. Specifications Counting Speed: up to 1000 bills/min Feeding System: Roller Friction System (Front-loading) Hopper Capacity: 600 bills (new bills) Stacker Capacity: 200 bills (new bills) Rejection Tray: 50 bills Max. Bill size range: 10 x 5 - 18 x 8 cm Display: Touchscreen LCD Display Power Source: 100 - 240 VAC 60/50 Hz Power Consumption: 50 Watts (Max. - Page 32 ® AccuBANKER USA 7104 NW 50th St Miami, FL 33166 9AM- 5PM ET Monday through Friday www.AccuBANKER.com Please give us a call at 1-888-993-2228...
Need help?
Do you have a question about the SWITCH AB7800 and is the answer not in the manual?
Questions and answers