Advertisement
Quick Links
PARTS INCLUDED
A
F
HARDWARE INCLUDED
33X
33X
TOOLS REQUIRED
#2 Phillips Screwdriver
DISCLAIMER
•
Two people are recommended for the assembly of this product.
•
Use hardware provided and tools recommended to avoid any product faults.
•
Always assemble product on a clean soft surface to avoid scratching.
B
G
27X
4X
12X
#2 Robertson screwdriver
ASSEMBLY INSTRUCTIONS
C
H
I
2X
W-01L
D
J
3X
1X
E
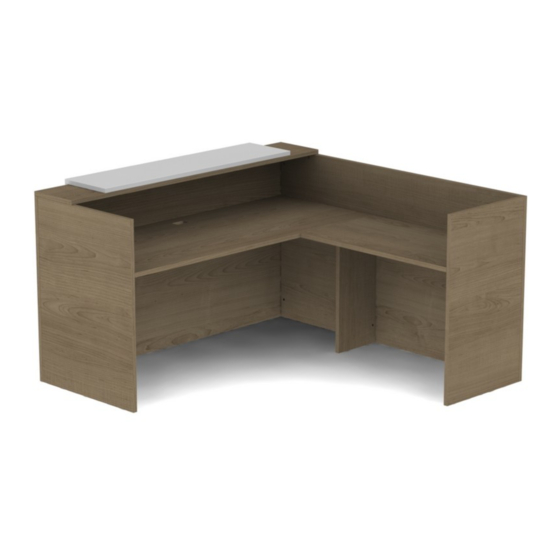
1
Advertisement

Related Manuals for Belair W-01L


Summary of Contents for Belair W-01L
- Page 1 W-01L ASSEMBLY INSTRUCTIONS PARTS INCLUDED HARDWARE INCLUDED TOOLS REQUIRED #2 Phillips Screwdriver #2 Robertson screwdriver DISCLAIMER • Two people are recommended for the assembly of this product. • Use hardware provided and tools recommended to avoid any product faults. •...
- Page 2 W-01L STEP 1 Ensure all pins and cams are inserted in parts before assembling. Start with desk assembly. Attach desk top A and left gable C as shown. Fasten pins and cams. STEP 2 Lay desk back B flat and lower top and gable onto back as shown.
- Page 3 W-01L STEP 4 Connect small support gable H to return top. Fasten pins and cams. STEP 5 Lay return back D flat and lower top and gables onto back. Fasten pins and cams and flip unit right side up. STEP 6...
- Page 4 W-01L STEP 7 Attach transaction top F to desk back. Fasten pins and cams. STEP 8 Connect waterfall top I and back J as shown. Fasten pins and cams. STEP 9 Place waterfall on center of transaction top and secure with screws through...
- Page 5 W-01L STEP 10 Secure desk return top to desk top with connecting flat brackets as shown. STEP 11 Use cover caps to cover any visible cams and screws.
-
Page 6: Parts Included
W-01L ASSEMBLY INSTRUCTIONS PARTS INCLUDED HARDWARE INCLUDED TOOLS REQUIRED #2 Phillips Screwdriver #2 Robertson screwdriver DISCLAIMER • Two people are recommended for the assembly of this product. • Use hardware provided and tools recommended to avoid any product faults. •... - Page 7 W-01L STEP 1 Ensure all pins and cams are inserted in parts before assembling. Start with desk assembly. Attach desk top A and right gable C as shown. Fasten pins and cams. STEP 2 Lay desk back B flat and lower top and gable onto back as shown.
- Page 8 W-01L STEP 4 Connect small support gable H to return top. Fasten pins and cams. STEP 5 Lay return back D flat and lower top and gables onto back. Fasten pins and cams and flip unit right side up. STEP 6...
- Page 9 W-01L STEP 7 Attach transaction top F to desk back. Fasten pins and cams. STEP 8 Connect waterfall top I and back J as shown. Fasten pins and cams. STEP 9 Place waterfall on center of transaction top and secure with screws through...
- Page 10 W-01L STEP 10 Secure return top to desk top with connecting flat brackets as shown. STEP 11 Use cover caps to cover any visible cams and screws.
Need help?
Do you have a question about the W-01L and is the answer not in the manual?
Questions and answers