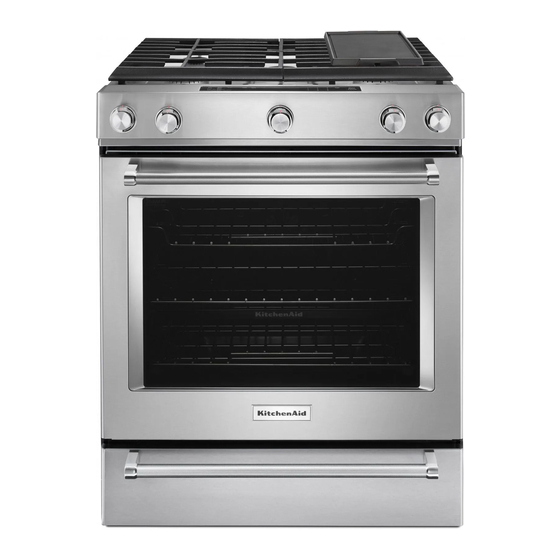
KitchenAid KSGB900ESS Manual
Slide-in gas range control
Hide thumbs
Also See for KSGB900ESS:
- User manual (56 pages) ,
- Installation instructions manual (48 pages)
Table of Contents
Advertisement
Available languages
Available languages
WARNING: To reduce the risk of fire, electric shock, or injury to persons, read the IMPORTANT SAFETY INSTRUCTIONS, located in
your appliance's Owner's Manual, before operating this appliance.
This manual covers several models. Your model may have some or all of the items listed. Refer to this manual or the Product Help
section of our website at www.kitchenaid.com for more detailed instructions. In Canada, refer to the Product Help Section at
www.kitchenaid.ca.
KEYPAD
CLOCK/TOOLS
CLOCK/TOOLS
OVEN LIGHT
TIMER SET/OFF
START
CANCEL UPPER
CANCEL LOWER
(on some models)
BAKE
Slide-In Gas Range Control Guide
FEATURE GUIDE
Do not let food sit for more than one hour before or
after cooking.
Doing so can result in food poisoning or sickness.
FEATURE
INSTRUCTIONS
Clock
The Clock can use a 12- or 24-hour cycle. See the "Electronic Oven Controls" section.
1. Press CLOCK/TOOLS until "CLOCK" is displayed.
2. Use the number keypads to set the time of day.
3. Press START to change the time.
4. Press "3" for AM or "6" for PM.
Settings
Enables you to personalize the audible tones and oven operation to suit your needs.
See the "Electronic Oven Controls" section.
Oven cavity
The oven light is controlled by a keypad on the oven control panel. While the oven door is
light
closed, press OVEN LIGHT to turn the light On and Off. When the oven door is opened,
the oven light will automatically come On.
Oven timer
The Timer can be set in hours or minutes up to 9 hours and 59 minutes.
1. Press TIMER SET/OFF.
2. Press the number keypads to set the length of time in hr-min-min. Leading zeros do
not have to be entered. For example, for 2 minutes, enter "2."
3. Press TIMER SET/OFF to begin the countdown. If enabled, end-of-cycle tones will
sound at end of countdown.
4. Press TIMER SET/OFF again to cancel the Timer and return to the time of day. Do not
press the Cancel keypad because the oven will turn off.
5. If the Timer is running but not in the display, press TIMER SET/OFF to display the
countdown for 5 seconds.
Cooking start
The Start keypad begins any oven function. If Start is not pressed within 2 minutes after
pressing a keypad, the function is canceled and the time of day is displayed.
Range
The Cancel keypad stops any function for the appropriate oven or drawer, except the
function
Clock and Timer.
Baking and
1. Press BAKE.
roasting
2. Press the number keypads to set the desired temperature. If the temperature entered
is not in the range of the temperatures allowed, the minimum or maximum allowed
temperature will be displayed. Enter a temperature in the allowable range.
3. Press START.
4. To change the temperature, repeat steps 2 and 3.
5. Press CANCEL UPPER when finished.
WARNING
Food Poisoning Hazard
1
Advertisement
Table of Contents

Related Manuals for KitchenAid KSGB900ESS


Summary of Contents for KitchenAid KSGB900ESS
- Page 1 This manual covers several models. Your model may have some or all of the items listed. Refer to this manual or the Product Help section of our website at www.kitchenaid.com for more detailed instructions. In Canada, refer to the Product Help Section at www.kitchenaid.ca.
- Page 2 KEYPAD FEATURE INSTRUCTIONS STEAM BAKE Steam bake 1. Insert the steam rack with water reservoir in the oven. 2. Pour 11 /2 cups (350 mL) of warm water into the water reservoir. NOTE: Do not fill past the MAX mark. 3.
- Page 3 KEYPAD FEATURE INSTRUCTIONS COOK TIME Timed Timed cooking allows the oven to be set to turn on at a certain time of day, cook for a set cooking length of time, and/or shut off automatically. To set a Timed Cook or a Delayed Timed Cook, see the “Cook Time” section. DELAY START Delayed start The Delay Start keypad is used to enter the starting time for an oven function with a...
-
Page 4: Electronic Oven Controls
Electronic Oven Controls Fahrenheit and Celsius The temperature is preset to Fahrenheit but can be changed to Control Display Celsius. The display will flash when powered up or after a power loss. 1. Press SETTINGS/CLOCK or CLOCK/TOOLS until “TEMP Press CANCEL or CANCEL UPPER to clear. When the oven is UNIT”... -
Page 5: Surface Temperatures
Demo Mode Sabbath Mode The Sabbath mode sets the oven to remain ON in a bake setting IMPORTANT: This feature is intended for use on the sales floor until turned off. with 120 V power connection and permits the control features to be demonstrated without the oven turning on. -
Page 6: Surface Burners
Surface Burners 3. Clean clogged burner ports with a straight pin as shown. Do not enlarge or distort the port. Do not use a wooden toothpick. IMPORTANT: Do not obstruct the flow of combustion and If the burner needs to be adjusted, contact a trained repair ventilation air around the burner grate edges. -
Page 7: Surface Grates
5. Replace the burner cap, making sure it is properly aligned with The surface grates interlock using the hook on one end of the the burner base. If burner caps are not properly positioned, grate and the indent on the other. To remove the grates, lift the surface burners will not light. -
Page 8: Home Canning
Cookware Cookware Characteristics IMPORTANT: Do not leave empty cookware on a hot surface Porcelain ■ See stainless steel or cast iron. cooking area, element or surface burner. enamel-on- ■ Porcelain enamel bakeware without the steel or cast Ideal cookware should have a flat bottom, straight sides and a metal base may bond to the cooktop if iron well-fitting lid, and the material should be of medium-to-heavy... -
Page 9: Roll-Out Rack
OVEN USE Roll-Out Rack Odors and smoke are normal when the oven is used the first few The roll-out rack allows easy access to position and remove food times or when it is heavily soiled. in the oven. It is not recommended to use the roll-out rack in the top rack, position 7, or the bottom rack, position 1. -
Page 10: Sabbath Mode
4. Reach through the rack to hold the sliding rack and the front 2. Press the number keypads to set the desired temperature. If crossbar. Lift the front of the rack assembly, and then push the the temperature entered is not in the range of the rack assembly to the back of the oven. -
Page 11: Convection Cooking
Steam Bake During convection baking or roasting, the bake, broil, and convection elements cycle on and off in intervals while the fan The Steam Bake function works in conjunction with the steam circulates the hot air. During convection broiling, the broil and rack to provide additional moisture during baking. -
Page 12: Baking Drawer
3. Press COOK TIME. The Cook Time oven indicator light will 4. To change the temperature, repeat steps 2 and 3. light up. 5. Press CANCEL LOWER when finished. 4. Press the number keypads to enter the length of time to cook. 6. - Page 13 Ce manuel concerne plusieurs modèles. Le modèle que vous avez peut comporter toutes les caractéristiques énumérées ou seulement certaines d’entre elles. Consulter ce manuel ou la section d’aide des produits de notre site Internet www.kitchenaid.com. Au Canada, consulter la section d’aide des produits de notre site Internet www.kitchenaid.ca.
- Page 14 TOUCHE INSTRUCTIONS CARACTÉRISTIQUE CANCEL UPPER Fonction de la La touche Cancel (annulation) désactivent toutes les fonctions du four ou du CANCEL LOWER cuisinière tiroir correspondant à l’exception de l’horloge et de la minuterie. (on some models) [annulation four supérieur/annulation four inférieur) (sur certains modèles)] BAKE Cuisson au four et...
- Page 15 TOUCHE INSTRUCTIONS CARACTÉRISTIQUE EASY CONVECT BAKE Cuisson par 1. Appuyer sur EASY CONVECT BAKE (cuisson au four par convection facile). (cuisson au four par convection 2. Appuyer sur “1” pour que le four convertisse automatiquement la convection facile) température et la durée pour la cuisson par convection. Appuyer sur “2” pour convertir manuellement la température et la durée.
- Page 16 TOUCHE INSTRUCTIONS CARACTÉRISTIQUE BAKING DRAWER Tiroir de cuisson lente 1. Appuyer sur BAKING DRAWER SLOW COOK (cuisson lente au tiroir de SLOW COOK cuisson). (cuisson lente au tiroir 2. Utiliser les touches numériques pour régler la température souhaitée. Si la de cuisson) (sur température entrée ne se trouve pas dans la fourchette des températures certains modèles)
-
Page 17: Commandes Électroniques Du Four
Commandes électroniques du four Réglages De nombreuses fonctions du four peuvent être réglées pour Affichage des commandes répondre à vos besoins. La touche SETTINGS/CLOCK (réglages/ L’affichage clignote à la mise sous tension ou après une coupure horloge) ou Clock/Tools (réglages/outils) sert à effectuer ces de courant. - Page 18 Désactivation des signaux sonores Mode de démonstration Désactive tous les signaux sonores, y compris le signal sonore de IMPORTANT: Destinée au personnel commercial en rayon, cette fin de programme et les signaux sonores d’appui sur une touche. fonction permet, avec un raccordement au secteur 120 V, de Les signaux sonores de rappel restent actifs lorsque tous les sons présenter les fonctions des commandes sans pour autant activer sont désactivés.
-
Page 19: Brûleurs De Surface
Brûleurs de surface 3. Appuyer sur la touche “3” pour augmenter la température par paliers de 5 °F (3 °C) ou sur la touche “6” pour diminuer la IMPORTANT : Ne pas entraver l’évacuation de l’air de combustion température par paliers de 5 °F (3 °C). L’intervalle et de ventilation autour des bords des grilles de brûleur. -
Page 20: Grilles De Surface
1. Enlever le chapeau et la base du brûleur et nettoyer tel 5. Réinstaller le chapeau du brûleur et s’assurer qu’il est bien qu’indiqué à la section “Nettoyage général” du manuel du aligné avec la base du brûleur. Lorsque le chapeau de brûleur propriétaire. -
Page 21: Ustensiles De Cuisson
Ustensiles de cuisson Les grilles s’imbriquent à l’aide du crochet situé à une extrémité de l’une d’entre elles et de la fente qui se trouve sur l’autre. Pour IMPORTANT : Ne pas laisser d’ustensile de cuisson vide sur une retirer les grilles, soulever l’arrière de la grille de gauche pour la surface de cuisson, un élément ou un brûleur de surface chauds. -
Page 22: Positionnement Des Grilles Et Des Ustensiles De Cuisson Au Four
Positionnement des grilles et des Ustensile Caractéristiques ustensiles de cuisson au four Terre cuite ■ Suivre les instructions du fabricant. ■ Utiliser des réglages de température Se servir de l’illustration et du tableau suivants comme guide. basse. ■ Peut érafler la table de cuisson. Acier émaillé... -
Page 23: Grille Déployante
Grille déployante 3. Abaisser l’avant de la grille et l’introduire avec précaution dans le four en la faisant glisser au-delà des encoches en “V”. Cette grille déployante offre un accès facile à l’utilisateur pour le Enfoncer la grille à l’intérieur du four jusqu’à ce qu’elle bute positionnement et le retrait des aliments. -
Page 24: Mode Sabbat
Mode Sabbat entame la cuisson à la température correcte après y avoir placé le plat. Placer les aliments au four lorsque le signal sonore de Le mode Sabbat maintient le réglage de cuisson au four tant que préchauffage retentit. Ne pas ouvrir la porte du four pendant le le four n’est pas éteint. -
Page 25: Cuisson Par Convection
Le changement de température lors de la cuisson au gril permet Options de cuisson par convection un contrôle plus précis de la cuisson. Plus le réglage du gril est Cuisson au four par convection : cuisson au four sur plusieurs bas, plus la cuisson est lente. -
Page 26: Tiroir De Cuisson
5. Appuyer sur CANCEL LOWER (annulation four inférieur) après avoir terminé. 6. Retirer les aliments du tiroir. Cuisson lente avec le tiroir de cuisson: ©2020 KitchenAid. All rights reserved. Used under license in Canada. ® ™ W11427481A Tous droits réservés. Utilisé sous licence au Canada.
Need help?
Do you have a question about the KSGB900ESS and is the answer not in the manual?
Questions and answers