Table of Contents
Advertisement
Quick Links
Advertisement
Table of Contents

Subscribe to Our Youtube Channel
Related Manuals for Artusi ADW5607


Summary of Contents for Artusi ADW5607
- Page 1 A PPLIANCES FO R LIV IN G ADW5607 OPERATION MANUAL...
- Page 2 This instruction manual has been specially created to inform you of the features specified in this Manual may not be available on your appliance. full range of features your ARTUSI appliance has to offer and serves as an All our appliances are only for domestic use, not for commercial use. Products introduction to getting the very best out of your ARTUSI appliance.
- Page 3 This Operation Manual is supplied together with the "Installation Manual". Important note! These operation instructions must be properly kept. Model No.: ADW5607B & ADW5607X The model mentioned this manual may not be sold on every market, and may vary at any time. The models and specifications of the products sold in your country must be known dearly.
- Page 5 Fashion appearance Match General dish rack design. with the kitchen style freely Designed for different The dishwasher appearance dishes. is featured by the modern More applicable to the and fashion shape and the demands of different decent color. users, and more convenient to arrange the dishes.
-
Page 7: Table Of Contents
Catalog Safety and Warning ............... Dish Maintenance ................Packing List..................Part name ....................Product Specifications ................ Installation Precautions ..............Installation Guidelines 1-15 ..............1 Instructions ...................16 Cutlery basket ..................Basket and Cup holder 20-21 ..............Place the dishes in the drawer ............ -
Page 8: Safety And Warning
Important safety instructions Instructions to the user The well-designed dishwasher can operate safely during the normal use. The following operating methods must be kept in mind during the use of dishwasher. Important safety instructions For the product over the warranty period, the after-sales service personnel can offer ... - Page 9 Repair and Service Important safety instructions Installation Warranty instructions of dishwasher Before operating the dishwasher, it is necessary to install the dishwasher in accordance with the installation manual. If your dishwasher is not provided with installation manual, please Dear users, call the after-sales service phone.
- Page 10 Technical Data Important installation instructions Installation Before the dishwasher is cleaned or repaired, the power plug of dishwasher must be unplugged. Technical Data To power off the dishwasher, the power plug must be disconnected in order to avoid damage. It is forbidden to pull the power wire or the connection between the power wire and the socket.
-
Page 11: Dish Maintenance
Data of Washing Program Dish maintenance Dish maintenance To know the selecting method of program, please refer to "Quick Guidance". When the dishwasher is used to clean the dishes, the mixture of high-temperature water The time of washing program is given in the following table: and dish washing powder may damage the dishes. -
Page 12: Packing List
Packing List Please check the accessories in the box according to the List Display Possible failure cause Packing content Quantity Roof lifting motor failure Machine 1 set Basket components 1 set The water inflow is abnormal, unstable or low. Cutlery basket 1 set NTC test value is not symmetric (during Class B test) Water inlet pipe... -
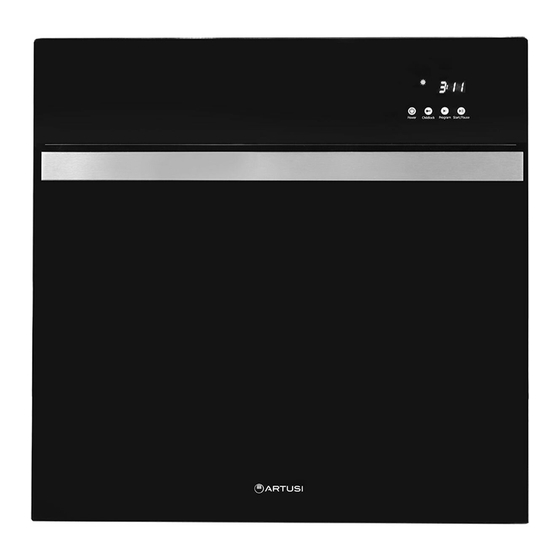
Page 13: Part Name
Part Name Fault Diagnosis Start Indicator icon Press the key " " to eliminate the beeping sound Display Touch Button Handle Check and record the error code according to the failure table If "E04" code is Glass Panel shown If "E02" code is shown If "E01"... - Page 14 Part Name Possible cause Failure Solution Cylindrical filter Such case often happens upon initial The motor There is no water around use of dishwasher or reuse of noise is very the motor. dishwasher that has been out of Flat filter loud service for a long period.
-
Page 15: Product Specifications
Troubleshooting Product Specifications Solution Possible cause Failure Product name Drawer dishwasher Disable the child lock. Press the The drawer The child lock function is key” " till no symbol is Rated Voltage cannot be activated. 220-240V~ shown on the screen. opened (no Press any key, and start the beeping or... -
Page 16: Installation Precautions
Installation Precautions Failure Possible cause Solution Important safety instructions! The drain pipe is not •Only qualified personnel mastering basic mechanical and electrical knowledge may install the correctly connected to Reinstall the drain pipe onto the drain hole. dishwasher. the drain hole. •The instruction book must kept by the customer. - Page 17 Troubleshooting Product Installation Guidelines Failure Possible cause Solution 670mm (Standard floor cabinet) Refer to the "Quick Guidance" and select the 55mm (Cabinet plate) The washing program and the suitable program; or, the dirt is dry and affixed dish capacity are not suitable. onto the dishes so the dishes have to be soaked for a period.
-
Page 18: Installation Guidelines
Installation Guide lines Cleaning of spray arm Water inlet connection to dishwasher: 1. Power off the dishwasher, or unplug the power wire plug. 2. Lift up the glass cup bracket from the bracket iron wires (if the bracket is folded), lift up all the tea cup trays, and ensure that they are vertical and close to the drawer top. - Page 19 Removal and cleaning of strainer and filter Installation Guidelines Lift up and remove the filter. It is normal if there is water under the filter. As shown on the picture, rotate the filter cap and handle, and lift up the filter cap at the filter cap notch to separate the cap from the handle.
- Page 20 Installation Guidelines Cleaning of strainer and filter Important note! If the cleaning or anti-scaling agent of dishwasher is used, one washing program shall be Pass the water pipe through the cabinet shelf. applied after washing to prevent the cleaning agent from damaging the dishwasher. ...
- Page 21 Installation Guidelines Cleaning and Maintenance Important note! The dishwasher must be powered off during cleaning and maintenance (unplug the Fixing of the dishwasher. power wire of dishwasher, or turn on the fuse). Put the dishwasher into the pre-opened cabinet smoothly. After ...
-
Page 22: Instructions
Add the rinse aid Instructions How to add the rinse aid Note:lf there is no distributor model, cannot add the rinse, Combination of washing the dishes is recommended to be used. 1. Counterclockwise rotate and remove the plug. 2.Add the rinse aid into the round hole. Notice to prevent the rinse Aid from splashing outward the feeder. - Page 23 Use instructions of washing block Touch Instructions If the washing block is used, the manufacturer's suggestions on the packing bag shall be observed. Some washing blocks may not be applicable to all the washing programs. Lid motor operation ...
- Page 24 • 1、Childlock can be automatically activated for every start after selecting a program and pressing By pressing ( ) while any setting is selected, the corresponding setting submenu is entered in ) if "Permanent activation of Childlock at start' is configured as "ON" as a preference in order to change the preferences.
-
Page 25: Cutlery Basket
touch areas are enabled again. Adding of washing block Notice: You can see the washing agent with similar washing effect sold in the supermarket, Knife and fork barrel know and observe the use suggestions of washing agent manufacturer. ... -
Page 26: Basket And Cup Holder
Adding of Washing Agent Basket Tableware layout (reference) : Adding of dish washing powder Notice: You can see the washing agent With similar washing effect sold in the supermarket, know and observe the use suggestions of washing agent manufacturer. Type Item Dinner plate... - Page 27 Washing procedure is introduced Cup holder First know the hardness of your water, and then determine the necessary dosage of washing agent according to the following form. Meanwhile, please refer to the section 'Water Softener'. Please read "Quick Guidance" to know the program to be selected. ...
-
Page 28: Place The Dishes In The Drawer
Place the dishes in the drawer Water hardness is introduced What's the water hardness? Place the dishes in the drawer. Please make sure that: • The arrangement of dishes must ensure that the water sprayed by spray arm can reach The hard water indicates the water with a high content of calcium, magnesium and any zone where the dishes are placed (the improper arrangement of dishes may result in other minerals. -
Page 29: Water Hardness Is Introduced
Appliances Privacy Policy is available at 2. What is not Covered by the Warranty. of the artusi in respect of an artusi product www.artusi.com.au. Worldwide Appliances will The Warranty does not apply if an artusi product purchased as a “factory second”... -
Page 30: Washing Procedure Is Introduced
Last Name: First Name: Address: State: Postcode: Email: Home Phone: Mobile: Purchase Date: (Please attach proof of purchase to validate warranty) SERIAL NUMBER MODEL NUMBER (if you cannot locate the serial number please call ARTUSI on 1300 694 583) 01032014... - Page 32 DISCLAIMER Worldwide Appliances PTY LTD, trading as ARTUSI, is continually seeking ways to improve the design specifications, aesthetics and production techniques of its products. As a result alterations to our products and designs take place continually. Whilst every effort is made to produce information and literature that is up to date, this brochure should not be regarded as an infallible guide to the current specifications, nor does it constitute an offer for the sale of any particular product.
Need help?
Do you have a question about the ADW5607 and is the answer not in the manual?
Questions and answers