Table of Contents
Advertisement
Quick Links
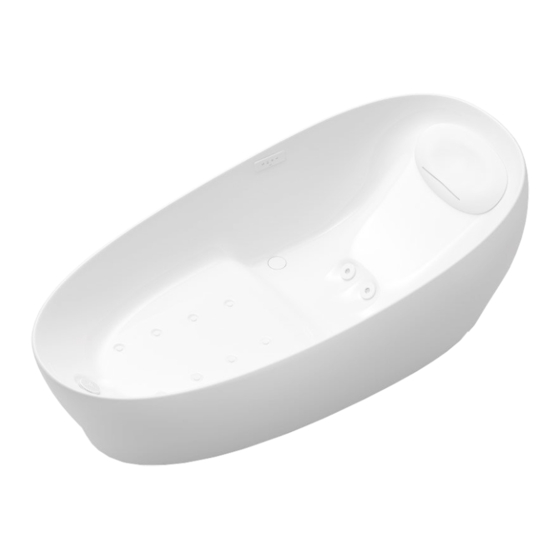
FLOTATION TUB
PJYD2200
Please explain the FLOTATION TUB functions and operation to the customers.
Keep the power turned off when there is time until handing over the product in a new home.
To service installers
Installation Guide
2
4
5
6
7
8
9
10
10
11
14
15
Advertisement
Table of Contents

Subscribe to Our Youtube Channel
Summary of Contents for Toto PJYD2200
-
Page 1: Table Of Contents
Installation Guide FLOTATION TUB PJYD2200 Cautions and warnings Included parts Required tools Dimension drawings Electrical construction Installation procedures Meaning of the indications Building a base for the bathtub Installing the bathtub Conduct a trial run Finishing To service installers Please explain the FLOTATION TUB functions and operation to the customers. -
Page 2: Cautions And Warnings
Cautions and warnings Please read the installation manual and follow these cautions and warnings carefully before beginning the construction. Follow all safety precautions and warnings. When this appears next to a topic, this indicates that misoperation could result in death WARNING or serious injury. - Page 3 WARNING Make sure to install the bathtub according to the installation guide and in a stable location that can withstand its mass. When connecting the wiring, check to see that the power is turned off. This may cause electric shock. Ensure that you have an ergonomic working position during transport and assembly.
-
Page 4: Included Parts
Included parts : Bathtub : Polyethylene foamed sheet : Instruction manual : Installation guide : Cleaning spatula for NECK BATH : Drain trap (PP) : Flathead screwdriver (small) *Hand over A-3, 5 to the customer after the construction is completed. -
Page 5: Required Tools
Required tools B-11 B-10 H05VVF 3 x 1.5 mm AWG8 B-12 B-13 B-14 PVC adhesive PVC primer Silicone B-15 B-16 Water detection sheet B-19 B-17 B-18 Soft cloth that will not damage the bathtub... - Page 6 Item External dimensions 2200 mm (L) × 1050 mm (W) × 780 mm (H) Bathtub depth 394 mm Capacity 293 L Weight 170 kg GALALINE Materials Normal drainage (partial electrical valve automatic drainage) Drainage method Drain plug Push-operated drain plug Drainage rate (with trap) 48 L/min 48 L/min...
-
Page 7: Dimension Drawings
Dimension drawings For an optional water faucet, ask the dealer,contractor from whom you purchased the product,or TOTO. -
Page 8: Electrical Construction
Electrical construction B-11 25A I n 0.03A H05VVF 220-240V 50/60Hz 700W/850W B-11 Waterproof Tile Turn the wiring circuit breaker off during operation. Protect the product with a wiring circuit breaker (I⊿n 0.03A and 25A differential switch, 20A magnetic thermal switch) and ground fault circuit interrupter (GFCI). Install both switches outside of the bathroom. -
Page 9: Installation Procedures
Installation procedures >>P.10 >>P.11 >>P.12 >>P.13 >>P.14 ② ① >>P.15... -
Page 10: Meaning Of The Indications
Meaning of the indications This operation must be conducted by a contractor. Operation that must be checked. Building a base for the bathtub B-11 Waterproof Tile Please conduct site operation directly on the drain. When embedding a power cable for the bathtub on the installation side, please use a sheath tube with an inner diameter of less than 20 mm. -
Page 11: Installing The Bathtub
Installing the bathtub B-14 Lift up Lift up Other Choices B-18 B-17 Cardboard box, etc., for packaging the bathtub... - Page 12 Power supply B-11 Brown Blue Green/ Yellow IPX5 B-4 M12...
- Page 13 B-12 A(40mm) A(40mm) B-15 B-4 M10 WARNING Check to see that the hole positions are not overlapping with the cavity portions of the tile base. If there are cavities, use an adhesive anchor to stabilise. B-14...
-
Page 14: Conduct A Trial Run
Conduct a trial run Check to see that there is no water leakage when the B-16 product is operating or stopped. Conduct a trial run for 10 minutes. If trouble occurs during the trial run Symptoms Processing The controller does not light Is power being supplied? up, or operate any functions. -
Page 15: Finishing
WARNING The bathtub may shake if it is not properly stabilised. Finishing B-13 WARNING that does not contain alcohol. - Page 16 2017. 11 Printed in China ©TOTO Ltd. All rights reserved. NTE183...


Need help?
Do you have a question about the PJYD2200 and is the answer not in the manual?
Questions and answers