Advertisement
Advertisement
Table of Contents

Related Manuals for Autool CT150


Summary of Contents for Autool CT150
- Page 1 AUTOOL CT150/CT200 Fuel System Cleaner...
-
Page 2: Safety Warning
Allow the unit to cool down completely before storing the unit name mentioned in this manual, they shall all belong to AUTOOL and wrap the cord. and its other affiliated company, in other countries without the... -
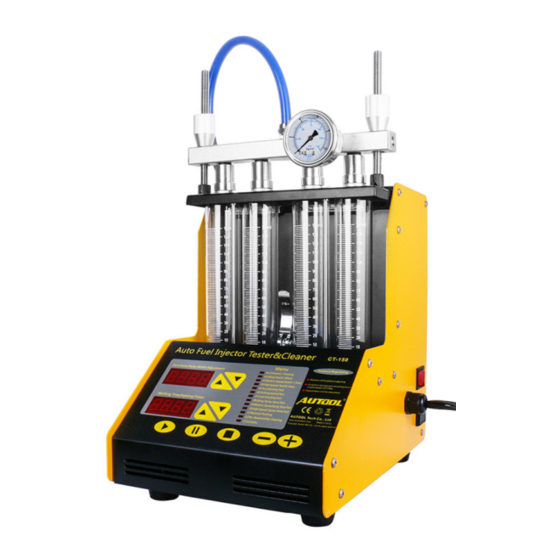
Page 3: Product Introduction
Product Introduction Adopting the powerful ultrasonic cleaning technology, the Welcome to the CT200 / CT150 injector cleaning detector equipment offers complete cleaning to the injectors. manufactured by Shenzhen Accidental Technology Co., Ltd.. The Fuel pressure control through microcomputer offers stable... -
Page 4: Specifications
The CT150 injector cleaning detector is a cabinet structure. CT150 is similar to C150 except the number of the tanks. The Specifications Figure 1 shows the structure of the CT150. It is divided into two Working Condition: layers. The upper layer is the ultrasonic cleaning machine table Power supply: AC220V±10%... -
Page 5: Operating Procedures
Note: This equipment requires a special test solution and cleaning agent. The test solution is used by the host during uniformity detection/atomization observation, sealing test, fuel injection quantity detection automatic cleaning detection. The main engine uses gasoline plus cleaning Figure.02 agent during the cleaning. -
Page 6: Operation
Pour the cleaning liquid from the ultrasonic cleaning tank Insert the injector pulse signal line into the injector back into the original bottle and wipe the ultrasonic separately. cleaner with a soft dry cloth. Turn on the ultrasonic power switch. Wipe the machine table top with a dry soft cloth. - Page 7 Pour the cleaning liquid from the ultrasonic cleaning tank Insert the injector pulse signal line into the injector back into the original bottle and wipe the ultrasonic separately. cleaner with a soft dry cloth. Turn on the ultrasonic power switch. Wipe the machine table top with a dry soft cloth.
- Page 8 Up-inlet injector installation method and testing steps After test completed, system will stop automatically and beep with a buzzer. Select the oil separator from the accessory box, select the matching “O” ring and install it on the blockage, and apply a little grease to load the plug into the oil separator. 1-Platen screw;...
- Page 9 Select the uniformity/atomization detection in the control In the uniformity test, make sure that the liquid level in the test panel, set the corresponding working condition parameters, cup reaches more than 30ml, but considering that the oil will and press the [Run] key (Note: During the operation, foam during the injection process, to prevent overflow, refer to press the [Oil drain] key to perform uniformity and the formula: pulse width (ms) ×...
-
Page 10: Leakage Test
Reverse flush Set the working parameters and press the [Run] key. Injector Cleaner & Tester can also perform reverse flush by After cleaning, the system will stop automatically and beep connecting with flush-back adaptor at [Uniformity/Sprayability with a buzzer. test] mode. Reverse flush is a way to clean the injectors with the Note: test liquid flowing from the outlet to the inlet of the injector. - Page 11 to the pressure specified by the factory to be inspected, most On-Vehicle cleaning Beyond the original factory pressure of 10%), observe The hose line connection of the engine with return hose is whether the injector is dripping. shown as in Fig.06. After the test is completed, the system will automatically stop 、...
- Page 12 Without return hose connecting: Tidy up after on-vehicle cleaning The hose line connection of theengine without returnhose is After the on-vehicle cleaning is completed, turn off the Auto shown as in Fig.07. Ignition Switches restitute the link of the Auto fuel hoses then start the Auto to check the leakage of Auto fuel system.
-
Page 13: Warranty & Service
War ranty Ser vice to change product designs and specifications without prior notice. There are 3 years' warranty for AUTOOL product main unit and The physical appearance and color may differ from those shown 1 year warranty for the accessories since the day the customers in the instruction manual.
Need help?
Do you have a question about the CT150 and is the answer not in the manual?
Questions and answers