Instant Pot DUO User Manual
3, 5.7 and 8 litre multi-use pressure cookers
Hide thumbs
Also See for DUO:
- User manual ,
- Getting started manual (20 pages) ,
- Quick start manual (15 pages)
Table of Contents
Advertisement
Quick Links
DUO
TM
3, 5.7 and 8 Litre
Multi-Use Pressure Cookers
User Manual
Important Safeguards
Product Specifications
Initial Set-up
Product, Parts and Accessories
Smart Programme Settings
Cleaning Before First Use
Overview of Pressure Control
Features
Initial Test Run (Water Test)
Cooking with the Duo
Pressure Cooking Timetable
Grain-to-Water Ratios
Care, Cleaning and Storage
Troubleshooting
Warranty
Contact Information
Advertisement
Table of Contents

Related Manuals for Instant Pot DUO


Summary of Contents for Instant Pot DUO
- Page 1 Initial Set-up Product, Parts and Accessories Smart Programme Settings Cleaning Before First Use Overview of Pressure Control Features Initial Test Run (Water Test) Cooking with the Duo Pressure Cooking Timetable Grain-to-Water Ratios Care, Cleaning and Storage Troubleshooting Warranty Contact Information...
- Page 2 Welcome to the world of Instant cooking. Thank you for welcoming us into your kitchen. Having families ourselves, we developed the Instant Pot® Duo™ pressure cookers to allow busy families and professionals alike to cook healthy, delicious meals more easily and in less time.
-
Page 3: Table Of Contents
Table of Contents IMPORTANT SAFEGUARDS .................... 5 Initial Set-up ........................8 Product, Parts and Accessories ..................9 Duo Mini, 5.7 and 8 Litre Pressure Cookers ..............9 Product, Parts and Accessories ..................10 Inner Pot .........................10 Cooker Base ........................10 Product, Parts and Accessories ..................11 Accessories ........................11... - Page 4 Anti-Block Shield ......................22 Sealing Ring ........................23 Float Valve ........................24 Condensation Collector ....................26 Introduction to Pressure Cooking .................27 Cooking with the Duo ....................27 Depressurising the Cooker (Venting Methods) ............29 Natural Release (NR) ....................29 Quick Release (QR) .......................30 Initial Test Run (Water Test) ...................32 Using Pressure Cooking Smart Programmes ..............33...
-
Page 5: Important Safeguards
FAILURE TO FOLLOW THESE SAFEGUARDS AND INSTRUCTIONS MAY RESULT IN INJURY AND/OR PROPERTY DAMAGE. Use only the Instant Pot Duo lid with the Instant Pot Duo pressure cooker base. Using any other pressure cooker lids may cause injury and/or damage. - Page 6 • Never use below-counter power sockets, and never use with an extension lead. 23. Unplug your Instant Pot and let it cool before cleaning. Allow all surfaces to dry thoroughly before use. 24. The appliance is not intended to be operated by means of an external timer or a separate remote-control system.
- Page 7 CREATE THE RISK OF SERIOUS INJURY. Special Lead Set Instructions As per safety requirements, a short power supply lead is provided to reduce the hazards resulting from grabbing, entanglement and tripping. Product Specifications Duo Mini 3 Litres 700 watts 220-240V ~50/60Hz 3.9 kg cm: 29 L ×...
-
Page 8: Initial Set-Up
Important Safeguards may result in damage to the appliance, property damage or personal injury. • Use only the Instant Pot Duo lid with the Instant Pot Duo pressure cooker base. Using any other pressure cooker lids may cause injury and/or damage. -
Page 9: Product, Parts And Accessories
Product, Parts and Accessories Duo Mini, 5.7 and 8 Litre Pressure Cookers Before using the Instant Pot Duo, verify that all parts are accounted for. Top of Lid Steam Release Handle Float Valve Handle Lid Fins Lid Position Marker Bottom of Lid... -
Page 10: Product, Parts And Accessories
Product, Parts and Accessories Inner Pot Stainless Steel Inner Pot Instant Tip: The lid has been designed with lid fins that fit perfectly inside the handles on the left and right sides of the cooker base to help keep your countertop dry! Cooker Base Outer Pot Condensation Rim... -
Page 11: Product, Parts And Accessories
Product, Parts and Accessories Accessories Sealing Ring (installed in lid) Condensation Collector Steam Rack with Handles (Mini steam rack may not have handles) Getting Started Guide Safety, Maintenance and Warranty Illustrations are for reference only and may differ from the actual product. -
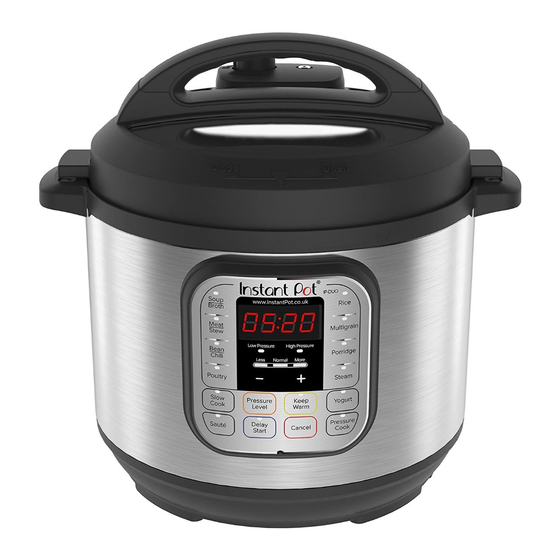
Page 12: Control Panel
Control Panel The Instant Pot Duo multi-use pressure cooker features an intuitive control panel to help make cooking fast and easy. Soup Rice Broth Meat Multigrain Stew Low Pressure High Pressure Bean Porridge Chili Less Normal More Poultry Steam Slow... -
Page 13: Control Panel
Smart Programmes Pressure Cooking: • Pressure Cook • Soup/Broth • Meat/Stew • Bean/Chili • Poultry (Not available on Duo Mini) • Rice • Multigrain (Not available on Duo Mini) • Porridge • Steam Non-Pressure Cooking: • Slow Cook •... -
Page 14: Smart Programme Settings
Smart Programme Settings Adjust and Save Pressure Cooking Temperature Select a pressure cooking Smart Programme, then press Pressure Level to toggle between High (10.2–11.6 psi) and Low (5.8–7.2 psi) pressure levels. Note: A higher pressure results in higher cooking temperature. When cooking begins, the pressure level you selected is saved and remembered the next time the Smart Programme is selected. -
Page 15: Smart Programme Settings
Smart Programme Settings Cancel and Standby Mode When the cooker is plugged in but not in operation, the display reads OFF to indicate Standby mode. Press Cancel to stop a Smart Programme at any time. The cooker returns to Standby mode. Turn Sound On/Off Sound On: When in Standby, press and hold + button until display indicates S On. -
Page 16: Automatically Keep Food Warm After Cooking
Smart Programme Settings Automatically Keep Food Warm After Cooking The Keep Warm setting turns on automatically after cooking on all Smart Programmes except Sauté and Yogurt. When automatic warming begins, the timer begins counting from 00:00 to indicate the time passed, up to 10 hours. To turn automatic warming off, press Keep Warm. -
Page 17: Status Messages
Status Messages Indicates that the cooker is in Standby mode. Indicates that the pressure cooker lid is not properly secured or missing. Indicates that the cooker is in Preheat mode. Display timer indicates one of the following: • When a Smart Programme is running, the display timer counts down to indicate the cooking time remaining in the Smart Programme. -
Page 18: Cleaning Before First Use
To avoid personal injury or damage to the appliance, replace a deformed or damaged inner pot. Use only authorised Instant Pot inner pots made for this model when cooking. Illustrations are for reference only and may differ from the actual product. -
Page 19: Overview Of Pressure Control Features
Illustrations are for reference only and may differ from the actual product. CAUTION Always check the lid for damage and excessive wear prior to cooking. The Duo pressure cooking lid is not compatible with all Instant Pot pressure WARNING cookers. Always ensure you use an authorised Instant Pot pressure cooking lid compatible with Duo pressure cookers when pressure cooking. -
Page 20: Steam Release Handle
Overview of Pressure Control Features Steam Release Handle Turning the handle from Sealing to Venting and vice versa manually opens and closes the steam release valve, sealing and venting the cooker as you desire. When the cooker releases pressure, steam is ejected from the top of the steam release handle. - Page 21 Overview of Pressure Control Features Install the Steam Release Handle Place the steam release handle on the steam release pipe and press down firmly. The steam release handle sits loosely on the steam release pipe in order to pivot easily while the cooker is pressurized. It should remain in place when the lid is turned over.
-
Page 22: Anti-Block Shield
Overview of Pressure Control Features Anti-Block Shield The anti-block shield prevents food particles from coming up through the steam release pipe, assisting with pressure regulation. As an integral part of product safety, the anti-block shield must be installed before use and cleaned frequently. Remove the Anti-Block Shield Grip the lid like a steering wheel and use your thumbs to press firmly against the side of the anti-block shield (pressing towards the side of the lid and up) until it... -
Page 23: Sealing Ring
Always check for cuts, deformation and correct installation of the sealing ring prior CAUTION to cooking. Do not use a stretched or damaged sealing ring. Only use authorised Instant Pot sealing rings. Failure to follow these instructions may cause food to discharge, which may lead to personal injury or property damage. -
Page 24: Float Valve
Overview of Pressure Control Features Float Valve The float valve provides a visual indication of pressure within the cooker and appears in 2 positions. Pressurized The float valve is visible and flush with the lid. Depressurized The float valve is sunken into the lid. The float valve and silicone cap work together to seal in pressurised steam. - Page 25 Overview of Pressure Control Features Remove the Float Valve from the Lid Place one finger on the flat top of the float valve, then turn the lid over. Detach the silicone cap from the bottom side of the float valve. Remove the float valve from the top of the lid.
-
Page 26: Condensation Collector
Overview of Pressure Control Features Condensation Collector The condensation collector sits at the back of the cooker base and accumulates overflow moisture from the condensation rim. It should be installed before cooking, then emptied and rinsed out after each use. Remove the Condensation Collector Pull the condensation collector away from the cooker base;... -
Page 27: Introduction To Pressure Cooking
Introduction to Pressure Cooking Cooking with the Duo Pressure cooking uses steam pressure to raise the boiling point of water above 100ºC. This energy-efficient cooking method is the fastest way to thoroughly cook a variety of your favorite meals. Pressure cookers go through 3 stages when pressure cooking: 1. - Page 28 Introduction to Pressure Cooking 3. Depressurisation After pressure cooking completes, follow your recipe instructions for depressurising the cooker. If automatic Keep Warm is on after cooking completes, the timer counts up from 00:00 to indicate the elapsed time up to 10 hours. If not, the cooker returns to Standby and displays End.
-
Page 29: Depressurising The Cooker (Venting Methods)
Depressurising the Cooker (Venting Methods) Always follow recipe instructions for depressurizing the cooker. Natural Release (NR) Leave the steam release handle in the Sealing position. As the temperature within the cooker drops, the cooker depressurises naturally over time. Depressurisation time varies based upon the volume and type of food and liquid. When the cooker has completely depressurised, the float valve drops into the lid. -
Page 30: Quick Release (Qr)
Depressurising the Cooker (Venting Methods) Quick Release (QR) Quickly and carefully turn the steam release handle from the Sealing position to the Venting position. A stream of steam releases through the top of the steam release handle. Note: Steam may range in opacity but is always loud! If continuous spatter occurs while venting, turn the steam release handle back to the Sealing position and try again after a few minutes. - Page 31 Depressurising the Cooker (Venting Methods) 10-Minute NR Leave the steam release handle in the Sealing position for 10 minutes after cooking has completed, then turn the steam release handle to the Venting position. A stream of steam releases through the top of the steam release handle. If continuous spatter occurs while venting, turn the steam release handle back to the Sealing position and try again after a few minutes.
-
Page 32: Initial Test Run (Water Test)
Initial Test Run (Water Test) Follow these steps to familiarize yourself with your Instant Pot Duo. Total test time: Approximately 20 minutes. 1. Remove the inner pot from the cooker base. 2. Add 750 mL of water to the inner pot. -
Page 33: Using Pressure Cooking Smart Programmes
Using Pressure Cooking Smart Programmes Whether you are a novice cook or a culinary expert, the Duo provides Smart Programmes to get you cooking with the touch of a button. The steps below follow the safest procedure for using the cooker and can be applied to the following Smart Programmes: Soup/Broth, Meat/Stew, Bean/Chili, Poultry*, Rice, Multigrain*, Porridge, Steam and Pressure Cook. -
Page 34: Using The Pressure Cooking Smart Programmes
Using The Pressure Cooking Smart Programmes 1. Open and remove the lid as described in Pressure Control Features— Pressure Cooking Lid. 2. Add food and liquid ingredients to the inner pot. Note: Cold or frozen food items take longer to generate steam and slow down pressurisation. - Page 35 Using The Pressure Cooking Smart Programmes 10. Press Pressure Level to toggle between Low and High pressure. Note: When pressure cooking, the pressure level controls the temperature. A higher pressure results in a higher cooking temperature. Note: Cooking time and pressure level adjustments are saved to the Smart Programme when cooking begins.
-
Page 36: Pressure Cooking Settings
Time Setting Less Normal More Rice Default Cooking Time (not adjustable) 00:08 00:12 00:15 Cook time adjusts automatically Cooking Time Range depending on the volume of rice: 8–15 minutes. Display indicates Auto. *Not available on Duo Mini. Use Pressure Cook instead. - Page 37 Low (35–55 kPa / 5.8–7.2 psi) Pressure High (65–85 kPa / 10.2–11.6 psi) Time Setting Less Normal More Pressure Cook Default Cooking Time (adjustable) 00:20 00:35 00:45 Cooking Time Range 00:01–04:00 *Not available on Duo Mini. Use Pressure Cook instead.
-
Page 38: Pressure Cooking Tips
Multigrain* Normal mung beans, etc. Tough grains or a Begins with 45 minutes of warm water More mixture of grains and soaking time prior to 60 minutes of beans pressure cooking. *Not available on Duo Mini. Use Pressure Cook instead. - Page 39 Pressure Cooking Tips Smart Programme Setting Suggested Use Notes Oatmeal, steel cut or Less rolled Adjust time as directed in recipe. White rice, porridge/ Normal Porridge congee Always use NR to release pressure when cooking foods that expand. Rice porridge/congee More with a mixture of various grains...
-
Page 40: Pressure Cooking Timetable
Pressure Cooking Timetable The following cooking times are recommendations only. Always follow a trusted recipe. Food Time Asparagus, Beans (Yellow and Green), Broccoli 1–2 minutes Brussels Sprouts, Cabbage (Whole or Wedges), 2–3 minutes Cauliflower (Florets) Butternut Squash 4–6 minutes Carrots (Whole or Chunks) 6–8 minutes Corn (on the Cob) 3–5 minutes... -
Page 41: Grain-To-Water Ratios
Pressure Cooking Timetable Food Time Fish (Whole) 4–5 minutes Fish (Fillet), Lobster 2–3 minutes Seafood Mussels 1–2 minutes Shrimp (Or Prawn) 1–3 minutes Seafood Stock 7–8 minutes Use a meat thermometer to ensure meat reaches a safe minimum internal CAUTION temperature. -
Page 42: Using Non-Pressure Cooking Smart Programmes
Using Non-Pressure Cooking Smart Programmes The Duo is much more than a pressure cooker. These non-pressure cooking Smart Programmes get you cooking quickly and easily. Always ensure the lid is set to Venting when using non-pressure cooking programmes. The following sections provide the safest steps for using the cooker. -
Page 43: Slow Cook
Using Non-Pressure Cooking Smart Programmes Slow Cook Slow Cook is a non-pressure cooking programme that is compatible for use with any common slow cooker recipe. Setting Suggested Use Notes Low setting on common Less Follow recipe directions for slow cookers slow cooking. -
Page 44: Sauté
Using Non-Pressure Cooking Smart Programmes Sauté Sauté is a non-pressure cooking programme that can be used in place of a frying pan or flat-top grill. Setting Suggested Use Notes Simmering, thickening and The display switching from Hot to On indicates Less reducing liquids the cooker is maintaining the cooking... -
Page 45: Yogurt
Using Non-Pressure Cooking Smart Programmes Yogurt Yogurt is a non-pressure cooking Smart Programme made for easy fermented dairy and non-dairy recipes. Instant Pot Size Minimum Milk Volume Maximum Milk Volume 3 Litres 500 mL 1.9 L 5.7 Litres 1000 mL 3.8 L... - Page 46 Using Non-Pressure Cooking Smart Programmes Ferment Yogurt Setting Suggested Use Notes For lower temperature fermentation (e.g., Default fermentation time is 24 hours. Less Jiu Niang, a sweet Adjust fermentation time based on recipe. fermented glutinous rice dessert) A longer fermentation will result in tangier yogurt. Fermenting milk after Normal culture has been added...
-
Page 47: Care, Cleaning And Storage
Care, Cleaning and Storage Clean your Duo after each use. Always unplug your Duo and let it cool to room temperature before cleaning. Let all surfaces dry thoroughly before use, and before storage. Cleaning Part Instruction Method • Wash after each use. - Page 48 Care and Cleaning Cleaning Part Instruction Method Detachable Power • Use a barely-damp cloth to wipe any particles off power Lead lead. • Wipe the inside of the outer pot as well as the Damp Cloth condensation rim with a barely-damp cloth, and allow to Only air dry.
-
Page 49: Troubleshooting
Troubleshooting Register your product today. Contact Customer Care: +44 (0) 3331 230051 support@instantpot.co.uk Problem Possible Reason Solution Reposition sealing ring, ensure it is snug Sealing ring not properly installed behind sealing ring rack. Gently press the float valve downward with Difficulty Float valve in the popped-up position a long utensil. - Page 50 Troubleshooting Problem Possible Reason Solution Remove float valve from lid and clean Food debris on float valve or float valve thoroughly. Perform Initial Test Run silicone cap check for function. Record findings and contact Customer Care. Check for scorching on bottom of inner pot;...
- Page 51 Troubleshooting Problem Possible Reason Solution Faulty sensor Contact Customer Care. Customer Care Heat element has failed Contact Add thin, water-based liquid to inner pot based on size: C7 or Not enough liquid 3L: 250 mL NoPr 5.7L: 375 mL Error code 8L: 500 mL appears on display and...
-
Page 52: Warranty
Warranty Limited Warranty This Limited Warranty is effective for one year from the date of original consumer purchase. Proof of original purchase date and, if requested by an authorized representative of Instant Brands Inc. (“Instant Brands”), return of your appliance, is required to obtain service under this Limited Warranty. -
Page 53: Contact Information
• A copy of the original purchase receipt with order number, model and serial number. • A description of the product defect, including any photographs or video if possible. Contact Information Instant Pot / Earlyview Ltd Unit 5 Hersham Farm Business Park, Kitsmead Lane Chertsey, Surrey KT16 0DN, UK Email: support@InstantPot.co.uk Telephone: 03331 230051 This warranty was last updated on 1 September 2019 for all products sold from [1 November 2019]. - Page 54 Instant Brands Inc. 11–300 Earl Grey Dr., Suite 383 Ottawa, Ontario K2T 1C1 Canada Earlyview Ltd (Instant Pot Official Distributor) 5 Hersham Farm Business Park Kitsmead Lane, Chertsey Surrey, KT16 0DN Register your product today at: www.instantpot.co.uk/support/register Contact Customer Care: +44 (0) 3331 230051 support@instantpot.co.uk...
Need help?
Do you have a question about the DUO and is the answer not in the manual?
Questions and answers