
Related Manuals for SP Scientific FTS Systems BioCool 80


Summary of Contents for SP Scientific FTS Systems BioCool 80
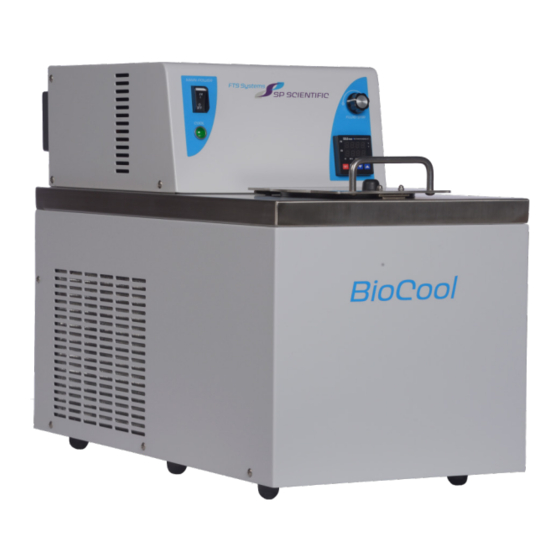
- Page 1 ’ EMPERATURE PERATOR ANUAL FTS S ™ 80 YSTEMS Controlled Rate Freezing Bath...
- Page 3 The information in this document is subject to change without prior notice. Always confirm with SP Scientific that you are using the most current version of this document. SP Scientific is free to modify any of its products and services, in any manner and at any time, notwithstanding the information contained in this document.
-
Page 4: Important Symbols
Always empty the reservoir / bath chamber prior to moving the unit. Never operate equipment with damaged line cords. Never operate the unit without cooling fluid in the reservoir. Never remove warning labels. Never operate damaged or leaking equipment. Rev 002, 08/12 © SP Scientific 2012... -
Page 5: Warranty Information
Warranty Information FTS Systems BioCool™ 80 low temperature baths are warranted by SP Scientific to be free of defects in material and workmanship when operated under normal conditions as specified in the instructions provided in this manual. Please take this opportunity to locate the serial tag on your new FTS Systems BioCool™ 80 and record the information below for future reference. - Page 6 Rev 002, 08/12 © SP Scientific 2012...
-
Page 7: Table Of Contents
Magnetic Stirrer ............................. 15 Powering Off ..............................15 Restarting................................15 Fluid .......................... 17 Recommended Fluid and Selected Properties ....................17 Fluid Filling ................................. 17 Magnetic Stirrer ............................. 18 Maintenance ......................19 Cleaning ................................19 Rev 002, 08/12 © SP Scientific 2012... - Page 8 Voltage ................................20 Accessories ....................... 21 Straw Rack (Model SR-36) ..........................21 Ampule Rack (Model SR-12) ..........................21 Ampule Rack (Model SR-15) ..........................22 Appendix A: Temperature Calibration ............... 23 Appendix B: Troubleshooting ..................25 Rev 002, 08/12 © SP Scientific 2012...
-
Page 9: Introduction
Specimen chamber is 5 inches (12.7 cm) in diameter and 6 inches (15.2 cm) deep. • Magnetic stirrer and vortex breaker allow for constant agitation of bath. • Optional racks allow for the use of straws or ampules. Rev 002, 08/12 © SP Scientific 2012... -
Page 10: Maximum Cooling Rates
The FTS Systems BioCool™ 80 offers continuous operation at temperatures as low as -80 °C. Lowest possible temperatures may be dependent upon the selected bath fluid, as well as ambient conditions and airflow. Rev 002, 08/12 © SP Scientific 2012... -
Page 11: Buzzer
The buzzer will sound at the end of a program run, notifying the operator that the run has completed. Note: For additional information about the buzzer, including how to program a run and silence the buzzer, please see SP Scientific’s Solo Controller operator’s manual. Buzzer Rev 002, 08/12... - Page 12 Introduction FTS Systems BioCool™ 80 Rev 002, 08/12 © SP Scientific 2012...
-
Page 13: Installation
Should damage or loss be discovered, you may make a written request for inspection by the carrier's agent within 15 days of the delivery date. You may then file a claim with the freight carrier or SP Scientific, depending on the terms of your shipment. -
Page 14: Installation
Prior to connecting your FTS Systems BioCool™ 80 to the available electrical supply, ensure that the Main Power switch is in the Off position. You may connect the unit to the available electrical supply at this time. Rev 002, 08/12 © SP Scientific 2012... -
Page 15: Installing The Magnetic Stirrer And Vortex Breaker
Note: The screws on top of the magnetic stirrer should not come in contact with the sides of the bath as you place the magnetic stirrer into the reservoir. If they do, retract them using your fingers or a screwdriver. Rev 002, 08/12 © SP Scientific 2012... - Page 16 (Pushing the edges of the vortex breaker beyond the black gasket at the top of the reservoir may require some force.) Vortex Breaker Handle Temperature Probe Magnetic Stirrer and Vortex Breaker Assembled in Reservoir Reservoir (Top View) Rev 002, 08/12 © SP Scientific 2012...
-
Page 17: Operation
Chapter 2: Installation) and fill the reservoir with fluid (as described in Chapter 4: Fluid). To activate the refrigeration system: Toggle the on/off breaker switch to the On position. Main Breaker Rev 002, 08/12 © SP Scientific 2012... -
Page 18: The Solo Controller
Press the Set button to select the displayed value. Note: For more detailed information on operating the Solo controller, including how to connect your Solo controller to a PC for ease of operation, see SP Scientific’s Solo Controller operator’s manual. -
Page 19: Ramp / Soak Patterns
(Pattern 0, Pattern1 and Pattern 2) appear as follows: Note: Please refer to SP Scientific’s Solo Controller operator’s manual for complete details on how to operate Ramp/Soak on your FTS BioCool™ 80 and how to download and install the Solo software on a PC. - Page 20 10 minutes Step 1 Temp. -7 °C Time. 12 minutes Step 2 Temp. -7 °C Time. 30 minutes Step 3 Temp. -33 °C Time. 52 minutes Step 4 Temp. -33 °C Time. 0 minutes Rev 002, 08/12 © SP Scientific 2012...
- Page 21 Step 5 Temp. -35 °C Time. 0 minutes Step 6 Temp. 0 °C Time. 0 minutes Step 7 Temp. 0 °C Time. 0 minutes Last Step Number Additional Cycles Next Pattern Number Program End Rev 002, 08/12 © SP Scientific 2012...
- Page 22 The program ends when it reaches -35 °C in step 5. Note: The system has been factory programmed to sound an alarm when the programmed pattern ends. The trend line of Sample Pattern 2 is shown in green below: Rev 002, 08/12 © SP Scientific 2012...
-
Page 23: Magnetic Stirrer
Restarting Due to the nature of the refrigeration system and its compressor, the BioCool™ 80 should never be restarted immediately after it is powered off. SP Scientific recommends waiting approximately five (5) minutes between shutting down and restarting the BioCool™ 80. - Page 24 Operation FTS Systems BioCool™ 80 Rev 002, 08/12 © SP Scientific 2012...
-
Page 25: Fluid
RESERVOIR RIM AND SEEP INTO THE POLYURETHANE INSULATION. ORGANIC SOLVENTS WILL ATTACK AND DAMAGE THIS INSULATION MATERIAL, RENDERING THE INSULATION INEFFECTIVE. WITHOUT ADEQUATE INSULATION, THE BIOCOOL™ 80 WILL NOT REACH MAXIMUM LOW TEMPERATURES. Rev 002, 08/12 © SP Scientific 2012... -
Page 26: Magnetic Stirrer
Note: Do not operate the magnetic stirrer without fluid in the reservoir. Be sure the stirrer is turned off before emptying fluid from the reservoir. Rev 002, 08/12 © SP Scientific 2012... -
Page 27: Maintenance
ALWAYS SHUT OFF THE POWER SUPPLY TO THE UNIT BEFORE PERFORMING MAINTENANCE PROCEDURES. ALWAYS NOTIFY THE SP SCIENTIFIC SERVICE DEPARTMENT BEFORE PERFORMING REPAIRS TO A UNIT THAT IS UNDER WARRANTY. FAILURE TO NOTIFY SP SCIENTIFIC SERVICE BEFORE PERFORMING REPAIRS WILL VOID THE FACTORY WARRANTY. Cleaning Condenser The refrigeration system is air-cooled. -
Page 28: Compressor Safeties
During this time, any line drops will cause a significant voltage drop in inadequate wiring or on extension cords. Open circuit measurements are not satisfactory. Rev 002, 08/12 © SP Scientific 2012... -
Page 29: Accessories
Unit should run with all 3 black Delrin® racks in place even if 36 straws are not being processed. This will help prevent condensation of water vapor. If liquid nitrogen chilled forceps are being used for crystallization, SP Scientific suggests that the entire Delrin® rack is lifted out of the Lucite top and seeded at one time. -
Page 30: Ampule Rack (Model Sr-15)
Loosen the nuts on either side of the rack to be moved, adjust the disk and retighten the nuts. Note: Always cover bath with the BioCool™ 80 lid. Rev 002, 08/12 © SP Scientific 2012... -
Page 31: Appendix A: Temperature Calibration
Pressing and holding this button will accelerate the pace at which descending increments are displayed. The Up button is used to increase the value shown on the SV display. Pressing and holding this button will accelerate the pace at which ascending increments are displayed. Rev 002, 08/12 © SP Scientific 2012... - Page 32 Lock the controller: Press the Rotate Button, to until LoC (i.e., ) appears in the display. Press either the Down or Up arrow button until Loc2 (i.e., ) appears. Press the SET button to accept. Rev 002, 08/12 © SP Scientific 2012...
-
Page 33: Appendix B: Troubleshooting
Magnetic stirrer making noise. Ensure that the stirrer is centered in the bath and that the holding screws on the magnetic stirrer are snug. Note: Refer to Chapter 2: Installation, for more information. Rev 002, 08/12 © SP Scientific 2012... - Page 34 Appendix B: Troubleshooting FTS Systems BioCool™ 80 Rev 002, 08/12 © SP Scientific 2012...
- Page 36 SP Scientific 3538 Main Street Stone Ridge, NY 12484 USA (800) 251-1531 (845) 687-0071 935 Mearns Road Warminster, PA 18974 USA (800) 523-2327 (215) 672-7800 815 State Route 208 Gardiner, NY 12525 USA (800) 431-8232 (845) 255-5000 www.SPScientific.com...
Need help?
Do you have a question about the FTS Systems BioCool 80 and is the answer not in the manual?
Questions and answers