Advertisement
Available languages
Available languages
Quick Links
INSTALLATION AND CARE GUIDE
ข้ อ แนะนำ า การติ ด ตั ้ ง และการดู แ ลรั ก ษา
IMPORTANT CONSUMER INFORMATION
Consumer Responsibilities
1. Do not attack the sensor.
2. Do not directly flush the sensor with water. The sensor is an electronic instrument.
3. Do not let sunlight or other light source enter or be reflected into Sensor Window.
4. Do not hang on the opposite wall any reflective items or install light/electronic sensor such as toilet
flushing sensor.
5. Do not make Sensor Window near strong ultraviolet or electromagnetic field.
6. Keep the sensor window clean. The sensor cover can be cleaned by soft rag with neutral liquid detergent.
Do not use eradicator, abrasive powder or oil acid or alkali liquid detergent. Do not spray air freshener,
disinfectant or other kind of odious removing, cleaning organic liquid to the sensor directly.
7. Urinal is designed or use with potable water. Avoid water that includes a lot of contaminants or acid/alkalli
water and impure water.
8. When AC power unit is connected to 220V AC power supply. Corresponding protective measures should be
taken.
9. Please confirm no water penetration at the connection area of AC wire. And the connection area is not easy
to be affected by damp.
1 0. Don't connect power unit to AC power supply until the sensor installation is finished.
1 1. The head AC power supply must be protected with appropriate fuse.
1 2. Please confirm the AC power supply and water supply should be shut off before maintaining the products
with AC power related.
1 3. All electrical connection must be compliance with related regulation and codes.
1 4. All installation staff should be well familiar with installation instruction.
BEFORE YOU BEGIN
• Please read these instructions carefully to familiarize yourself with the required tools, materials, and installation
sequences. Follow the sections that pertain to your particular installation. This will help you avoid costly mistakes.
In addition to proper installation, read all operating and safety instructions.
• All information in these instructions is based upon the latest product information available at the time of
publication. Kohler China reserves the right to make changes in product characteristics, packaging, or availability
at any time without notice.
• These instructions contain important care, cleaning, and warranty information - please leave instructions for
the consumer.
REQUIRED TOOLS AND MATERIALS
• Open end/adjustable wrenches
• Tape measure
• Basin Wrench
• Pipe wrench
• Square
• Level
• Socket wrench with sockets
Kohler Co.
แป้ น เซ็ น เซอร์ ส ำ า หรั บ โถปั ส สาวะชาย
• Screw driver
• Seal tape
• Connection wire
• Wire cutter
• Insulation tape
• Bushing
1
บาดั ้ น
BARDON/
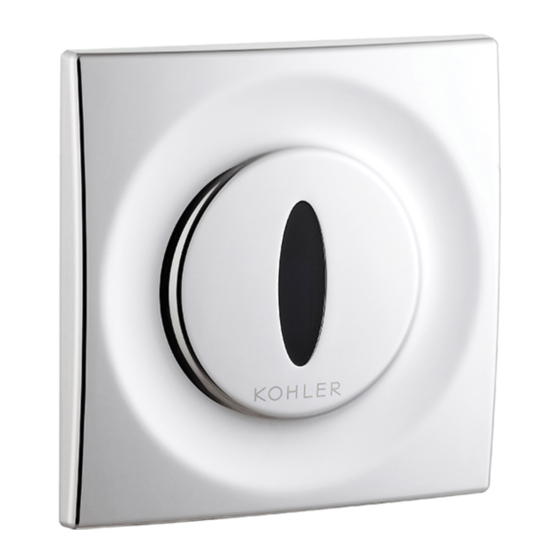
URINAL SENSOR
K-8787X-B03
1106445-X2-A
Advertisement

Subscribe to Our Youtube Channel
Related Manuals for Kohler K-8787X-B03


Summary of Contents for Kohler K-8787X-B03
- Page 1 BARDON/ URINAL SENSOR แป้ น เซ็ น เซอร์ ส ำ า หรั บ โถปั ส สาวะชาย INSTALLATION AND CARE GUIDE K-8787X-B03 ข้ อ แนะนำ า การติ ด ตั ้ ง และการดู แ ลรั ก ษา IMPORTANT CONSUMER INFORMATION Consumer Responsibilities 1. Do not attack the sensor.
- Page 2 1045462-SP 1019265-SP* Membrane Bracket Assy Cover Connector 1045461-SP Diaphragms Assy Screw M2.5X6 Screw M3X8 Pressing Board 1056081-SP 1045456-SP Solenoid Valve Assy O-ring Slurry Mold Flushing Control Stick Hex Pan 2.5 mm **Finish/color code must be specified when ordering 1106445-X2-A Kohler Co.
- Page 3 Dimensions are approximate. Unit: mm 84-124 G1/2" G1/2" 280-360 Dimension Model K-4904X-ER K-4904X-ET ≈150 K-4986X-ER K-4991X-ER K-4991X-ET ≈150 K-5016T-YER K-18645X-Y NOTE: a. T he dimensions above are just for reference. b. T he connection take between the outlet connection and urinal is not supplied in this package. Please use K-2464X-NA as top inlet, use stainless steel hose as rear inlet. c. T o ensure an effective flush performance, an urial with corresponding flush volume is required. And the urinal should comply with ASME A112.19.2-2003. Siphon urinal is not recommended. d. T o insure you can use the sensor with ease, when used with rear inlet urinal, recommended inner diameter of stainless steel hose chose by customer is no less than 9mm. The connection dimensions are shown in the figures. e. T o ensure an effective flush performance strongly recommended inner diameter of water supply (including water meter, valve, etc.) is no less than 25mm, and supplied water pressure (sensor inlet dynamic pressure) is 0.18Mpa~0.55Mpa. Kohler Co. 1106445-X2-A...
-
Page 4: Sensor Specifications
Install Bushing Water Supply ≥50 (Recommended Inner Diameter Is More Than 25mm) ≥50 ≈130 ≈28 Connector ≥90 ≈130 Outer diameter of Bushing ≤25mm Battens Installation Site ≥75 Outlet Connection ≥90 ≥90 1106445-X2-A Kohler Co. - Page 5 i s n o t l e s s t h a n 0 . 5 m m i s a l s o Ceiling recommended. DC connection line use wire of AC Power Unit which the nominal section area is not less Bushing than 0.3mm . It is cut according to acted installation requirements (The length of cut wire is recommended less than 10m). e. The head AC power supply must be protected with appropriate fuse. f. Please confirm the AC power supply and water supply should be shut off before maintaining the products with AC power related Kohler Co. 1106445-X2-A...
- Page 6 5. While using AC power for 8787X-B03, connect solenoid valve with control box assy, and then connect AC power supply to power unit. Install the cover as shown in the figure: a. Buckle the sensor cover into the wall slightly above bracket assy. b. Press the sensor cover down along the wall and fit tightly into the bracket assy. c. Push upward with hex wrench and rotate clockwise to lock the sensor cover. Indicator Hex Wrench USER’S GUIDE NOTICE: The first 10 minutes with power is the standby time for adjusting sensing distance. Persons or subjects should avoid standing before the sensor. The sensor will not flush during this time. Set Working Status: The product comes our factory with: 1. The working status is set as dual-flush. If you want to cancel the first flushing function, place manual flush stick adjacent to right side of sensing window for more than 1 second during the 10-minute standby period (Human presence in sensing range would cause the indicator to flash fast). The sensor would generate a flushing cycle to indicate the setup of the sensor has been adjusted to after-use flushing. If the action is not completed during this 10 minute, or you need to restore the working status to dual-flush, plug off the power cord and reconnect the power supply until the indicator stops flashing and repeat the above procedures. 2. The diction time is set as 2s to avoid improper function in narrow toilets, the detection time is automatically set from 2s to 5s. Working Status: Before powering the system on, clear the unwanted objects in front of the sensor window lest shortening the sensing distance. Sensing Distance: During the first 10 minutes, when powered on, the system is in the phase of automatic regulation, and no operation is required. Deodorizing Flushing: The urinal will take a flush automatically when it’s used 3 or 4 times in 2 minutes. 1106445-X2-A Kohler Co.
-
Page 7: Maintenance
w i n d o w , t h e m a n u a l s t a t u s w i l l b e terminated automatically and reassume the normal working status. MAINTENANCE Urinal Repair : When repairing, you don’t have to dismount the sensor. Cover the sensing window with tape and work with ease. CAUTION : Don’t use very adhesive tape in case the scar will be hard to remove. Care & Cleaning Keep the sensor window clean. wipe the soft cloth and mild cleaner. CAUTION : a. Do not use dust-removing powder, abrasive powder or cleaner containing oil, acid or alkaline ingredient. b. Do not spray air-refresher, disinfect, or other deodorizing, cleaning solvent directly into the sensor. c. Keep wire away from water. d. Don’t attack the sensor window. Clean the Filter Screen If the flushing volume reclines sharply after installation or used for a long time with no cause from water pressure, the filter may need a wash. Turn off the fixed cap with filter-key, take out the filter, clean with a brush and reinstall it. Notice: T urn off the water supply or tighten the adjusting bolt before cleaning. Filter Fixed Cap Filter-Key Kohler Co. 1106445-X2-A... -
Page 8: Troubleshooting
2. There is a mirror or some other reflectible 2. Remove the object. flashing). objects within the sensing distance. 3. Clean the window. 3. The sensing window needs cleaning. No flushing or 1. Still in the waiting status. 1. Wait for 10 minutes. poor flushing while 2. Adjusting bolt not fully open. 2. Open the adjusting bolt. the indicator can 3. Low water pressure. 3. Improve water supply. flash. 4. Filter is obstructed. 4. Clean the filter. 5. The connector is not connected well. 5. Check the connector. Keep flushing 1. The small hole of diaphragms assembly is 1. Clean the small hole of diaphragms indicator not blocked. assembly. flashing. 2. Foreign objects exist in valve chamber. 2. Clean the valve chamber and diaphragms with a brush. Battery indicating 1. Just power cut (AC). 1. Check the power supply. light keeps flashing and no flushing. 1106445-X2-A Kohler Co. - Page 9 • ประแจขั น นอตใต้ อ ่ า งล้ า งมื อ • ประแจจั บ ท่ อ • คี ม ตั ด สายไฟ • เทปพั น สายไฟ • ไม้ ฉ าก • ปลอกหุ ้ ม สายไฟ • ระดั บ น� ้า • ประแจบ็ อ กซ์ พ ร้ อ มชุ ด ลู ก บ็ อ กซ์ Kohler Co. 1106445-X2-A...
- Page 10 บล็ อ ก สติ � ก ควบคุ ม การชํ า ระล้ า ง ประแจแอล 2.5 มม. **ระบุ ร หั ส วั ส ดุ เ คลื อ บผิ ว /สี ใ นการสั � ง ซื �อผลิ ต ภั ณ ฑ์ 1106445-X2-A Kohler Co.
- Page 11 เพื ่ อ ประสิ ท ธิ ภ าพในการช� า ระล้ า งที ่ ด ี เส้ น ผ่ า ศู น ย์ ก ลางด้ า นในของท่ อ น� ้าดี ท ี ่ แ นะน� า (รวมถึ ง มาตรวั ด น� ้า, วาล์ ว ฯลฯ) ไม่ น ้ อ ยกว่ า 25 มม. และค่ า แรงดั น น� ้า (แรงดั น แบบไดนามิ ค ของท่ อ น� ้าดี ) อยู ่ ร ะหว่ า ง 0.18-0.55 เมกะปาสคาล Kohler Co. 1106445-X2-A...
- Page 12 เส้ น ผ่ า ศู น ย์ ก ลางด้ า นนอก ≥ ของปลอกหุ ้ ม สายไฟ ≈ แผ่ น รอง ≤25 มม. นอต ข้ อ ต่ อ ทางนํ �าออก ตํ า แหน่ ง ติ ด ตั � ง ≥ ≥ ≥ 1106445-X2-A Kohler Co.
- Page 13 ฉ. ตรวจสอบให้ แ น่ ใ จว่ า ปิ ด แหล่ ง จ่ า ยไฟ A C แ ละวาล์ ว เปิ ด -ปิ ด น� ้า ก่ อ นซ่ อ มบ� า รุ ง ผลิ ต ภั ณ ฑ์ ท ี ่ ใ ช้ ไ ฟฟ ้ า Kohler Co. 1106445-X2-A...
- Page 14 เมื ่ อ เปิ ดเครื ่ อ ง ในช่ ว ง 10 นาที แ รกเซ็ น เซอร์ จ ะปรั บ ระยะการตรวจจั บ อั ต โนมั ต ิ การช� า ระล้ า งแบบก� า จั ด กลิ ่ น : โถปั ส สาวะชายจะช� า ระล้ า งอั ต โนมั ต ิ เ มื ่ อ มี ก ารใช้ ง าน 3 ถึ ง 4 ครั ้ ง ใน 2 นาที 1106445-X2-A Kohler Co.
- Page 15 ข้ อ พึ ง ระวั ง : ปิ ดวาล์ ว น� ้า หรื อ ขั น โบลท์ ป รั บ อั ต ราการไหลของน� ้าให้ แ น่ น ก่ อ นท� า ความสะอาด ฟิ ล เตอร์ ฝาปิ ด กุ ญ แจถอดฟิ ล เตอร์ Kohler Co. 1106445-X2-A...
- Page 16 2. ท� า ความสะอาดวาล์ ว และไดอะแฟรมด้ ว ยแปรง ไฟแสดงสถานะ 1. ไฟฟ ้ าดั บ (AC) 1. ตรวจสอบแหล่ ง จ่ า ยไฟ แบตเตอรี ่ ก ะพริ บ และ ผลิ ต ภั ณ ฑ์ ไ ม่ ช � า ระล้ า ง 1106445-X2-A Kohler Co.
Need help?
Do you have a question about the K-8787X-B03 and is the answer not in the manual?
Questions and answers