MikroTik CCR1009-7G-1C-PC Quick Start Manual
Hide thumbs
Also See for CCR1009-7G-1C-PC:
- Manual (5 pages) ,
- Quick manual (57 pages) ,
- Quick start manual (21 pages)
Advertisement
Table of Contents
- 1 Safety Warnings
- 2 Quick Start
- 3 Extension Slots and Ports
- 4 Powering
- 5 Mounting
- 6 Resetting the Device
- 7 Reset Button
- 8 Configuration
- 9 Accessories
- 10 Specifications
- 11 Operating System Support
- 12 Safety Notice
- 13 Federal Communication Commission Interference Statement
- 14 Industry Canada
- 15 CE Declaration of Conformity
- Download this manual
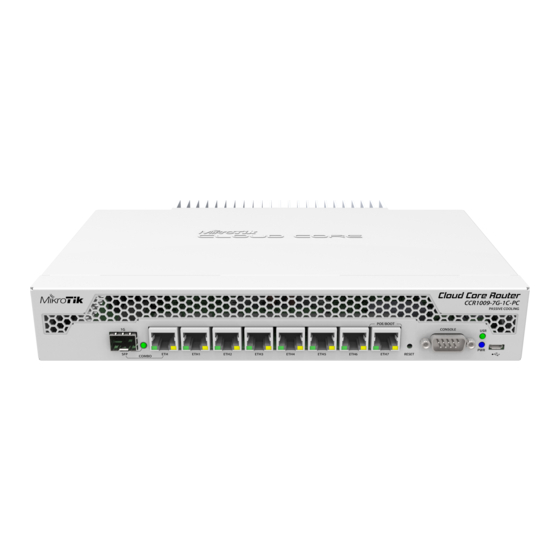
CCR1009-7G-1C-PC
CCR1009-7G-1C-PC
Cloud Core Router - Fully independent Ethernet ports each with a direct connection to the CPU.
Safety Warnings
Before you work on any equipment, be aware of the hazards involved with electrical circuitry, and be familiar with standard practices for preventing
accidents.
Ultimate disposal of this product should be handled according to all national laws and regulations.
The Installation of the equipment must comply with local and national electrical codes.
This unit is intended to be installed in the rackmount. Please read the mounting instructions carefully before beginning installation. Failure to use the
correct hardware or to follow the correct procedures could result in a hazardous situation for people and damage to the system.
Read the installation instructions before connecting the system to the power source.
It is the customer's responsibility to follow local country regulations, including operation within legal frequency channels, output power, cabling
requirements, and Dynamic Frequency Selection (DFS) requirements. All Mikrotik radio devices must be professionally installed.
Quick start
Mount unit or place on the flat surface (see "
Connect to the powering source (see "
The Initial connection has to be done via the Ethernet cable, using the MikroTik Winbox utility.
Use Winbox to connect to the default IP address of 192.168.88.1, with the username admin and no password.
We recommend clicking the "Check for updates" button and updating your system software to the latest version to ensure the best performance
and stability.
Set up your password to secure the device.
Extension Slots and Ports
MicroUSB type AB.
1x SFP cage in the combo group with 1x 10/100/1000 Ethernet port (software selectable which one will be active).
7x 10/100/1000 Ethernet ports.
RS232 serial console port (115200bit/s, 8 data bits, 1 stop bit, no parity).
Powering
The device accepts powering in the following ways:
DC input power jack, 18-57 V DC .
PoE input, 18-57 V passive PoE.
Maximum power consumption 25 W. With attachments 30 W.
Connecting to a POE Adapter:
a.
Connect the Ethernet cable from the device Eth7 to the POE out port of the POE adapter.
b.
Connect an Ethernet cable from your LAN to the POE adapter.
c.
Connect the power cord to the adapter, and then plug the power cord into a power outlet.
Mounting
Mounting
").
Powering
").
Advertisement
Table of Contents

Related Manuals for MikroTik CCR1009-7G-1C-PC


Summary of Contents for MikroTik CCR1009-7G-1C-PC
- Page 1 Powering "). The Initial connection has to be done via the Ethernet cable, using the MikroTik Winbox utility. Use Winbox to connect to the default IP address of 192.168.88.1, with the username admin and no password. We recommend clicking the "Check for updates" button and updating your system software to the latest version to ensure the best performance and stability.
- Page 2 The device is designed to use indoors and it can be mounted in a rackmount enclosure using provided rack mounts, or it can be placed on the desktop. Use a Phillips screwdriver to attach rackmount ears on both sides of the device if designated use is for rackmount enclosure: Attach rack ears to both sides of the device and tighten four screws to secure them in place, as shown in the picture.
- Page 3 USB A Female to Micro B cable Rackmount mounting set for the CRS110 case. Please visit wiki pages for MikroTik SFP module compatibility table: https://wiki.mikrotik.com/wiki/MikroTik_SFP_module_compatibility_table The SFP modules can become very hot when used, please take great care when unplugging them, refer to the general SFP module usage guidance: https://wiki.mikrotik.com/wiki/S%2BRJ10_general_guidance...
- Page 4 BG С настоящото Mikrotīkls SIA декларира, че този тип радиосъоръжение RouterBOARD е в съответствие с Директива 2014/53/ЕС. Цялостният текст на ЕС декларацията за съответствие може да се намери на следния интернет адрес: https://mikrotik.com/products CS Tímto Mikrotīkls SIA prohlašuje, že typ rádiového zařízení RouterBOARD je v souladu se směrnicí 2014/53/EU. Úplné znění EU prohlášení o shodě...
- Page 5 HU Mikrotīkls SIA igazolja, hogy a RouterBOARD típusú rádióberendezés megfelel a 2014/53/EU irányelvnek. Az EU-megfelelőségi nyilatkozat teljes szövege elérhető a következő internetes címen: https://mikrotik.com/products IT Il fabbricante, Mikrotīkls SIA , dichiara che il tipo di apparecchiatura radio RouterBOARD è conforme alla direttiva 2014/53/UE. Il testo completo della dichiarazione di conformità...
- Page 6 Note. Information contained here is subject to change. Please visit the product page on www.mikrotik.com for the most up to date version of this document. BG. Инструкция : Свържете адаптера на захранване, за да включите устройството. Отворете 192.168.88.1 в уеб браузър, за да настроите...
Need help?
Do you have a question about the CCR1009-7G-1C-PC and is the answer not in the manual?
Questions and answers