Table of Contents
Advertisement
Quick Links
Advertisement
Table of Contents

Related Manuals for TriStar Power AirFryer Pro TXG-KE10L


Summary of Contents for TriStar Power AirFryer Pro TXG-KE10L
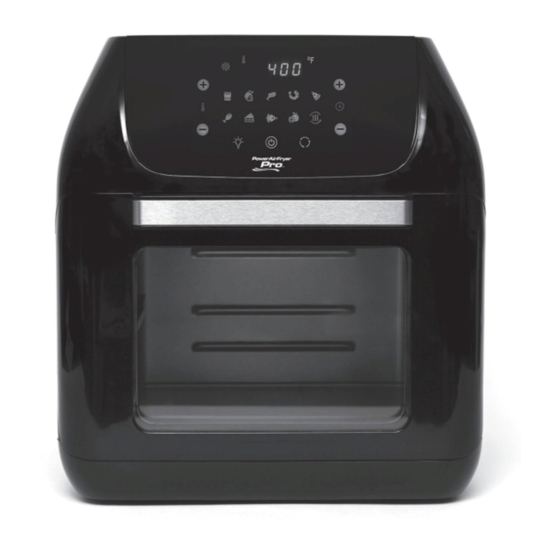
- Page 1 Owner’s Manual Save These Instructions - For Household Use Only MODEL: TXG-KE10L When using electrical appliances, basic safety precautions should always be followed. Do not use the Power AirFryer Pro Guarantee Information Inside until you have read this manual thoroughly.
- Page 2 AirFryer, Rotisserie, Dehydrator & More Before You Begin It is very important that you read this entire manual, making certain that you are totally familiar with the Unit's operation and precautions. The Power AirFryer Pro Good News! The Power AirFryer Pro has changed everything.
-
Page 3: Table Of Contents
Table of Contents IMPORTANT SAFEGUARDS Parts & Accessories Using the Accessories Using the Digital Control Panel Cooking Presets General Operating Instructions Cooking Chart Cleaning & Storage Troubleshooting Frequently Asked Questions 60-Day Guarantee Power AirFryer Pro™ | Model: TXG-KE10L... -
Page 4: Important Safeguards
IMPORTANT SAFEGUARDS When using electrical appliances, basic safety precautions should always be followed, including: • NEVER IMMERSE the Main Unit Housing, which • DO NOT USE this Unit if the plug, the power cord, contains electrical components and heating elements, or the appliance itself is damaged in any way. - Page 5 IMPORTANT SAFEGUARDS • If the Power AirFryer Pro is used improperly or for professional or semiprofessional purposes WARNING: For California Residents or if it is not used according to the instructions in the user manual, the guarantee becomes invalid This product can expose you to Bisphenol A, which is known and the manufacturer will not be held liable for to the State of California to cause birth defects or other reproductive harm.
-
Page 6: Parts & Accessories
Parts & Accessories Quantity may vary depending on model. (Optional) (Optional) (Optional) Important Please make sure that your Power AirFryer Pro has been shipped with the components that you ordered (some accessories may be sold separately). Check everything carefully before use. If any part is missing or damaged, do not use this product. - Page 7 Parts & Accessories 1. Main Unit Chicken: 4 lbs; roast: up to 5–6 lbs (depending on the diameter of the meat. Up to 6-in. diameter.). Cleans easily with a damp sponge or cloth and 10. Rotisserie Fetch Tool a mild detergent. Avoid harsh, abrasive cleaners. NEVER submerge this Unit in water or liquids of Use to remove cooked roasts and chicken any kind.
-
Page 8: Using The Accessories
Using the Accessories Placing Heating Element Cover into Unit 1. Insert Heating Element Cover into top of Unit (FIG. A). 2. Use Heating Element Cover to reduce splatter onto the heating element from food during operation, making clean-up easier. FIG. A Placing Crisper Trays into Unit 1. - Page 9 Using the Accessories Rotisserie Shaft & Skewers Racks 1. Place the two Skewer Racks at each end of the Rotisserie Shaft. Make sure the Set Screws are on the outer side of the Rotisserie Shaft (FIG. C). 2. Slightly tighten Set Screws. Do not overtighten as you may need to adjust the tightness after you insert the Skewers.
- Page 10 Using the Accessories Placing Round Basket into Unit 1. Open the door of the Unit. Slide the Mesh Basket onto the rails in the center of the Unit. 2. Slide the switch on the left side of the Unit to the right and hold the switch in place while pushing the Mesh Basket as far back into the Unit as possible (FIG.
- Page 11 Using the Accessories Using the Fry Basket 1. With the latch off the Basket Handle (FIG. I), 3. The door cannot close with the Basket Handle compress the Handle, place it between the still on the Fry Basket. Remove Handle before slots on the Fry Basket, and release the Handle closing.
-
Page 12: Using The Digital Control Panel
Using the Digital Control Panel FIG. N 10 16 1. Power/Start–Stop Button temperature by 5° F (2.7 ) intervals ranging ° C - Once the from 150° F (65 ) to 400° F (200 ° C ° C Unit is plugged in, the Power Button Dehydration ranges from 90° F (30 ° C will light up. -
Page 13: Cooking Presets
Cooking Presets Preset Button Preset Button Default Temperature Default Time Cooking Chart 7. French Fry 400° F (200° C) 15 mins. 8. Steaks/Chops 350° F (177° C) 25 mins. *Cooking time for whole 9. Fish 325° F (163° C) 15 mins. roasted chicken will vary with weight. -
Page 14: General Operating Instructions
General Operating Instructions Before using the 1. Read all material, warning stickers and labels. Power AirFryer Pro 2. Remove all packing materials, labels, and stickers. 3. Wash all parts and accessories used in the cooking process for the first time with warm soapy water. - Page 15 General Operating Instructions Cooking with the Power AirFryer Pro 1. Place the ingredients on an Crisper Tray, on one 5. The Unit will automatically start the cooking cycle of the Rotisserie accessories, or in a few seconds after a preset function is selected the Round Basket.
-
Page 16: Cooking Chart
Cooking Chart Food Item Min–Max Time Temperature Comments Thin Frozen Fries 1 1/4–3 cups 15–16 mins. 400° F (200° C) Thick Frozen Fries 1 1/4–3 cups 15–20 mins. 400° F (200° C) Homemade Fries 1 1/4–3 1/4 cups 10–16 mins. 400°... -
Page 17: Cleaning & Storage
Cooking Chart Settings The table on page 16 will help you select the correct NOTE: Keep in mind that these settings are temperature and time for best results. As you indications. Since ingredients differ in origin, size, become more familiar with the Power AirFryer Pro shape, and brand, we cannot guarantee the best cooking process, you may adjust these settings to settings for your ingredients. -
Page 18: Troubleshooting
Troubleshooting Problem Possible Cause Solution 1. The appliance is not plugged in. 1. Plug power cord into wall socket. 2. You have not turned the Unit on The Unit does not work 2. Set the temperature and time. by setting the preparation time Check that door is closed. -
Page 19: Frequently Asked Questions
Frequently Asked Questions 1. Can I prepare foods other than fried dishes 8. Is the Power AirFryer Pro dishwasher safe? with my Power AirFryer Pro? Only the accessories are dishwasher safe. You can prepare a variety of dishes, including The Unit itself containing the heating coil steaks, chops, burgers, and baked goods. - Page 21 Write the return merchandise authorization number on the outside of the package. Send the product to the following return address: Power AirFryer Pro Tristar Products 500 Returns Road Wallingford, CT 06495...
- Page 22 Power AirFryer Pro™ | Model: TXG-KE10L...
- Page 23 Power AirFryer Pro™ | Model: TXG-KE10L...
- Page 24 This product has been manufactured to the highest standards. Should you have any questions, our friendly customer service staff is here to help you. 973-287-5197 Distributed by: Tristar Products, Inc. Fairfield, NJ 07004 © 2019 Tristar Products, Inc. Made in China PAFP_KE_IB_TP_ENG_V1_190109...
Need help?
Do you have a question about the Power AirFryer Pro TXG-KE10L and is the answer not in the manual?
Questions and answers