Table of Contents
Advertisement
Quick Links
TorqueMate
Plus
®
Operation Manual
Version 1.1
Mountz Incorporated
1080 N. 11th Street
San Jose, CA 95112
Customer Service: 800-456-1828
Fax: 408-292-2733
www.etorque.com
mountzsales@mountztorque.com
Copyright © 2001 Mountz Incorporated
All rights reserved. No part of this document may be reproduced, distributed, or
transmitted in any form, or by any means (graphic, electronic, or mechanical, including
photocopying, taping or information and retrieval systems now known or as may be
hereafter developed) without the specific written permission of Mountz Incorporated.
Mountz and its logo are registered trademarks.
Information contained herein is subject to change without prior notice.
Mountz, Inc.
ISO 9001
1
Advertisement
Table of Contents

Related Manuals for Mountz TorqueMate Plus


Summary of Contents for Mountz TorqueMate Plus
- Page 1 (graphic, electronic, or mechanical, including photocopying, taping or information and retrieval systems now known or as may be hereafter developed) without the specific written permission of Mountz Incorporated. Mountz and its logo are registered trademarks.
-
Page 2: Table Of Contents
Table of Contents Introduction ..........4 Parts Check List . - Page 3 Table of Contents (cont.) Charging The Batteries ........23 Application Notes .
-
Page 4: Introduction
TorqueMate® Plus. • Production Applications - Hand Use: Use a Mountz TWX or SMX torque sensor connected to the TorqueMate to apply torque to any assembly. The TWX is suited for wrench style applications, while the SMX is perfect for screwdriver or socket style functions. -
Page 5: Parts Check List
Parts Check List Check to make sure that you have all of the following accessories. Retain the packing materials in case you need to send the unit in for service or to be calibrated with a transducer using Dead Weights. •... -
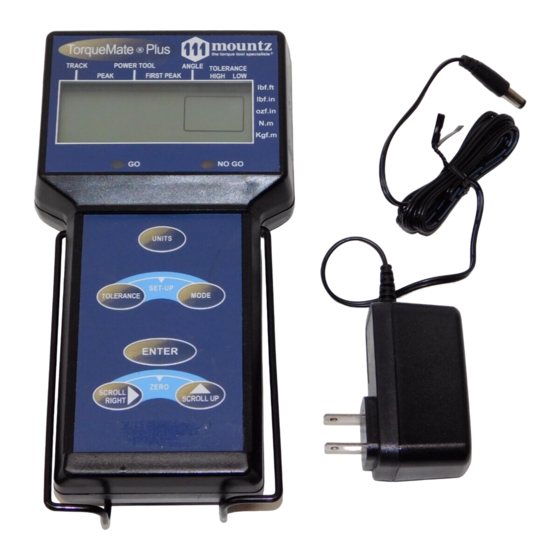
Page 6: Features
Features Top View X Ducer RS232 Charge On/Off Five Modes of Operation for Small window can display - Production, Quality Control, angle, second peak torque Calibration Laboratory and Joint Analysis reading or data number depending upon mode Five different engineering Large window displays units of torque measure torque reading... -
Page 7: Accuracy
Features (cont.) Output: RS-232C port for data transfer to printer, data logger or computer. Engineering Units: 5 different units of torque measure are available. lbf.ft., lbf.in., ozf.in., N.m., Kgf.m (Other measurement units available as special order) Battery Operated: NiMH batteries provide long life, without “memory”. Up to 8 hours of operation per charge. -
Page 8: Before You Begin
Before You Begin I M P O R TA N T Transducer Number You must have a calibrated transducer with a transducer number assigned to it. Always make sure the TorqueMate® Plus is set to the transducer number that you have attached. Every time you turn on the TorqueMate®... -
Page 9: Operation
Operation The TorqueMate® Plus is an accurate, user friendly torque display that allows a user to quickly change functions and features without getting “lost” in a menu structure. Any change made after pressing the enter key returns you directly to the operation mode. CHANGING MODES AND UNITS With the Scroll and Enter Keys - The most used functions are changed by simply pressing the key labeled with the feature you want to modify. -
Page 10: Pause (Paus) Mode
Operation (cont.) PAUSE (PAUS) MODE The TorqueMate® Plus automatically conserves battery power after 5 minutes without use. The display will show “PAUS”. Pressing the Enter key returns the TorqueMate® Plus to the operation mode. UNIT OF MEASURE (Engineering Units) To change the unit of measurement: 1. -
Page 11: Mode Of Operation
Operation (cont.) MODE OF OPERATION To change the mode of operation: 1. Press the Mode key. 2. Press the Scroll Up key until the mode arrow points to the desired mode of operation: a) Track Mode: The display “tracks” the applied torque in clockwise and counterclockwise directions. There is a real time torque feature that is available only in Track mode. -
Page 12: Setting Tolerances
Operation (cont.) SETTING GO AND NO/GO TOLERANCE (High/Low) LIMITS In the Peak, Power Tool or First Peak mode: 1. Press the Tolerance key (the arrow icon will point to Low Tolerance). 2. Change the value of the flashing digit by pressing the Scroll Up key (and the decimal will be fixed). 3. -
Page 13: Joint Rate
Operation (cont.) To check the joint rate: Check the rate of a joint (soft, medium or hard) by tightening the fastener to the specified torque and measuring the rotation angle of the fastener from 50% to 100% of the torque applied. •... -
Page 14: Set-Up Mode
Set-Up Mode Enter the Set-Up mode by pressing the Tolerance and Mode key simultaneously (the Set-Up icon will turn on). Scroll through the various Set-Up functions by pressing the Scroll Up key. When you get to the option you want to change press the Enter key. Upon changing any option, you will be returned to the operation mode. -
Page 15: Manual & Auto Clear And Memory On/Off
Set-Up Mode (cont.) 4. MANUAL CLEAR/AUTO CLEAR (Selects The Reset (Clear) Mode For The Display) a. Press Enter to select this option. b. Press the Scroll Up key to toggle between Manual Clear ON or Auto Clear ON. If the mode is set to Peak or First Peak mode the operation, for Auto Clear, is as follows: If you turn ON Auto Clear Mode, the display will indicate On x, where x can be 1, 2, 3, 4, 5, 6, 7, 8, 9, or A. -
Page 16: Transducer #, Calibrate, Filters
Set-Up Mode (cont.) 6. c-XX (“c” stands for Code Number) (Selects The Attached Transducer Number) The transducer number, full scale range and the units icon will show in the window. If the Window shows a range of “3333” (indicates an open cell which can be programmed to the transducer) the associated transducer number has never been calibrated. -
Page 17: Fast Calibration
Set-Up Mode (Fast Cal) Quickly Entering Calibration Data For A Transducer (Fast Cal) To quickly enter calibration data for a transducer you must know the mv/v signal output at full scale and the range of the transducer (both should be marked on the transducer). If the transducer is not marked with this information then contact manufacturer of the transducer to obtain it. -
Page 18: Transducers
The part number is 065145. The correct part number for an RTSXA (with Angle and 10 pin Bendix) is 065151. If you have a transducer that has a special connector Mountz can make a custom connector for the TorqueMate® Plus. For example, if your transducer has a Bendix type connector you can order a cable with the TorqueMate®... -
Page 19: Schematic Diagram
Transducers (cont.) I M P O R TA N T The TorqueMate® Plus and transducers are instruments that should be handled with care. Never over- load transducers above full capacity. Avoid using impact tools on transducers*. Before use, load the transducer to full scale in the direction to be used, then zero the display to compensate for any zero off- set. -
Page 20: Transducer Calibration
Transducer Calibration • Always calibrate the TorqueMate® Plus with the unit plugged into the AC power adapter and make sure the batteries are fully charged. • Calibration data for up to 15 transducers can be memorized by the TorqueMate® Plus. There are two options available for calibrating a transducer: 1. -
Page 21: Brushless Rotary Transducer Calibration
Transducer Calibration (cont.) The display will now show the mv/v signal of the transducer at full range. The default is 2.000 and the mV/V range can be anywhere between 1.000 and 4.000 mV/V. Enter the actual value by pressing the Scroll up key to change the value of the blinking digit. -
Page 22: Intervals
3 months. If you still find that the unit is in calibration increase the interval to 6 months. Note: Calibration Intervals Mountz Service Centers will calibrate and certify any transducer or transducer / display to N.I.S.T. It is recommended that this happen every 6 months but calibration intervals should be based on usage. -
Page 23: Charging The Batteries
Charging the Batteries Always leave the TorqueMate® Plus turned on when charging the batteries. This allows the micro- processor to monitor the charging cycle. The TorqueMate® Plus can be used while charging without affecting torque accuracy. The unit will go into battery saving pause (PAUS) mode after 5 minutes with- out use, but the batteries will still be charging. -
Page 24: Application Notes
The TorqueMate® Plus, and the mountz family of transducers have been designed to minimize these variations and are well suited for both the analysis of the application joint and the testing of the... -
Page 25: Breakaway Torque Methods
Application Notes (cont.) You can test pulse and power tools in different ways: 1. Preferred Method (and quickest): Use the TorqueMate® Plus in Power Tool Mode with a rotary trans- ducer between the pulse tool and the actual application. This is the best way to test since you are using the actual joint as the test station. -
Page 26: Calibrating Torque Wrenches
TWX or SMX transducer in a fixture. Mount the transducer directly to a bench and apply the torque directly to the wrench by hand, or attach the transducer to a Mountz mechanical loader and isolate the wrench from the operator, reducing the possibility of operator errors (highly recommended). -
Page 27: Filters
Filters The process of converting pulse type dynamic mechanical torque to an electronic signal using a trans- ducer may result in unwanted inputs (noise), resulting in a distorted torque value (usually high). Often it is possible through the use of appropriate circuitry to selectively filter out some or all of the unwanted noise. -
Page 28: Accessories
Accessories The versatile TorqueMate® Plus can adapt to an assortment of transducers for testing and calibrating differ- ent applications. Model / Style Model Ranges Application Areas 2 ozf.in - 5000 lbf.ft Calibrating hand tools & Reaction Style power tools (requires RDA) RTSX 1 lbf.in - 1500 lbf.ft For power tools &... -
Page 29: Accessories
Accessories (cont.) Battery Pack NiMH 8.4 V 1.1Ah Part Number: 771170 Battery Charger Input: 115 VAC60 HZ Output:12 VDC 300 mA Part Number: 771044 Adapter D-Sub 9 pin to 6 Pin RJ12 (TorqueMate® Plus) Part Number: 701031 Transducer Cable 10 Pin Modular Plug to Open Wire Part Number: 065145 RS232 Cable 6 Pin to 6 Pin Modular... -
Page 30: Specifications
Specifications Input Signal ........1 to 4 mV/V Full Scale and 5 VDC Full Scale for Brushless Rotary (BLRTSX Type) Bridge Excitation .
Need help?
Do you have a question about the TorqueMate Plus and is the answer not in the manual?
Questions and answers