Table of Contents
Advertisement
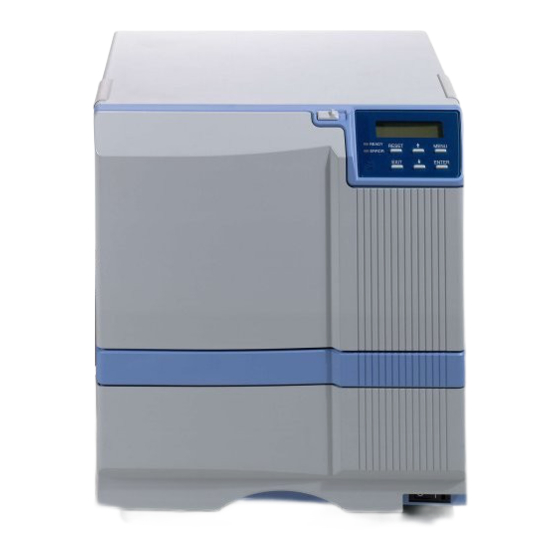
Sublimation Type Retransfer Printer CX-330
Status Monitor
Operating Environment
This software runs on the following systems.
Microsoft
Microsoft
Microsoft
Microsoft
Microsoft
Software License Agreement
Users need to accept the terms and conditions of the software license
agreement to use this software.
License Agreement" at the back of the "CX-330 Instruction Manual"
(separate booklet) before using this software.
Instruction Manual
®
®
Windows
8 32bit/64bit
®
®
Windows
7 (First Release, Service Pack 1) 32bit/64bit
®
TM
Windows Vista
(Service Pack 1/2) 32bit
®
®
Windows
XP (Service Pack 2/3) 32bit
®
®
Windows
2000 Professional (Service Pack 4) 32bit
Feb. 2014, 4th Edition
Please read through the "Software
KAT-T305-004
Advertisement
Table of Contents

Subscribe to Our Youtube Channel
Related Manuals for DNP CX-330


Summary of Contents for DNP CX-330
- Page 1 Users need to accept the terms and conditions of the software license agreement to use this software. Please read through the “Software License Agreement” at the back of the “CX-330 Instruction Manual” (separate booklet) before using this software. Feb. 2014, 4th Edition...
-
Page 2: Table Of Contents
Contents Before Using this Software ..............3 What is status monitor? ..................3 Screen Configuration .....................6 Monitoring Printer Status ..............7 Displaying Printer Status..................7 List of Status Messages ..................8 Displaying Media Status ..................9 Selecting a Printer....................9 Changing Printer Settings..............10 Changing Retransfer Conditions............12 Changing Bend Remedy Conditions.......... -
Page 3: Before Using This Software
Before Using this Software What is status monitor? The status monitor is software for displaying the printer status as well as specifying various printer settings. Caution Use the status monitor only when the power of the printer is turned on. Operating Environment The status monitor runs on the following systems. - Page 4 Before Using this Software (Cont’d) When a user logs in without administrator authority and the administrator setting items are enabled, the printer settings can be specified on the status monitor. The caution screen appears. How to run The status monitor runs on the following method. 1) Runs by the shortcut of desktop.
- Page 5 Before Using this Software (Cont’d) Caution ® The following Windows dialog may appear when you first start up the status monitor using ® ® ® Windows 8, Windows 7, Windows Vista and Windows XP (Service Pack 2/3). This dialog will not appear again if you set to “Allow access” or “Unblock”. The status monitor incorrectly runs if you set to “Cancel”...
-
Page 6: Screen Configuration
Before Using this Software (Cont’d) Screen Configuration Close Button Screen selection Tabs Minimize Button Close button: Closes the status monitor. Screen selection tabs: Use these to switch to the following screens. Printer Status: Displays the printer’s status. Printer Setting: Displays and enables specification of the printer’s print settings. Retransfer: Displays and enables setting of the conditions during retransfer of the card. -
Page 7: Monitoring Printer Status
Monitoring Printer Status [Printer Status] Tab Sheet The “Printer Status” screen displays the printer’s status. Content of the screen is automatically updated at regular intervals. Printer Icon Printer Status Displaying Printer Status Printer Status: Displays the printer’s status. There are three modes, which are represented by different icons. -
Page 8: List Of Status Messages
When the bottom right icon appears, perform “Cleaning the card feed rollers and heat rollers” found in the “CX-330 Instruction Manual” (separate booklet). [Under Normal Circumstances]... -
Page 9: Displaying Media Status
You may not be able to control the ink ribbon properly in this case. Refer to the “Setting the ink ribbon” of the “CX-330 Instruction Manual” (separate booklet) on how to check its installation. -
Page 10: Changing Printer Settings
Changing Printer Settings [Printer Setting] Tab Sheet The “Printer Setting” screen enables you to specify the print settings of the printer. Operation Update button: Enables the printer settings specified using the slide bars, radio buttons and list box. Refresh button: Displays the printer settings on the screen. - Page 11 Changing Printer Settings (Cont’d) Setting Procedures Make sure that you take down the set values before making any changes. Print Settings Resin K Ink Print Level: For setting the print density level of the Resin K ink. UV Ink Print Level: For setting the print density level of the UV ink.
-
Page 12: Changing Retransfer Conditions
Changing Retransfer Conditions [Retransfer] Tab Sheet The “Retransfer” screen enables you to set the retransfer conditions on the card. Operation Update button: Applies the selected value to the printer. Refresh button: Displays the printer settings on the screen. Card Type: The appropriate value varies according to the type of card used. - Page 13 Changing Retransfer Conditions (Cont’d) Setting Procedures The vertical axis shown in the setting area indicates the retransfer temperature, and the horizontal axis represents the retransfer speed. Click on the corresponding square to change the value. The selected value is indicated using “ ”.
-
Page 14: Changing Bend Remedy Conditions
Changing Bend Remedy Conditions [Bend Remedy] Tab Sheet The “Bend Remedy” screen enables you to set the conditions for the card’s bend remedy. Operation Update button: Applies the selected value to the printer. Refresh button: Displays the printer settings on the screen. Card Type: The appropriate value varies according to the type of card used. - Page 15 Changing Bend Remedy Conditions (Cont’d) Setting Procedures The vertical axis in the setting area indicates the bend remedy temperature, and the horizontal axis represents the bend remedy speed. Click on the corresponding square to change the value. The selected value is indicated using “ ”.
-
Page 16: Checking Media Status
Checking Media Status [Media Setting] Tab Sheet The “Media Setting” screen enables you to display the ink ribbon’s status and specify the card or retransfer film settings. Display and Change of Settings Ink Status Name: Displays the name of the mounted ink ribbon. A message indicating the cause appears when the ink ribbon cannot be recognized. - Page 17 “Standard”. If the card thickness is 0.25 mm, select “Thin”. Caution 1) To use cards of different thickness, refer to “Switching the card thickness” of the “CX-330 Instruction Manual” (separate booklet). 2) When thin cards are used for double-sided printing, errors such as card jam may occur.
-
Page 18: Message Displayed And Actions To Take When Ink Ribbon Is Not Recognized
Checking Media Status (Cont’d) Message displayed and actions to take when ink ribbon is not recognized When the ink ribbon cannot be recognized, the cause for this problem is indicated in the “Name” field under “Ink Status”. Message Cause and Action to Take During Ink Recognition Error (252:Invalid TAG Data) The TAG record data adhered to the ink ribbon is incorrect. -
Page 19: Checking Printer Configuration
Checking Printer Configuration [Property] Tab Sheet The “Property” screen enables you to verify the device configuration as well as the printer’s firmware version. Version: Displays the firmware version of the printer as well as peripheral devices. When optional devices, such as the MG unit, external IC unit, and laminator, are not connected, this is indicated as “????”. -
Page 20: Selecting A Printer
Selecting a Printer [Printer Select] Tab Sheet The “Printer Select” screen enables you to select a printer and specify network settings. Current Printer: You can switch to the relevant printer when multiple printers are connected to a single host computer. Pressing the “Scan Printer”... -
Page 21: Network Settings
Selecting a Printer (Cont’d) Network Settings Caution 1) Determine the “Network Setting” items according to the instructions of the network administrator for the location where the printer unit is installed. 2) Other network devices may be affected if the “Network Setting” is incorrect. 3) When only USB connection is used, there is no need to specify the “Network Setting”. -
Page 22: Security Settings
Selecting a Printer (Cont’d) Security Settings Caution 1) Determine the “Security Setting” items according to the instructions of the network administrator for the location where the printer unit is installed. 2) Encrypted communication cannot be established if the “Security Setting” is incorrect. 3) When only USB connection is used, there is no need to specify the “Security Settings”. - Page 23 Selecting a Printer (Cont’d) The “preshared key file” is required for “preshared key authentication”. The “printer certificate file” and the “certification authority certificate” are required for “printer certificate authentication”. Enter the password for the printer certificate file. After setting of the necessary files is complete, click on the “Close” button on the “IP Sec Setting” screen to close the screen.
-
Page 24: Test Print
Test Print [Others] Tab Sheet The “Others” screen enables you to perform test print for the printer. Test print uses the printer’s self-diagnosis function without making use of the printer driver. You can use it to verify whether the printer is functioning correctly. For printers connected via the network, “Test Print”... -
Page 25: Other Features
Other Features [Others] Tab Sheet The “Others” screen also contains features that require technical knowledge as well as those for use by technical personnel. The following is a brief outline. For printers connected via the network, “Firmware Download” screen is not displayed. Also for a user without administrator authority who does not check [Firmware Download] on [Administrators] dialog, the Firmware Download screen is not displayed. -
Page 26: Administrators
Other Features (Cont’d) [Administrators] Dialog Even a user without administration authority can enable “Printer Setting” etc in function or tab unit. Non-administrative User Settings: Selected functions can be set by checking the checkbox. Printer Counter Clear: The [Clear] button of the print counter in the [Printer Status] Tab enables. Printer Setting –... -
Page 27: Troubleshooting
Feed Jam happens. Please unset Turn off the power, and refer to “Removing card jams the card tray and remove the card (Hopper jam)” in the “CX-330 Instruction Manual” 01039000 after turning off the printer power. (separate booklet) on procedures to remove the jammed card. - Page 28 Retransfer Film is broken. Refer to “Mending broken ink ribbon and retransfer film” in the “CX-330 Instruction Manual” (separate 0103A000 booklet) on procedures to restore the retransfer film. Mark on Retransfer Film could not Install the retransfer film correctly.
- Page 29 Troubleshooting (Cont’d) (Cont’d) Error Code Displayed Message Actions Hardware failure happens in the MG Turn off the power of the printer and turn on again. encoder. Please turn off and on the 0104AC00 Call for servicing if this problem recurs. printer power to initialize the printer.
- Page 30 Troubleshooting (Cont’d) (Cont’d) Error Code Displayed Message Actions Hardware failure of Retransfer Roller Turn off the power of the printer and turn on again. Thermistor happens. Please turn Call for servicing if this problem recurs. 0104F200 off and on the printer power to initialize the printer.
-
Page 31: Error Of Status Monitor
Troubleshooting (Cont’d) Error of Status Monitor ® ® The following error occurred when the status monitor is started up on Windows 8, Windows Windows Vista ® Cause: The status monitor cannot run because it is an unidentified program by Windows Action: Choose the “Run as administrator”, and the status monitor runs by a user within administrator authority. - Page 32 © 2014 JVC KENWOOD Corporation KAT-T305-004...
Need help?
Do you have a question about the CX-330 and is the answer not in the manual?
Questions and answers