
Subscribe to Our Youtube Channel
Related Manuals for Hardlife Utility C4040


Summary of Contents for Hardlife Utility C4040
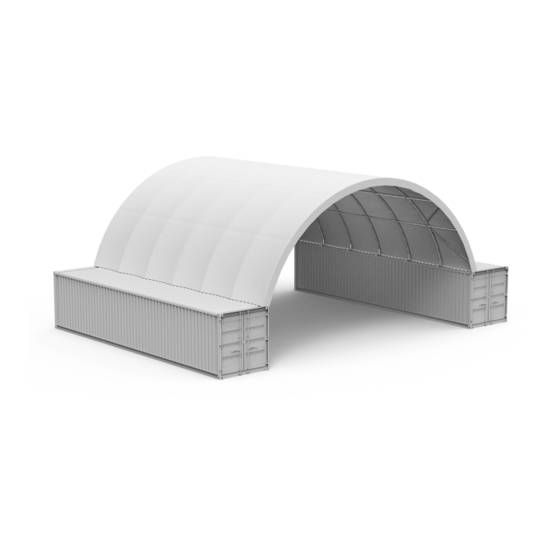
- Page 1 SHELTER ASSEMBLY MANUAL Model # W12xL12xH 4.5m C4040 Back wall & frame of Container Shelter C4040 Back wall & frame...
- Page 2 SPECIFICATION Width:12m Length:12m Height:4.5m IMPORTANT-----READ MANUAL FIRST Improper site preparation, Assembly and Maintenance may invalidate warranty and cause unnecessary and costly mistake. If you have any questions contact your local dealer. For User Friendly assembly we have identified each individual component with the part code as indicated in the parts list.
- Page 3 Parts List Part Code Description Base Plate for endwall door Base plate at both site Extension Leg for High Qube Container Lower standing leg Middle standing leg Upper standing leg for the door Middle standing leg for the door Upper standing leg for both side Lower horizontal tube Upper horizontal tube 1 group...
- Page 4 EQUIPEMNT AND TOOLS FOR INSTALIATION 1. Measuring tape 2. String for alignment 3. Step ladder 4. Welder 5. Sledge hammer 6. Wrench 7. Scissors INSTALLATION PROCESS A—FRAME INSTALLATION Figure 1 There are four base plate comes with the back endwall. Each of them should be placed in the right position(especially the two base plate close to the containers.) 1.
- Page 5 3. Part No.3 is extention leg. YOU DONT NEED IT WHEN YOUR CONTAINER IS GENERAL PURPOSE CONTAINER. YOU NEED IT WHEN YOUR CONTAINER IS HIGH QUBE 4. Connect all parts together by using clips(Part No. 20 & Part No.23 and bolts. C--INSTRUCTION FOR COVER ATTACHED Assembly the end cover first.
- Page 6 Figure 3 1. Use rope(NO.16) to tie the end cover (No.15) to the end wall. 2.Use rope(NO.26) to tie the Wheels (No.25) to pull door. The process is quite easy. But some tightening adjustments will be necessary to produce a flat. Please adjust the cover timely.
- Page 7 The rope for the left: tie the rope down on the endwall arch first.Then lead the rope to the bottom of the door cover from inside, then lead the rope from bottom to the top then go through the pulley on the left from outside, then lead the rope from left pulley to the right upper pulley.
Need help?
Do you have a question about the C4040 and is the answer not in the manual?
Questions and answers