
Related Manuals for Hardlife Utility C2020H


Summary of Contents for Hardlife Utility C2020H
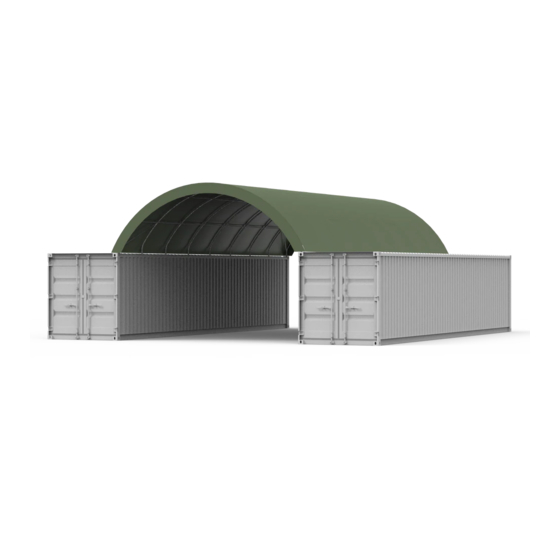
- Page 1 SHELTER ASSEMBLY MANUAL Model #C2020H / W6x L6x H 2m Model #C2040H / W6x L12x H 2m Container Shelter...
-
Page 2: Parts List
Parts List Spare Parts List for C2020H & C2040H Qty For Qty For Part Code Description C2020H C2040H Base plate on left Base plate on right Three way fitting Four way fitting Top bent tube Sidewall bent tube Top roof purlin Connection purlin φ25mm Lower tensioning tube for roof cover... -
Page 3: Specification
SPECIFICATION C2020H : Width: 6m Length: 6m Height: 2m C2040H : Width: 6m Length: 12m Height: 2m IMPORTANT-----READ MANUALFIRST Improper site preparation, Assembly and Maintenance may invalidate warranty and cause unnecessary and costly mistake. If you have any questions contact your local dealer. - Page 4 2. String for alignment 3. Step ladder 4. Welder 5. Sledge hammer 6. Wrench 7. Scissors INSTALLATION PROCESS A—BASE INSTALLATION Please refer to the diagram (Figure 1) to place the base plates. Above is base plates lay out for C2020H...
- Page 5 Above is base plates lay out for C2040H Figure 1 1. The measure is from center to center of the tubes. Referring to the above diagram and confirm the place of the base plates. ENSURE THAT THE FOUNDATIONS IS SQUARE. 2.All the base plates need use welder to be welded on the Containers.
- Page 6 Above is Frame for C2020H Below is Frame for C2040H...
- Page 7 B--FRAME INSTALLATION 1. As Figure 2 shown find Three-way fitting (part code 1), Top bent tube (part code 3) and Sidewall bent tubes (part code4). To connect them by Screw M8x70 ( part code13).Which makes one group of arch. Please NOTE the direction of the screw. DO NOT install the screws on the top of the truss where the fabric will rest.
- Page 8 Figure 2 C--INSTRUCTION FOR COVER ATTACHED Install the Roof Cover NOTE: DO NOT install the cover onto the frame of your building in high wind conditions. A slight breeze is the most advantageous for cover installation. To take advantage of the breeze, pull the cover up over the arches with the breeze blowing in the cover like a sail filled with air.
- Page 9 Figure 3...
- Page 10 1. Put the Roof cover (part code 9) EVENLY, CARRFULLR AND SLOWLY on the frame. Adjust the cover so that it is square and evenly centered on the frame. 2. Weld the Angle seats (part code 8) on each container and use Rope (part code 11) to knit the front &...
- Page 11 Install the End Cover Find out the spare parts according to above drawing, fix the end cover in the back of the shelter.
Need help?
Do you have a question about the C2020H and is the answer not in the manual?
Questions and answers