Table of Contents
Advertisement
Advertisement
Table of Contents

Related Manuals for Reichert AT550


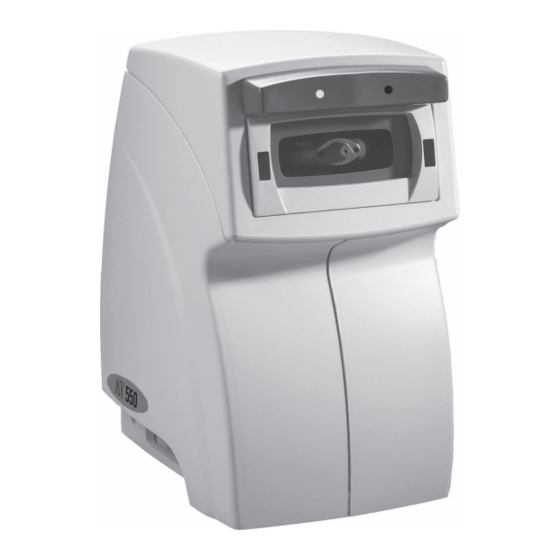
Summary of Contents for Reichert AT550
- Page 1 AT550 Auto Tonometer Service Manual 13900-103 Rev. A Page 1...
-
Page 2: Table Of Contents
Reichert Assistance ........................4 Warnings & Cautions ......................... 5 Theory of Operation ..........................6 AT550 Introduction ........................6 Special Features of the AT550 ....................6 Positioning System Operation ....................6 Air Puff System ..........................8 Applanation System........................8 Proximity Detector ........................8 Target Illuminator ........................ - Page 3 List of Figures Figure # Description Page# OP-1 Positioning System Block Diagram ..............7 OP-2 Applanation System Block Diagram ............... 9 TT-1 LCD P/N 13920-947 or 13960-945 ..............15 TT-2 LCD P/N 13960-966 ................... 15 TT-3 Power Input / Output Circuit Board Layout ..........18 TT-4 Power Input / Output Block Diagram ............
-
Page 4: Introduction
No part of this publication may be reproduced, stored in a retrieval system, or transmitted in any form or by any means, electronic, mechanical, recording, or otherwise, without the prior written permission of Reichert Ophthalmic Instruments, A Leica Microsystems Company. -
Page 5: Warnings & Cautions
• Instrument is not used in accordance with its User’s Guide. CAUTION: ANY REPAIR OR SERVICE TO THE AT550 MUST BE PERFORMED BY EXPERIENCED PERSONNEL OR DEALERS WHICH ARE TRAINED BY REICHERT OPHTHALMIC INSTRUMENTS SO THAT CORRECT OPERATION OF THE AT550 IS MAIN- TAINED. -
Page 6: Theory Of Operation
Special Features of the AT550 Positioning System Operation The AT550 has special features which are not available on The new AT550 optimizes the alignment of the patient to other tonometers. The AT550 features are: it can be serviced in the field, it has a port for installing software the optical system without the use of a joystick or the necessity of a chinrest. - Page 7 Theory of Operation ( Continued Position LED * Arrow direction showing infrared LED light path 1 Surface Mirror IR Pass Filter Position Spacer Lens Lens Position R. LED Driver LED Camera I2C Bus I2C Bus R. Video L. Video Display Control Bus Control Bd.
-
Page 8: Air Puff System
Theory of Operation ( Continued Air Puff System is displayed on the LCD screen. The air puff system produces a small puff of ambient air Proximity Detector out of the nozzle of the air tube when the patient is fully aligned in front of the instrument. - Page 9 Figure OP-2. Measurement System 13900-103 Rev. A Page 9...
-
Page 10: Troubleshooting
Troubleshooting The following list provides suggestions when a fault condition exists. Note: Reference to a Harness Connection List is given in Appendix B. Error Codes This instrument is designed to display error codes when a malfunction has occurred. These error codes will aid the technician to isolate the malfunction. - Page 11 Troubleshooting ( Continued Error Code Table (Continued) Code# Definition Probable Cause Right VVL camera error ........J2 (Fig.7, 31) Disc’d Software incompatibility issue. J2 (Fig.7, 7) Disc’d J8 (Fig.7, 7) Disc’d Defective Optical Head Assembly Undefined ............. Not used in this instrument Tonometer Subsystem Error ......
-
Page 12: Miscellaneous System Errors
Troubleshooting ( Continued Miscellaneous System Errors The information in this section will aid the technician to isolate the malfunction. Probable causes are listed in sequence of probability (first probable cause listed is the most likely cause or the easiest to test). The following list provides some known System Errors that can occur. - Page 13 Troubleshooting ( Continued Miscellaneous System Errors (Continued) Definition Probable Cause Solution Does Not Find ... (Continued) ....External light confusing positioning system. Isolate sources of external light (incandescent and/or infrared) and remove light source. Finds one eye not the other ...... Light interference on measuring side Remove interference Infrared interference (infrared light source).
-
Page 14: Testing
Digital Oscilloscope (Digital Real Time, 1GHz) A list of software revisions for this instrument is included in Appendix C. CAUTION: ANY REPAIR OR SERVICE TO THE AT550 MUST BE PERFORMED BY EXPERIENCED PERSONNEL OR DEALERS THAT ARE TRAINED BY REICHERT OPHTHALMIC INSTRUMENTS SO THAT CORRECT MEASUREMENT OF THE AT550 IS MAINTAINED. -
Page 15: Lcd Brightness Adjustment
Testing ( Continued LCD Brightness Adjustment dently. This procedure details the adjustment of the brightness for LCD Contrast Adjustment the LCD backlight. This adjustment is located on the Power Input / Output Board (Fig.7,27) (citcuit board on This procedure details the adjustment of the LCD contrast bottom of unit). -
Page 16: Test Point Voltages
Testing ( Continued Test Point Voltages The following information regarding the test points that are located on the circuit boards of this instrument are given as a guide to verify the correct operation of the unit. If special operating conditions are required to observe the references given, effort will be given to provide the necessary information with the appropriate references. - Page 17 Testing ( Continued Motor Control Circuit Board (Assy 13900-945, Schematic 13960-914) Refer to Figures TT-5 & TT-6. Test Points TP1 = Test Point 1, 2.4 KHz Square Wave @ +5.0 VDC p-p, Motor Clock TP2 = Test Point 2, 2.4 KHz Square Wave @ +3.6 VDC p-p, X-Axis Motor Clock TP3 = Test Point 3, 2.4 KHz Square Wave @ +3.6 VDC p-p, Y-Axis Motor Clock TP4 = Test Point 4, 2.4 KHz Square Wave @ +3.6 VDC p-p, Z-Axis Motor Clock TP5 = Test Point 5, Positioning System Drive Current Sense Voltage...
- Page 18 Testing ( Continued CCFL OUT CCFL OUT Figure TT-3, Power Input / Output Circuit Board Layout Page 18 13900-103 Rev. A...
- Page 19 Testing ( Continued FROM CONTROL BOARD Figure TT-4, Power Input / Output Block Diagram 13900-103 Rev. A Page 19...
- Page 20 Testing ( Continued Figure TT-5, Main Control Circuit Board Layout Page 20 13900-103 Rev. A...
- Page 21 Testing ( Continued Figure TT-6, Main Control Block Diagram 13900-103 Rev. A Page 21...
- Page 22 Testing ( Continued TP13 TP12 TP11 TP10 P FOCUS P FOCUS R FOCUS R FOCUS P U/D P U/D R -CYL R -CYL R +CYL R +CYL P L/R P L/R L/R DET L/R DET R SPH LIM R SPH LIM TP13 TP12 TP11...
- Page 23 Testing ( Continued Figure TT-8, Motor Control Block Diagram 13900-103 Rev. A Page 23...
-
Page 24: Calibration
953) includes the calibration program which is correct Service Software PCMIA card. Align the only used on the AT550 with version 1.00 and 1.01 printer paper in the door slot and close the Printer operating software. The 1.17 revision (P/N 13900- Door. -
Page 25: Pressure Delivery (Ramp) Calibration
Calibration ( Continued Pressure Delivery (Ramp) Calibration: This test provides instructions for measurement of the air puff solenoid drive current. While in the Services Menu screen, press the button beneath the DOWN ARROW icon until "CAL./VER." is highlighted. Press the button beneath the SELECT icon. -
Page 26: Optical Alignment
Figure CT-5. Note: The shiny brass surfaces of the Glass Eye Tool which are facing the AT550 may require darkening to eliminate reflections. The square dots must be within the target squares or improper alignment of the system will occur resulting in incorrect readings, and/or asterisk readings. -
Page 27: Fire Around
Fire Around The Fire Around is a test which performs an alignment test of the optical system of the AT550. This test measures the optical alignment at the center of the test eye and then at eight equidistant points around the center of the eye. -
Page 28: Tonometer Alignment
Calibration ( Continued Tonometer Alignment This test displays the gain value for the applanation voltage of the measurement system. A value too high will cause saturation of the peak voltage and a value too low will cause asterisk readings. Note: Revision A (shown on the data plate on the lower section of the patient's side right cover - refer to Figure CT-10) units have a potentiometer on the... -
Page 29: Rubber Eye Calibration
If your data sheet does not have a section for the Figure CT-13. Rubber Eye Calibration Screen AT550, your rubber eyes are out of date and will require recalibration. DO NOT use the values for values for the medium eye. Use the +, –, and the the NCTII, Xpert, or the Xpert Plus. -
Page 30: Final Checks
Place your Ensure all input power to the AT550 is disconnected finger approximately 1 inch (2.5 cm) in front of the air- and then reinstall the side covers using the four lower puff nozzle. -
Page 31: Cleaning
Cleaning Introduction This section contains the cleaning procedures. Names given to parts are the same parts as referenced in the AT550 Parts Manual (P/N 13900-102). Special Tools & Equipment None Required Warnings & Cautions CAUTION: DO NOT USE SOLVENTS OR STRONG CLEANING SOLUTIONS ON ANY PART OF THIS INSTRU- MENT OR DAMAGE MAY OCCUR. -
Page 32: General Disassembly
General Disassembly General disassembly of the unit requires removing the outside covers and the top of the tonometer head assembly. Perform the following steps in the order given. Remove the headrest assembly by pulling it straight out, away from the unit. Refer to Figure DS-1. CAUTION: DO NOT PULL THE TOP COVER AWAY FROM THE UNIT WITHOUT DISCONNECTING THE LEFT/RIGHT... -
Page 33: Repairs
Repair 2 Printer Door Latch Replacement Names given to parts are the same parts as referenced in Repair 3 Printer Replacement the AT550 Parts Manual (P/N 13900-102). Repair 4 Power I/O Circuit Board Replacement Repair 5 Control Circuit Board Replacement... -
Page 34: Repair 1 Nosepiece Cover Replacement
Repair 1 Repair 2 Printer Door Latch Replacement Nosepiece Cover Replacement This section details the steps necessary to replace a The steps below provide the information for changing the broken printer door latch. Nosepiece Cover. Note: For this repair it is not necessary to perform the Disengage the connection to the Touch Plate and then steps in Disassembly or Assembly. -
Page 35: Printer Replacement
Repair 3 Printer Replacement This section details the steps necessary to replace a defective printer. It is not necessary to perform the steps in the Dissassembly section of this manual to perform this repair sequence. CAUTION: THE INTERNAL CIRCUITS OF THIS INSTRUMENT HAVE ELECTROSTATIC DISCHARGE SENSITIVE DEVICES (ESDS) AND ARE SENSITIVE TO STATIC HIGH VOLTAGES STORED IN AND TRANSFERRED... -
Page 36: Power I/O Circuit Board Replacement
Repair 4 Power I/O Circuit Board Replacement This section details the steps necessary to remove/ Cut the plastic wire tie which secures the transformer replace the power I/O board. and ground wires to the XYZ Positioning Assembly. Remove the four screws, washers, and nuts which CAUTION: THE INTERNAL CIRCUITS OF THIS INSTRUMENT secure the XYZ Positioning Assembly to the Mounting... -
Page 37: Control Circuit Board Replacement
Repair 4 ( Repair 5 Continued Power I/O Board Installation Control Circuit Board Replacement CAUTION: THE INTERNAL CIRCUITS OF THIS INSTRUMENT This section details the steps necessary to remove/ HAVE ELECTROSTATIC DISCHARGE SENSITIVE replace the Control Board. DEVICES (ESDS) AND ARE SENSITIVE TO STATIC HIGH VOLTAGES STORED IN AND TRANSFERRED CAUTION: THE INTERNAL CIRCUITS OF THIS INSTRUMENT... -
Page 38: Lcd Screen Replacement
Ensure all input power to the unit is disconnected before removal of the LCD. Remove the four screws which attach the front bezel with the Reichert logo. Remove the bezel. Remove the four screws which secure the LCD to its mounting bracket. -
Page 39: Motor Board Replacement
Repair 7 Motor Board Replacement This section details the steps necessary to remove/ replace the Motor Board. CAUTION: THE INTERNAL CIRCUITS OF THIS INSTRUMENT HAVE ELECTROSTATIC DISCHARGE SENSITIVE DEVICES (ESDS) AND ARE SENSITIVE TO STATIC HIGH VOLTAGES STORED IN AND TRANSFERRED BY THE HUMAN BODY. -
Page 40: General Assembly
General Assembly General assembly of the unit requires assembling the outside covers and the top of the tonometer head to the unit. Perform the following steps in the order given. Install one of the side covers and secure it with the bottom side screws. -
Page 41: Appendix A Specifications, Transportation & Storage
Appendix A - General Specifications Specifications: Height: 17 in., 43.0 cm. Width: 9 1/2 in., 24.0 cm. Depth: 13 1/2 in., 34.0 cm. Weight, unpacked: 30 lbs., 13.6 kg. Voltage: Catalog No. 13900 100V/120V Catalog No. 13901 220V/240V Current: Model 13900 - 1.0 amp Model 13901 - 0.5 amp Frequency: 50/60 Hz... -
Page 42: Appendix B Harness Connection List
Appendix B - Harness Connection List FROM DESCRIPTION PART NUMBER 13900-921, MAIN CONTROL PCB 13900-921, J2 13900-941, J1 MAIN VIDEO HARNESS 13900-935 13960-924, MOTOR CONTROL PCB 13960-924, J13 13900-924, J1 L/R DETECTOR HARNESS 13900-939 / -944 ASSYs 13960-924, J2 13960-938 HOME SWITCH ASSY HARNESS 13960-938 ASSY 13960-924, J8,... -
Page 43: Appendix C Software Revision List
· Added button push to test XYZ assembly during assembly. home. · Added button push to test printer assembly during assembly. · Changed logo/name in software to Reichert on most units. · Added option to display kPa (mmHg was the only option). Revision 1.12 to 1.13 (8/00) ·... -
Page 44: Ordering Information - Accessories
Dust Cover 13900-101 User's Guide To order any of these accessories, contact your local authorized Reichert dealer. Other Reichert Products To complement your KR460 Automated Keratometer/Refractor, we invite you to take a look at the other products made by our company:...
Need help?
Do you have a question about the AT550 and is the answer not in the manual?
Questions and answers