
Related Manuals for Reichert AT550


Summary of Contents for Reichert AT550
- Page 1 Auto Non-Contact Tonometer User’s Guide Ophthalmic Instrum A Division of Leica Microsystems Inc.
-
Page 3: Table Of Contents
Printer Paper ..................35 Fuses ..................... 36 Forehead Rest ..................36 PC Card ....................36 Troubleshooting Troubleshooting ................37 Product Specifications Non-Contact Tonometer..............38 Transportation & Storage .............. 38 Ordering Information Accessories ..................39 Other Reichert Products ..............39 Warranty Warranty ....................40... -
Page 4: Introduction
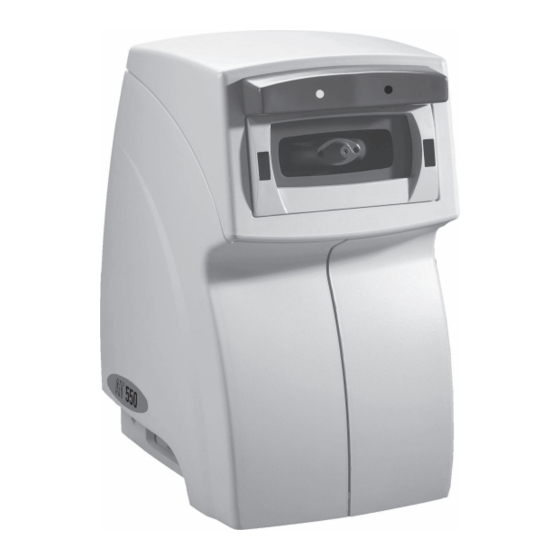
Introduction Congratulations on your purchase of the AT550 Auto Non-Contact Tonometer The AT550 is an auto-aligning non-contact tonometer used to measure the intraocular pressure of the eye by delivering an air puff to the eye. This User’s Guide is designed as a training and reference manual. We recommend you carefully read and follow the steps in this guide to ensure optimum performance from your new instrument. -
Page 5: Classification
IPX0 Equipment is ordinary equipment enclosed without protection against ingress of water. The AT550 is not suitable for use in the presence of flammable anesthetic mixtures with air or with oxygen or nitrous oxide. According to the mode of operation, the AT550 is a Continuous Operation instrument. -
Page 6: Precautions
IEC601 series. Safety standards and/or the system configuration must meet the requirements of the IEC601-1-1 electrical systems standard. WARNING: The area around the AT550’s nosepiece may create a “pinch hazard. ” Do not place your finger into the aperture surrounding the nosepiece. WARNING: For continued protection against risk of fire, replace fuses only with the same type and rating. -
Page 7: External Parts & Package Contents
5. Forehead rest 6. Nosepiece objective 7. Display contrast control PACKAGE CONTENTS 8. RS-232C port 9. Low voltage inlet • AT550 Auto Non-Contact Tonometer Main power & fuse holder • Power cord PC Card Slot • Dust cover Printer paper advance • Spare printer paper (2 rolls) -
Page 8: Operating System
Instrument Components Operating System The AT550 incorporates a user-friendly icon/menu-based operating system. This system will speed up your training time, since you do not have to memorize many functions before using the instrument. Instrument functions are initiated by pressing the gray buttons located below the icons displayed on the screen (picture below). -
Page 9: Icon Glossary
Instrument Components Icon Glossary Listed below are descriptions of the icons used in the operating system. MEASURE Initiates measurement sequence. LEFT EYE Initiates instrument alignment and measurement process for MEASURE patient’s left eye (appears only if instrument cannot detect eye). RIGHT EYE Initiates instrument alignment and measurement process for MEASURE... - Page 10 Instrument Components Icon Glossary (cont.) SETUP Allows access to the default settings so that changes can be made. RETURN Returns to preceding screen. RIGHT ARROW Used in setup menu to move right horizontally. LEFT ARROW Used in setup menu to move left horizontally. UP ARROW Used in setup menu to move up vertically through options.
-
Page 11: Disengaging The Travel Lock
Instructions for Use - Installation Disengaging the Travel Lock The AT550 is shipped with the travel lock engaged to prevent damage during shipment. The travel lock is located behind the printer door in the top right-hand corner (see p. 5, No. -
Page 12: Engaging The Travel Lock
Instructions for Use - Installation Engaging the Travel Lock If it is necessary to ship the instrument to another location, engage the travel lock as follows: Press the button below the MODE icon. The MODE icon can be found on most operating screens. - Page 13 The instrument is now in the “park” position. Pack head area with piece of foam or packing material. Engage the travel lock, if possible, as described above. If you have questions, contact your local Reichert Ophthalmic Instruments dealer or our Customer Service Department directly at (716) 686-4500.
-
Page 14: Mounting To Instrument Stand
Instructions for Use - Installation Mounting to Instrument Stand Arm The AT550 can be installed on a table top or instrument stand arm. For instrument stand arm installation, follow the instructions below: CAUTION: Make sure the travel lock is engaged to prevent damage to internal mechanisms. - Page 15 (see Disengaging the Travel Lock, p. 9): After a period of inactivity, the AT550 will go into a “sleep” mode to conserve energy, causing the screen to go blank. To reactivate the AT550, push any gray button on the...
-
Page 16: Changing Defaults
Instructions for Use - Setup Changing Defaults The AT550 is shipped to you in the most frequently used configuration. These default settings can be changed using the setup function. Measurement, printer, communication and miscellaneous setting options are listed on pp. 17-20. Once changes have been made, they will remain set until further changes are made. - Page 17 Instructions for Use - Setup following page: Changing Defaults (cont.) Down Return Select Move to the option you want to change with the UP or DOWN arrow button, then press the SELECT button. The screen will change to show the parameters you can change within that option.
-
Page 18: How To Change Settings
Instructions for Use - Setup Changing Defaults (cont.) Down Return Select How to Change Settings The current default settings are highlighted with a white box. To change these settings, use the UP or DOWN ARROW button to outline the option in the left column. - Page 19 Instructions for Use - Setup To exit the SETUP menu, press the RETURN button a second time. Measurement Options Down Return Select The following change can be made to the default settings to alter the measurement parameters: READINGS Choose one measurement per eye (Single) or three measurements eye with the average being shown Avg (3).
-
Page 20: Printer Options
Instructions for Use - Setup Printer Options Down Return Select The following changes can be made to the default settings to alter the printer parameters: DATE FMT Choose the printed format. D=Day, M=Month, Y=Year TIME FMT Choose the time format. DATE Once you have selected the option to be changed, use the PLUS (+) MINUS (-) buttons to increase or decrease the numbers, then... -
Page 21: Communication Options
Return Select The AT550 can transfer data to an external device, such as a computer, through the RS-232C serial port. Make changes to the Communications Setup settings (Baud, Parity, Data Bits, Stop Bits, Flow) to match those of the external device connected to... -
Page 22: Miscellaneous Options
Instructions for Use - Setup PRINTER You can turn the printer off if you only want to send data to the RS- 232C serial port. Miscellaneous Options Down Return Select LANGUAGE Choose the language used on the user screens. TONE Audible tone indicator can be turned on or off. -
Page 23: Patient Positioning & Alignment
Instructions for Use - Operation Patient Positioning & Alignment The AT550 features a unique auto-alignment system that enables the instrument to align itself and follow the patient’s eye movement. This innovative system makes the whole measurement process quicker and more comfortable for the patient. - Page 24 Instructions for Use - Operation Patient Positioning & Alignment (cont.) 4. Ask the patient to remain as still as possible during the measurement process. Before you push the MEASURE button, ask the patient to blink and open his/her eyes. Measure 5.
-
Page 25: Measurement Process
Instructions for Use - Operation Measurement Process To begin the measurement process, instruct the patient to lean forward onto the forehead rest, keeping the green fixation light in view. Once the patient is positioned comfortably, press the button below the MEASURE icon to begin the measurement process. - Page 26 Instructions for Use - Operation Measurement Process (cont.) As the alignment continues, you will see the circular icon moving around the screen until it centers. At this point, the icon stops moving and a measurement is taken. The screen will change and display a reading for the eye that was measured. The screen will look similar to that shown below.
- Page 27 Instructions for Use - Operation Measurement Process (cont.) Measure To measure the opposite eye, instruct the patient to move to the opposite side of the forehead rest and view the green fixation light with their other eye. Press the button under the MEASURE icon. This will repeat the measurement process. Print Clear Data After completing a set of measurements, the screen should look similar to that...
-
Page 28: Eye Selection
Instructions for Use - Eye Selection The AT550 can detect which eye is being measured automatically. This is displayed in the top left-hand corner of the screen. Right Eye If the system fails to detect which eye is being measured, the screen will change to... -
Page 29: Demonstration
Pressing the button under the DEMO icon initiates an air puff. This can be used to demonstrate to a patient how the air puff feels. Demonstration Each time the instrument is demonstrated, an internal check of the AT550’s systems is conducted to ensure optimum performance of your instrument. -
Page 30: Low Confidence Readings
Instructions for Use - Low Confidence Readings During the measurement process, the AT550 may detect a condition which could create a low confidence reading or a “flyer. ” Low confidence readings can result from an untimely blink or interference from a patient’s eyelashes. - Page 31 Instructions for Use - Low Confidence Readings AT550 measurements are made in a few milliseconds and occur at random relative to the ocular pulse. Normal measurement fluctuation of 2 to 4 mmhg should be expected due to the cardiac-related pulse amplitude. Occasionally an erroneously high reading may appear (a “flyer”).
-
Page 32: Too Close
Instructions for Use - Too Close During the measurement process, the AT550 may detect a situation where the patient’s eye is too close to the nosepiece. Should this occur, the instrument will back away from the patient’s eye and then start aligning and measuring again. -
Page 33: Touch Sensor
Instructions for Use - Touch Sensor If a finger is placed inside the open space surrounding the AT550’s nosepiece, the unit’s screen will change to that shown below. This is meant to prevent damage to the instrument and/or to prevent the possibility of causing injury to the patient. -
Page 34: Printing Measurement Data
1-31-99 12:00PM 17.0 16.0 AT550 Auto Tonometer Clearing Data If you decide not to make a printout, press the button under the CLEAR DATA icon. Clear Data This will clear all data from the memory and the screen. The instrument is now ready... -
Page 35: Help Screens
UP or DOWN ARROW. Once selected, the screen will change showing instructions and tips for using the AT550 Once you have finished reading, use the RETURN icon to return to the normal operating mode. If at any time you have questions relating to the use of the AT550, contact your local dealer... -
Page 36: Print-Related Errors
Instructions for Use - Printer Error Messages Print-Related Errors Change the instrument’s printer paper when the screen below appears on the screen: Instructions for changing printer paper are located on the inside of the printer door (see p. 35). If the printer paper runs out before printing all the measurement data, the data will be stored. -
Page 37: Nosepiece
Maintenance or our Customer Service Department directly at (716) 686-4500. The AT550 requires very little routine maintenance due to its advanced design. For instance, there are no bulbs or lamps to change. If you have questions relating to maintenance, contact your local dealer or our Customer Service Department directly at (716) 686-4500. -
Page 38: Fuses
For hygienic reasons, after each patient, wipe the forehead rest with a clean cloth or with alcohol wipes. PC Card The PC card slot is located behind the printer door. Before removing or installing a PC card, disconnect the AT550 from the power supply and follow installation... -
Page 39: Troubleshooting
Troubleshooting REMEDY MESSAGE/PROBLEM MEASUREMENT Reposition patient. Instrument continually aligns — does Position instrument away not take reading. from bright lights. Out of paper. PRINTER Will not print. Printer not turned on in setup (see p. 35). See instructions on inside of Paper jams in printer. -
Page 40: Non-Contact Tonometer
Product Specifications Non-Contact Tonometer Height: 17 in., 43.0 cm. Width: 9 1/2 in., 24.0 cm. Depth: 13 1/2 in., 34.0 cm. Weight, unpacked: 30 lbs., 13.6 kg. Voltage Catalog No. 13900 100V/120V Catalog No. 13901 220V/240V Current Model 13900 - 1.0 amp Model 13901 - 0.5 amp Frequency 50/60 Hz... -
Page 41: Accessories
UL2601-1, IEC60601-1 and CSA C22.2 NO. 601.1 To order, contact your local authorized Reichert dealer. Other Reichert Products To complement your AT550 Auto Non-Contact Tonometer, we invite you to take a look at the other products made by our company: Keratometer Advanced Logic Lensometer ®... -
Page 42: Warranty
This product is warranted by Reichert Ophthalmic Instruments, a Division of Leica Microsystems Inc. against Reichert reserves the right to make changes in design defective material and workmanship under normal use or to make additions to or improvements in its products... - Page 44 Reichert Ophthalmic Instruments A Division of Leica Microsystems Inc. PO Box 123 Buffalo, New York USA 14240 0123 Telephone 716 686 4500 Fax 716 686 4545 e-mail: info@reichert.com www.reichert.com ISO-9001 Certified Ophthalmic Instrum 13900-101-Rev. B...
Need help?
Do you have a question about the AT550 and is the answer not in the manual?
Questions and answers