
Related Manuals for Westinghouse WGen9500


Summary of Contents for Westinghouse WGen9500
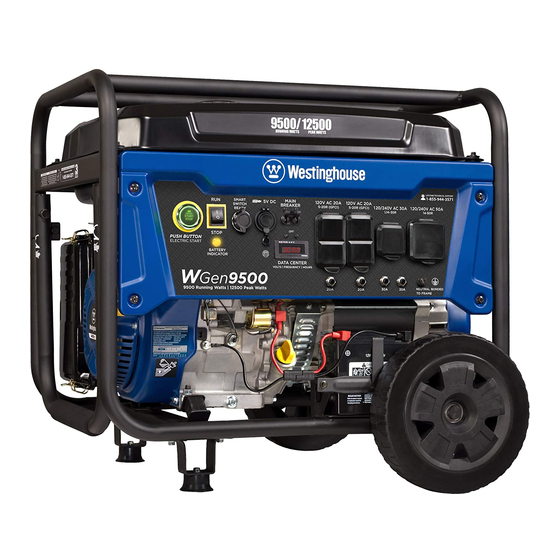
- Page 1 USER MANUAL WGen9500 Portable Generator Gasoline: 9500 Running Watts | 12500 Peak Watts DO NOT RETURN THIS PRODUCT TO THE STORE If you have questions or need assistance, please call customer service at 855-944-3571.
-
Page 2: Table Of Contents
The illustrations used in this manual are intended as representative reference views only. We reserve the right to make any specification or design change without notice. 2 | Westinghouse Outdoor Power Equipment, LLC... -
Page 3: Introduction
Westinghouse Outdoor Power Warranty registration 777 Manor Park Drive Columbus, OH 43228 For Your Records Date of Purchase: Model Number: Serial Number: Place of Purchase: IMPORTANT: Keep your purchase receipt for trouble-free warranty coverage. Westinghouse Outdoor Power Equipment, LLC | 3... -
Page 4: Safety
Do Not Operate in Wet Conditions environment, or cause the equipment to operate improperly. Note: Indicates a procedure, practice or condition that should be followed for the generator to function in the manner intended. 4 | Westinghouse Outdoor Power Equipment, LLC... -
Page 5: Safety Instructions
The connection must isolate the generator power from utility power and must comply with all applicable laws and electrical codes. Westinghouse Outdoor Power Equipment, LLC | 5... - Page 6 Remove the fuel cap slowly to release pressure, keep fuel from escaping around the cap, and to avoid the heat from the muffler igniting fuel vapors. Tighten the fuel cap securely after refueling. 6 | Westinghouse Outdoor Power Equipment, LLC...
-
Page 7: Safety Labels And Decals
SAFETY SAFETY LABELS AND DECALS Westinghouse Outdoor Power Equipment, LLC | 7... -
Page 8: Features
FEATURES GENERATOR COMPONENTS 8 | Westinghouse Outdoor Power Equipment, LLC... -
Page 9: Control Panel Components
Ground Terminal: The ground terminal is used to ON before electric or remote start. externally ground the generator. 3. Smart Switch Outlet: Connects the Westinghouse 10. 30 Amp AC Circuit Breakers: Circuit breakers ST Switch (sold separately) to the control panel. -
Page 10: Carton Contents
Note: The wheels are only intended for hand transport. • Cotter pin (2) The wheels are not suitable for towing the generator If any parts are missing, contact our service team at either on or off-road. service@wpowereq.com or call 1-855-944-3571. 10 | Westinghouse Outdoor Power Equipment, LLC... -
Page 11: Initial Oil Fill
Always mix the correct amount of fuel stabilizer to gasoline in an approved gasoline container before fueling the generator. Run the generator for five minutes to allow the stabilizer to treat the entire fuel system. Westinghouse Outdoor Power Equipment, LLC | 11... -
Page 12: Connect The Battery
Damage caused by spilled fuel is not covered under warranty. NOTICE Clean the fuel screen filter of debris before and after each fueling. Remove the fuel screen filter by slightly compressing it while removing it from the fuel tank. 12 | Westinghouse Outdoor Power Equipment, LLC... -
Page 13: Operation
(regular, flat, or otherwise), under stairs, next to walls or buildings, or in any other location that will not allow for adequate cooling of the generator and/or the muffler. DO NOT contain generators during operation. Westinghouse Outdoor Power Equipment, LLC | 13... -
Page 14: High Altitude Operation
START/STOP button illumination turns OFF. be attached to the recoil handle or control panel. If your Release the button. unit was shipped without a key fob, contact Westinghouse customer service. 6. Turn the generator battery switch to the OFF position. -
Page 15: Break-In Period
Firmly grasp and pull the recoil handle slowly until you feel increased resistance, then pull rapidly. Cold start: Close the choke by moving it right toward the front handle of the generator. Westinghouse Outdoor Power Equipment, LLC | 15... -
Page 16: Ac Circuit Breakers
Light (75 Watts) Coffee Maker 2590 Total 1600 Running Highest Watts* Starting Watts* Total Running Watts 2590 Highest Starting Watts + 1600 Total Starting Watts Needed 4190 *Wattages listed are approximate. Verify actual wattage. 16 | Westinghouse Outdoor Power Equipment, LLC... -
Page 17: Power Management
Drill (3/8”, 4 amps) receptacle being used. Circular Saw 1400 2300 (Heavy Duty, 7-1/4”) Miter Saw (10”) 1800 1800 Table Saw (10”) 2000 2000 *Wattages listed are approximate. Verify actual wattage. Westinghouse Outdoor Power Equipment, LLC | 17... -
Page 18: St Switch
Refer to the Maintenance section for specific procedures. Maintenance Code Required Maintenace Change engine oil Change engine oil, clean air filter P100 Change engine oil, clean air filter 18 | Westinghouse Outdoor Power Equipment, LLC... -
Page 19: Maintenance Schedule
Allow the filter to dry thoroughly. NOTICE Do not pollute. Follow the guidelines of the EPA or other governmental agencies for proper disposal of hazardous materials. Consult local authorities or reclamation facility. Westinghouse Outdoor Power Equipment, LLC | 19... -
Page 20: Engine Oil Level Check
6. Slowly pour oil into the oil filler neck until oil the level is between the L and H marks on the dipstick. Stop frequently to check the oil level. DO NOT overfill. Maximum oil capacity: 1.16 Quart (1.1 Liter) 20 | Westinghouse Outdoor Power Equipment, LLC... -
Page 21: Spark Plug Maintenance
Spark plug gap: 0.024 – 0.032 in. (0.60 – 0.80 mm) 7. Carefully install the spark plug finger tight, then tighten as additional 3/8 to 1/2 turn with the spark plug wrench. 8. Attach the spark plug boot. Westinghouse Outdoor Power Equipment, LLC | 21... -
Page 22: Battery Maintenance
Non-porous materials trap moisture and promote rust and corrosion. 6. Install the battery into the generator. Reinstall the battery hold-down plate and tighten the bolt. 7. Connect the quick-connect plug. 22 | Westinghouse Outdoor Power Equipment, LLC... -
Page 23: Valve Clearance
9. Install the gasket, rocker arm cover, and spark plug. recoil handle until resistance is felt. At this position the piston is coming up on its compression stroke and both valves are closed. Storing the engine in this position will Westinghouse Outdoor Power Equipment, LLC | 23... -
Page 24: Troubleshooting
Replace or repair tool or appliance. Stop and Faulty power tool or appliance. No power at AC receptacles restart the engine. Contact Westinghouse customer service toll- Faulty generator. free at 1 (855) 944-3571. 24 | Westinghouse Outdoor Power Equipment, LLC... -
Page 25: Exploded View
EXPLODED VIEW EXPLODED VIEW A Westinghouse Outdoor Power Equipment, LLC | 25... - Page 26 ROCKING ARM 96075 HEADCOVER SEAL WASHER 8.10 261806 TOP CAP 96081 CARBURETOR GASKET 8.11 91016 AIR INLET STUD STUD BOLT 5692 AIR FILTER 8.12 91007 AIR EXHAUST STUD STUD BOLT 96086 AIR FILTER GASKET 26 | Westinghouse Outdoor Power Equipment, LLC...
- Page 27 EXPLODED VIEW EXPLODED VIEW B Westinghouse Outdoor Power Equipment, LLC | 27...
- Page 28 WRENCH 10 & 13 MM ENDS 60030031 MUFFLER ASSEMBLY 6866 SPARK ARRESTER 520305 MUFFLER BRACKET 518801 FUEL TANK FILTER 91343 BOLT M8X16 519215 FUEL TANK CAP 96002 MUFFLER CONNECTING PIPE GASKET 511012 BATTERY 94206 SPRING WASHER 28 | Westinghouse Outdoor Power Equipment, LLC...
-
Page 29: Schematics
SCHEMATICS SCHEMATICS Westinghouse Outdoor Power Equipment, LLC | 29...
Need help?
Do you have a question about the WGen9500 and is the answer not in the manual?
Questions and answers