Westinghouse WGen12000DF Service Manual
Hide thumbs
Also See for WGen12000DF:
- User manual (98 pages) ,
- User manual (97 pages) ,
- User manual (32 pages)
Table of Contents
Advertisement
Advertisement
Table of Contents

Related Manuals for Westinghouse WGen12000DF


Summary of Contents for Westinghouse WGen12000DF
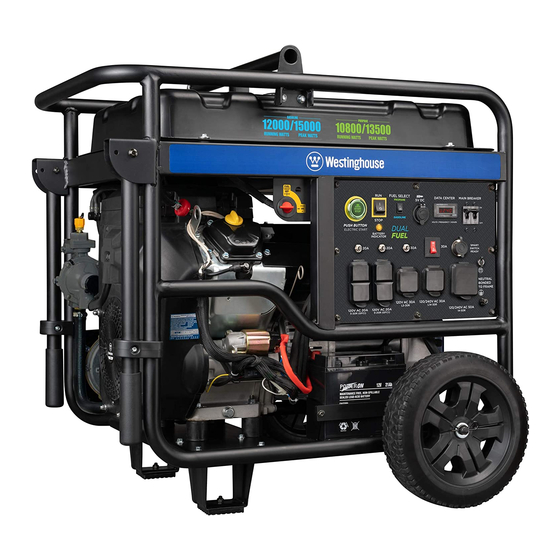
- Page 1 USER MANUAL WGen12000 Dual Fuel Portable Generator Gasoline: 12,000 Running Watts | 15,000 Peak Watts Propane: 10,800 Running Watts | 13,500 Peak Watts DO NOT RETURN THIS PRODUCT TO THE STORE If you have questions or need assistance, please call customer service at 855-944-3571.
-
Page 2: Table Of Contents
The illustrations used in this manual are intended as representative reference views only. We reserve the right to make any specification or design change without notice. 2 | Westinghouse Outdoor Power Equipment, LLC... -
Page 3: Introduction
Date of Purchase: Or scan the following QR code with your smartphone Model Number: camera to be directed to the link. Serial Number: Place of Purchase: IMPORTANT: Keep your purchase receipt for trouble-free warranty coverage. Westinghouse Outdoor Power Equipment, LLC | 3... -
Page 4: Safety
Note: Indicates a procedure, practice or condition that should be followed for the generator to function in the manner intended. 4 | Westinghouse Outdoor Power Equipment, LLC... -
Page 5: Safety Instructions
The connection must isolate the generator power from utility power and must comply with all applicable laws and electrical codes. Westinghouse Outdoor Power Equipment, LLC | 5... - Page 6 • Gas has a distinctive odor, this will help detect potential leaks quickly. • Gas vapors can cause a fire if ignited. • Gasoline is a skin irritant and needs to be cleaned up immediately if it comes in contact with the skin. 6 | Westinghouse Outdoor Power Equipment, LLC...
- Page 7 7” to 14” of water column. A certified plumber must ensure that the pressure is correct or install a step down regulator if needed. Westinghouse Outdoor Power Equipment, LLC | 7...
-
Page 8: Safety Labels And Decals
SAFETY SAFETY LABELS AND DECALS 8 | Westinghouse Outdoor Power Equipment, LLC... -
Page 9: Components
COMPONENTS COMPONENTS GENERATOR COMPONENTS Westinghouse Outdoor Power Equipment, LLC | 9... -
Page 10: Control Panel Components
ST Switch (sold separately) to the control panel. carrying a maximum of 20 amps on a single 10. Battery Charging Port: Used to charge the battery receptacle or a combination of both receptacles. with the included battery charger. 10 | Westinghouse Outdoor Power Equipment, LLC... -
Page 11: Data Center
Refer to the Maintenance section for specific procedures. Maintenance Code Required Maintenance Change engine oil Change engine oil, clean air filter P100 Change engine oil, clean air filter, replace fuel filter Westinghouse Outdoor Power Equipment, LLC | 11... -
Page 12: Assembly
Note: The wheels are only intended for hand transport. The wheels are not suitable for towing the generator If any parts are missing, contact our service team at either on or off-road. service@wpowereq.com or call 1-855-944-3571. 12 | Westinghouse Outdoor Power Equipment, LLC... -
Page 13: Initial Oil Fill
3. Connect the negative (-) cable (black boot) to the negative (-) battery post. Secure the boot over the battery post. 4. Install the battery in the battery tray. Install the battery plate and bolts. Tighten the bolts securely. Westinghouse Outdoor Power Equipment, LLC | 13... -
Page 14: Fuel
Always mix the correct amount of fuel stabilizer to gasoline in an approved gasoline container before fueling the generator. Run the generator for five minutes to allow the stabilizer to treat the entire fuel system. 14 | Westinghouse Outdoor Power Equipment, LLC... -
Page 15: Connect An Lpg/Propane Tank
IMPORTANT: DO NOT use thread seal tape or any other type of sealant to seal the LPG/propane hose connection. 5. Tighten the LPG/propane hose connector to the generator with a 19 mm or adjustable wrench. DO NOT over-tighten. Torque: 5-10 lb-ft. Westinghouse Outdoor Power Equipment, LLC | 15... -
Page 16: Operation
(regular, flat, or otherwise), under stairs, next to walls or buildings, or in any other location that will not allow for adequate cooling of the generator and/or the muffler. DO NOT contain generators during operation. 16 | Westinghouse Outdoor Power Equipment, LLC... -
Page 17: High Altitude Operation
The START/STOP button will illuminate after be attached to the recoil handle or control panel. If your the button is released. unit was shipped without a key fob, contact Westinghouse customer service. 5. Push the Pairing button on the side of the control panel until the START/STOP button illumination turns OFF. -
Page 18: Fuel Selector Switch
• The generator is placed in an safe, appropriate location. • The generator is on a dry, flat, and level surface. • The engine is filled with oil. • All loads are disconnected. 18 | Westinghouse Outdoor Power Equipment, LLC... -
Page 19: Starting The Engine: Propane
PROPANE TO GASOLINE 1. Turn the fuel tank valve to the ON position. 2. Turn the fuel selector switch to gasoline operation. 3. Turn the propane tank valve to the fully closed position. Westinghouse Outdoor Power Equipment, LLC | 19... -
Page 20: Power Management
*Wattages listed are approximate. Verify actual wattage. Running Highest Watts* Starting Watts* Total Running Watts 2590 Highest Starting Watts + 1600 Total Starting Watts Needed 4190 *Wattages listed are approximate. Verify actual wattage. 20 | Westinghouse Outdoor Power Equipment, LLC... -
Page 21: Extension Cords
Fire and electrocution hazard. Never use worn or ST SWITCH damaged extension cords. Damaged or overloaded The generator is compatible with the Westinghouse ST extension cords could overheat, arc, and burn resulting Switch, purchased separately. When utility power is on it in death or serious injury. -
Page 22: Transporting
Inspect chain and hook for any damaged links or any may occur. defects that could cause failure. It is recommended to use hooks with safety latches installed. 3. Lift the generator slightly to ensure it is lifting straight and level. 22 | Westinghouse Outdoor Power Equipment, LLC... -
Page 23: Maintenance
Ambient air temperature will affect engine oil performance. Oil drain bolt crush washer 94242 Change the type of engine oil used based on weather Battery, 21 AH 511015 conditions. Fuel filter 516401 Spark plug 97110 (5357) Westinghouse Outdoor Power Equipment, LLC | 23... -
Page 24: Engine Oil Change
Maximum oil capacity: 1.7 Quart (1.6 Liter) 4. Unclip the oil drain hose and twist the cap counterclockwise to allow the oil the to drain. 9. Install the oil dipstick. Screw in the oil fill cap securely. 24 | Westinghouse Outdoor Power Equipment, LLC... -
Page 25: Spark Plug Maintenance
Consult local authorities or reclamation facility. SPARK PLUG MAINTENANCE NOTICE Always use the Westinghouse OEM or compatible non- resistor-type spark plug. Use of resistor-type spark plug can result in rough idling, misfire, or may prevent the 7. Carefully install each spark plug finger tight, then tighten engine from starting. -
Page 26: Battery Maintenance
Tilt the battery forward and remove. Fill with fresh gasoline and add 2 to 6 months gasoline stabilizer. Drain the carburetor float bowl. Drain the fuel tank and carburetor 6 months or longer float bowl. 26 | Westinghouse Outdoor Power Equipment, LLC... -
Page 27: Valve Clearance
4. Start the generator and allow it to run until the generator 9. Install the gasket, rocker arm cover, and spark plug. engine stops. 5. Push the battery switch to the OFF position. 6. Disconnect the battery. Westinghouse Outdoor Power Equipment, LLC | 27... -
Page 28: Troubleshooting
Spark plug faulty, fouled, or improperly gapped. Gap or replace the spark plug. Reinstall. Fuel filter restricted, fuel system malfunction, fuel Contact Westinghouse customer service toll-free at 1 (855) 944- pump failure, ignition malfunction, valves stuck, 3571. etc. - Page 29 Close the propane fuel tank valve. Move the fuel selector switch to switching to propane. gas. Start the engine and allow the engine to run until the gasoline has been consumed in the carburetor. Begin propane start up procedure. Westinghouse Outdoor Power Equipment, LLC | 29...
-
Page 30: Exploded Views And Parts Lists Engine Exploded View
EXPLODED VIEW EXPLODED VIEWS AND PARTS LISTS ENGINE EXPLODED VIEW 30 | Westinghouse Outdoor Power Equipment, LLC... -
Page 31: Engine Parts List
321005 RIGHT CYLINDER HEAD ASSEMBLY 90041 NUT M20 10.16 261806 TOP CAP 94030 FLAT WASHER 97110 SPARK PLUG 329913 IMPELLER PRESSURE PLATE 50130015 WIND LEAD COVER ASSEMBLY 324600 IMPELLER 12.1 91385 BOLT M8X16 Westinghouse Outdoor Power Equipment, LLC | 31... - Page 32 326000 VALVE SPRING 18.12 261805 VALVE SPRING SEAT 18.13 261806 TOP CAP 18.14 322100 ROCKER ARM ASSEMBLY 18.15 91380 BOLT M10X80 18.16 265903 INTAKE VALVE 50600003 SEAL WASHER ASSEMBLY 19.1 94206 SPRING WASHER 32 | Westinghouse Outdoor Power Equipment, LLC...
-
Page 33: Generator Exploded View
EXPLODED VIEW GENERATOR EXPLODED VIEW Westinghouse Outdoor Power Equipment, LLC | 33... -
Page 34: Generator Parts List
INTAKE CONNECTOR 4.1.14 6254 SOCKET 326302 OUTLET CONNECTOR 4.1.15 6850 WATERPROOF CAP 326303 OUTLET CONNECTOR 4.1.16 6386 GROUND BOLT ASSEMBLY 327203 INTAKE CONNECTOR 4.1.17 6385 SOCKET 545910 PRESSURE REDUCING VALVE 4.1.18 6848 WATERPROOF CAP 34 | Westinghouse Outdoor Power Equipment, LLC... - Page 35 BOLT M8*20 11.13 91327 BOLT M6*12 11.14 501139 HIGH TEMPERATURE INSULATION COTTON 11.15 94214 FLAT WASHER 10.3×20.6×1.65 94432 NYLON BRAIDED TUBE 99509 FUNNEL 511043 CHARGER 99012 SPARK PLUG SLEEVE 99025 WRENCH 99576 OIL BOTTLE Westinghouse Outdoor Power Equipment, LLC | 35...
-
Page 36: Schematics
SCHEMATICS SCHEMATICS 36 | Westinghouse Outdoor Power Equipment, LLC...
Need help?
Do you have a question about the WGen12000DF and is the answer not in the manual?
Questions and answers