Table of Contents
Advertisement
Advertisement
Table of Contents

Related Manuals for Westinghouse WGen9500DF


Summary of Contents for Westinghouse WGen9500DF
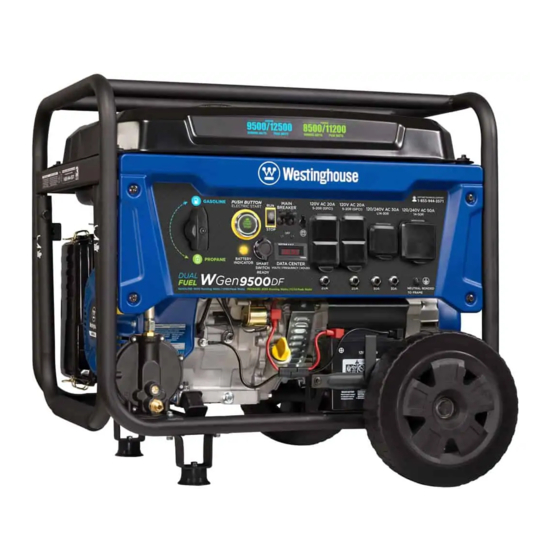
- Page 1 SAFETY USER MANUAL WGen9500 Dual Fuel Portable Generator Gasoline: 9500 Running Watts | 12500 Peak Watts Propane: 8500 Running Watts | 11200 Peak Watts DO NOT RETURN THIS PRODUCT TO THE STORE If you have questions or need assistance, please call customer service at 855-944-3571.
-
Page 2: Table Of Contents
The illustrations used in this manual are intended as representative reference views only. We reserve the right to make any specification or design change without notice. 2 | Westinghouse Outdoor Power Equipment, LLC... -
Page 3: Introduction
Westinghouse Outdoor Power Warranty registration 777 Manor Park Drive Columbus, OH 43228 For Your Records Date of Purchase: Model Number: Serial Number: Place of Purchase: IMPORTANT: Keep your purchase receipt for trouble-free warranty coverage. Westinghouse Outdoor Power Equipment, LLC | 3... -
Page 4: Safety
Do Not Operate in Wet Conditions environment, or cause the equipment to operate improperly. Note: Indicates a procedure, practice or condition that should be followed for the generator to function in the manner intended. 4 | Westinghouse Outdoor Power Equipment, LLC... -
Page 5: Safety Instructions
The connection must isolate the generator power from utility power and must comply with all applicable laws and electrical codes. Westinghouse Outdoor Power Equipment, LLC | 5... - Page 6 • Gas has a distinctive odor, this will help detect potential leaks quickly. • Gas vapors can cause a fire if ignited. • Gasoline is a skin irritant and needs to be cleaned up immediately if it comes in contact with the skin. 6 | Westinghouse Outdoor Power Equipment, LLC...
- Page 7 7” to 14” of water column. A certified plumber must ensure that the pressure is correct or install a step down regulator if needed. Westinghouse Outdoor Power Equipment, LLC | 7...
-
Page 8: Safety Labels And Decals
SAFETY SAFETY LABELS AND DECALS 8 | Westinghouse Outdoor Power Equipment, LLC... -
Page 9: Generator Components
FEATURES GENERATOR COMPONENTS Westinghouse Outdoor Power Equipment, LLC | 9... -
Page 10: Control Panel Components
6. 120 Volt AC, 20 Amp Duplex GFCI NEMA 5-20R Receptacles: Receptacles can supply a maximum of 13. Smart Switch Outlet: Connects the Westinghouse 20 Amps. ST Switch (sold separately) to the control panel. -
Page 11: Assembly
Note: The wheels are only intended for hand transport. • Cotter pin The wheels are not suitable for towing the generator If any parts are missing, contact our service team at either on or off-road. service@wpowereq.com or call 1-855-944-3571. Westinghouse Outdoor Power Equipment, LLC | 11... -
Page 12: Initial Oil Fill
Always mix the correct amount of fuel stabilizer to gasoline in an approved gasoline container before fueling the generator. Run the generator for five minutes to allow the stabilizer to treat the entire fuel system. 12 | Westinghouse Outdoor Power Equipment, LLC... -
Page 13: Connect A Lpg/Propane Tank
IMPORTANT: DO NOT use thread seal tape or any other type of sealant to seal the LPG/propane hose connection. 5. Tighten the LPG/propane hose connector to the generator with a 19 mm or adjustable wrench. DO NOT over-tighten. Torque: 5-10 lb-ft. Westinghouse Outdoor Power Equipment, LLC | 13... -
Page 14: Connect The Battery
If the leak continues or if the leak is not at a fitting then do not use the generator and contact customer service. IMPORTANT: Keep the propane tank valve in the fully closed position unless in use. 14 | Westinghouse Outdoor Power Equipment, LLC... -
Page 15: Operation
(regular, flat, or otherwise), under stairs, next to walls or buildings, or in any other location that will not allow for adequate cooling of the generator and/or the muffler. DO NOT contain generators during operation. Westinghouse Outdoor Power Equipment, LLC | 15... -
Page 16: High Altitude Operation
START/STOP button illumination turns OFF. be attached to the recoil handle or control panel. If your Release the button. unit was shipped without a key fob, contact Westinghouse 6. Turn the generator battery switch to the OFF position. customer service. -
Page 17: Fuel Selector Switch
Firmly grasp and pull the recoil handle slowly until you feel increased resistance, then pull rapidly. Cold start: Close the choke by moving it right toward the front handle of the generator. Westinghouse Outdoor Power Equipment, LLC | 17... -
Page 18: Starting The Engine: Propane
(more than one month before next use), refer to running if a propane tank is connected to the generator the Battery Maintenance and Storage sections of this BEFORE operation. manual for information regarding battery charging and fuel deterioration. 18 | Westinghouse Outdoor Power Equipment, LLC... -
Page 19: Ac Circuit Breakers
Light (75 Watts) Coffee Maker 2590 Total 1600 Running Highest Watts* Starting Watts* Total Running Watts 2590 Highest Starting Watts + 1600 Total Starting Watts Needed 4190 *Wattages listed are approximate. Verify actual wattage. Westinghouse Outdoor Power Equipment, LLC | 19... -
Page 20: Power Management
Drill (3/8”, 4 amps) receptacle being used. Circular Saw 1400 2300 (Heavy Duty, 7-1/4”) Miter Saw (10”) 1800 1800 Table Saw (10”) 2000 2000 *Wattages listed are approximate. Verify actual wattage. 20 | Westinghouse Outdoor Power Equipment, LLC... -
Page 21: St Switch
• Use the extendable handle for one-person, hand transport. Only use the handle while the generator is The wGen9500DF is compatible with the ST Switch, OFF, stationary, and resting on a horizontal surface. Do purchased separately. When utility power is on it will... -
Page 22: Maintenance
Do not pollute. Follow the guidelines of the EPA or other governmental agencies for proper disposal of hazardous materials. Consult local authorities or reclamation facility. 6. Dip the foam air filter in clean engine oil then squeeze 22 | Westinghouse Outdoor Power Equipment, LLC... -
Page 23: Engine Oil Change
DO NOT overfill. Maximum oil capacity: 1.16 Quart (1.1 Liter) 7. Install the oil dipstick and hand-tighten. 4. Wipe the dipstick clean, then insert it into the oil filler Westinghouse Outdoor Power Equipment, LLC | 23... -
Page 24: Spark Plug Maintenance
3. Note the orientation of the fuel filter. Using pliers, remove the fuel line clamps and remove the fuel filter. 8. Attach the spark plug boot. 4. Install the new fuel filter in the reverse order of removal. 24 | Westinghouse Outdoor Power Equipment, LLC... -
Page 25: Battery Maintenance
Do not use a plastic sheet as a dust cover. Non-porous hold-down plate and tighten the bolt. materials trap moisture and promote rust and corrosion. 7. Connect the quick-connect plug. Westinghouse Outdoor Power Equipment, LLC | 25... -
Page 26: Valve Clearance
9. Install the gasket, rocker arm cover, and spark plug. recoil handle until resistance is felt. At this position the piston is coming up on its compression stroke and both valves are closed. Storing the engine in this position will 26 | Westinghouse Outdoor Power Equipment, LLC... -
Page 27: Troubleshooting
No power at AC receptacles Replace or repair tool or appliance. Stop and Faulty power tool or appliance. restart the engine. Contact Westinghouse customer service toll- Faulty generator. free at 1 (855) 944-3571. Westinghouse Outdoor Power Equipment, LLC | 27... - Page 28 Start the engine and allow Gasoline not purged from the carburetor before the engine to run until the gasoline has been switching to propane. consumed in the carburetor. Begin propane start up procedure. 28 | Westinghouse Outdoor Power Equipment, LLC...
-
Page 29: Exploded Views
EXPLODED VIEW EXPLODED VIEW A Westinghouse Outdoor Power Equipment, LLC | 29... - Page 30 264501 STARTER PULLY 275902 14.3 261807 AIR INLET SPRING LOWER SEAT 14.4 90004 FLYWHEEL NUT 93513 VALVE SEAL STARTER MOTOR ASSEMBLY 266002 VALVE SPRING 15.1 91348 BOLT M8X35 261805 AIR INLET SPRING SEAT 30 | Westinghouse Outdoor Power Equipment, LLC...
- Page 31 RECOIL STARTER ASSEMBLY 16.3 5943 PULLING HANDLE 16.4 91325 BOLT M6X12 91817 OIL DRAIN BOLT 94004 OIL DRAIN BOLT WASHER 96075 HEADCOVER SEAL WASHER 96081 CARBURETOR GASKET 5692 AIR FILTER ELEMENT 96086 AIR FILTER GASKET Westinghouse Outdoor Power Equipment, LLC | 31...
- Page 32 EXPLODED VIEW EXPLODED VIEW B 32 | Westinghouse Outdoor Power Equipment, LLC...
- Page 33 ALTERNATOR COVER CARBON CANISTER AND FUEL TANK 95123 CONNECTING PIPE 10.11 532303-052 TAIL BRACKET FIXING PLATE 91327 BOLT M6X12 10.12 91512 BOLT M5X230 94423 FUEL HOSE CLAMP 94408 FUEL HOSE CLAMP 543601L CANISTER ASSEMBLY Westinghouse Outdoor Power Equipment, LLC | 33...
- Page 34 6866 SPARK ARRESTER 518801 FUEL TANK FILTER 545331 BATTERY 99010 TWO STAGE PRESSURE REDUCING 99504 SPARK PLUG WRENCH 511076 FUNNEL 99631 CHARGER 99025 OIL BOTTLE ASSEMBLY 511012 WRENCH 10 & 13 MM ENDS 34 | Westinghouse Outdoor Power Equipment, LLC...
-
Page 35: Schematics
SCHEMATICS SCHEMATICS Westinghouse Outdoor Power Equipment, LLC | 35...
Need help?
Do you have a question about the WGen9500DF and is the answer not in the manual?
Questions and answers
Do I need to remove the wheel to replace the battery and how do I remove it?
No, you do not need to remove the wheel to replace the battery on the Westinghouse WGen9500DF.
To replace the battery:
1. Loosen and remove the bolt from the battery hold-down plate.
2. Swing the plate outward.
3. Disconnect the quick-connect plugs and remove the battery.
4. Disconnect the black (–) quick-disconnect cable from the negative terminal and the red (+) cable from the positive terminal.
5. Connect the red (+) cable to the positive terminal of the new battery and the black (–) cable to the negative terminal.
6. Slide the rubber boots over the connection hardware.
7. Reinstall the battery and secure it with the hold-down plate.
This answer is automatically generated
How long does this generator run on propane (how many lbs per hour)?