Table of Contents
Advertisement
Quick Links
Advertisement
Table of Contents

Related Manuals for HomeMatic HmIP-HAP-UK


Summary of Contents for HomeMatic HmIP-HAP-UK
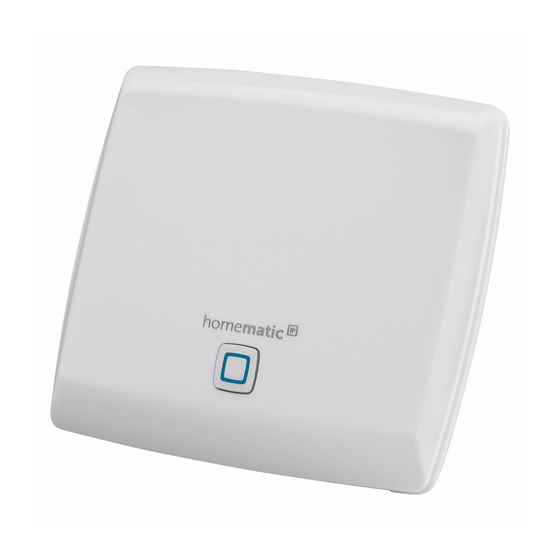
- Page 1 Mounting instruction and operating manual Access Point p. 2 HmIP-HAP-UK...
- Page 2 Package contents Quantity Description Homematic IP Access Point (UK) Plug-in mains adapter Network cable Screws Plugs User manual Documentation © 2017 eQ-3 AG, Germany All rights reserved. Translation from the original version in Ger- man. This manual may not be reproduced in any format, either in...
-
Page 3: Table Of Contents
Table of contents Information about this manual........4 Hazard information ............4 Homematic IP – The next smart home generation . 7 Function and device overview ........8 Start-up ................10 Set-up and mounting of the Access Point .....10 First steps: Connecting devices and adding rooms ..13 Operation and configuration ..........14... -
Page 4: Information About This Manual
Information about this manual Read this manual carefully before beginning operation with your Homematic IP components. Keep the manual so you can refer to it at a later date if you need to. If you hand over the device to other persons for use, hand over this manual as well. - Page 5 Hazard information Do not use the device if there are signs of damage to the housing, control elements or connecting sockets, for example, or if it demonstrates a malfunction. If you have any doubts, please have the device checked by an expert. Do not open the device.
- Page 6 Hazard information The device may only be connected to an easily accessible power socket outlet. The mains plug must be pulled out if a hazard occurs. Always lay cables in such a way that they do not become a risk to people and domestic animals. The device may only be operated within residential buildings.
-
Page 7: Homematic Ip - The Next Smart Home Generation
With Homematic IP, you can install your smart home solution in just a few little steps. The Homematic IP Access Point is the central element of the Homematic IP smart home system and communicates with the Homematic IP radio protocol. All devices of the... -
Page 8: Function And Device Overview
Function and device overview Function and device overview The Homematic IP Access Point is the central unit of the Homematic IP system. It connects smartphones via the Homematic IP cloud with all Homematic IP devices and transmits configuration data and control commands from the app to all Homematic IP devices. - Page 9 Function and device overview Back QR code and device number (SGTIN) Screw holes Interface: Network cable Interface: Plug-in mains adapter...
-
Page 10: Start-Up
Start-up Start-up This chapter describes how to set up your Homematic IP system step by step. First install the Homematic IP app on your smartphone and set up your Access Point as described in the following section. Once your Access Point has been set up successfully, you can add and integrate new Homematic IP devices to your system. - Page 11 Start-up • Scan the QR code (B) on the back side of your Access Point. You can also enter the device number (SGTIN) (B) of your Access Point manually.
- Page 12 Start-up • Please confirm in the app if the LED of your Access Point lights up permanently blue. If the LED lights up differently, please follow the instructions in the app or see “6.3 Error codes and flashing sequences” on page 15. •...
-
Page 13: First Steps: Connecting Devices And Adding Rooms
First steps: Connecting devices and adding rooms As soon as your Homematic IP Access Point and the Homematic IP app are ready for use, you can connect additional Homematic IP devices and allocate them in the app to different rooms. -
Page 14: Operation And Configuration
Homematic IP system. For further information about operation via the app and configuration of the Homematic IP system, please refer to the Homematic IP User Guide (available in the download area at www.homematic-ip.com). -
Page 15: Error Codes And Flashing Sequences
Devices must cease transmission when they reach the 1% limit until this time restriction comes to an end. Homematic IP devices are designed and produced with 100% conformity to this regulation. During normal operation, the duty cycle is not usually reached. - Page 16 Troubleshooting Fast yellow No connection Connect the Ac- flashing to network or cess Point to the router network/router. Permanent No Internet con- Please check the yellow lighting nection Internet connec- tion and firewall settings. Alternately Update in pro- Please wait until long and gress the update has...
-
Page 17: Restore Factory Settings
Resetting and deleting the entire installation: Here, the entire installation is reset. Afterwards, the app has to be uninstalled and reinstalled. The factory settings of your single Homematic IP devices have to be restored as to enable them to be connected again. -
Page 18: Resetting And Deleting The Entire Installation
Restore factory settings LED lights up red, please try again. • Release the system button to finish the procedure. The device will perform a restart and Access Point is being reset. Resetting and deleting the entire installation To reset the factory settings of the entire installation, the procedure described above must be performed twice in succession, within 5 minutes: •... -
Page 19: Maintenance And Cleaning
Maintenance and cleaning Maintenance and cleaning The device does not require you to carry out any maintenance. Enlist the help of an expert to carry out any maintenance or repairs. Clean the device using a soft, lint-free cloth that is clean and dry. -
Page 20: General Information About Radio Operation
Hereby, eQ-3 AG, Maiburger Str. 29, 26789 Leer/Germany declares that the radio equipment type Homematic IP HmIP-HAP-UK compliance with Directive 2014/53/EU. -
Page 21: Technical Specifications
Technical specifications Technical specifications Device short name: HmIP-HAP-UK Supply voltage Plug-in mains adapter (input): 100 V-240 V/50 Hz Power consumption plug-in mains adapter: 2.5 W max. Supply voltage: Current consumption: 500 mA max. Standby power consumption: 1.1 W Degree of protection:... - Page 22 Technical specifications Instructions for disposal Do not dispose of the device with regular domestic waste! Electronic equipment must be disposed of at local collection points for waste electronic equipment in compliance with the Waste Electrical and Electronic Equipment Directive. Information about conformity The CE sign is a free trading sign addressed exclusively to the authorities and does not include any warranty of any properties.
- Page 23 Free download of the Homematic IP app! Bevollmächtigter des Herstellers: Manufacturer’s authorised representative: eQ-3 AG Maiburger Straße 29 26789 Leer / GERMANY www.eQ-3.de...
Need help?
Do you have a question about the HmIP-HAP-UK and is the answer not in the manual?
Questions and answers